A DIY Tragedy in III Acts
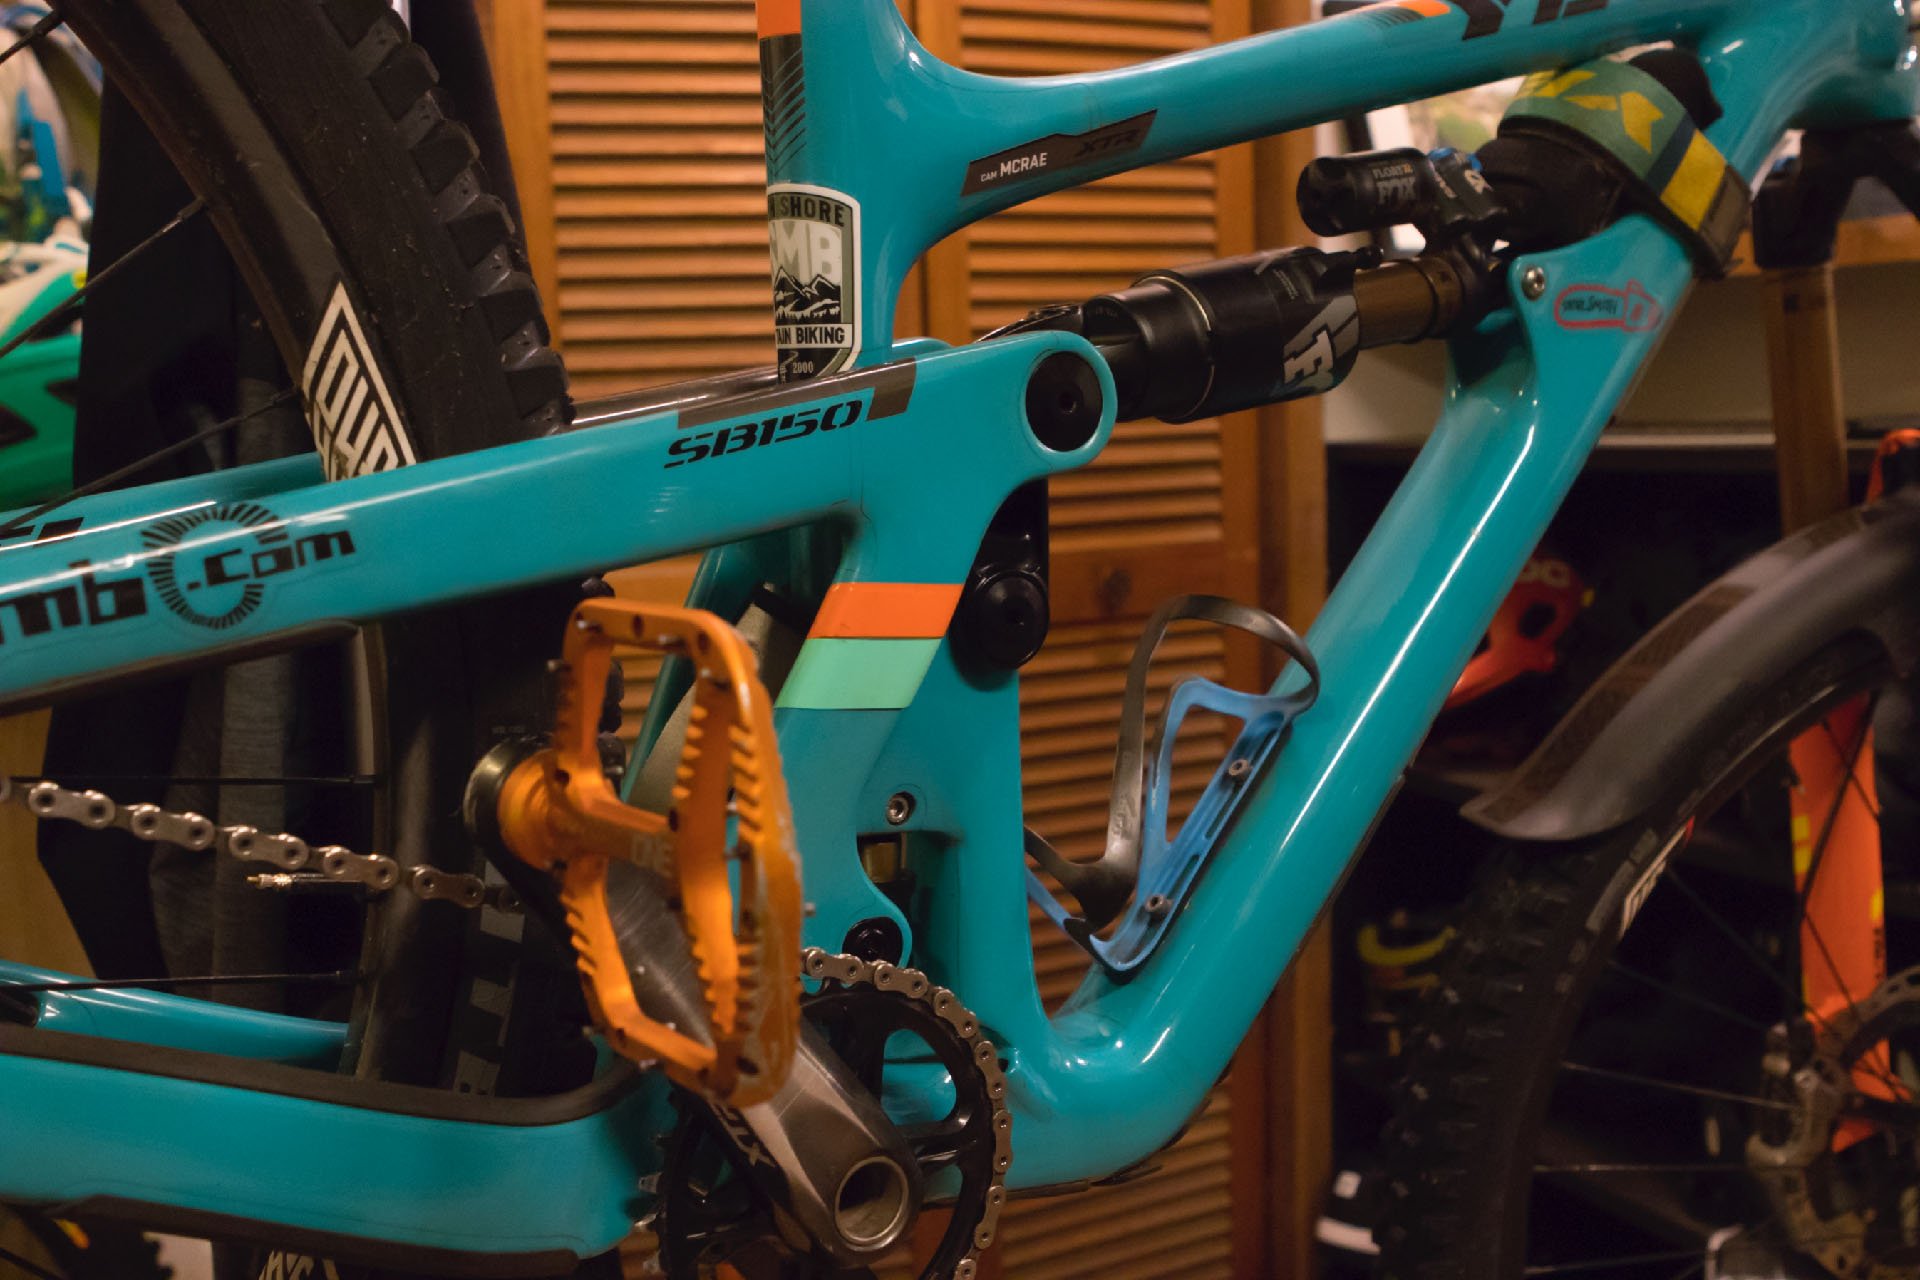
Yeti SB150 Bearing Swap - How To and How Not To
How hard could it be to swap some bearings on a Yeti SB150?
This was going to be an easy job. A quick and tidy task about which I could speak confidently and knowledgeably in an article. That's probably an exaggeration of my mindset, but it turned into something much farther from that than I feared. I assumed there would be a Youtube video (or six) and a guide on Yeti's site, but I failed to find either. Yeti has an assembly guide that is very good, but the bearings are already in the frame for the example. Still, it could be easily reverse engineered to simplify disassembly. Or it could have been, if I had taken the time to do that. Instead I lumbered forward and focussed on the logical starting point.
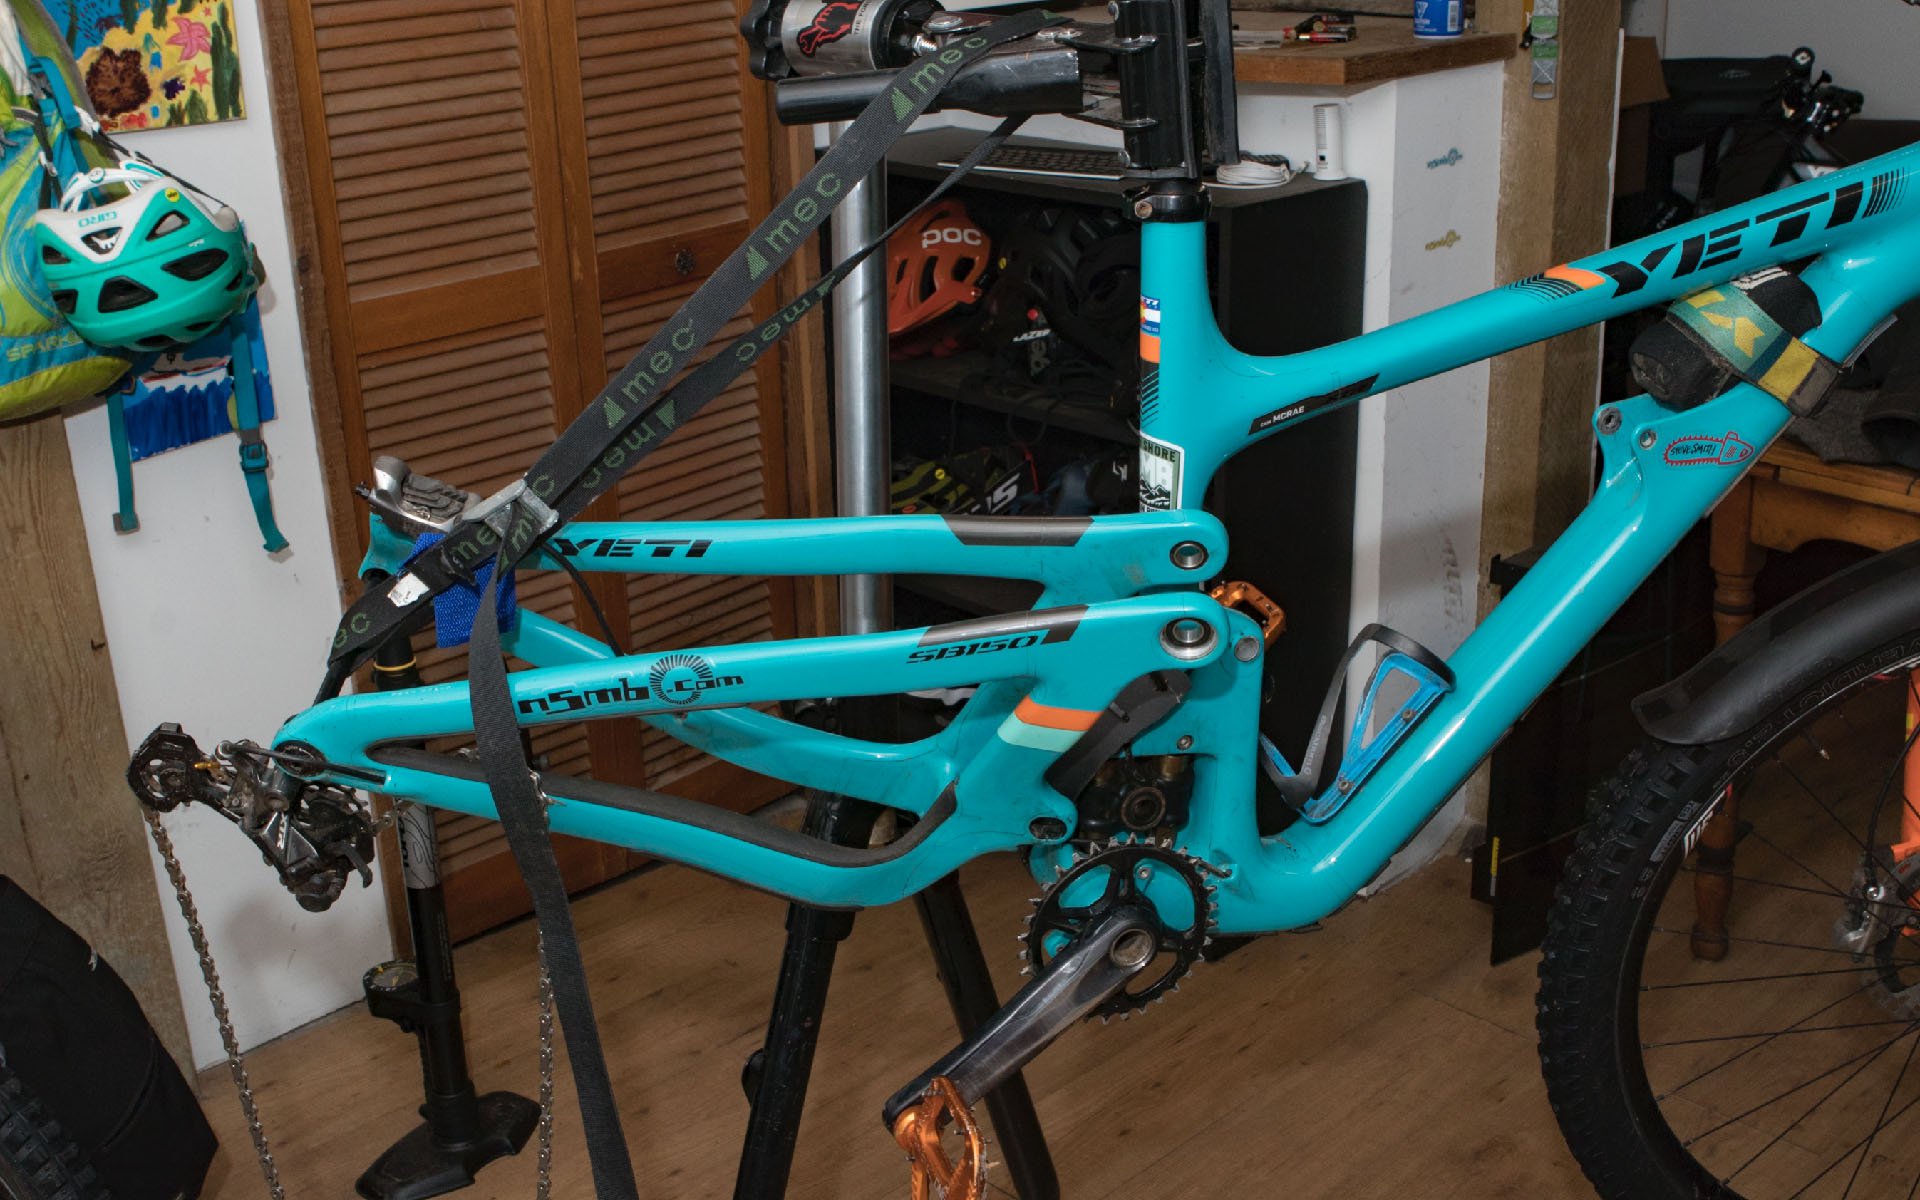
The state of my workbench is often a reflection of my progress. As you can see here I've gotten nowhere.
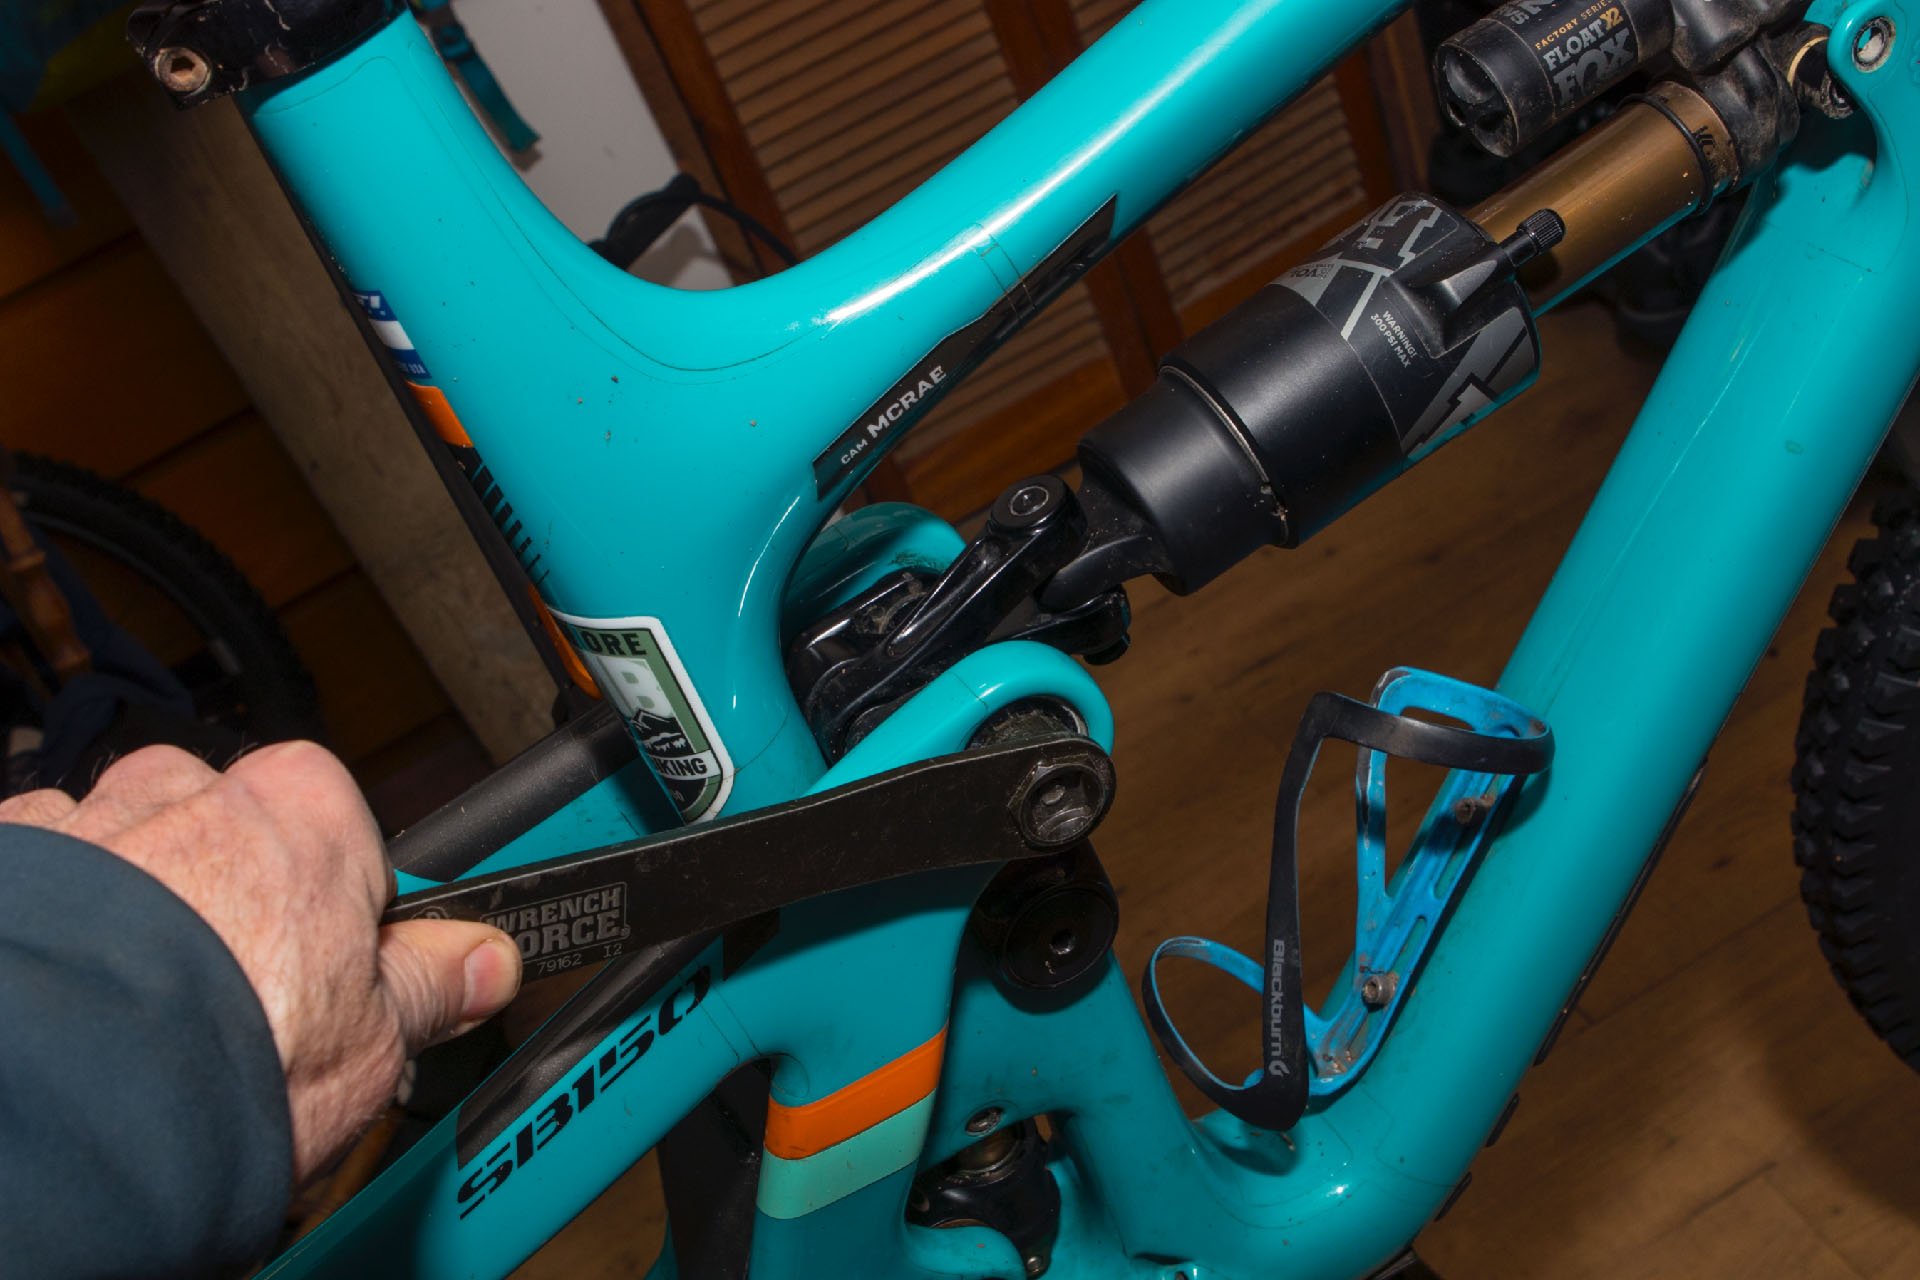
Once the bolts are removed, a Shimano UG/IG cassette tool is required to remove the bearing keepers on the swingarm.
I've always admired people who effortlessly do everything themselves. An early business partner of mine once raised his house several feet. By himself. I aspire to be one of those people who builds, fixes, renovates, recalibrates, and generally tackles tasks most of us leave to expensive experts, but I've taken only halting steps toward that goal.
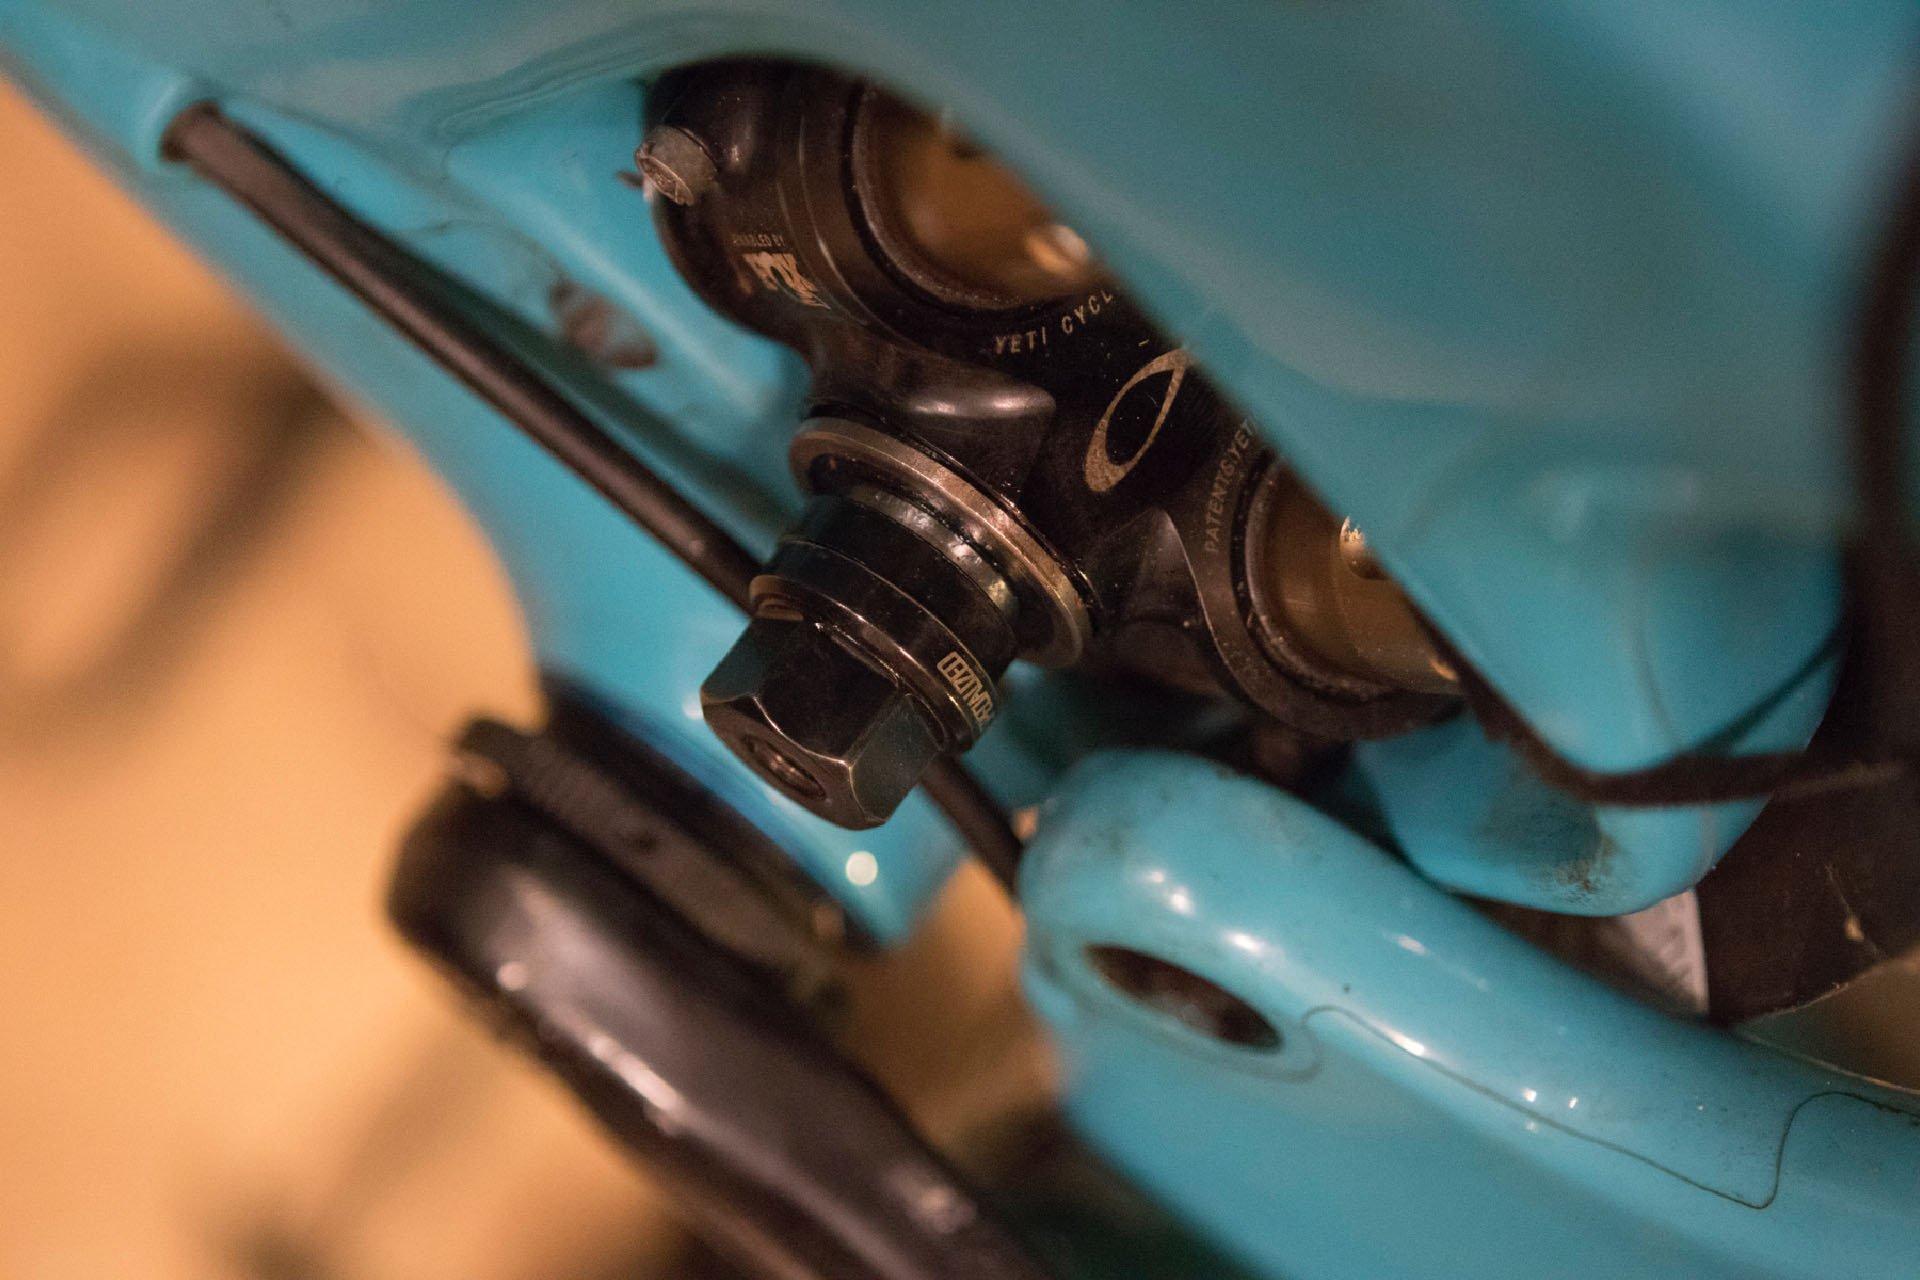
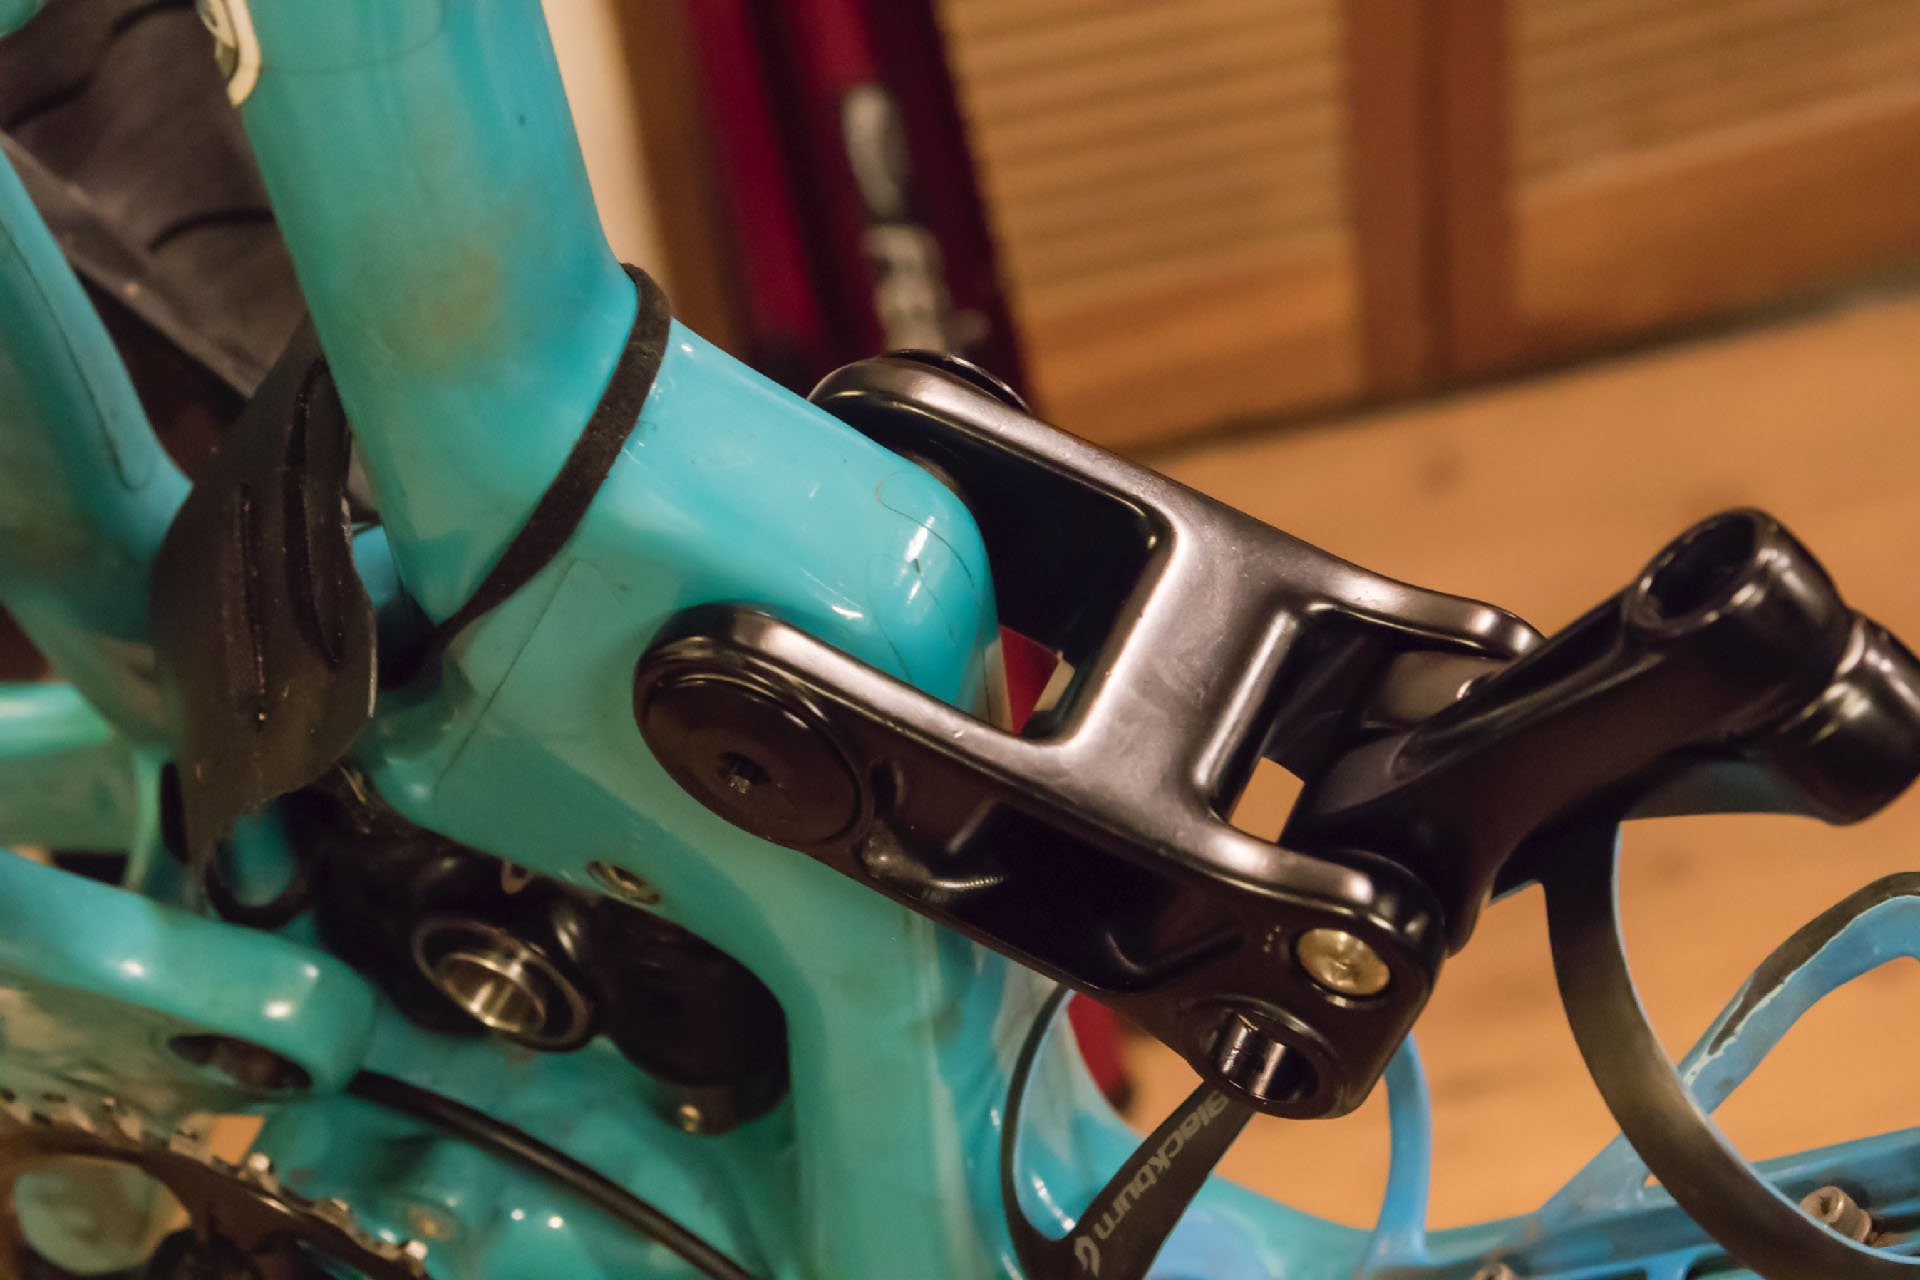
Dissasembly is usually the easy part, but it did not go smoothly. Start with the forward shock mount and then the bolt and collet axle that are both facing down at the rear shock mount.
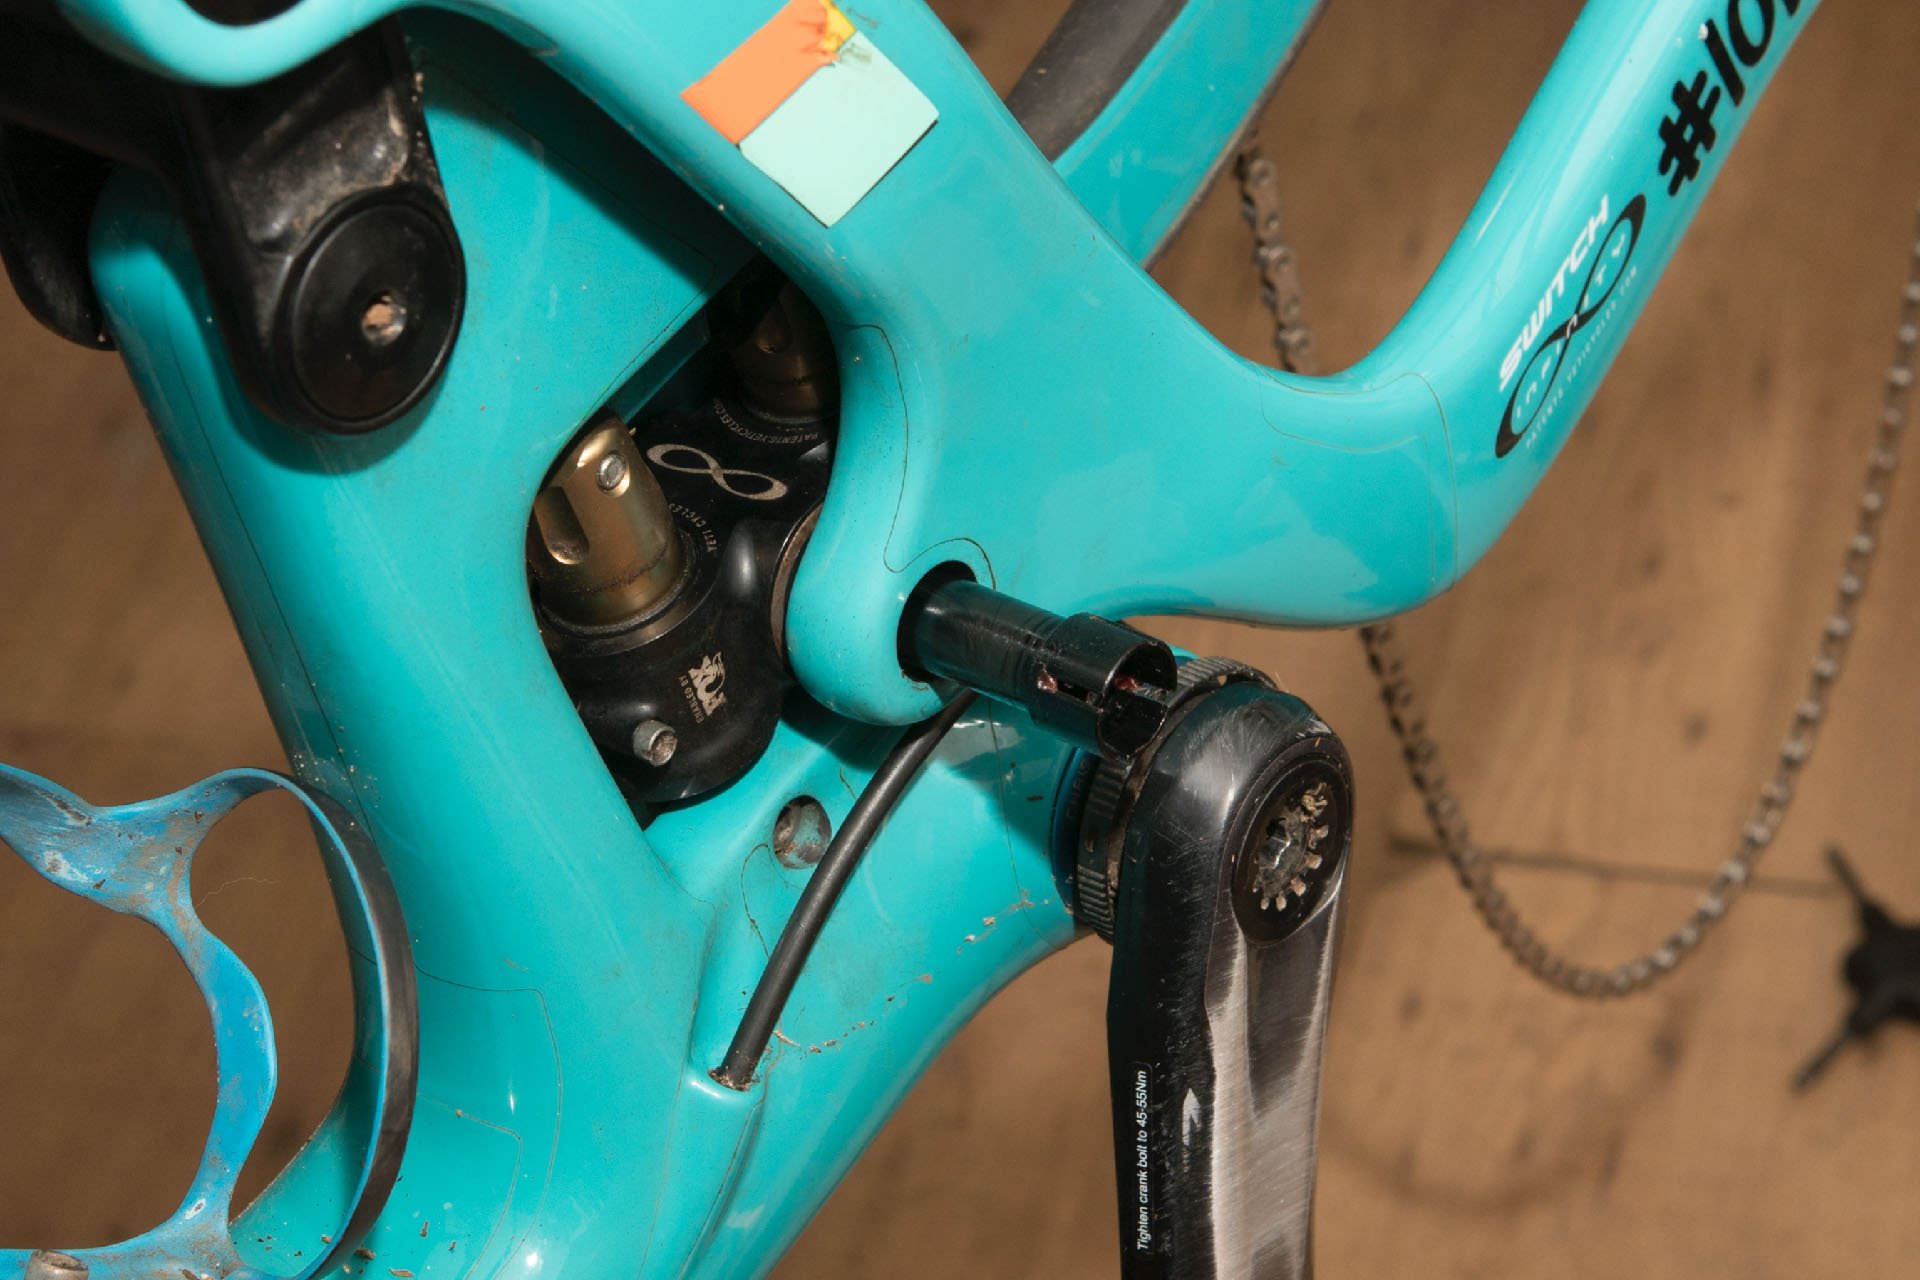
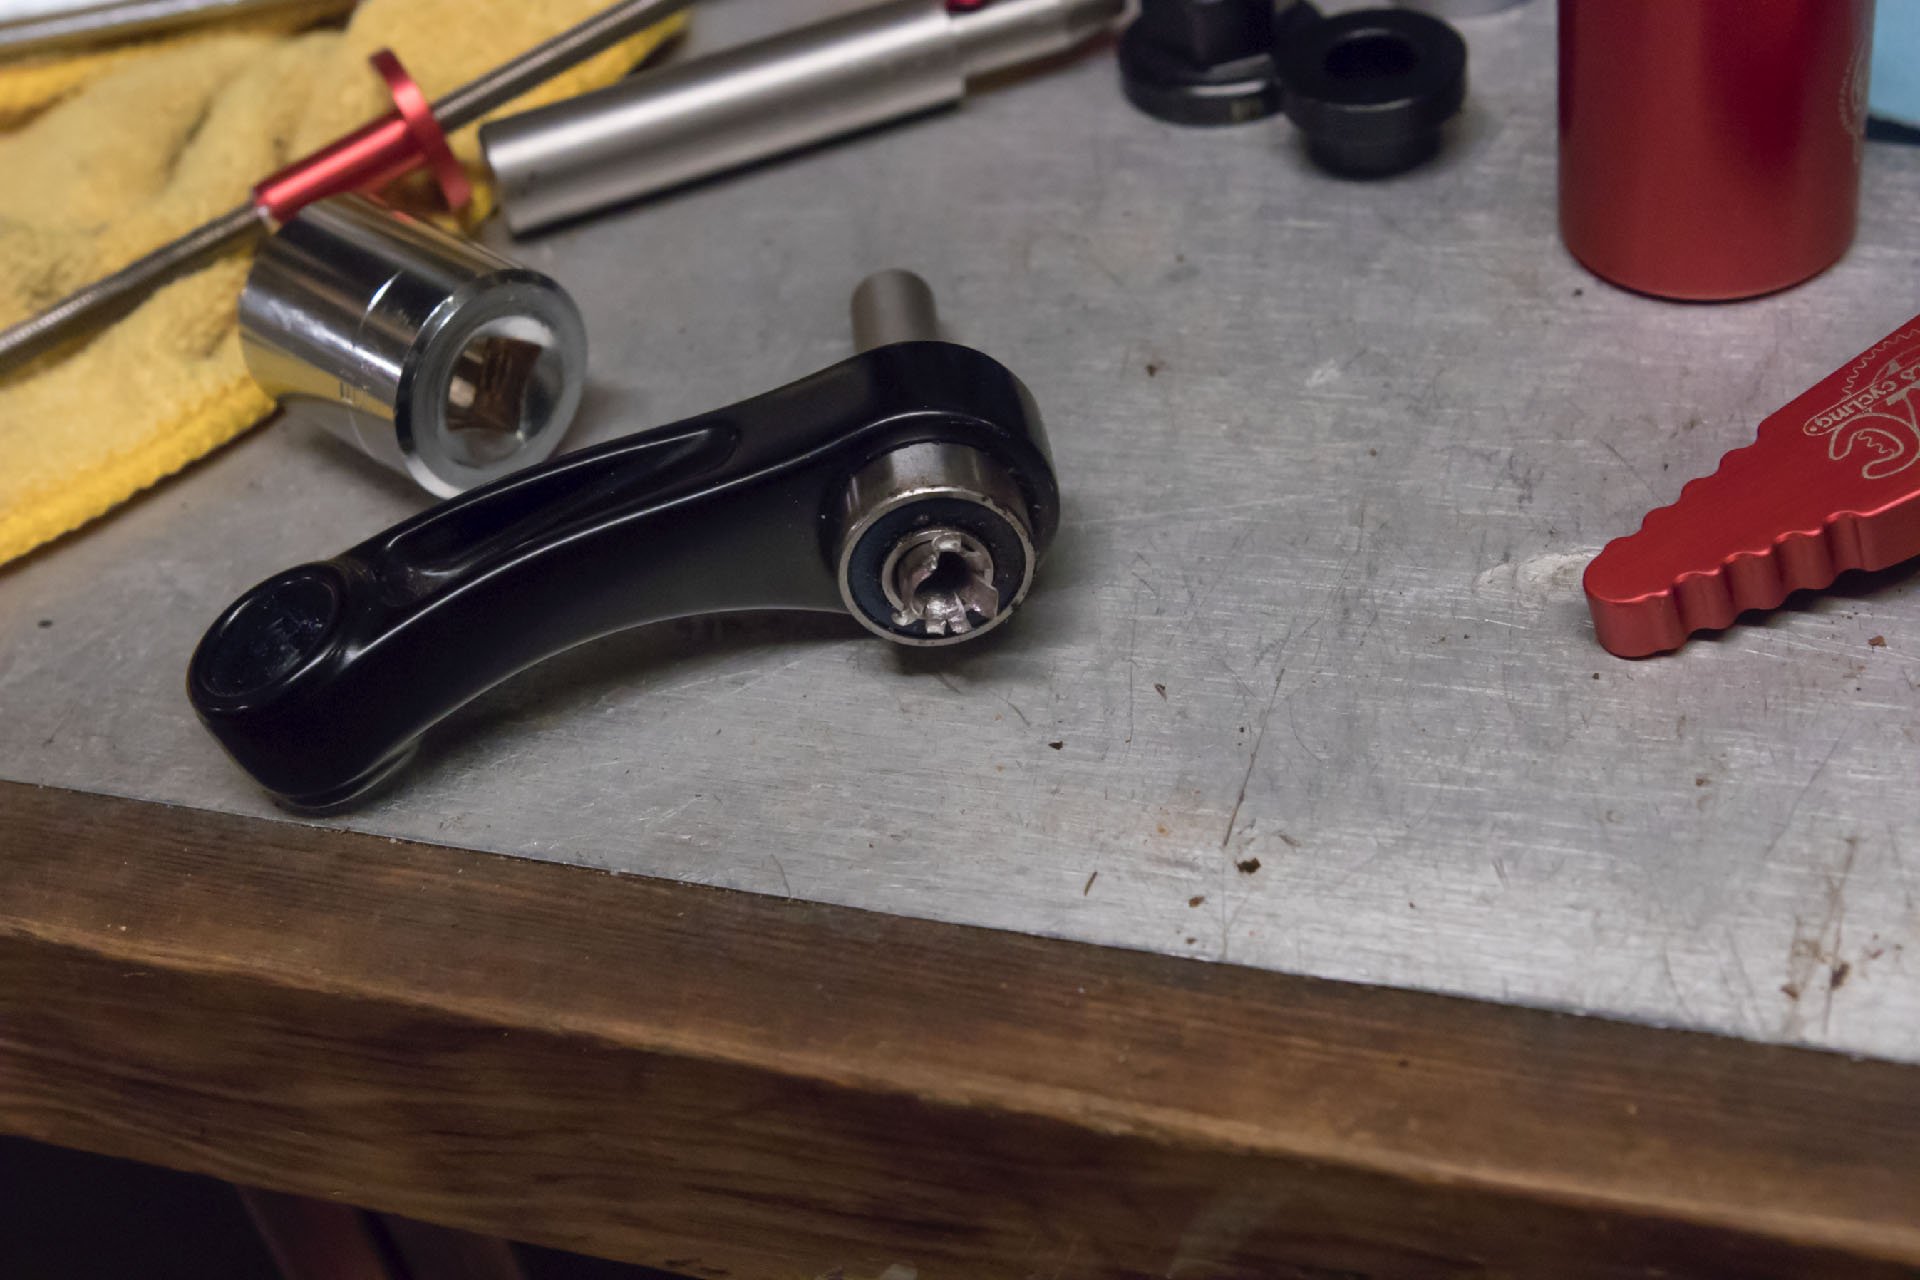
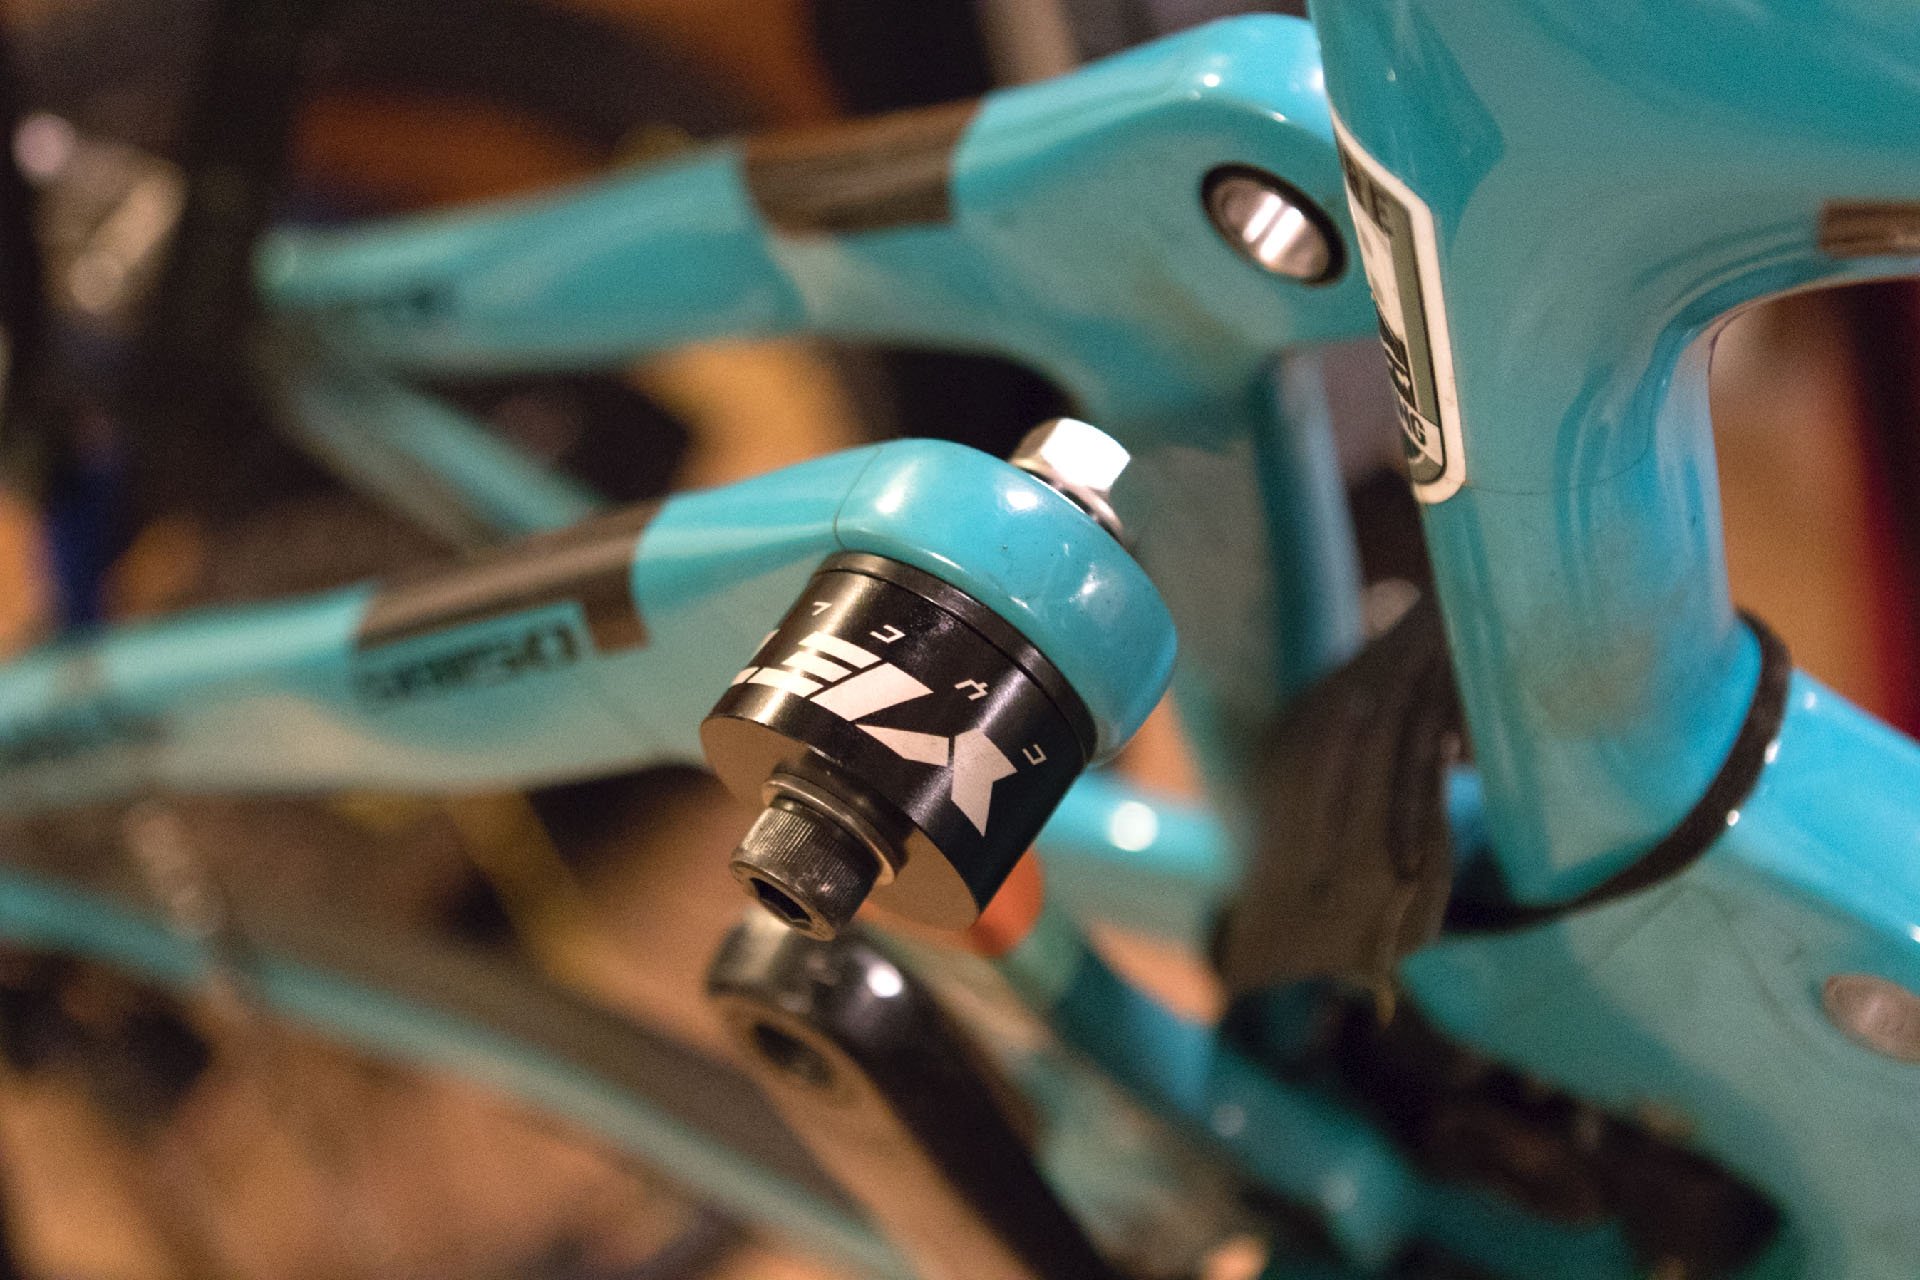
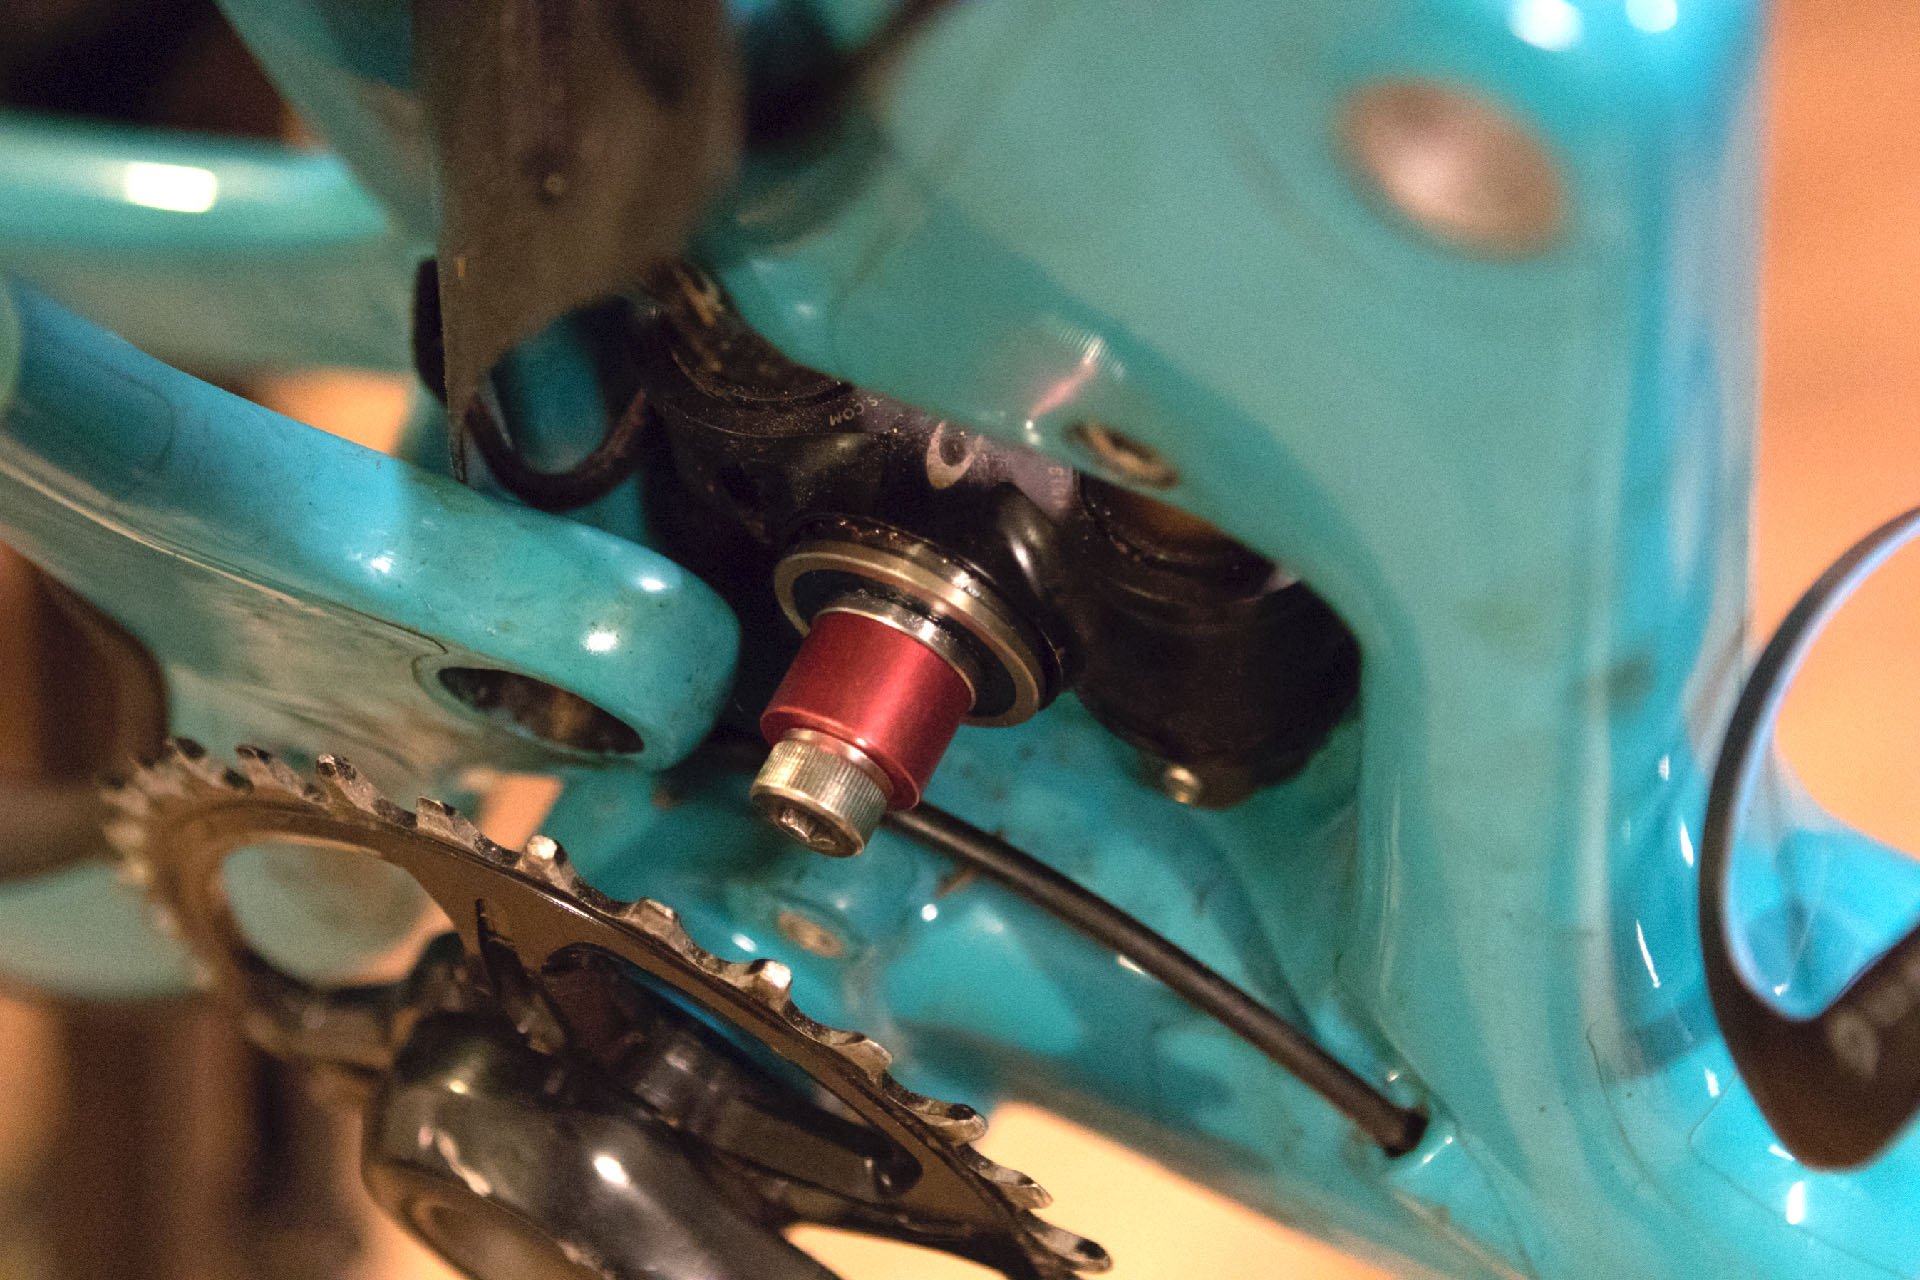
Once the bolt cover is removed, a 10mm hex will loosen the main pivot collet bolt. It's a good idea to remove this occasionally to clean and lube it so it doesn't begin to seize.
When I was younger and dumber, I purchased a British sports car. It was a 1964 Sunbeam Alpine Series IV. She was a red beauty with original paint and only 85,000 miles on the odometer. I'd just sold my previous Alpine, a 1967 that was a bondo buggy, that no longer ran, for $1750 despite picking it up for $1950. It had, after all, only caught fire once. The '64 was a beauty though. The original spare was still bolted in the trunk and the owner's manual was in the glove box. It had a 1592cc motor that belted out 85 bhp, a removal hardtop but no soft top, and no radio. She was fun to drive though, thanks to a four-speed manual with 'electric' overdrive in 3rd and 4th.
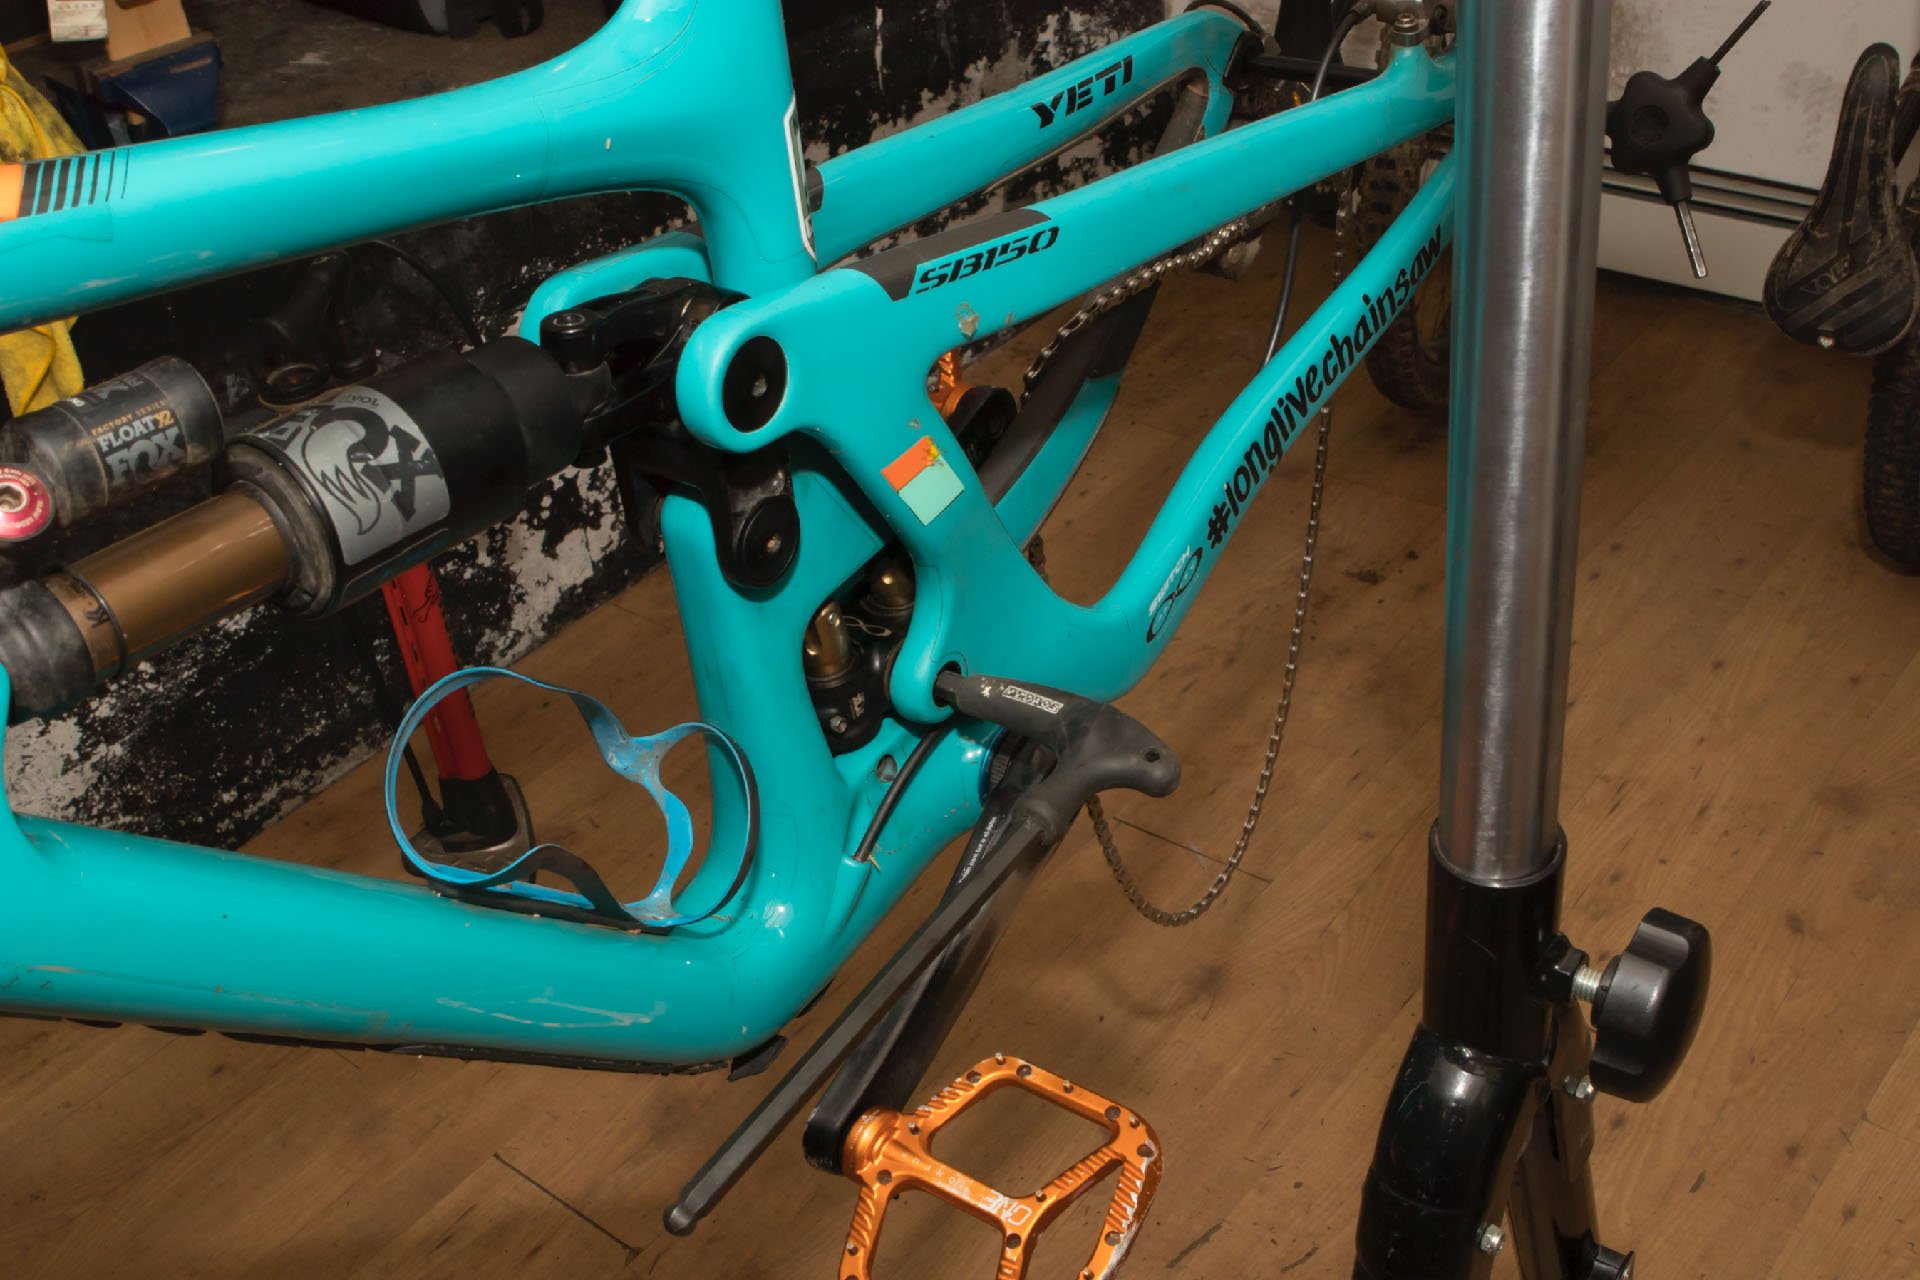
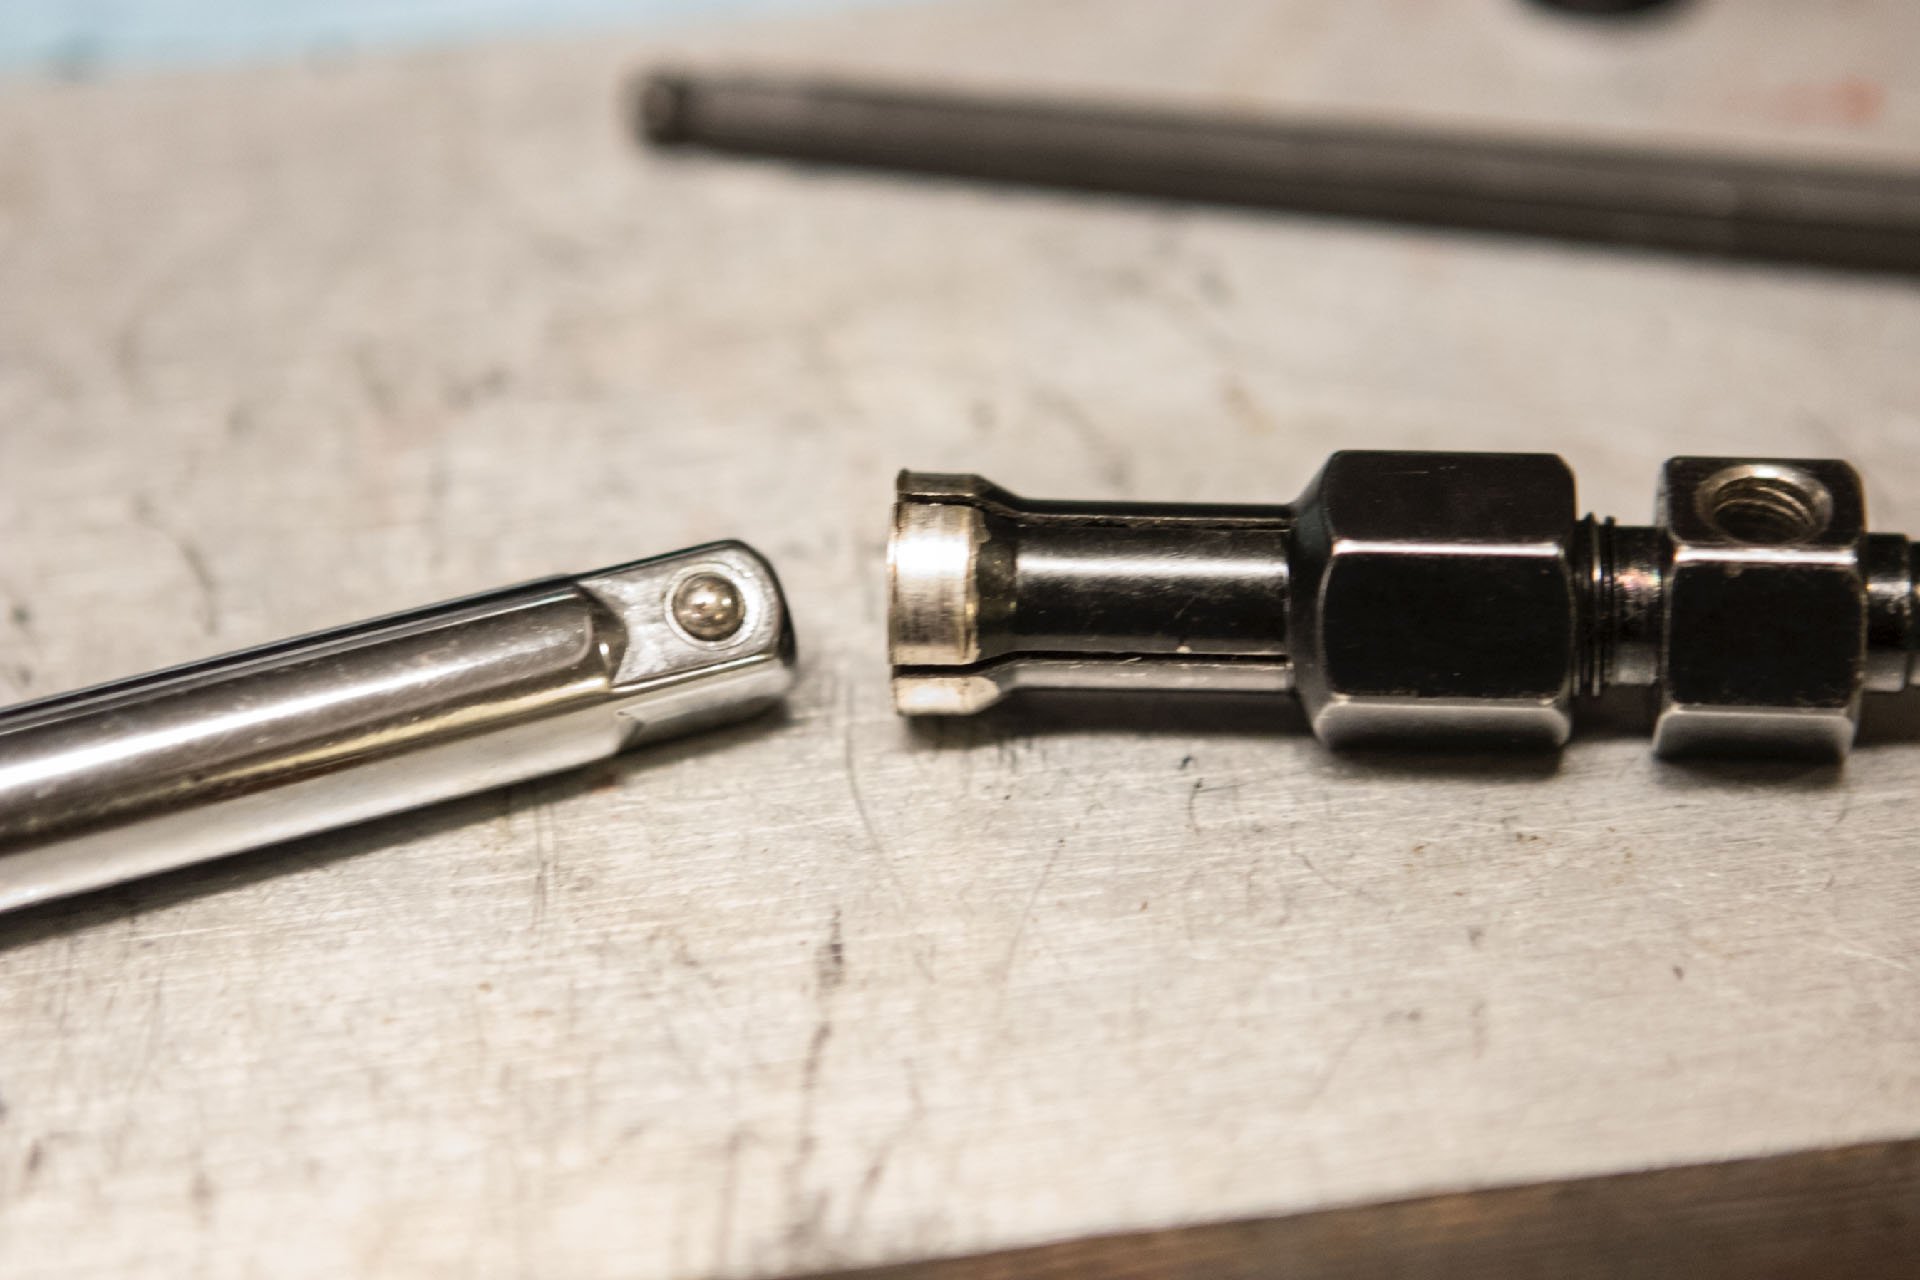
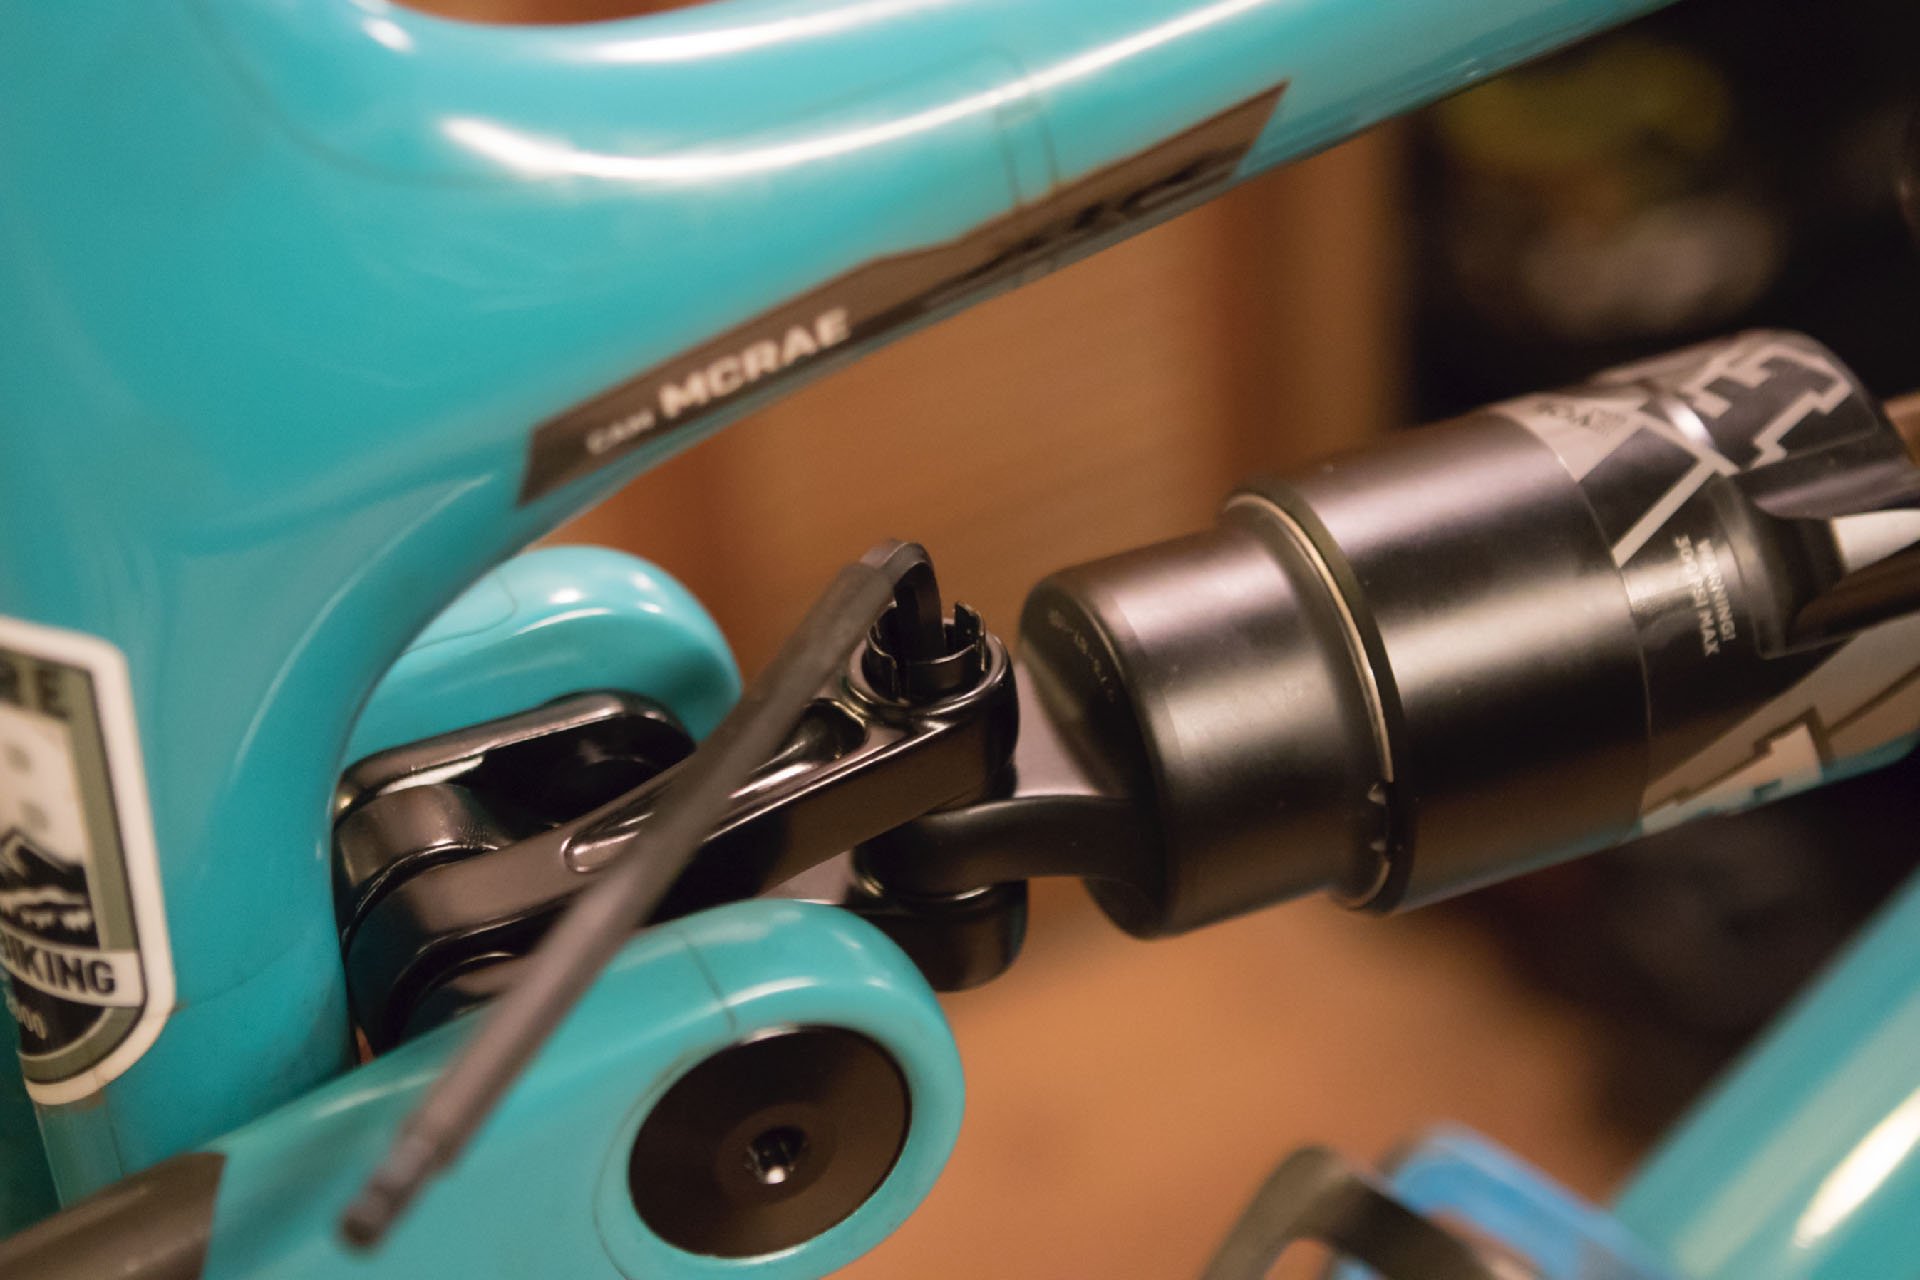
The collet axle is removed with a 5mm hex.
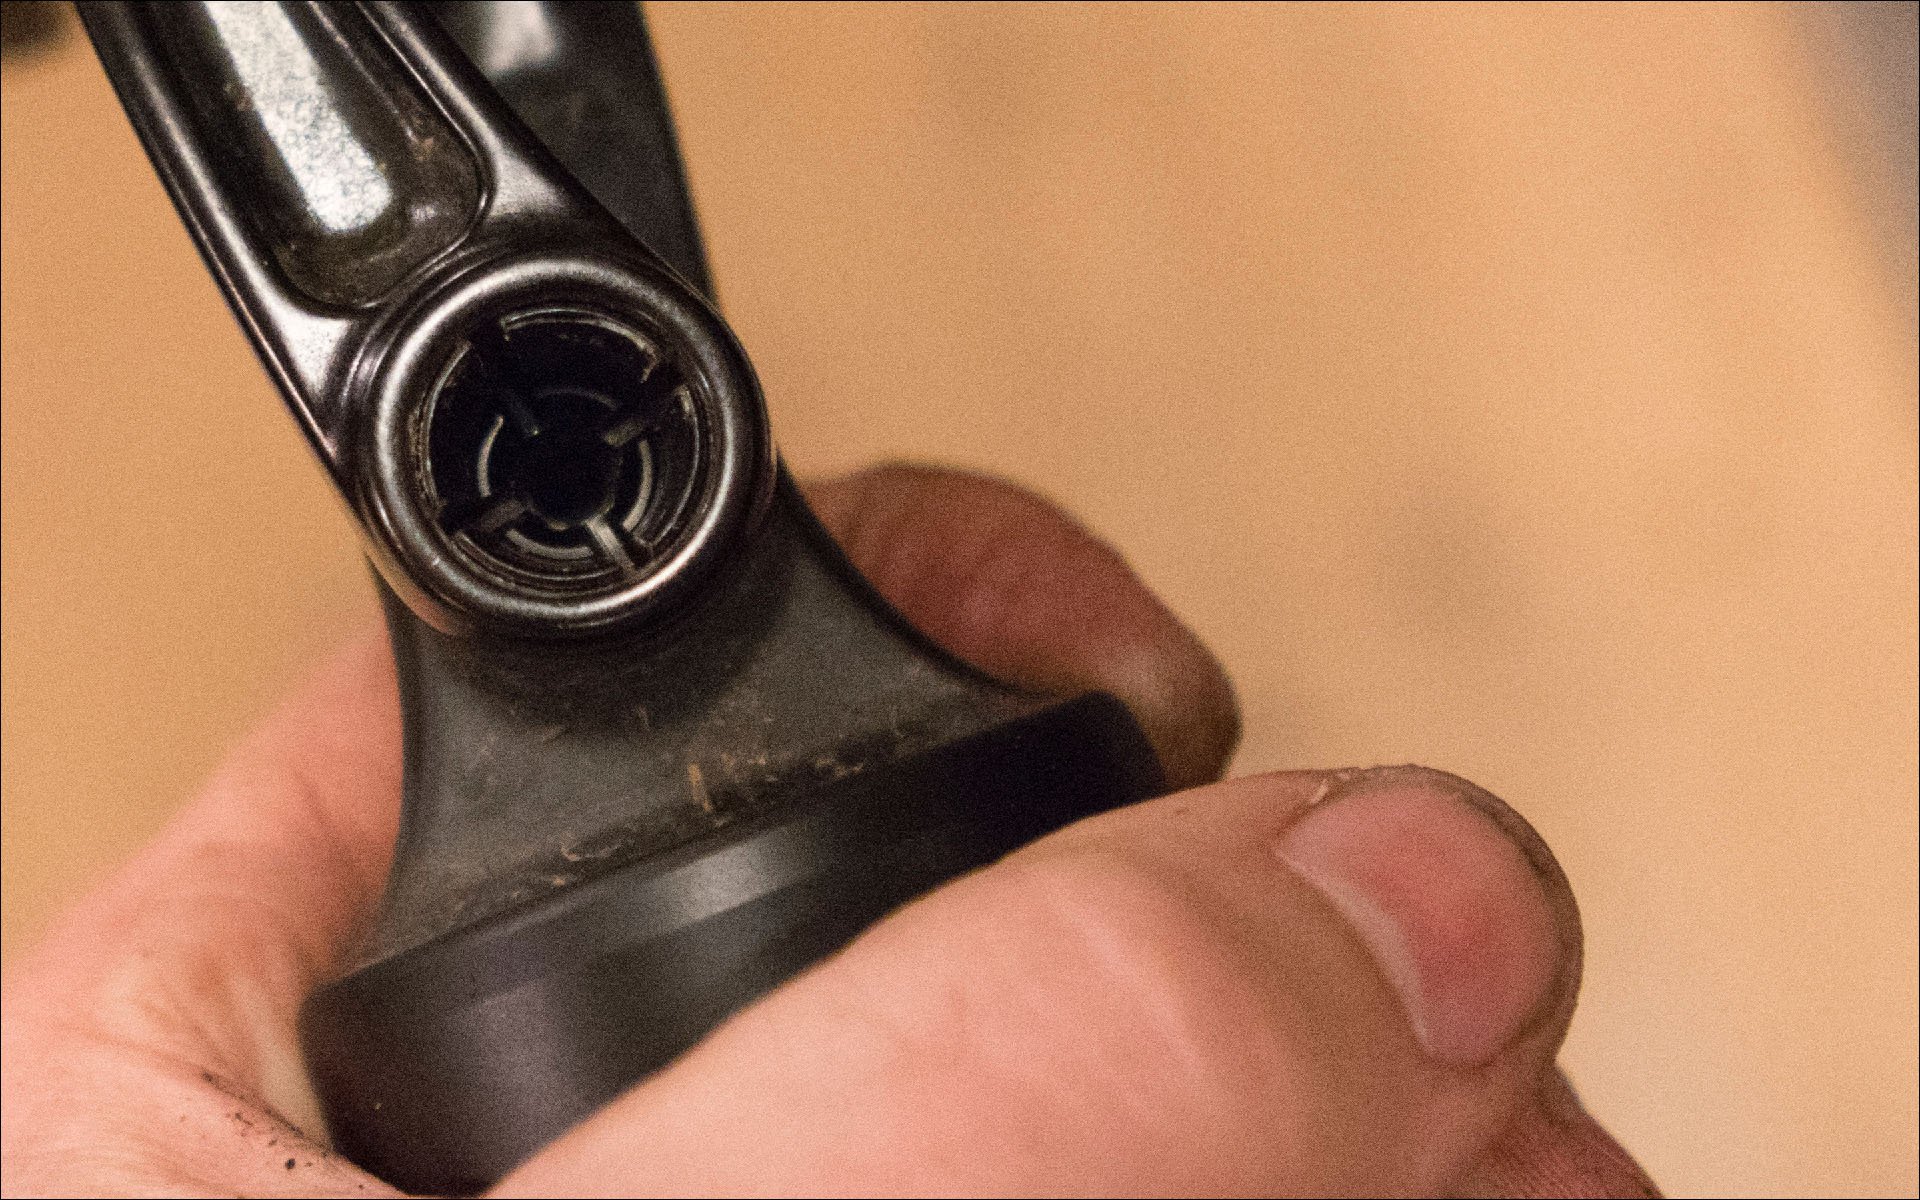
This is difficult to see, unless you read the manual.
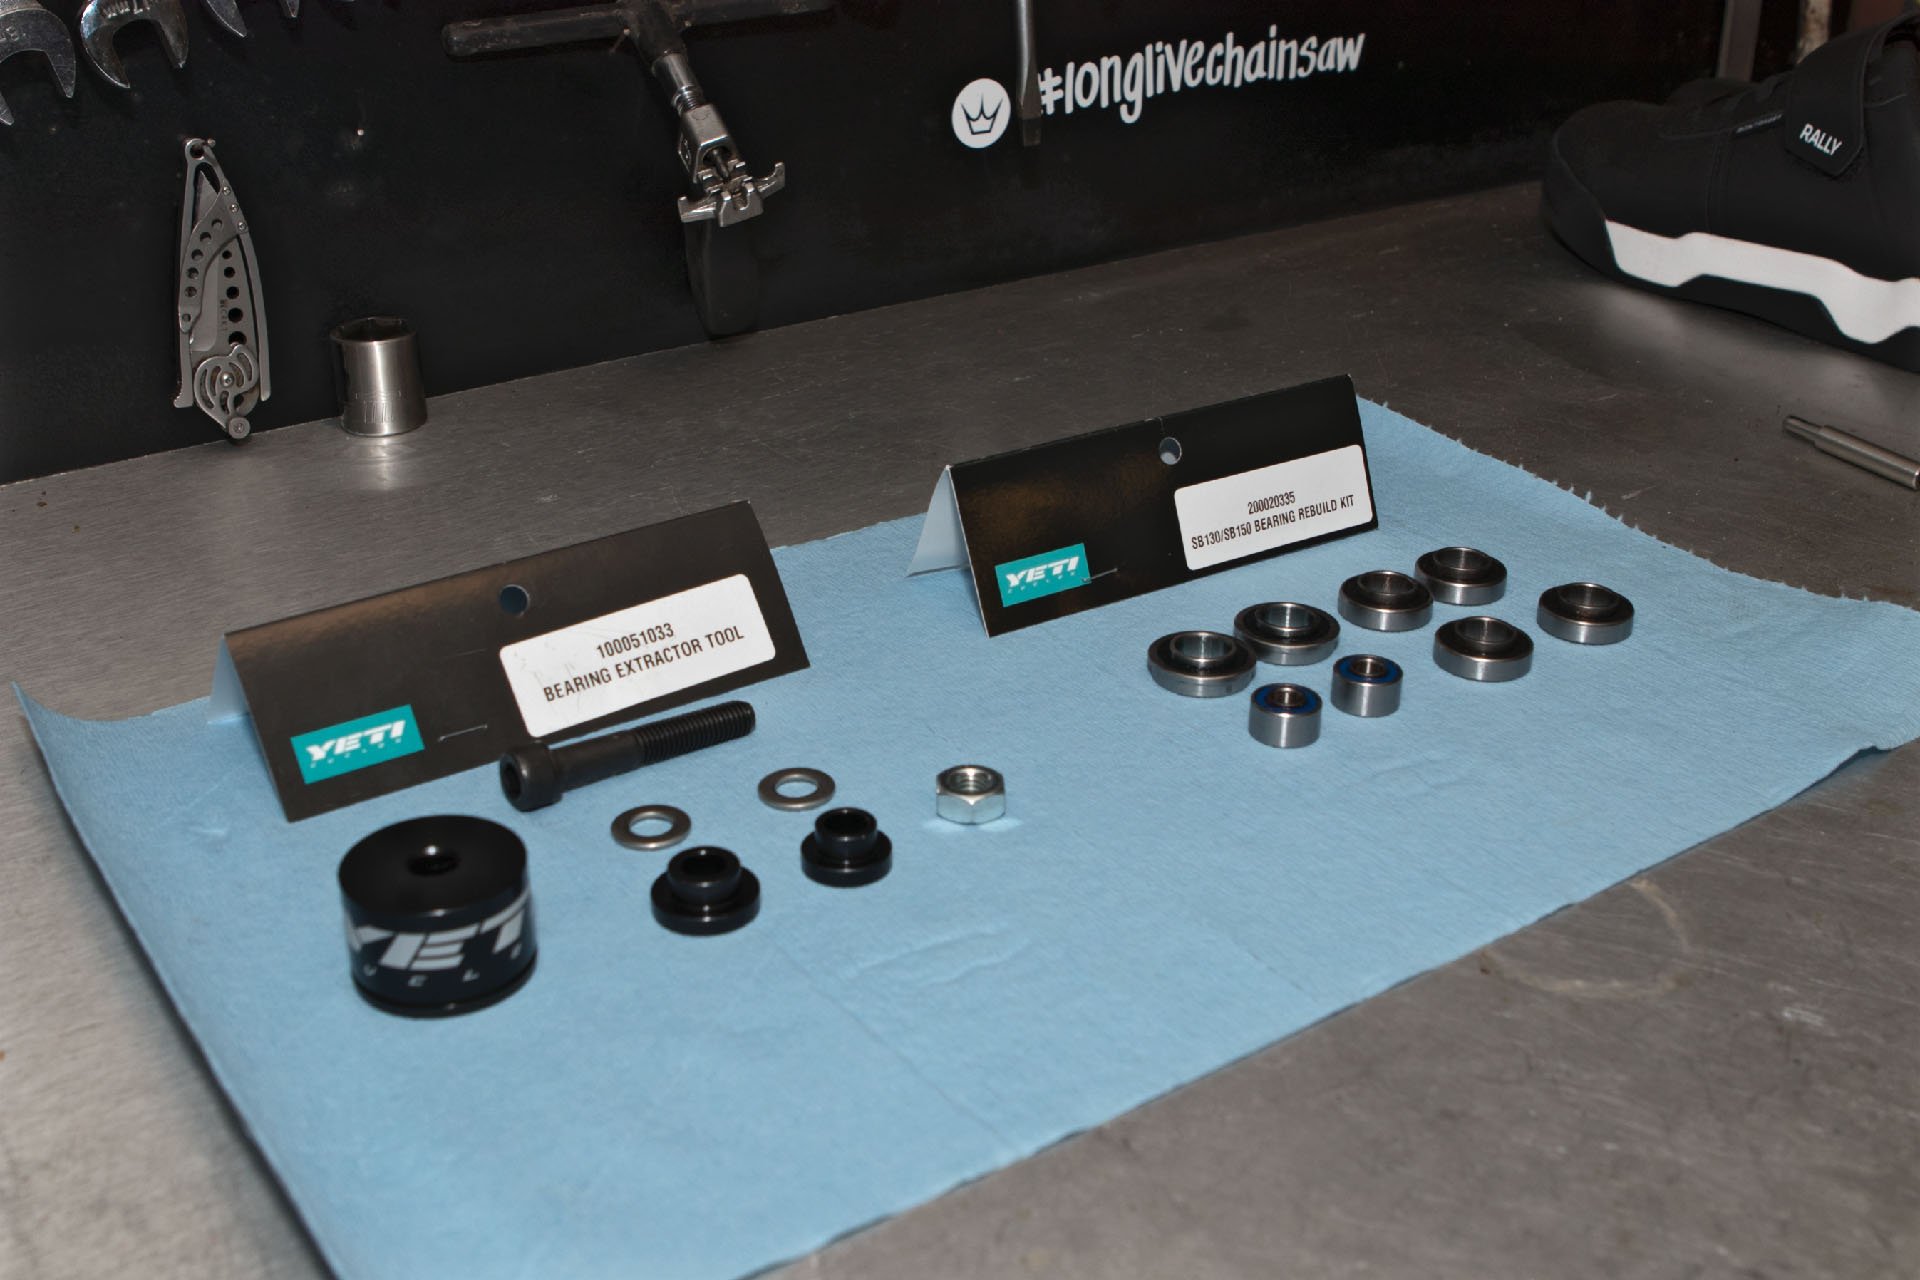
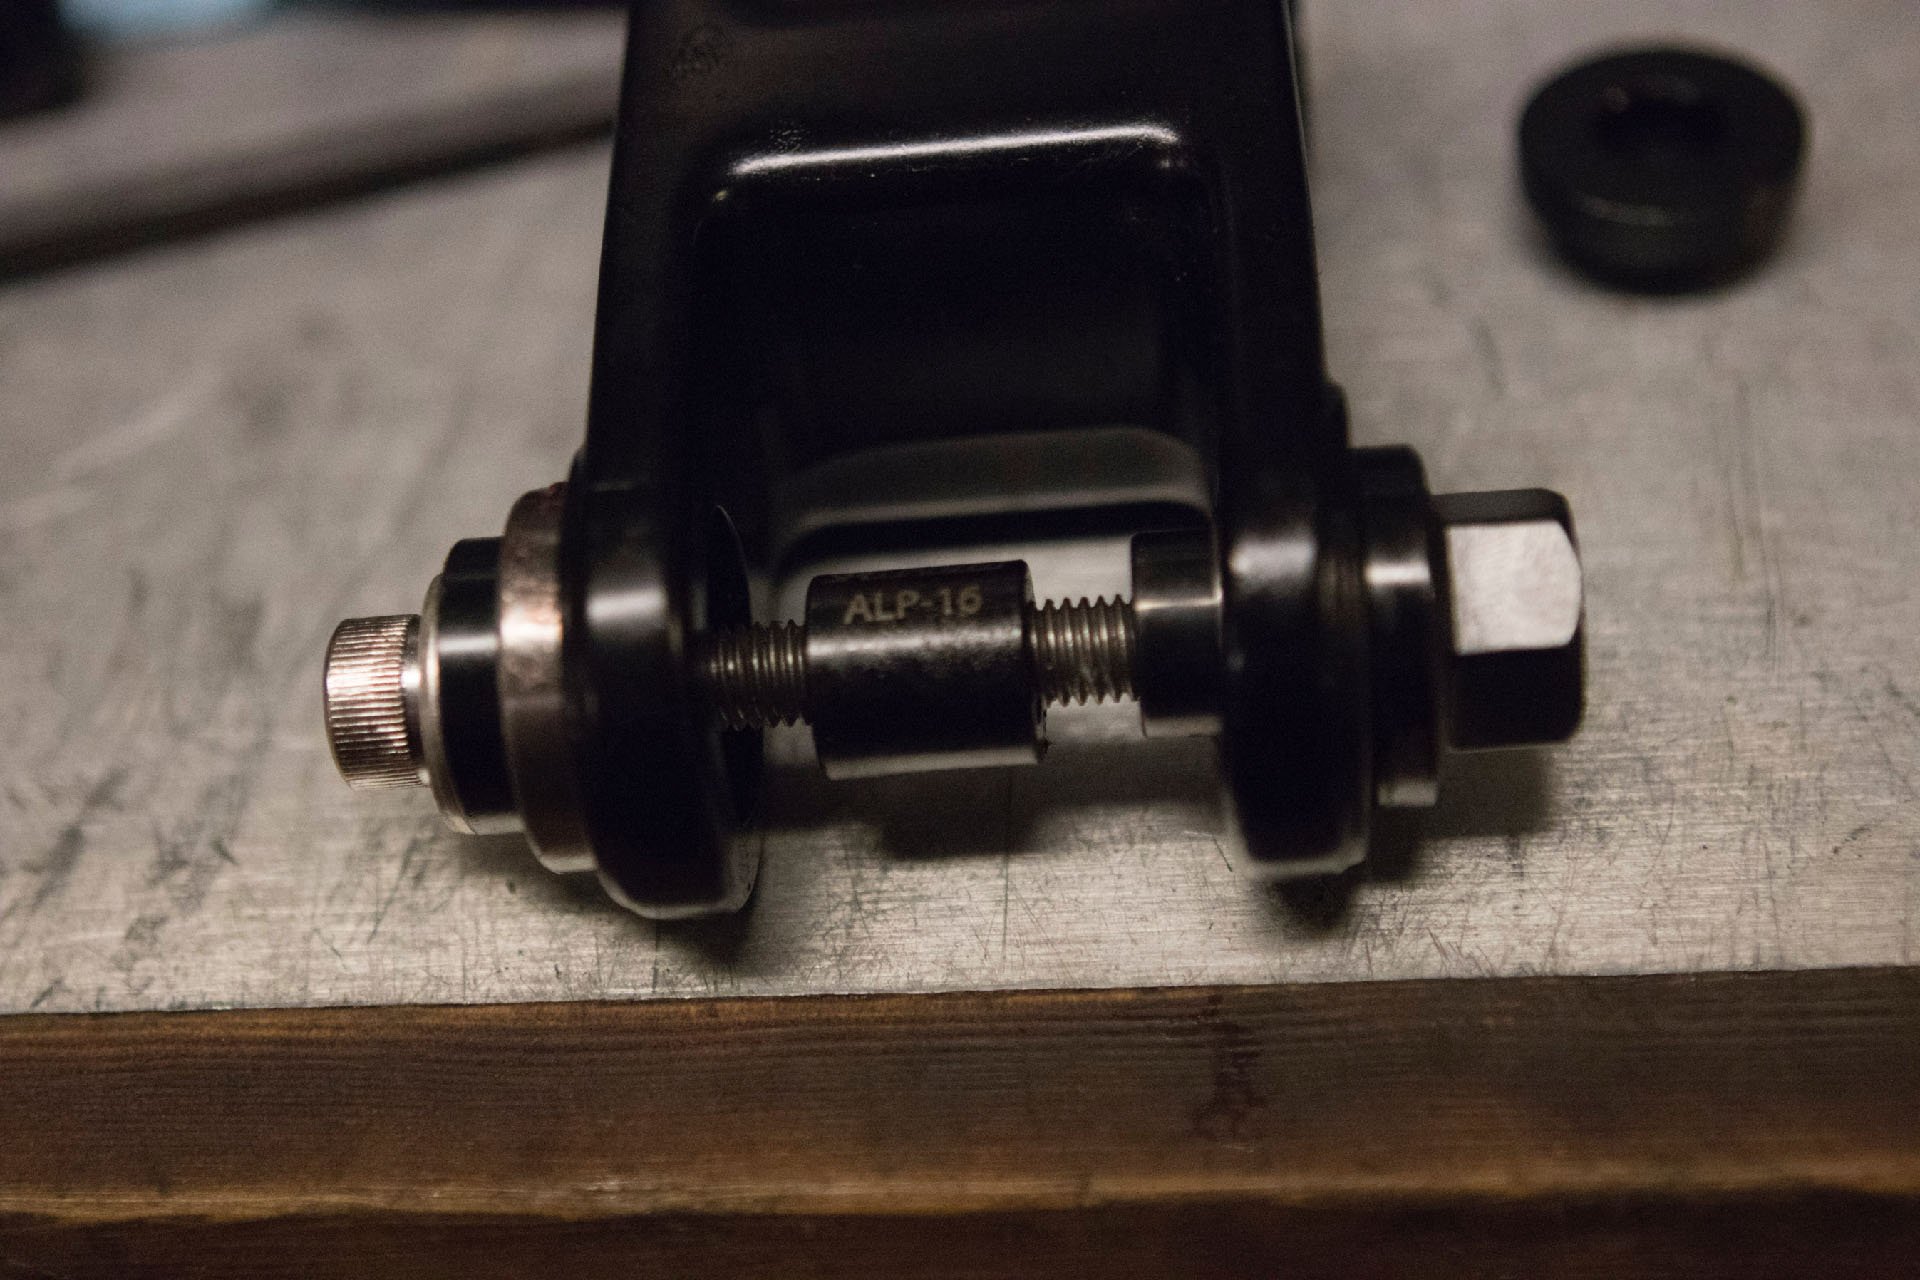
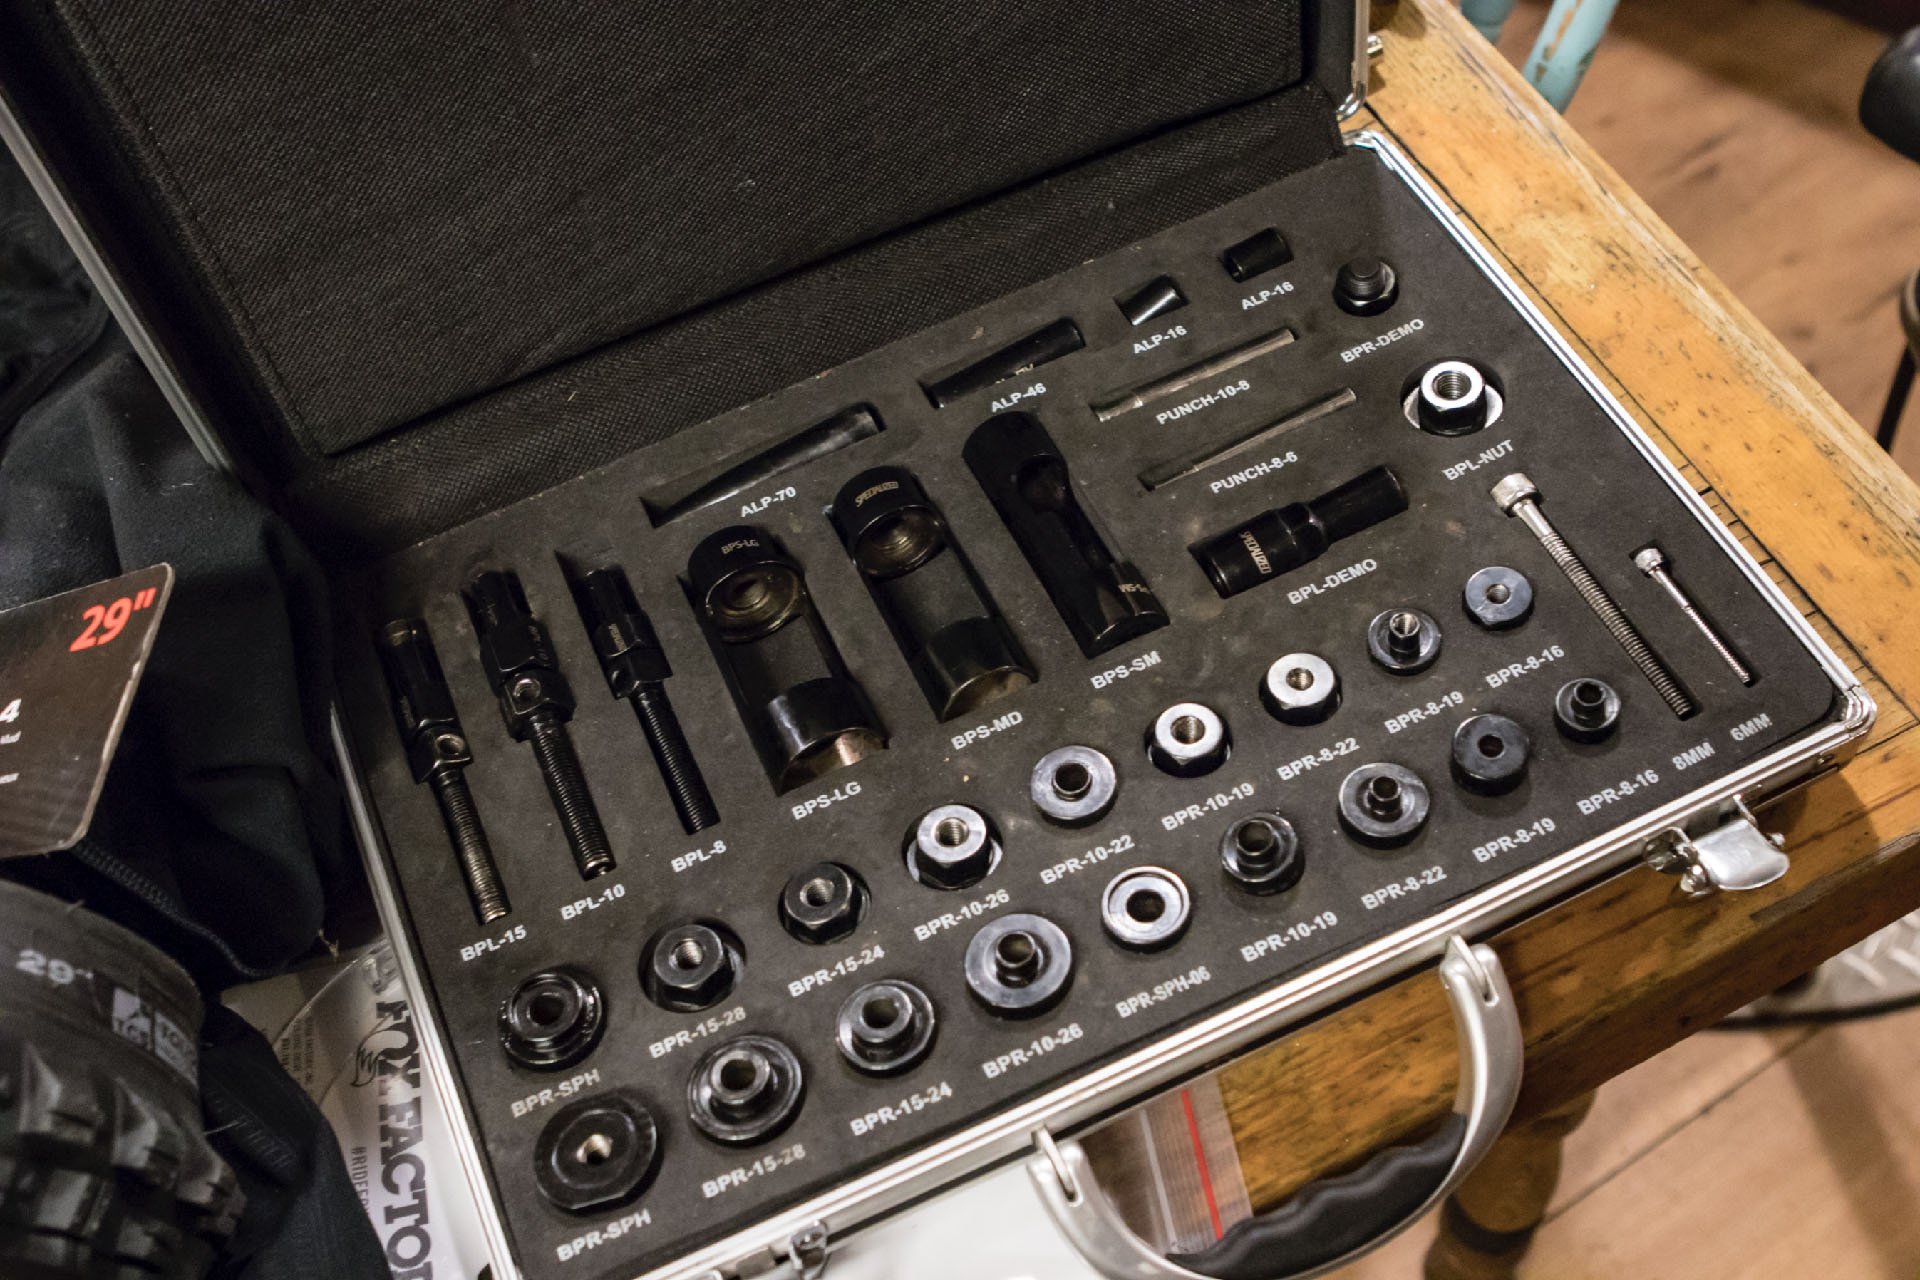
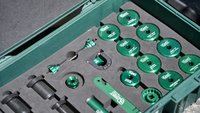
The tools required... or so I thought.
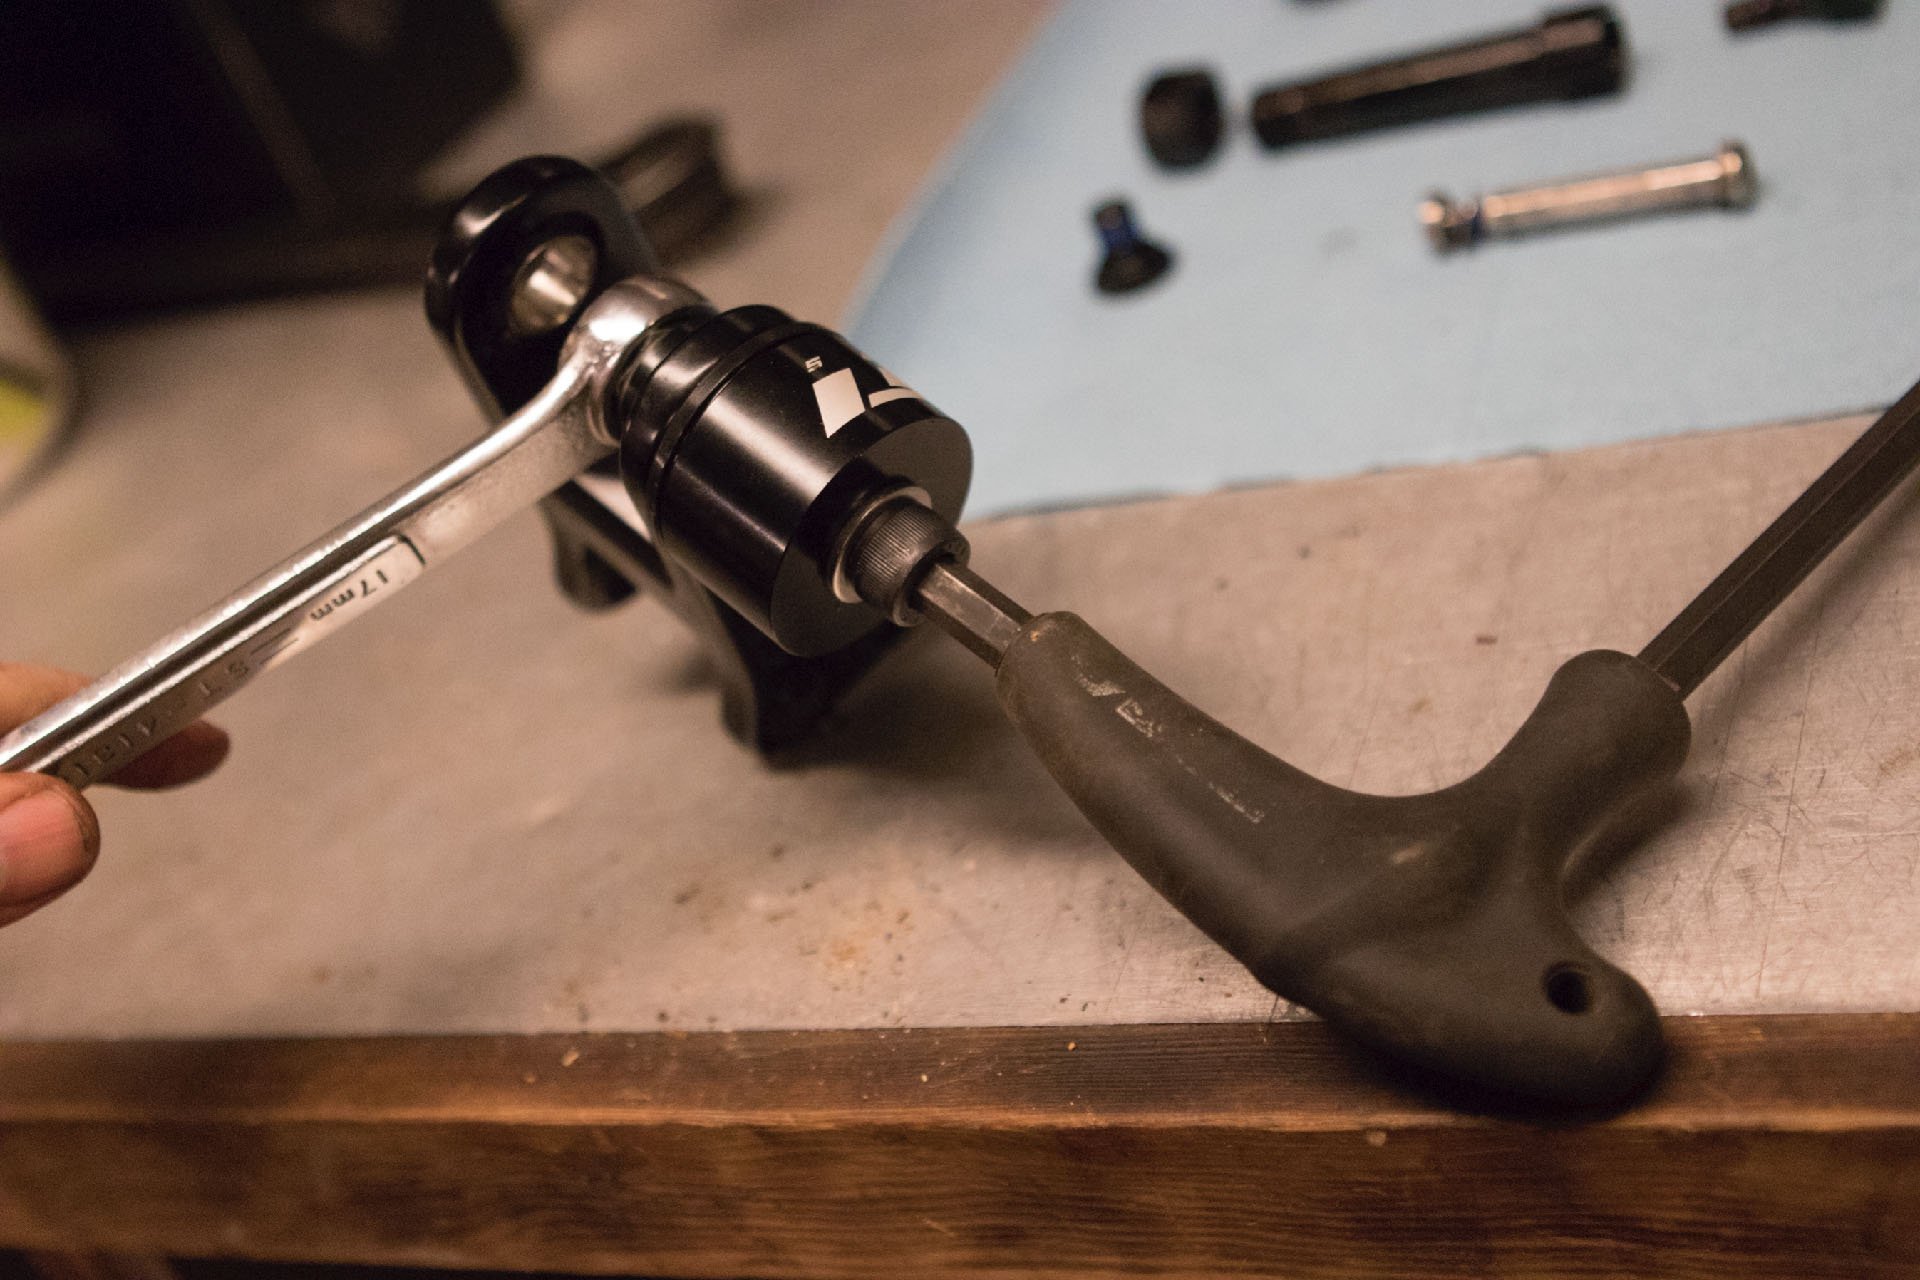
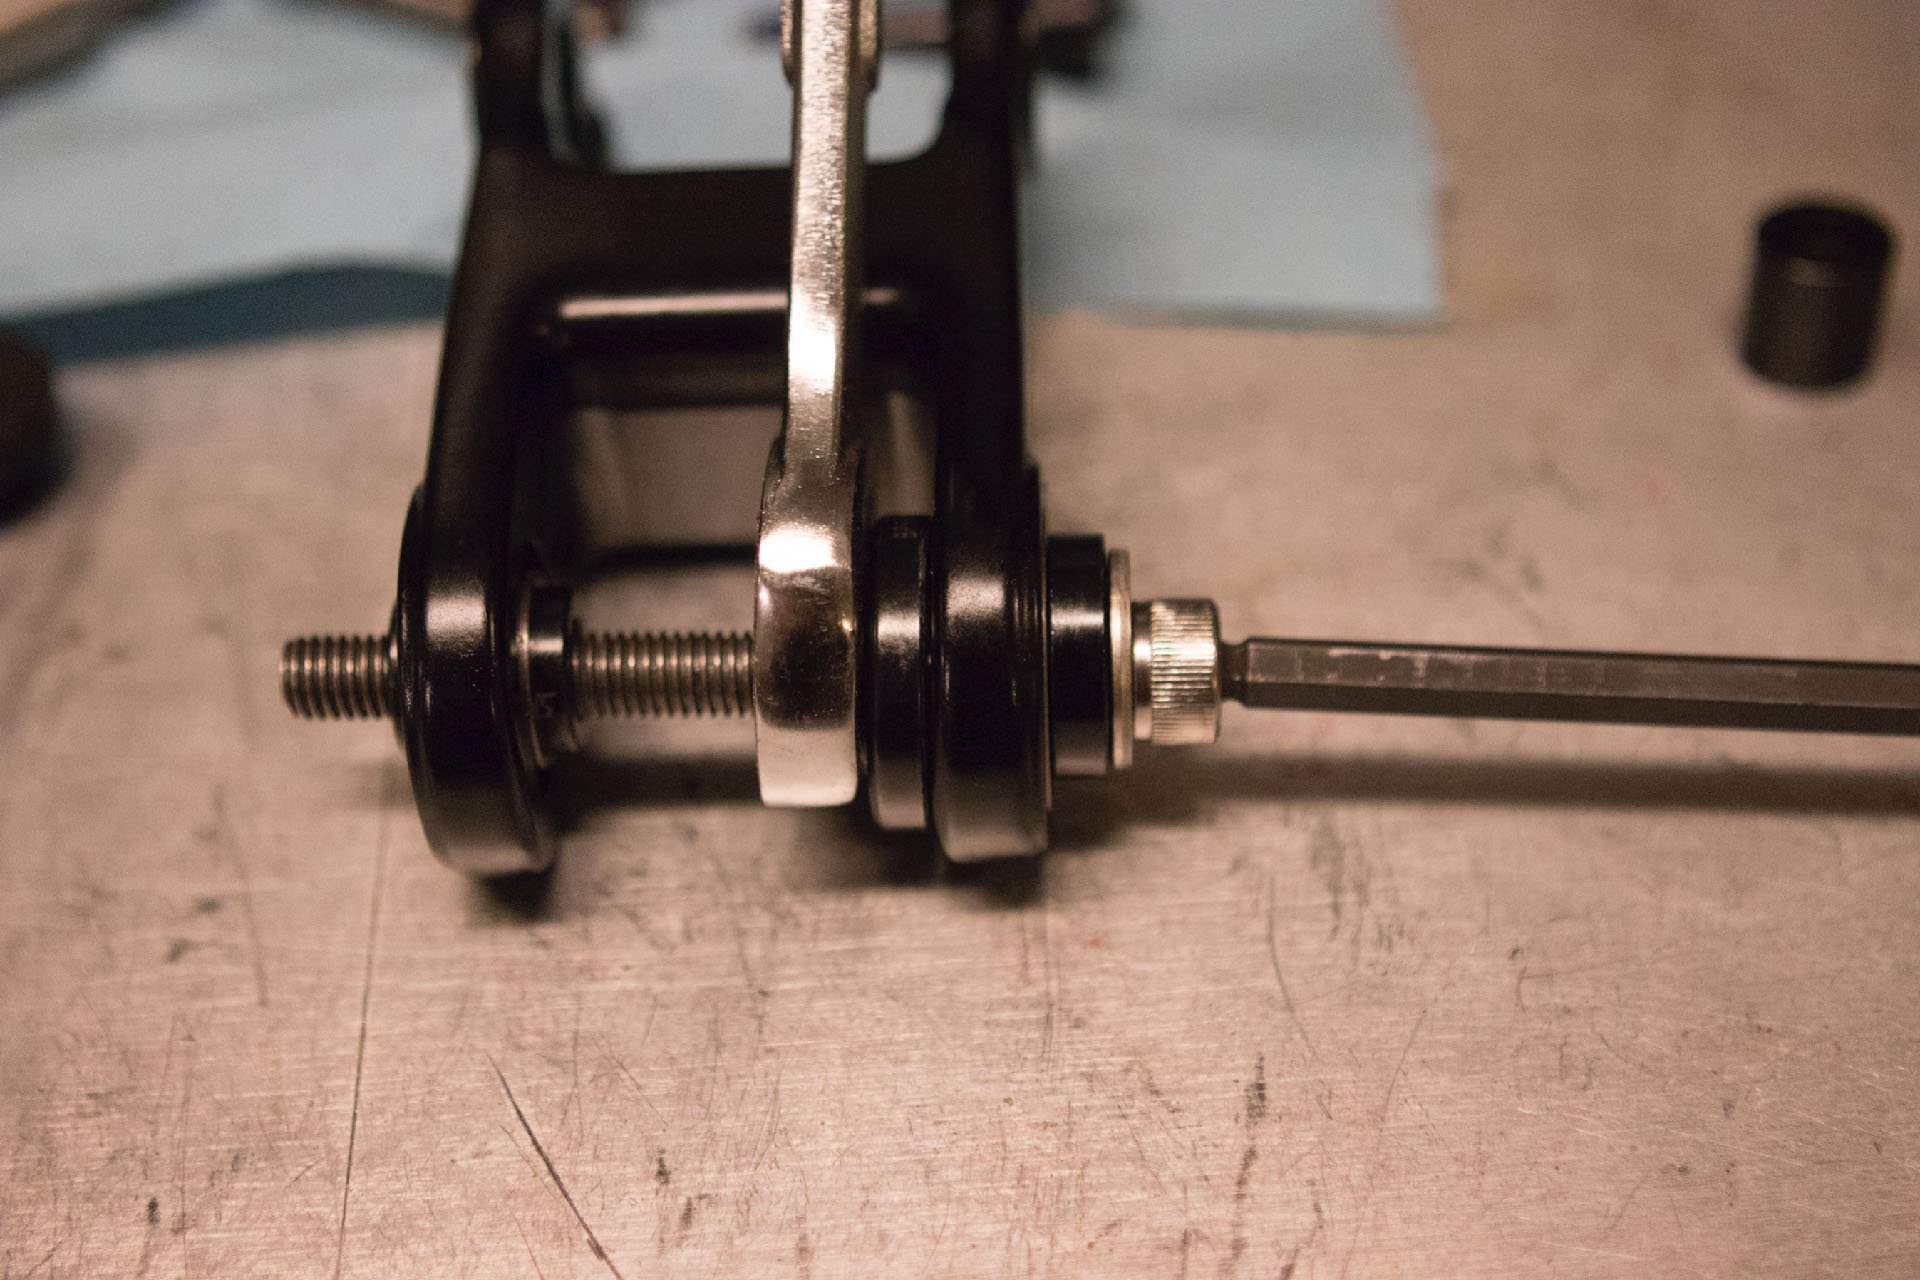
The tools in use. This worked as expected to remove the bearings from the upper link.
One summer I decided to take her on a longer trip and my girlfriend and I packed up the Alpine and headed east on the Trans Canada highway. Our destination was Shuswap Lake, about 250 km away from Hope, where the Sunbeam's head gasket blew. Luckily there was a transporter that could bring the car back to Vancouver the following week for $50, so we abandoned the the red '64 and rode the Greyhound.
Once the car was back I decided to tackle the head gasket myself. I had a manual and I bought a socket set and some other tools and dug in. It was a long process and I did it in shifts, but eventually the valves were adjusted, head and other gaskets were replaced and bolts were tightened in the proper order. I'd probably spent 20 hours under the hood and underneath the car by the time all was said and done.
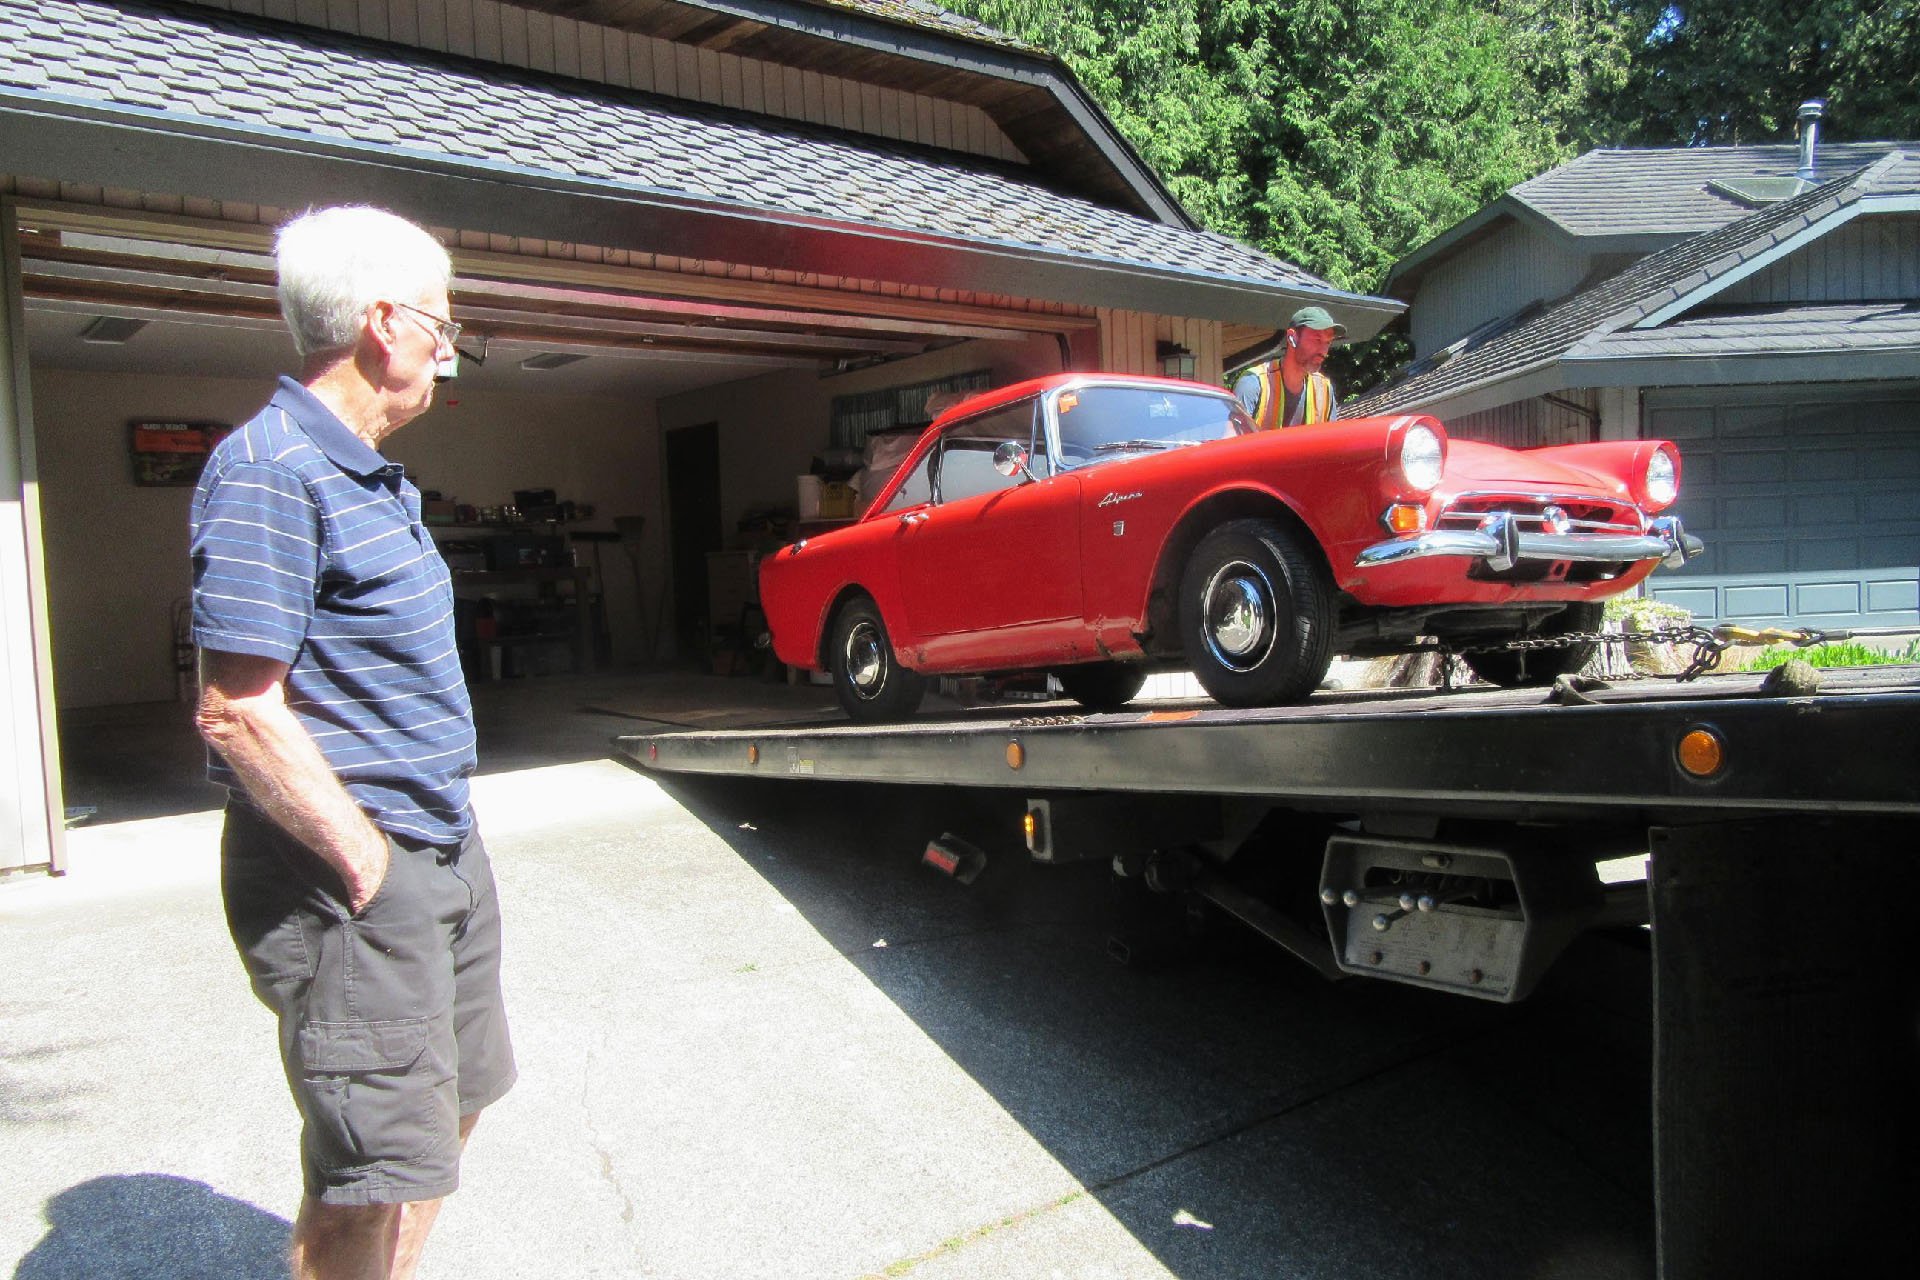
The guy I sold the Sunbeam Alpine to, in about 1991, still owns it. Here his dad supervises as it gets taken in for a complete restoration just last year.
Thanks to procrastination, the job took long enough that I had time to fantasize about the moment I turned the key. I imagined the engine roaring to life instantly and then settling into a nice throaty purr, but I feared the worst. I envisioned hearing nothing but a weak click, or worse, everything firing correctly and then some mistake I'd made would blow a piston, causing a fire that would burn down the garage. My confidence was such that I would have given the garage's survival about even odds, but she fired up and by some miracle began to purr.
Inappropriate tools used: vise, hacksaw, file, hammer, drill, crescent wrench, and side cutters.
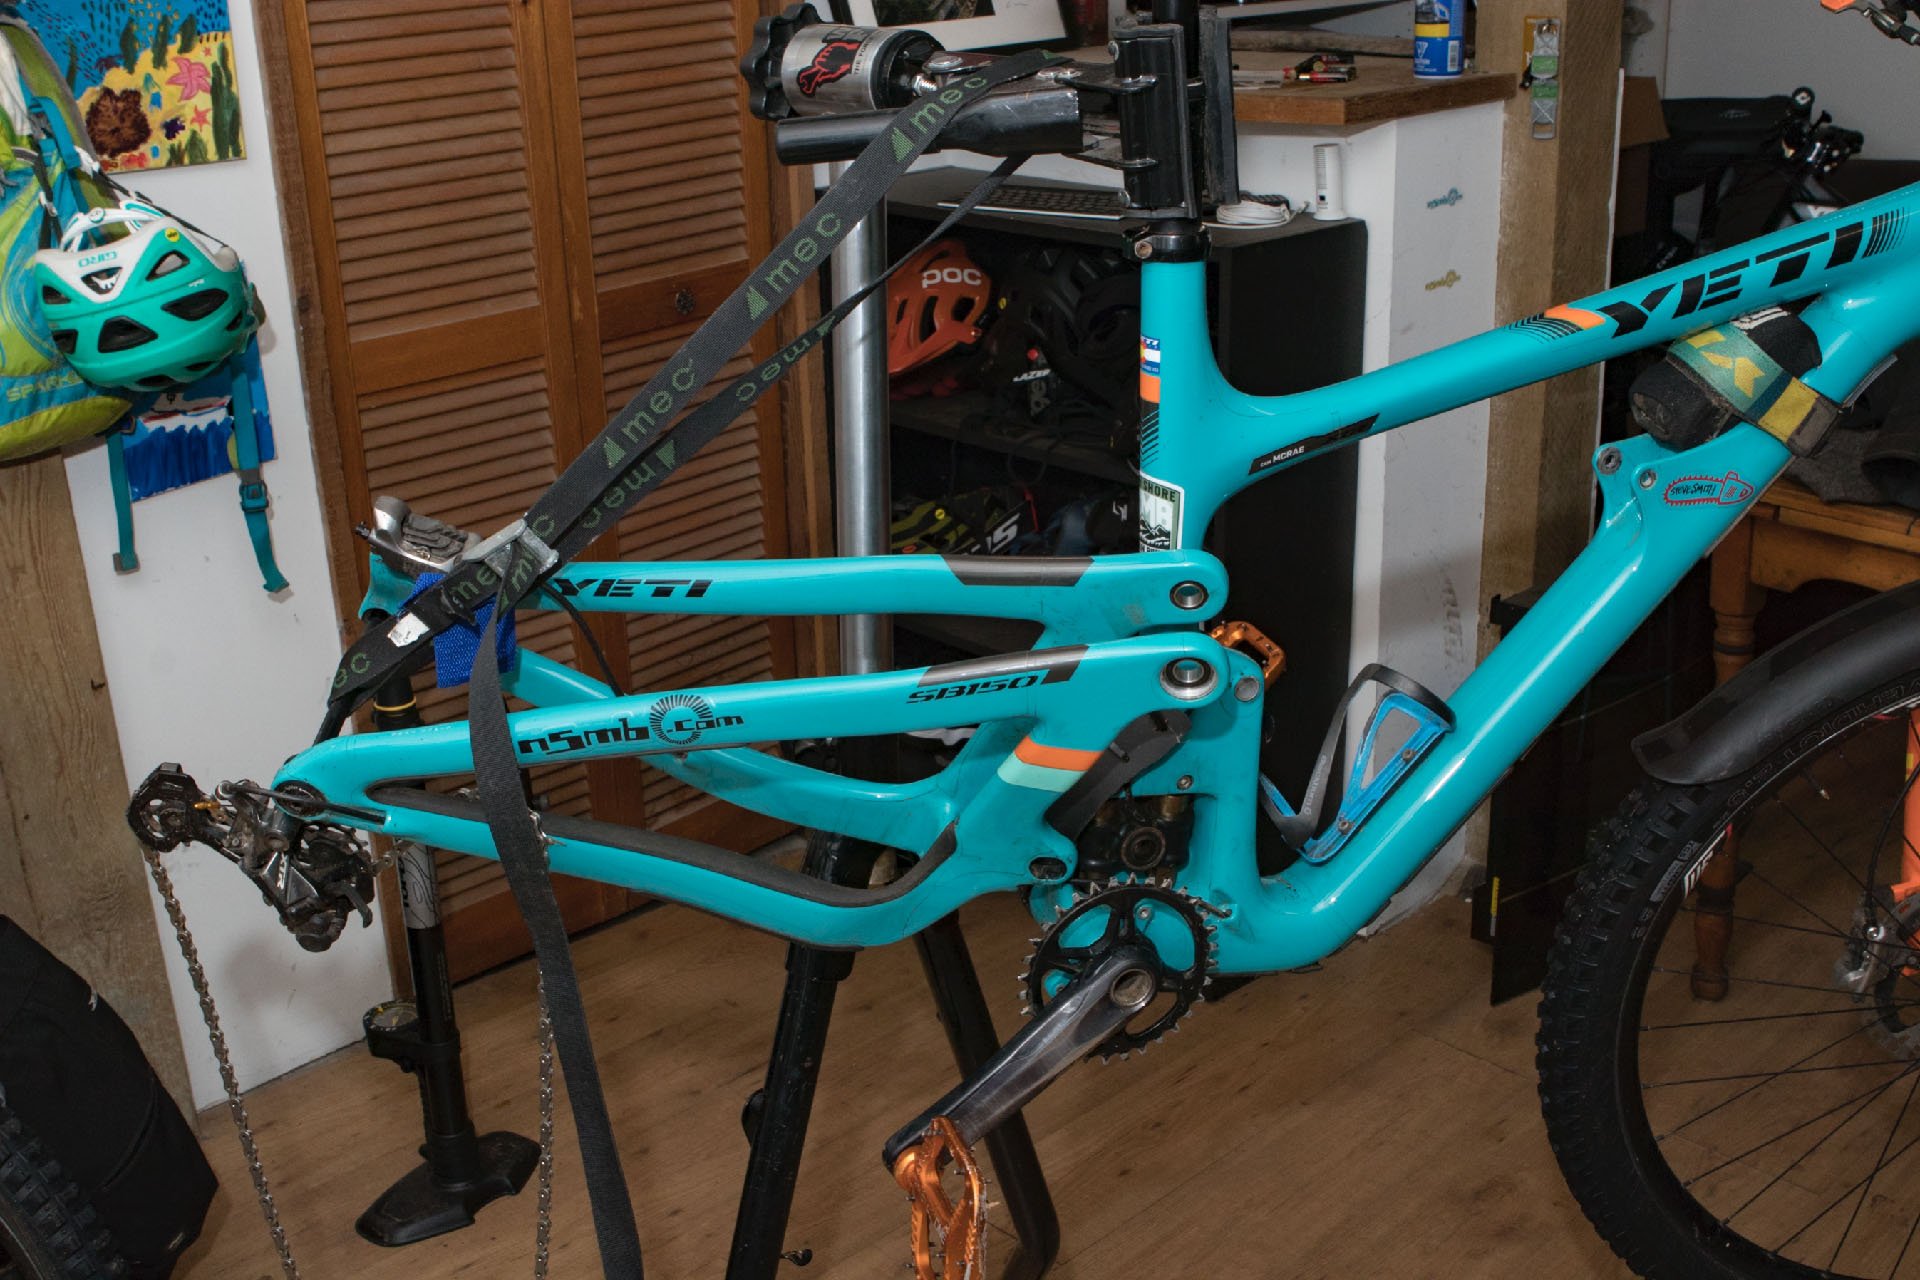
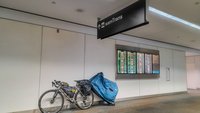
This was not an encouraging moment, but things would get worse. My makeshift rear mud guard managed to survive the project without need to be removed.
Last fall, I decided to wrestle our broken Samsung clothes dryer apart. As any 8-year kid with a phillips will tell you, disassembly is surprisingly easy. Mostly thanks to Youtube, that is. Once I reached the bottom I found that one of the metal spring-clips holding the motor in place had lost its sproing. I bent it back into shape, reassembled everything and it too roared to life. Of course the spring clip wasn't miraculously healed as I'd hoped and in a couple of weeks I had to do the whole thing over again with a new spring, but in the end it was even more satisfying than I'd hoped and it cost me all of $8. Those modest tasks are my highlights, but I guess I've done enough smaller stuff to remain delusional about my abilities.
This worked fine but for some reason I abandoned it...

...and tried this combo using two opposing punches.
Guess what happened?
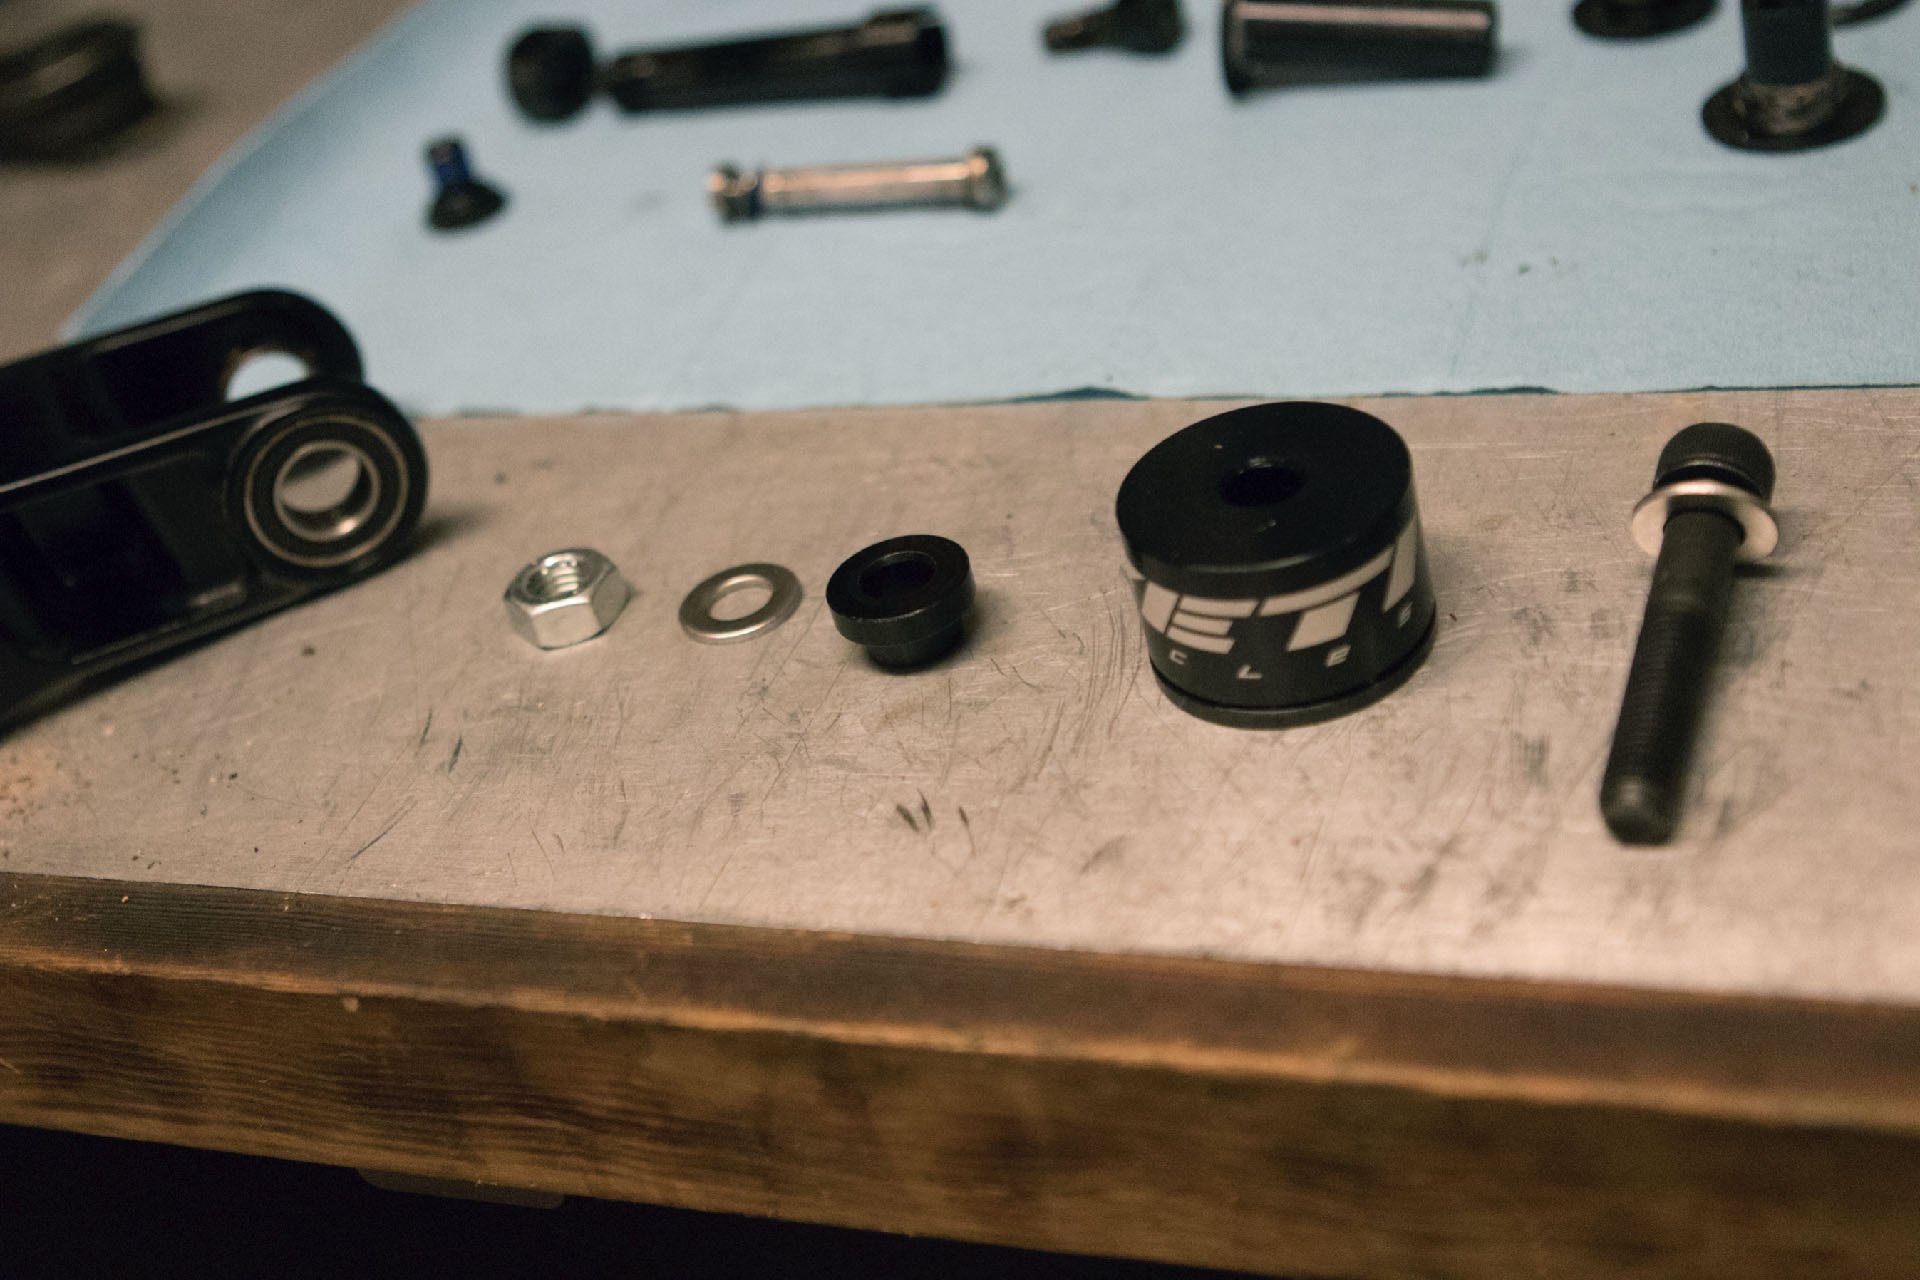
For the task at hand, I already had bearings and a bearing tool, straight from Yeti. I assumed these would be sufficient to complete the job, aside from hardware removal, for which I felt equipped. On the off chance the Yeti tool wasn't compatible with one bearing pair, my selection of presses and punches would pick up the slack. My bike was clean enough, I'd booked off an evening to complete the task, and went to work. In the end, the list of tools I used was long, and it included 7 you never want involved in your bearing removals or pressings. And that was just Act I.
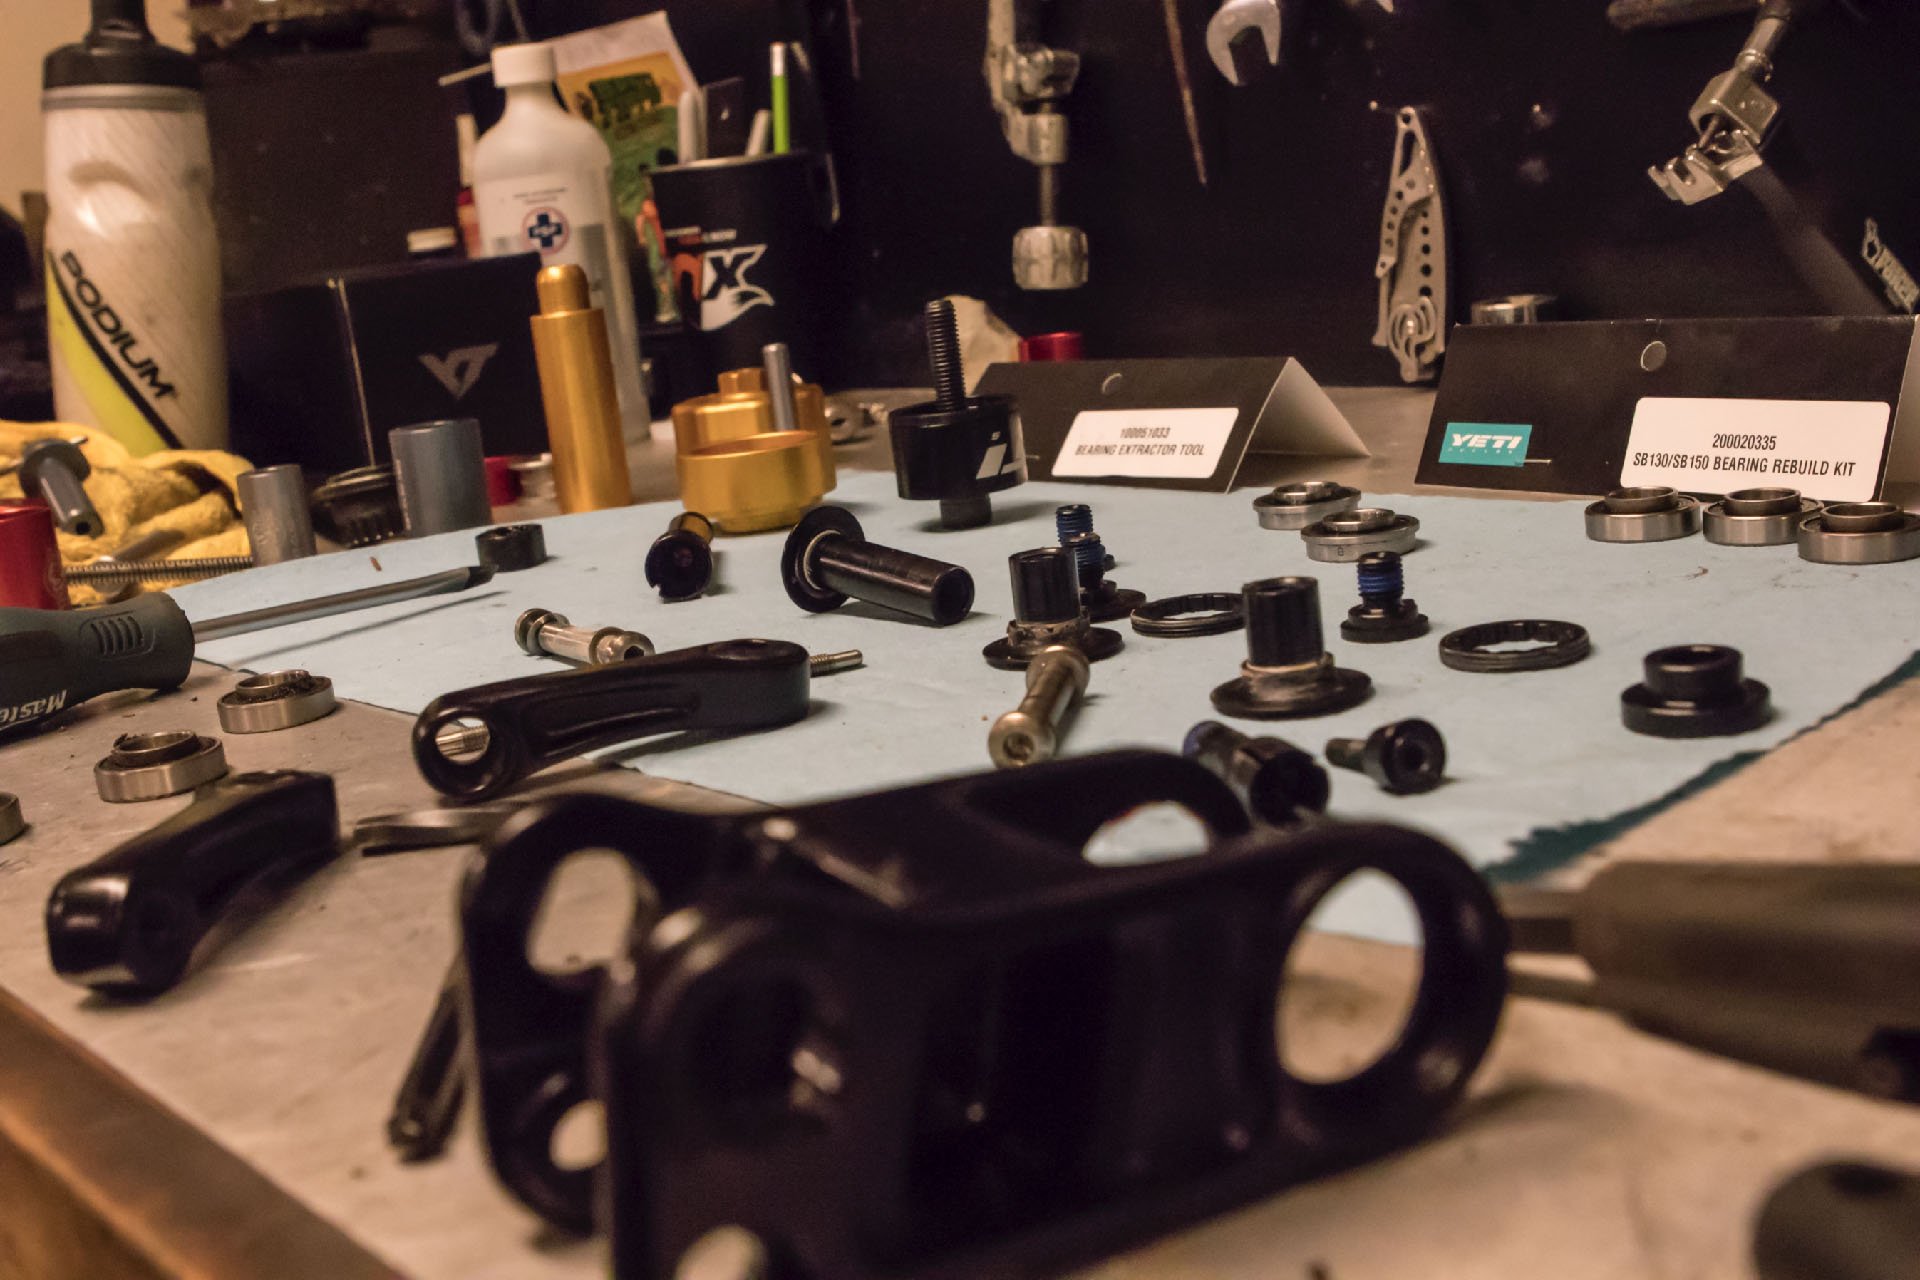
The state of the bench is an accurate reflection of my progress at this point.
Lately I've begun enjoying bike work more than I have for years and I was actually pretty keen on the task of replacing all the bearings on my Yeti SB150 test platform. And here I was staring at the shock, realizing it was the logical place to start. The rearward shock mount has a 4mm hex head bolt facing downwards, which I removed after the front fittings. But nothing moved. Instead of continuing to figure out the rearward fitting, I skipped forward and started to remove the bolts that secure the upper link to the main frame and swing arm. And then I aborted that part way and skipped forward to the main pivot, because it took me a moment to realize that I had the Shimano cassette tool required to remove the bearings from the swingarm.
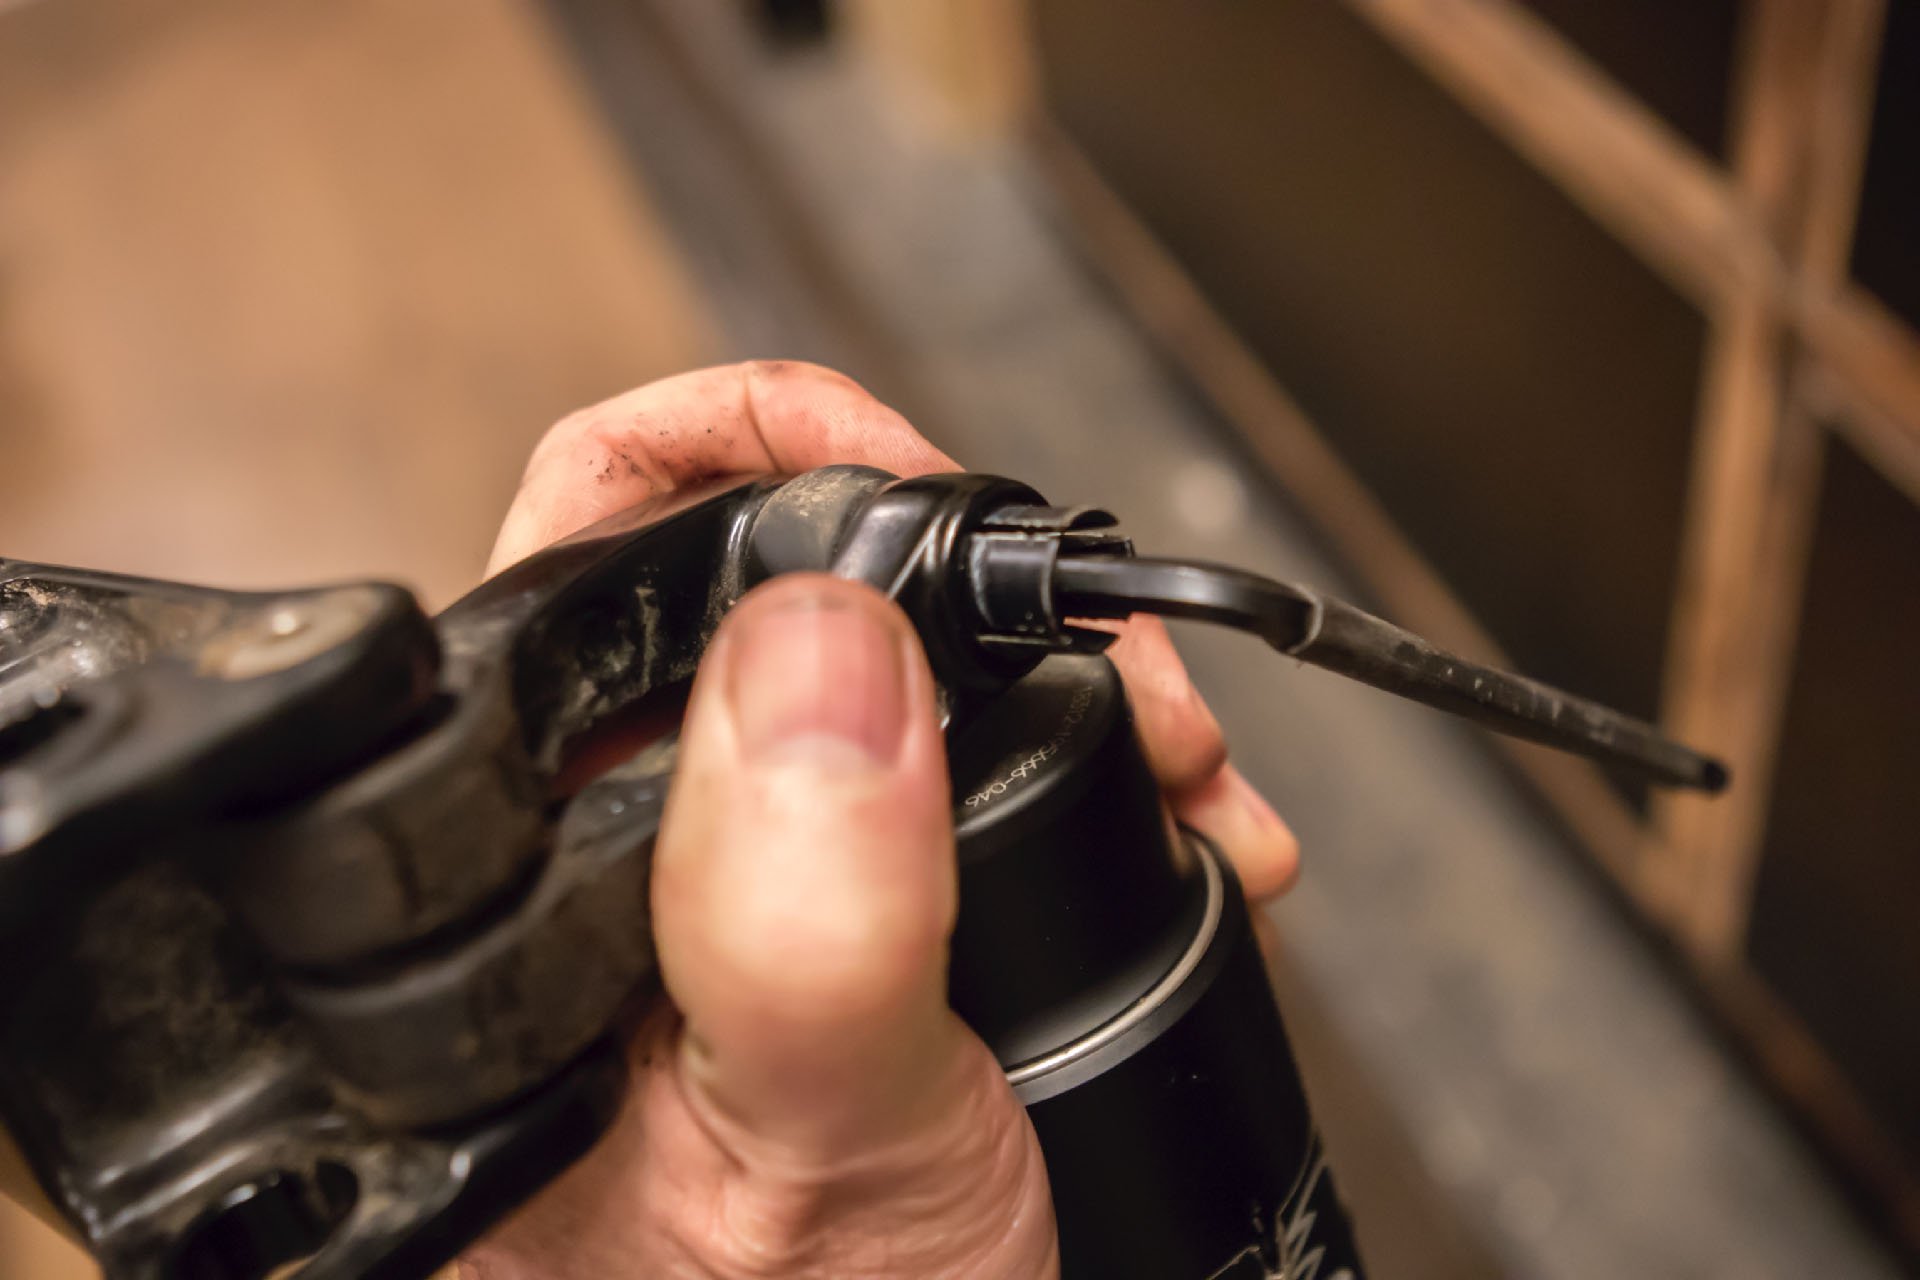
Once the swingarm was off, I removed the link and shock extenders from the frame, with the shock still attached. At that point I could see what would have been plain in the manual: the shock attaches to the extenders using a collet axle which was still in place, and I needed the manual to realize that because it's a black fitting that faces downward. It spun out easily with a 5mm hex wrench.
Upon my return, it was time to press in the link bearings. I couldn't get the bearings to press in straight with the Yeti tool here.
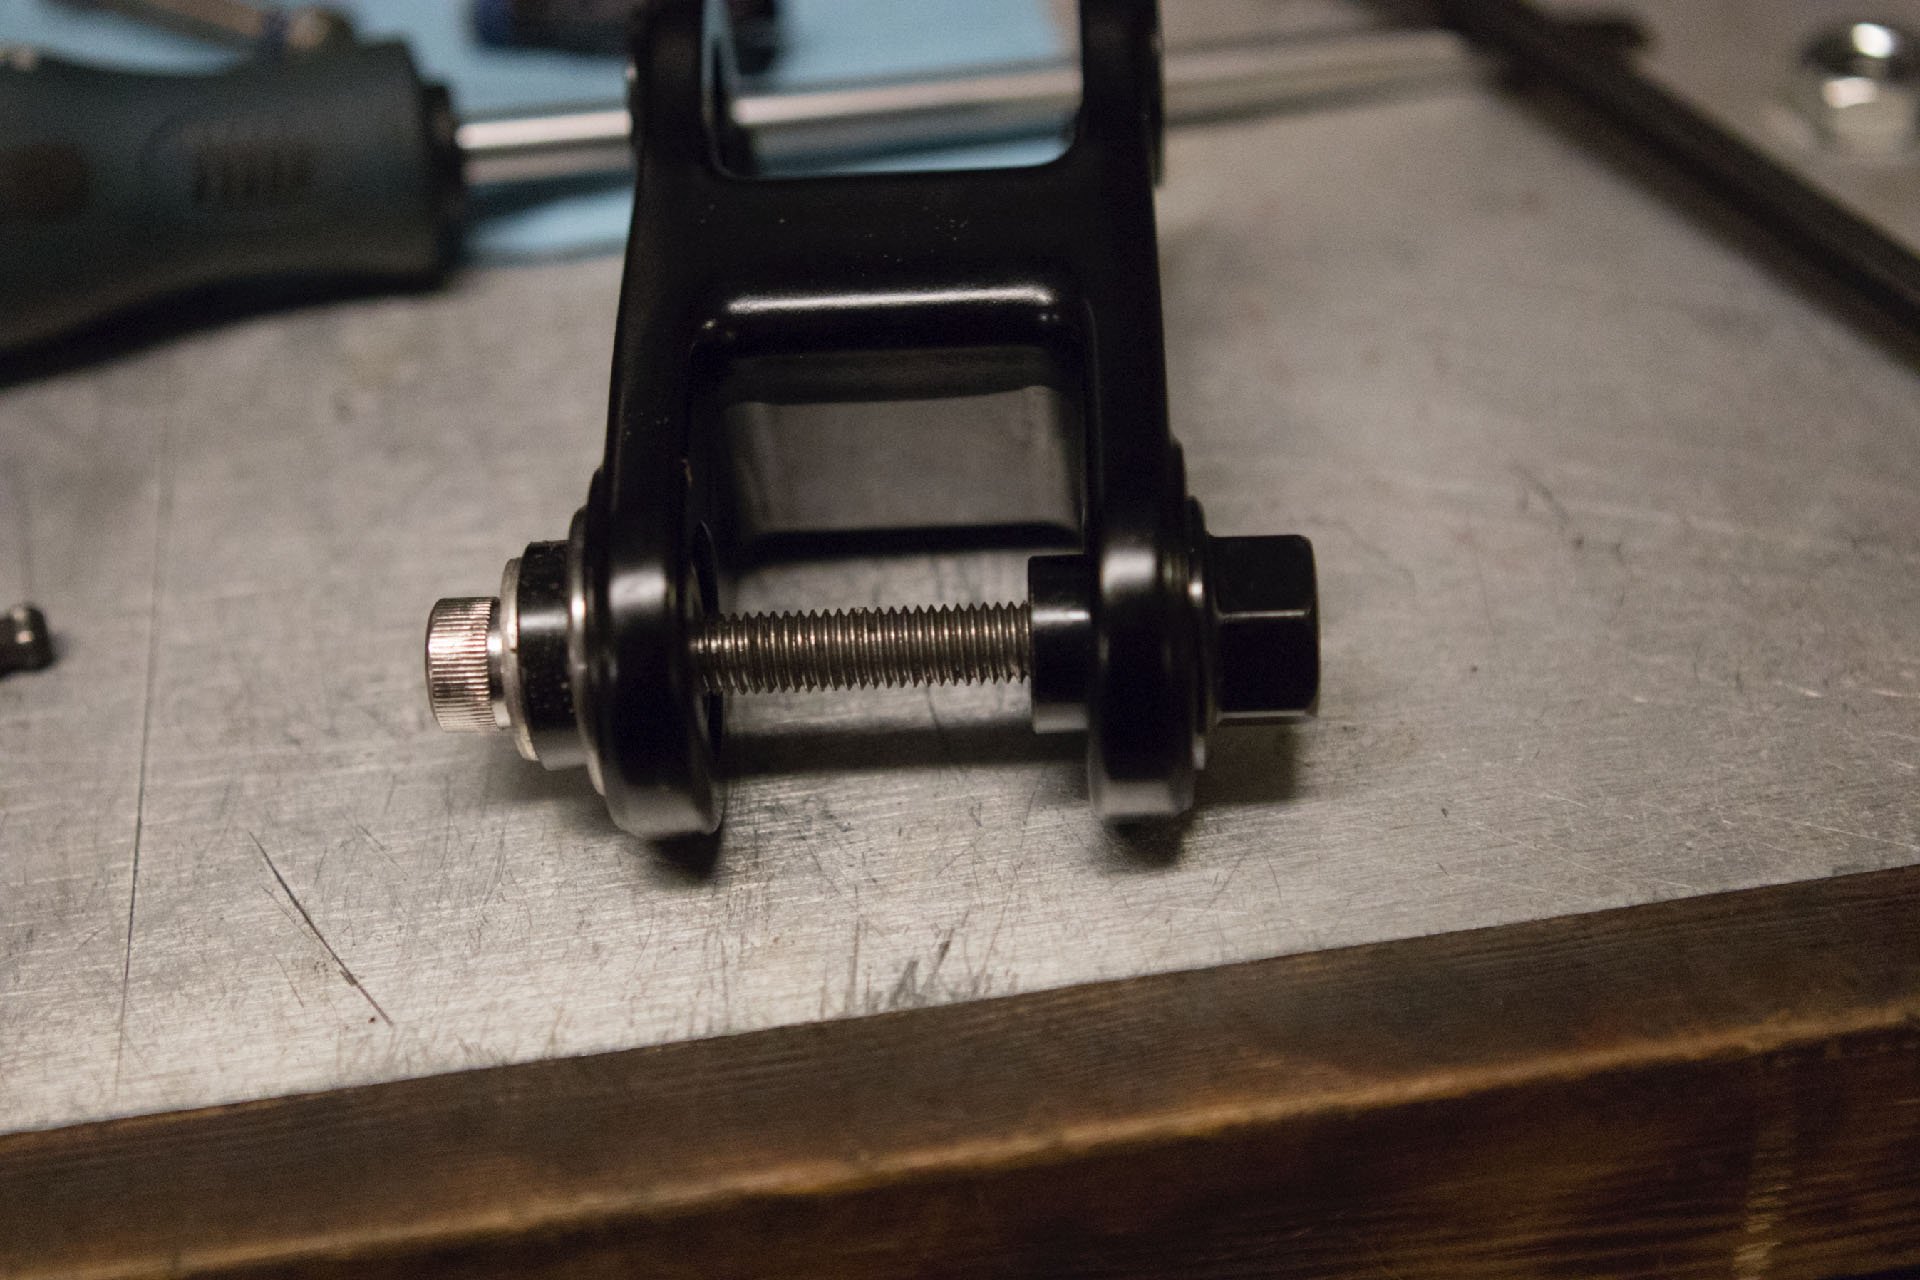
This was a little better but it wasn't yet straight enough.
This managed to pull perfectly because of added sleeves (slid to the middle for the photo) but excess resistance could cause the link to become pinched.
This became the third and final iteration or the press for the link bearings, using a combo of tools from the Yeti, Specialized, and Real World Cycling kits.
By then I'd botched things so badly I was feeling like turning in my man card, but I pressed forward, thinking it could only get better. And it did. Briefly. I felt like the bearing removal was going to be a snap with the Yeti tool. And for the upper link bearings, it mostly was. The tool acted like a sleeve the bearings could press into, and everything came apart as advertised.
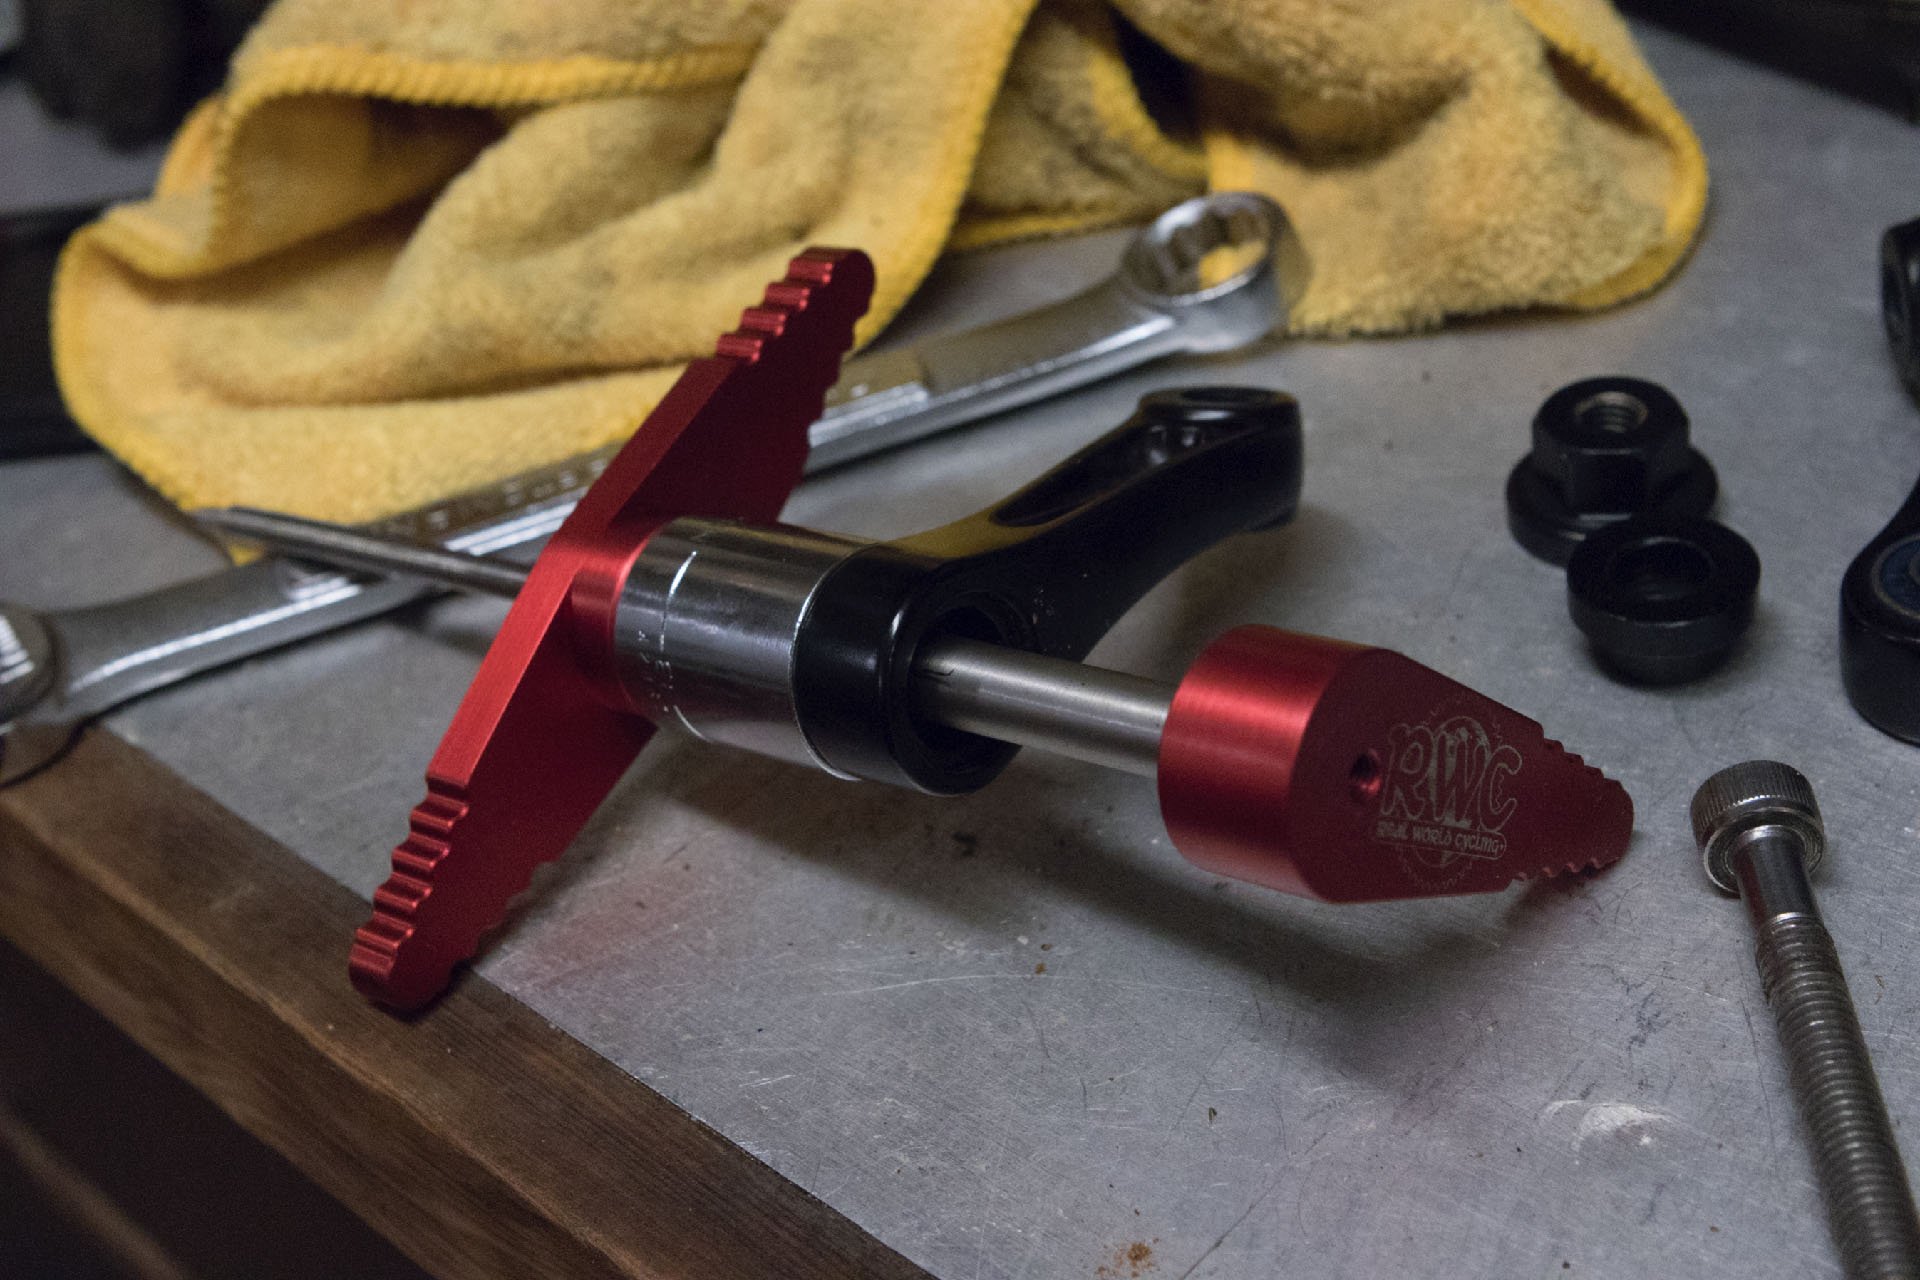
I discovered immediately that the Yeti tool wasn't going to be of any use for the extender bearings. Both the outer and inner diameters were too small for Yeti's press/sleeve/bolt combo, so I used tools from Real World Cycling, a sister brand of Enduro Fork Seals. I think. I'm certain their tools are great, unless your buddy Trevor partially destroys them.
This was the only place where the Yeti tool came in handy, but it worked great for this application. For 58 USD, I think most consumers are going to want to know beforehand that it isn't ideal for pressing in any of the other 3 bearing pairs and it's only helpful for removing 1 of those 3.
The threads Trevor fouled on the longer bolt made it only somewhat useful. I successfully removed one bearing and then decided to try a different technique. I can't remember why, but instead of using a 3/4" socket, and the punch that comes with the tools from Real World, I opted to use two punches facing each other. This seemed to be going well, but then progress seemed to slow and turning the handle became more difficult. When I pulled the device apart I learned the two punches were attempting to mate. After some hacksaw and file time in the vise for one punch, and some time to remove the other punch from the 1/2" inch receiver end of the socket it had become embedded in, I went back to the original technique and got the bearings out. This effort took far too long and I was done for the night.
I was thinking too much about the bearings inside the Switch Infinity shuttle. The collar on the bearing increased the outer diameter so much that the sleeve of the Yeti tool couldn't fit over it.
Luckily this expanding collet from the Specialized kit expanded perfectly after just sliding through the inner diameter of the bearing. Then I used a 1/2" socket extender to push the bearing out from behind.
At this point I had no idea how or when I'd be able to finish the job, but I wanted to get the bike done before my ride the next day. That did not happen, but luckily I could ride the just-built YT Jeffsy, which was a stellar companion to an afternoon on Seymour without rain.
Pressing both of these bearings in at the same time brought me an unreasonable amount of joy...
...and made the other mishaps fade away.
After almost 48 hours to think about solutions, I dug back into the task. Pressing in the new link bearings was a little tricky because there isn't much space between the bearings and not much to brace the Yeti tool against the link itself. Version 3 was a combination of tools from 3 kits (Yeti, Specialized's big bearing kit and the RWC tools) to finally get this right. To begin with, the tool kept sliding off the rounded edge of the link and pressing in at an angle. I used the vise with a towel for protection, to even up the angled, partially-inserted bearing, and then tried pushing the bearings toward each other from the outside. It became clear that any resistance here could pinch the link arms and compromise the fit. Eventually, and a little late, I came up with a tool combo that worked perfectly.
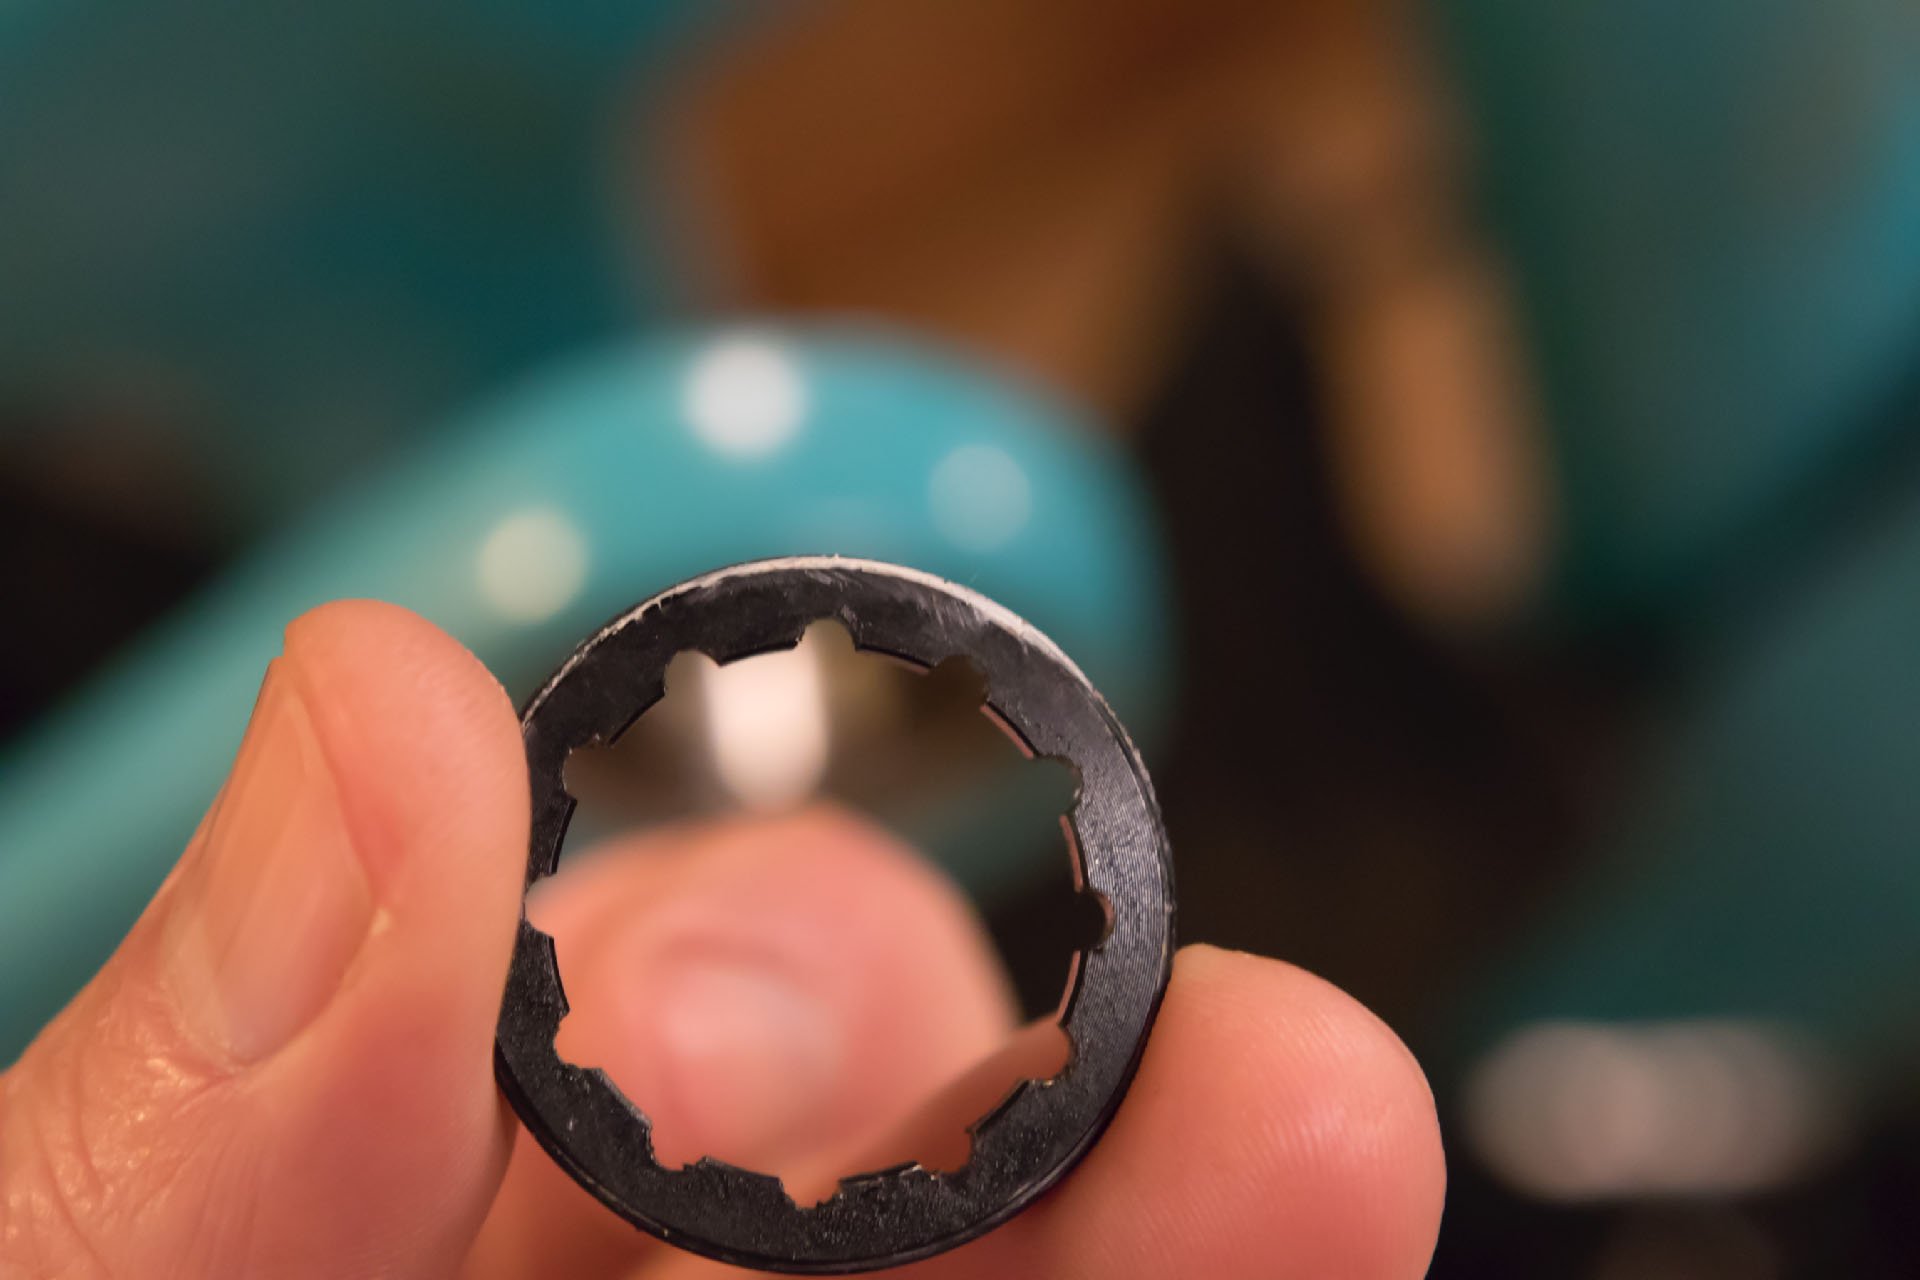
One ring to rule them all. Actually two. These bearing keepers thread in with the help of a Shimano UG/IG cassette tool.
Link with extenders in place.
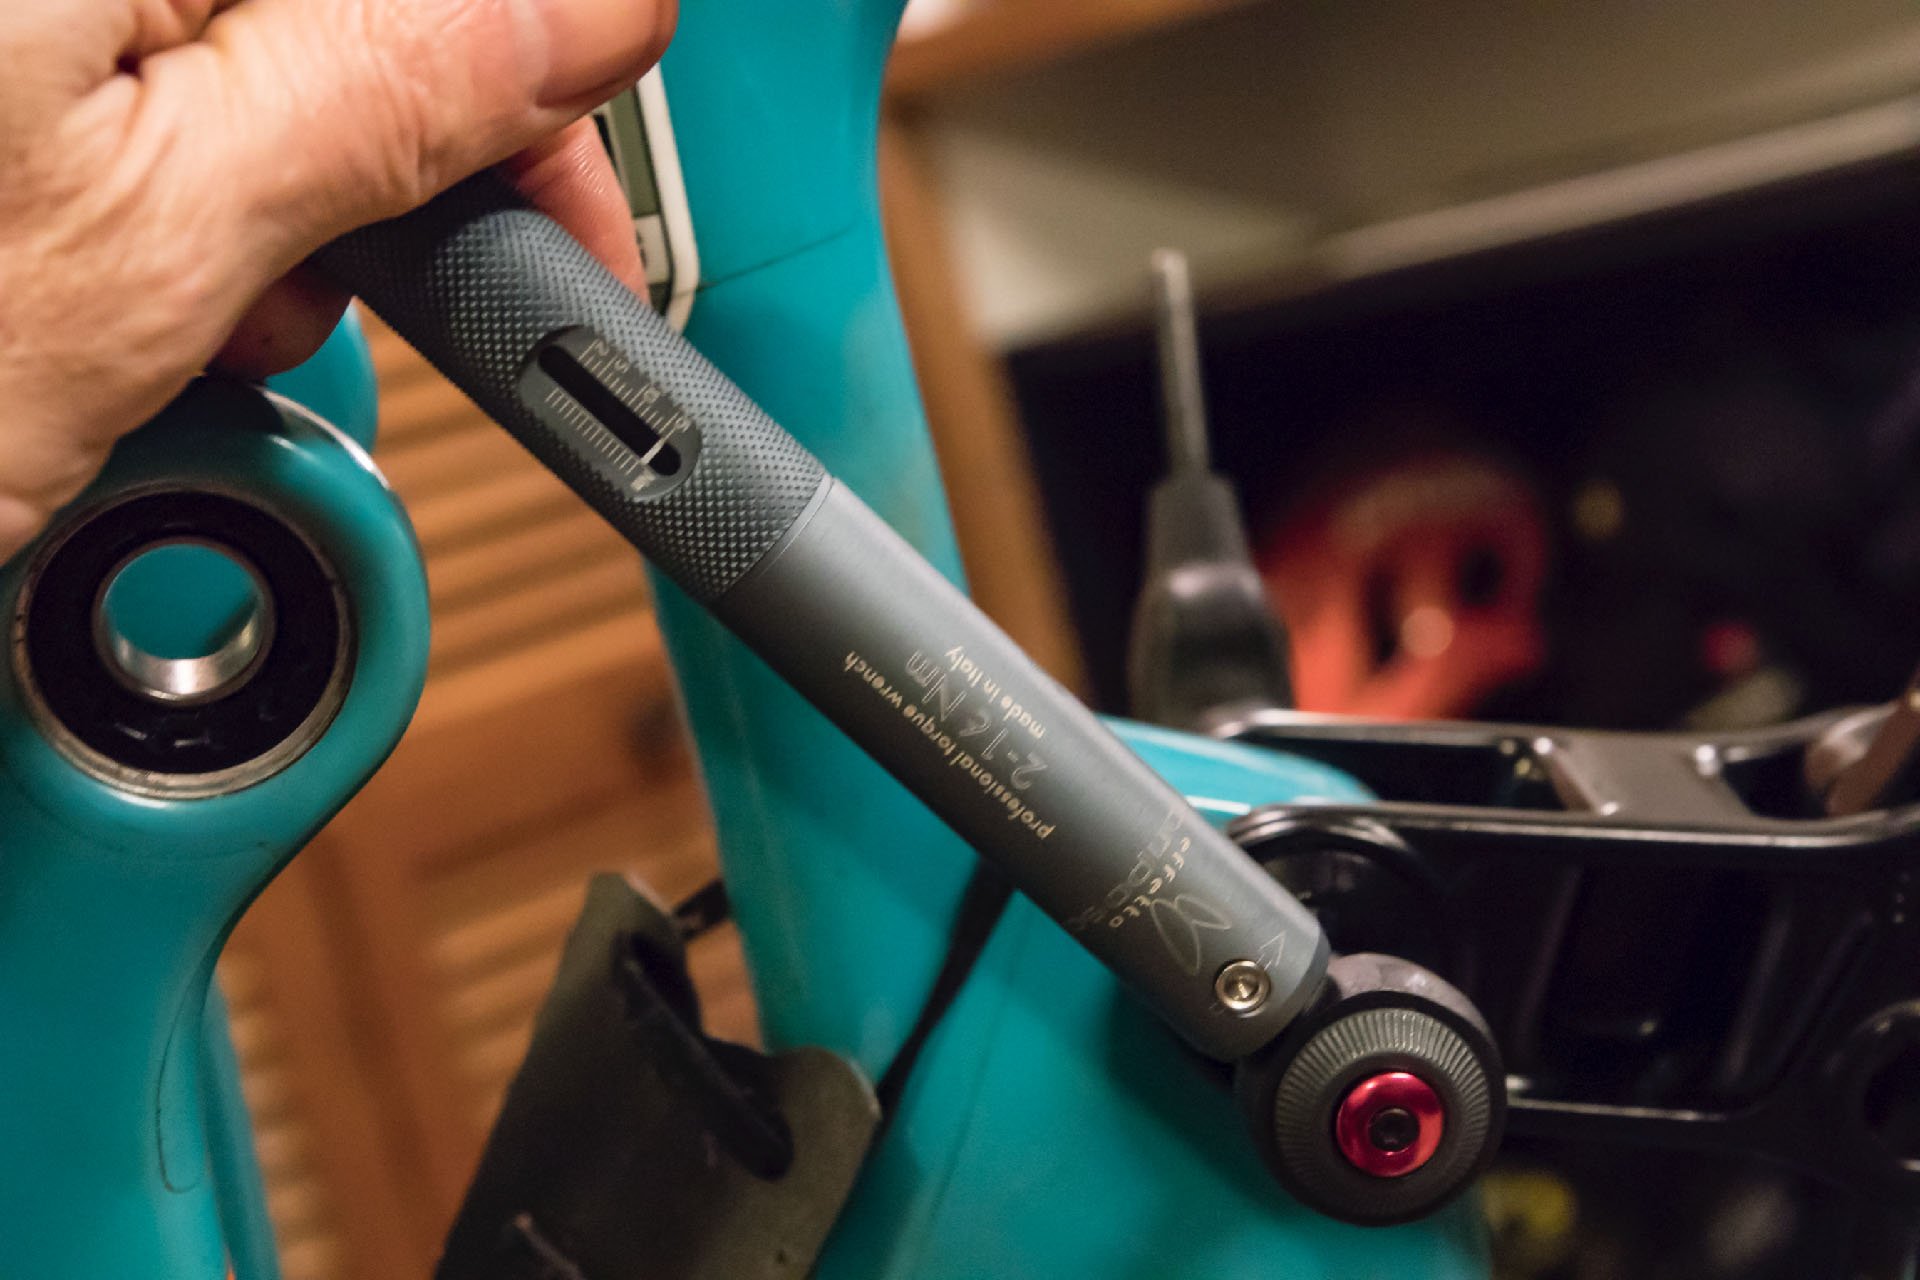
Torqued to perfection.
Don't do this. I gapped and pointed the bolt that sits inside the collet axle in on top. It may work okay, but it's not right.
Part way through this task I decided to listen to a podcast. I'd thought I wouldn't be able to concentrate on the process and taking photos if I was distracted, but the opposite turned out to be true and things began to get better. Bill Hader on Conan O'Brien Needs a Friend was the perfect companion and the swingarm bearings pressed out and the new ones back in perfectly - with the Yeti tool. Momentum was building but I had the Switch Infinity bearings to deal with and I assumed they would be the worst. After an early evening break I headed to my workshop after 10pm to try and finish the task.
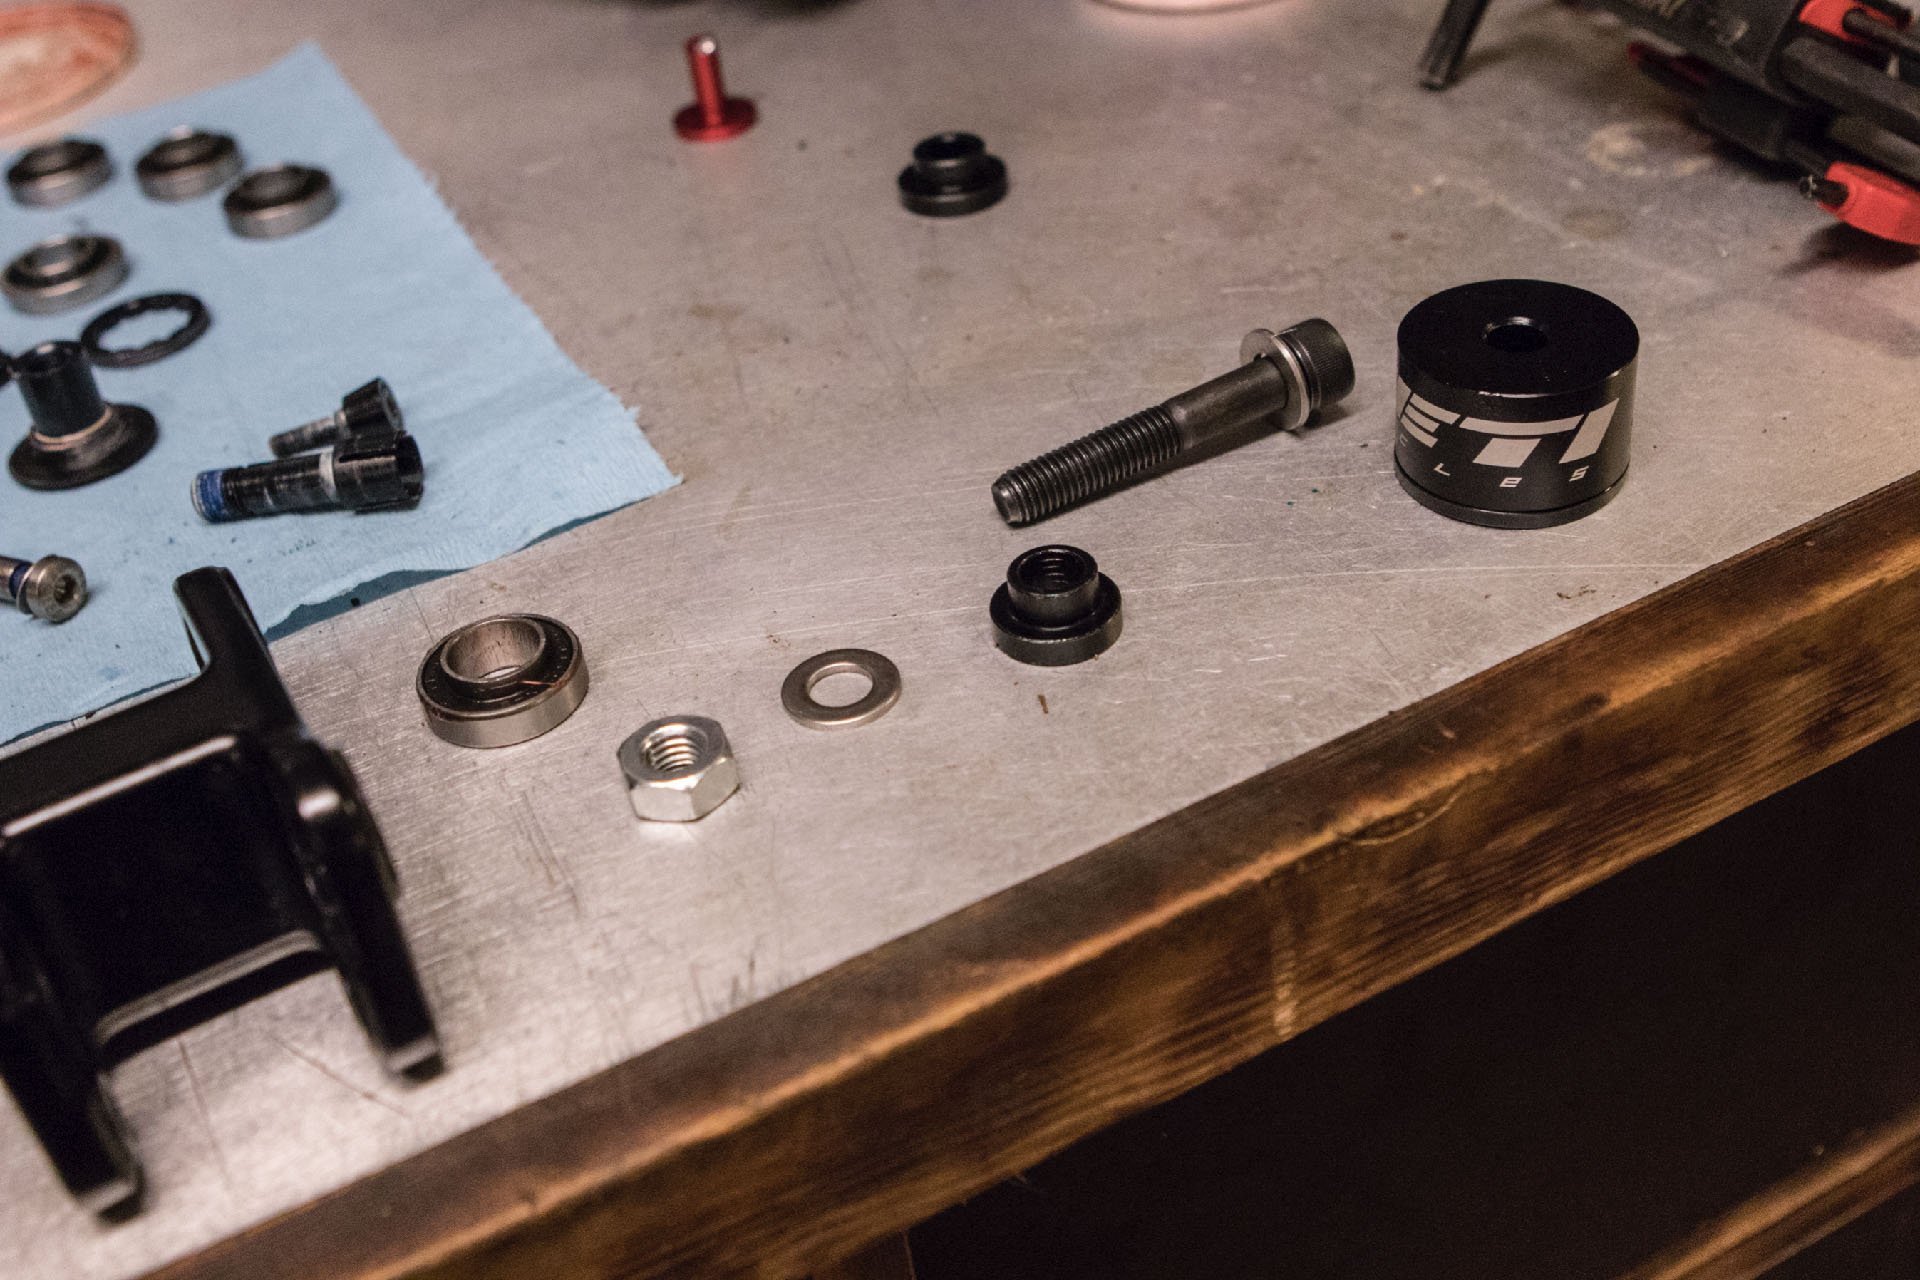
This Specialized bearing kit came in handy.
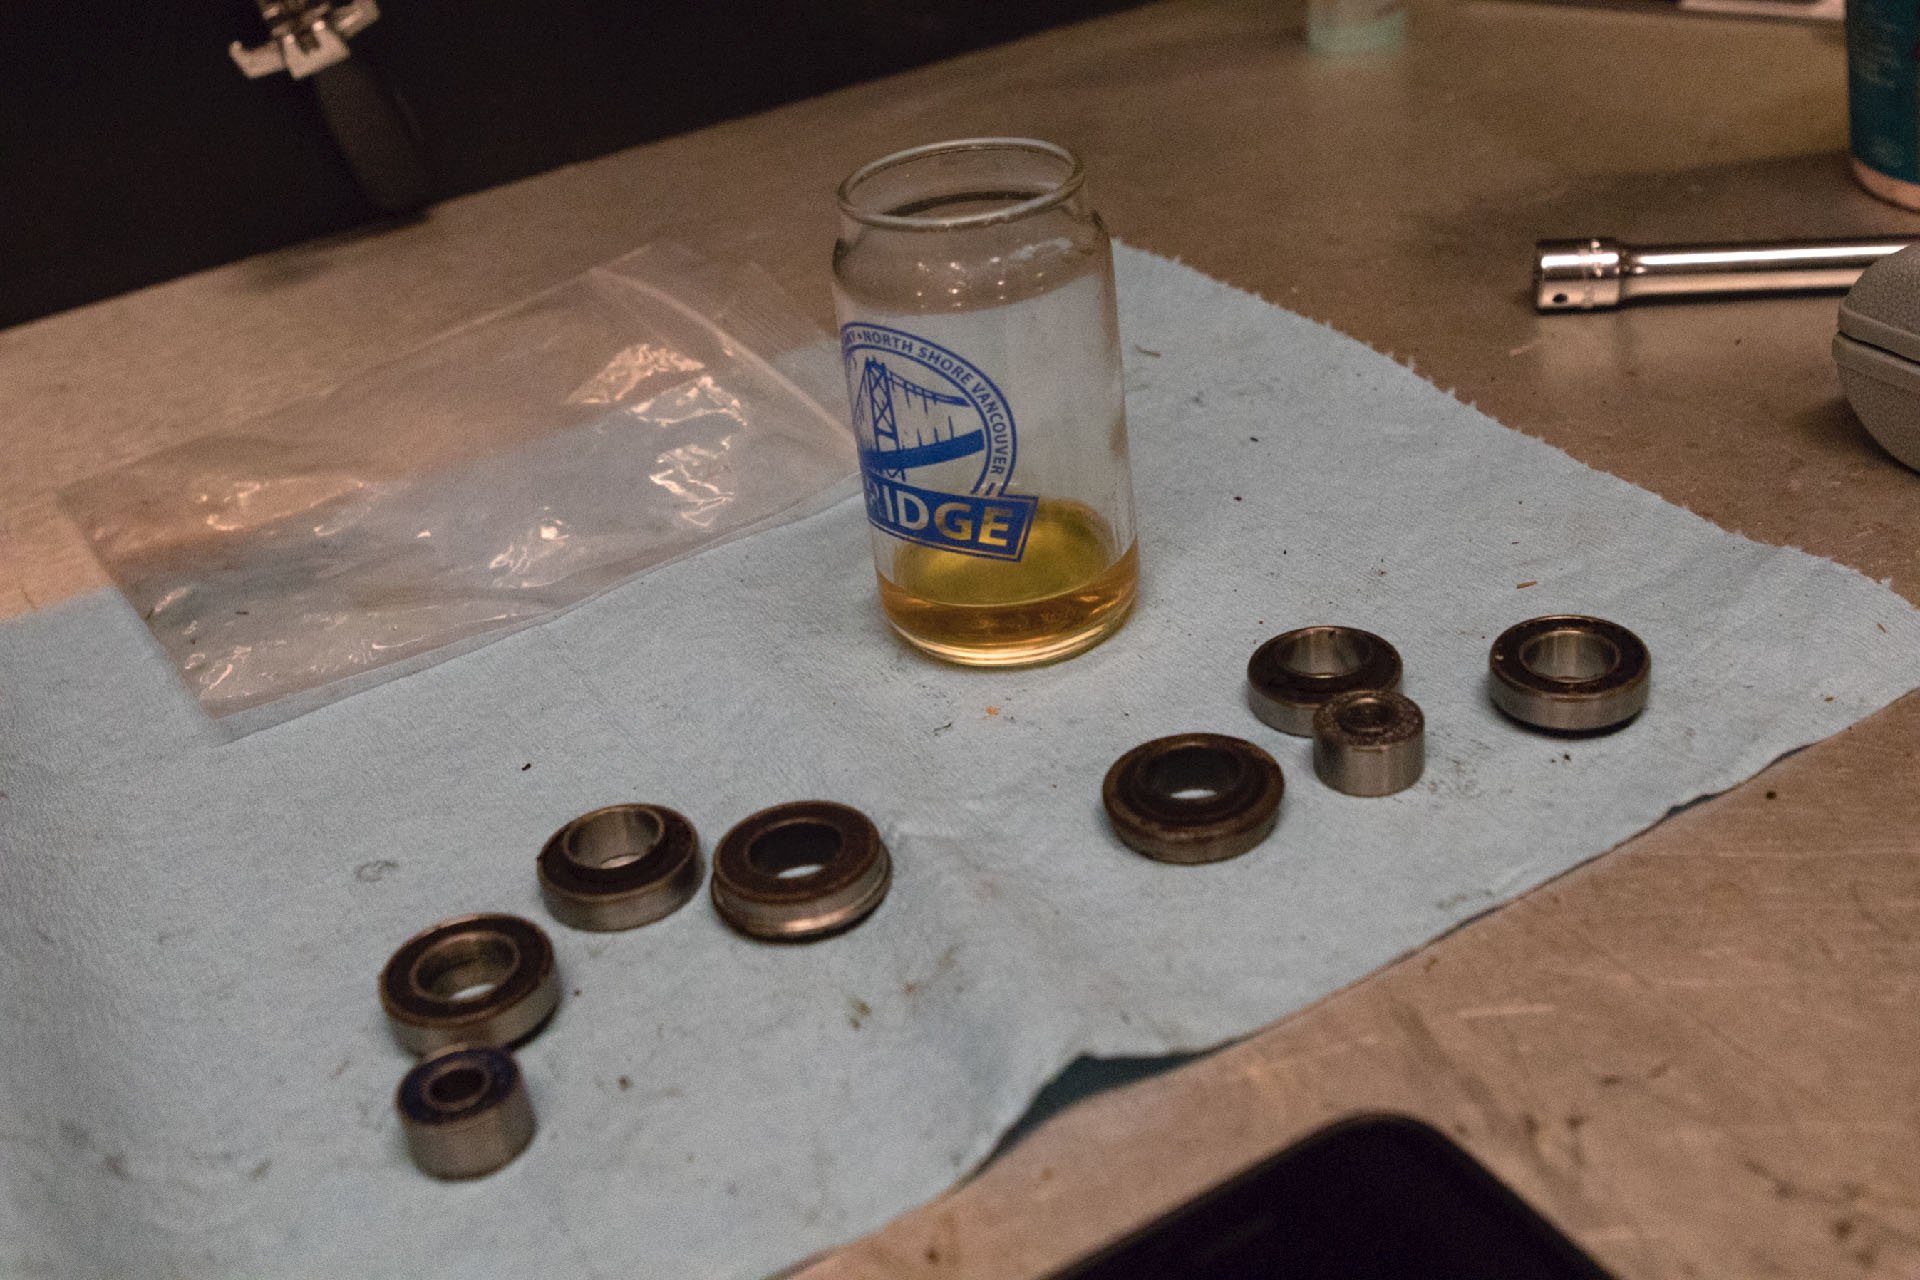
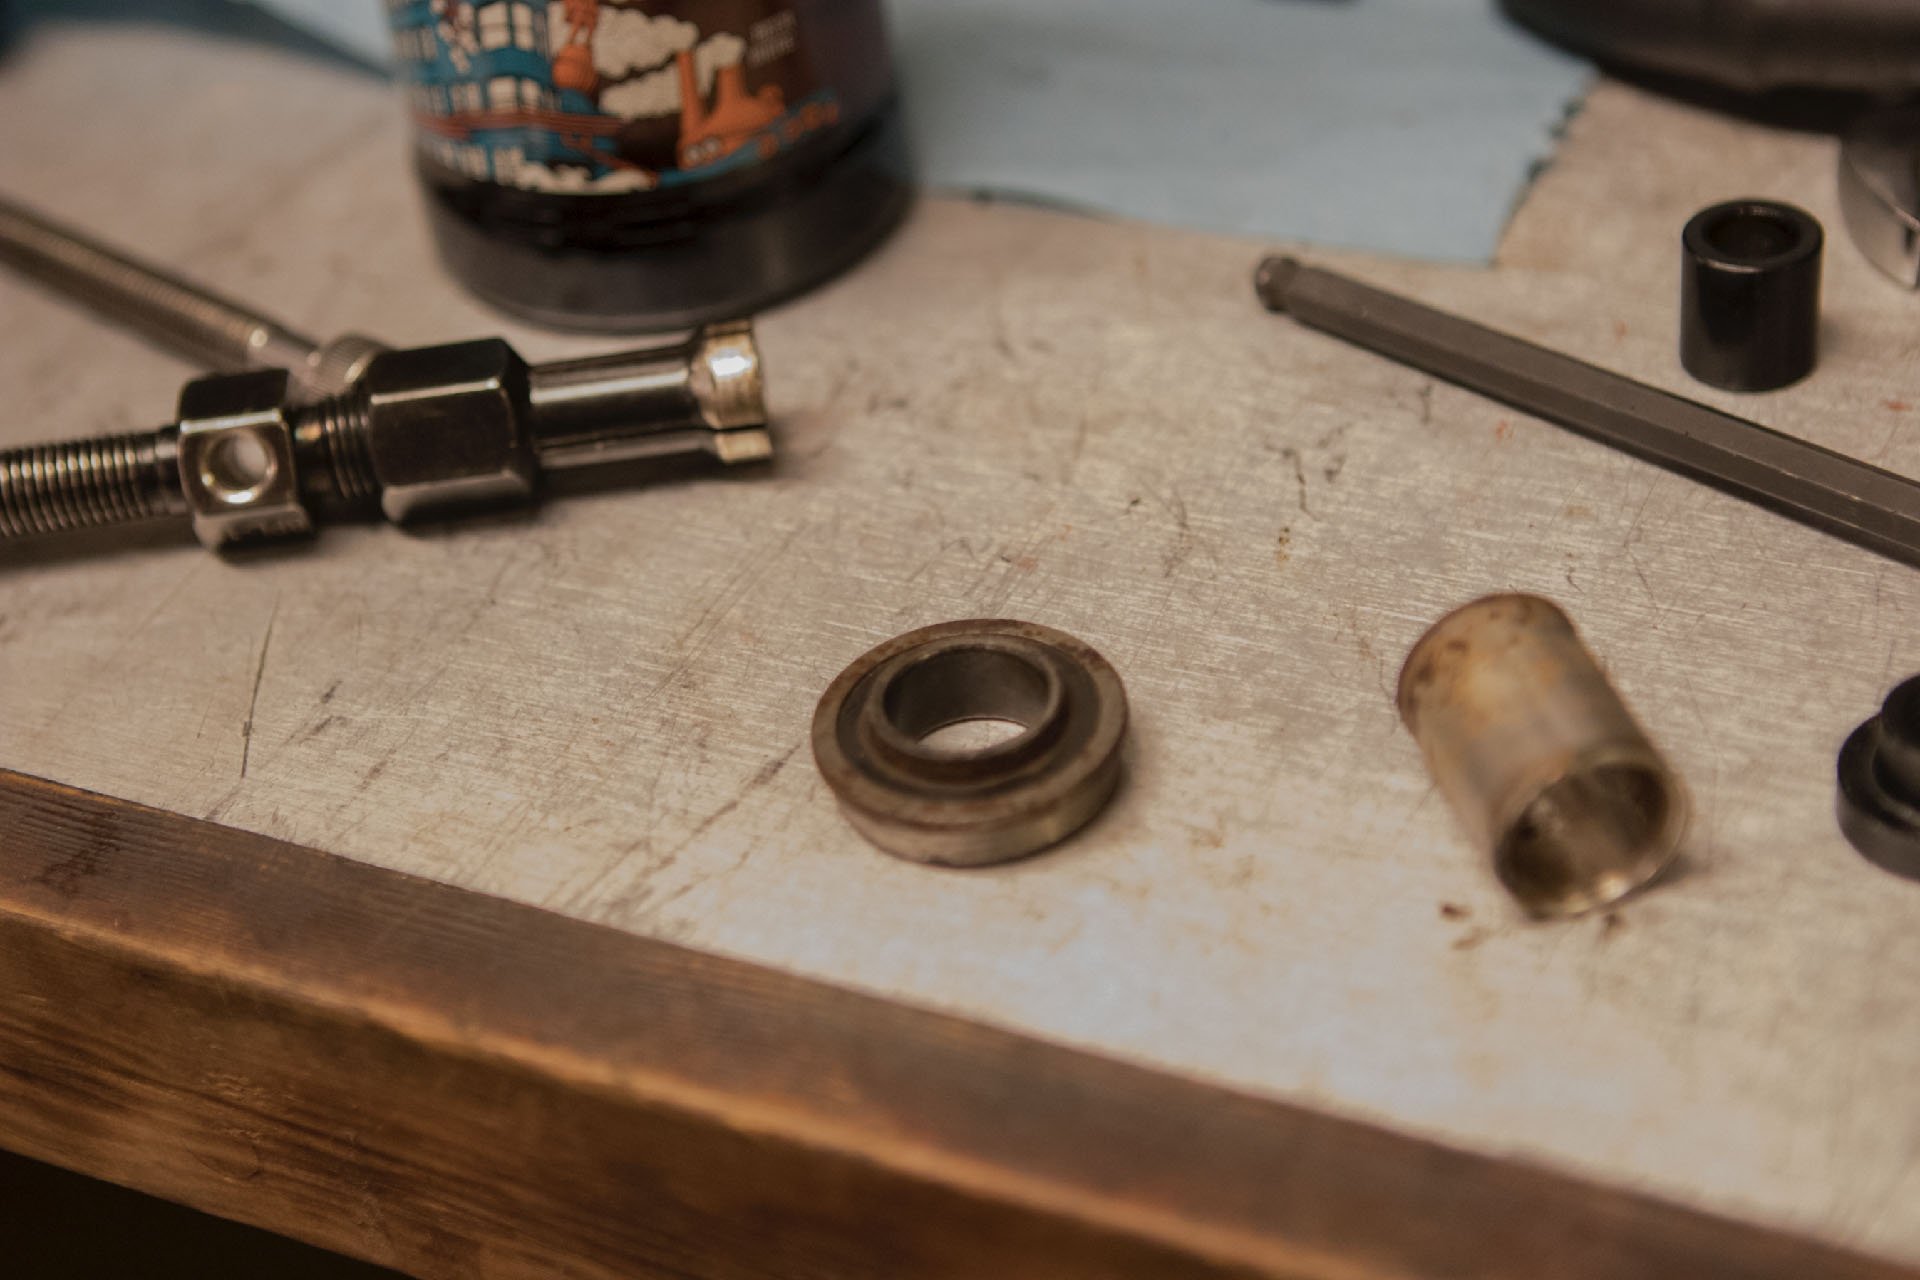
Strangely, one bearing from each pair was no longer spinning freely. One of the bearings from the Switch Infinity shuttle was almost seized.
And she's back together and ready to get dirty.
The Specialized kit had a collet punch* with the right ID for the bearings on the Switch Infinity shuttle. The Yeti tool was disqualified for these bearings because they have a shoulder that increases their OD beyond the diameter of Yeti's sleeve. I expanded the collet and banged the bearings out using the 1/2" extender from the socket set I'd bought years before to work on my Sunbeam. It wasn't an elegant solution but the bearings were out.
*I have no idea if this is the correct term for this tool
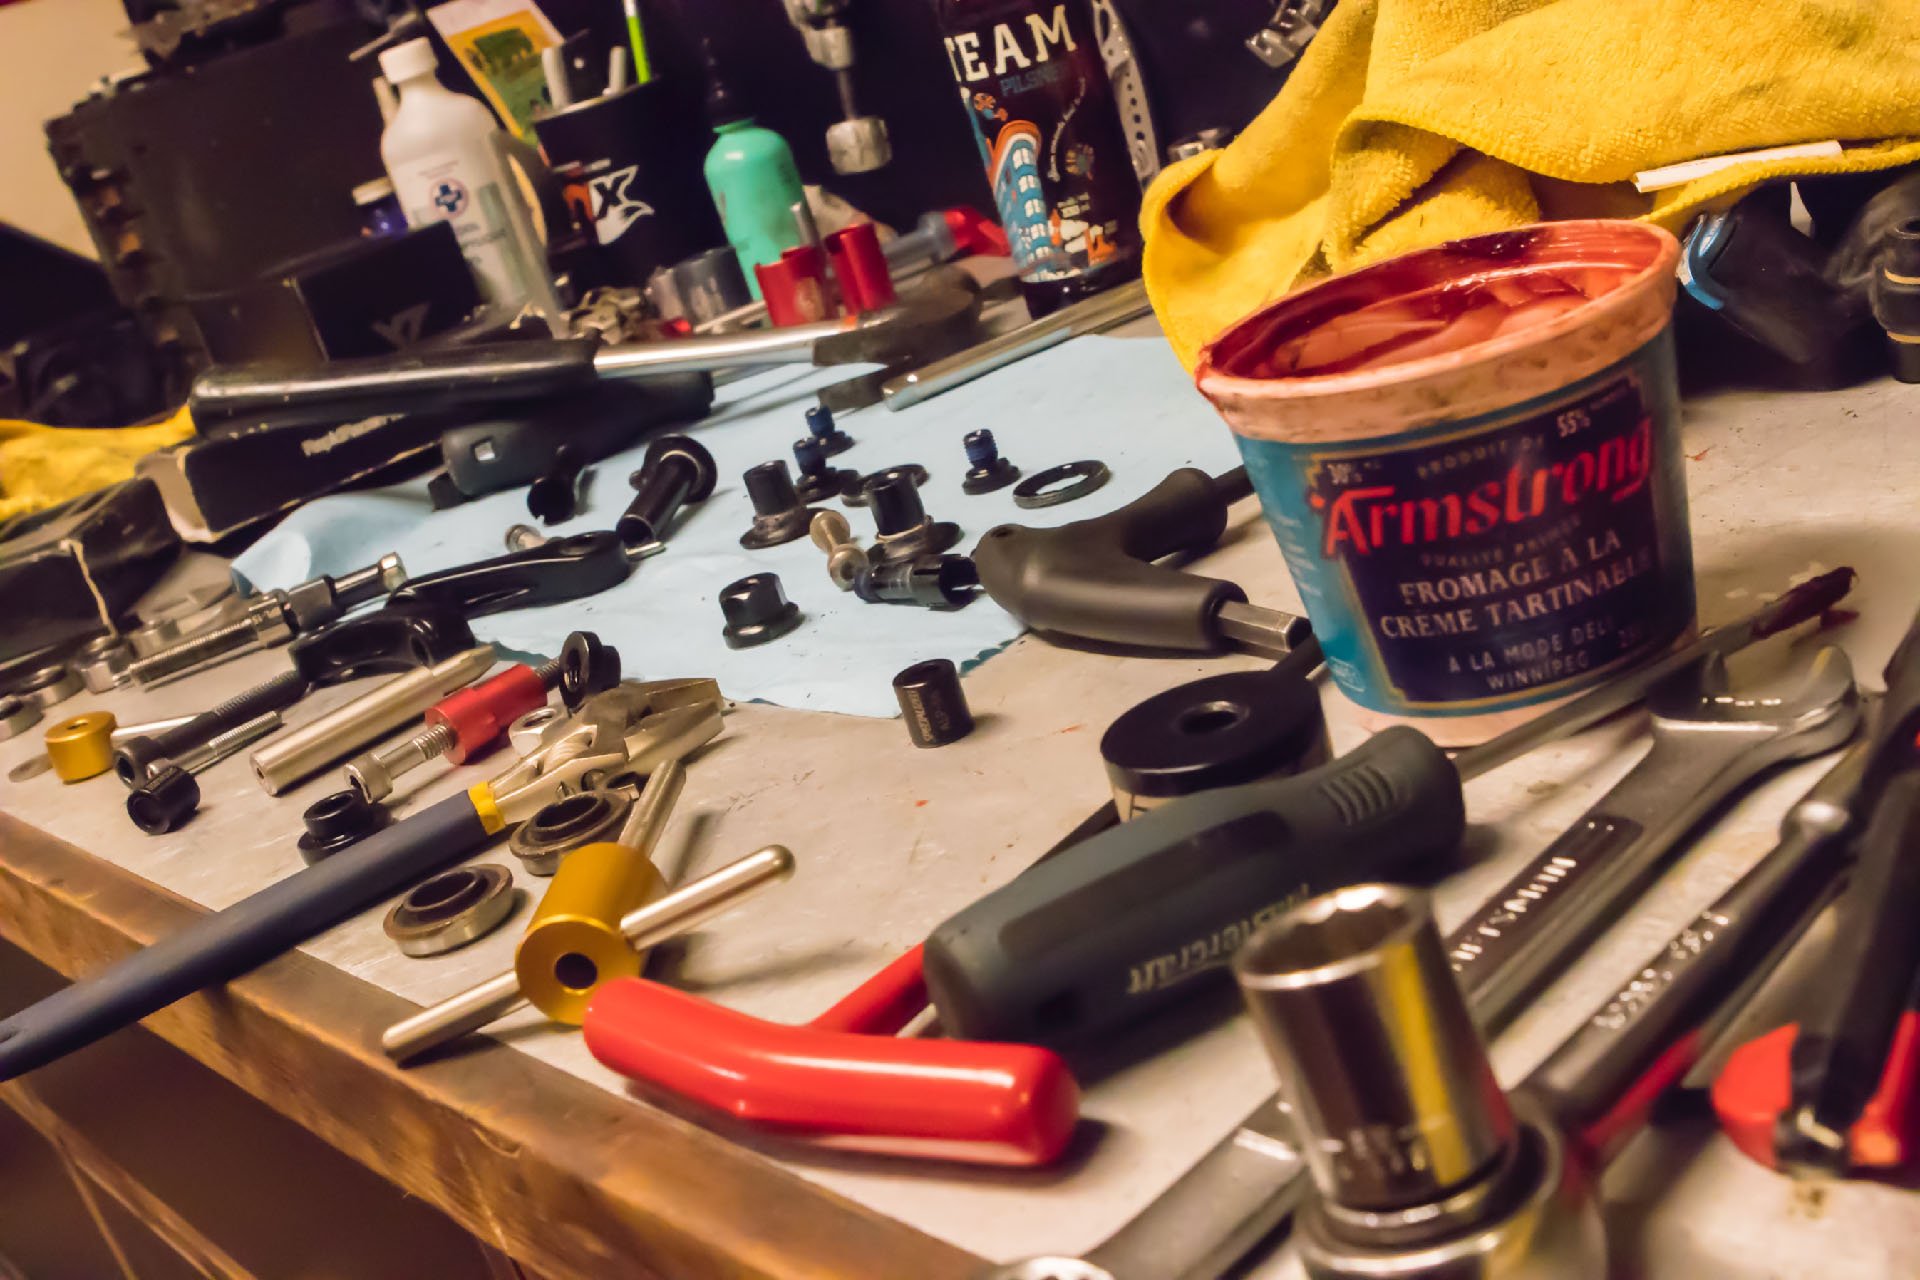
The final bench shot before clean up - and I'd cleaned up after the 2nd session. Inappropriate tools used; vise, hacksaw, file, hammer, drill, crescent wrench, and side cutters.
Pushing the final bearings back in allowed me to use all the ingenuity I'd picked up through my many failures, and I managed to assemble a press that eased both bearings heroically into position at the same time, with the addition of some parts from my buddy's RRP kit. And a little help from Conan and his guests. After that, the reassembly of the links, extenders and shock were relatively straightforward. The minefields I'd traversed to complete this task made the smoothly-pivoting finished product incredibly satisfying, and got me even more excited about the next time I saddle up the SB150.
I plan on continuing my sub par efforts to do stuff myself, because even when it doesn't go smoothly, I'm glad I made the effort.


Comments
Shinook
4 years, 1 month ago
Of all the bike maintenance tasks I do (which is almost everything unless I'm lazy), replacing bearings is the worst. I had to do it with a high level of frequency on my last bike (every few months) and I'd be ok never looking at another bearing press. Sadly, my current bike has 20 bearings throughout the frame (although they are very well sealed, whereas my last bike had next to nothing protecting them) and our dirt tends to wreck pivot bearings.
The worst of these are the blind bearings, removal of which can be a real chore if the manufacturer has loctited them or if they weren't pressed in with some kindof anti-seize.
I think the reason it sucks is the lack of availability of good tools that don't cost an obscene sum, especially for extraction. The tools I used for extraction of blind bearings would pop out after a few hammer blows, requiring an annoying replacement process several times before the bearing started to move. It lacked the flange shown on the blind extractor above. I also don't think hammering on your frame is an elegant solution, I found an obscure, small brand that made extractors that didn't require hammering, but sadly they only had a few size options available and I've yet to track them down again, making me wonder if I dreamed it up in my head.
On the non-blind bearings, you can easily fit the drift on the other side, then press it out, however what do you press it out into? A socket? One of those fancy extractors? They are all great until you get a frame that doesn't have an even surface for it to rest on, so you end up tightening this metal fitting onto your frame, chipping the paint at best. I'd like to see some kindof rubber or protective surface on those tools to prevent damaging the frame as you tighten the extractor and allowing it to conform to stylish, non-even surfaces (e.g. rocker pivot on Transition bikes). I guess I could hammer on it also, but not sure that's much better.
Reply
dan_l
4 years, 1 month ago
For blind bearings you can use a trick that I used to use when replacing pilot bushings on crankshafts. Wet some toilet paper and shove it in the hole. If the ID of the bearing is 10mm, procure a 10mm shaft and tamp down the toilet paper. Keep adding wet toilet paper while packing it in and the bearing will eventually walk right out. You can also use grease but it is a bit more messy.
Edit: Skip to 5mins in https://youtu.be/w62c4NQDwP0https://youtu.be/w62c4NQDwP0https://youtu.be/w62c4NQDwP0https://youtu.be/w62c4NQDwP0https://youtu.be/w62c4NQDwP0
Reply
Primož Resman
4 years, 1 month ago
Simple. The extraction cups the bearings are pulled into must be made from plastic. And to cover non-flat surfaces for the cups you cut away part of it. I did this (3D printed) for my Reign and it worked somewhat. Making it from a tougher, solid plastic would probably work better.
Reply
twk
4 years, 1 month ago
Sadly, this is just another instance of our expensive toys becoming harder and harder to work with at home -- sure, most people never bother replacing bearings themselves, and easy-to-replace linkage bearings are yet another constraint on the pretty complex development process of FS frames, but this kind of thing is why I stayed away from most big brand bikes, and intend to do so in the future. I also find it absurd that the tool provided by the frame manufacturer(!) is not up to the task.
I have yet to replace the bearings on my Bird frame, but I do not expect many hiccups once the time comes -- flat-surfaced machined alloy parts should be comparatively easy to deal with.
Seems like my needs are incompatible with boutique brands' idea of their average customer, but that's not surprising, considering where the bike industry at large seems to be heading.
Sorry for the rant, but all these issues could easily be avoided if manufacturers prioritized sustainability and ease of maintenance even the slightest bit more.
Reply
Shinook
4 years, 1 month ago
Some bikes are easier than others, but more importantly, some bikes protect their bearings better than others.
Santa Cruz uses dust covers that prevent debris from getting into the bearing. A layer of grease protects from water intrusion. The lower link, you can attach a grease gun and shoot grease around the bearing to protect it. Their bearings have consistently lasted the longest for me and required the least maintenance, outside of one demo bike I owned that had been pressure washed many times by the shop.
Transition (SBG) has a metal ring on their bearings that provides a minor amount of protection from grit buildup, aside from the lower main, which has nothing and exposes the face of the bearing to a 2mm or so gap. Post SBG models (e.g. new Scout) has the bearings recessed better into the frame and covered with a small seal.
Specialized uses a rubber seal that presses around the outside of the bearing, along with greasing the face of the bearing. It's more minimalist and less protection than what you get with Santa Cruz, but so far has worked for me.
I don't know what Giant does, I've taken some of my wife's link apart, but not the entire linkage. Every time I do, the bearings are perfect. I could be mistaken, but I think they use wheel bearings, which are better sealed, for their pivots. I'll check next time I disassemble her bike to be sure.
The point being, ease of maintenance is nice, but some brands do an absolute pisspoor job of protecting their bearings, which requires more tedious maintenance. I've had brands that I went years of riding in nasty wet muddy conditions and never required maintenance outside of greasing axles, while others required maintenance or work every few months. IMO there is no reason these bearings shouldn't be protected and require more maintenance than once a year.
How brands set up their bearings in the pivot has become a purchasing decision for me. If they are exposed and poorly sealed, then it's a no go for me. The next question for me is how easy it is to do (e.g. are the bearings in a link or frame? how many? are they blind?), but it's less important to me as avoiding having to do it at all.
Reply
twk
4 years, 1 month ago
I agree -- ease of maintenance only matters when one actually has to do it. That said, since I don't expect to switch bikes any time soon (unless I have to warranty a frame etc), I have to consider both, especially because I ride year-round and the weather tends to suck most of that time, too.
I like being prepared for eventualities :)
Reply
Andy Eunson
4 years, 1 month ago
Yeah the Santacruz set up is very good. I had my version one Bronson for four or five seasons. I’d check the bearings two or three times a season and pump grease into the bottom at the same time. Usually when doing an air sleeve cleanup. Never needed to change a bearing. I think on my Nomad three? I changed an upper bearing or two.
One reason I own a hardtail is so I have something ride when the Remedy is out of commission. The Remedy thus far is holding up fine. I think in the first week I owned it it was creaking so I pulled all the bearing seals off and pushed in some Motorex. But the bearings were well lubricated already. The various axles were not.
Reply
dan_l
4 years, 1 month ago
My V1 bronson would eat LL bearings every 9 months. The V3 is much better. I think the dual sided swingarm distributes loads better and doesn't "tweak" the bearings which would result in dented balls and rough/notchy performance.
Reply
Cam McRae
4 years, 1 month ago
Great info Shinook!
Reply
Primož Resman
4 years, 1 month ago
My 2015 Giant had horrible bearing layout. The lower shock mount was done through the lower link bearings and bearings in the frame with the bolt rotating with the shock. Barely. So the frame bearings barely turned. At the same time the lower shock mount had a tub around it where water would not flow out of. And be kept there by the frame bearings. Plus that you had to take the whole bike apart to remove all the links (the lower link was completely covered by the crank and chainguide).
As for bearings, the original ones were semi-max-fill, cageless but had more balls in them than caged bearings. So no, not wheel bearings. As for the seals, you have the metal cover (no touch sealing), a rubber seal (RS, with 2RS denoting the seal being present on both sides) and then what Enduro bearing has - LLU and the like. If you're buying off the shelf bearings, chances are it will be the standard 2RS sealing design which is not perfect, but works. Having another layer of protection surely helps.
And the Santa Cruz grease gun method squirts the grease THROUGH the bearings and out. In my opinion, done regularly, this is the best method for bearing upkeep. With this you don't even need additional sealing on them, just push the dirt out from the bearing with fresh grease.
Reply
Hugo Williamson
4 years, 1 month ago
Probably why Many in the Uk ride Orange single pivots!!
In the time it took me to read your article I can probably remove all the links and check the bearings on my Santa Cruz!! Not necessarily the best designed bike out there ( lower link and frame can grind away at each other) but it’s linkage/ bearing check, removal and replacement is pretty good!
Reply
fartymarty
4 years, 1 month ago
This is exactly why I ride a Starling.
Good work Cam. I'm glad it's not only my work bench that shows the state of my progress / frustration. It's something I am working on tho.
Edit - I did my main pivot bearing in my Murmur over the weekend. About an hour all in (including trip to LBS)
Reply
DanL
4 years, 1 month ago
Crikey. That’s me not looking at getting a yeti (If I could afford one) for just this reason now. I pulled and pressed all the bearings on my Process in 15 mins. I’m not sure how to quantify performance metrics on each bike, but good lord that’s ridiculous.
Kind of feels like having to drop the engine out of a porsche to change the oil filter.
Don’t take this as any kind if schadenfreude, it’s not. I feel your pain on fixing washing machines as well! Does this feel overengineered for just bearings or is Kona happier to just bang in some bearings and call it a day?
Reply
Deniz Merdano
4 years, 1 month ago
SUNBEAM is awesome...
In my 20s, when I could afford my own cars. I really got into restoring and racing Late 60s MGBs. I had 2, one mostly stock '68 and one '71 1/2 with dual SU Carbs that I lowered and widened. Some porting and polishing and open K&N filters, the bad boy was pushing 85hp at the wheels. It didn't matter because it drove like a gocart around corners. I managed a few wins on the track with it.
and when my friend's neighbour told me the Lucas electrics would never make it to Seattle one day, I took the dare and drove it to San Diego Non-stop(just for fueling) on #1 and PCH in 28 hours straight! 4 speed and no overdrive. Top down 5000rpm the whole way...
(i might have been looking for the excuse to do it)
Brakes seized descending in to NAPA, and i fized it on the side of #1 in 20 mins.
Got lost in Compton, LA and avoided getting shot.
other than that, not a single issue.
It was the best damn years ever owning that car and a couple of Austin Cambridges.
I love british garage engineering and execution.
I also had to fix a couple of Yeti SB100s at BC Bike RAce and It was a fight for dominance against the engineering that went into that rear end.
Reply
pdxkid
4 years, 1 month ago
Nice work and thanks for sharing the frustrations. This could be me. I'm curious - Did you give any feedback to Yeti about the experience you had with their tool and if so, what was their response? SB130 owner here who will definitely not be tackling this job myself.
Reply
Cam McRae
4 years, 1 month ago
I’m sure this is no shock to them, but this is a tricky category. Many other brands don’t sell presses at all. This is messy business, which is likely why many brands leave this up to shops and consumers to figure out. Cheers!
Reply
grimwood
4 years, 1 month ago
I had trouble removing those bearings on the swingarm, and I bet that Yeti tool would have made things a lot easier. The others (SI and ‘link’), after I removed them from the frame, I put them on a heater for a bit and bearings were very easy to remove.
I’d say the 150 is harder than most bikes I’ve worked on, but not the worst.
Reply
Cam McRae
4 years, 1 month ago
A couple of things to add here, but I thought there would be a revolt if I added anything more to my novel above.
I installed all the bearings and fittings with a good slathering of grease, and they all came out that way. Assembly was clearly top notch and the fittings are among the best I’ve used, right down to the titanium shock bolts.
Also, for the next round, and without taking photos, I’m pretty sure I could get ‘er done in an hour, now that I’ve identified tool combos and my own limitations (must listen to a podcast!)
I didn’t do any research on kits available for Yeti’s new SB models but I’m interested to know if there is an economical way to purchase the tools required. I haven’t done a recent Santa Cruz or Specialized or Trek Giant (as examples) so I can’t compare the process for those, but this makes me curious.
And let’s not forget, this is the MTB equivalent of an exotic car. An oil change for a Bugatti Veyron costs 15k. The equation for maximizing performance and balancing DIY maintenance changes as you go up the performance scale.
Reply
Shinook
4 years, 1 month ago
I can only speak to Transition, the other bikes I've had have not required bearing replacement.
I bought tools from Bearing Pro Tools, two or three blind extractors and several drifts. I think the total for everything I needed was around $70, I was able to buy just the sizes I needed rather than the several hundred for a full set from someone else.
The drifts work fine, the extractors are a pain. There is no flange on them to grab the inner race, so they slip out after a few hammer hits. The first time I removed them, it took me over an hour to get two out, as the stainless bearings had corroded slightly to the aluminum shell due to a lack of prep applied to the original set.
Removal of the non-blind bearings was fine on my bike, although I used a socket to press the bearing into, it sat uneven on the rocker and removed some paint. I replaced them on another bike that was about a year old (mine was 7 months when I first did it), they were seized/corroded so badly that we had to put the entire setup in a vice to press them out. I used to maintain sailboats, mixing stainless and alloy with insufficient grease/anti-seize is a bad combination..
Pressing in went fine, but it requires a careful feel to ensure the bearing isn't slightly pressed in crooked. This is the scariest part of doing it esp. on bikes that don't have the bearings in a link and the bearings are in the frame.
I would have paid around $120 for the proper tools, I think more than that and the value starts to deteriorate. The issue for me is that with the blind pullers, I just couldn't find any that looked worth the investment. They all function roughly the same and seem prone to the same flaws.
Reply
DanL
4 years, 1 month ago
I got the Bearing pro tools set as well and I found that the extractors for the blinds had to be cinched just a little more tightly - but I didn't have any corroded seatings.
Pressing in was definitely a softly, softly process for main pivots as it is very very easy to screw up if you're hamfisted. I did upgrade to a set of wheels manufacturing bearing press handles as they have a better feel, but otherwise for the price (if you only have a few bikes to work on) , the bearing pro tools are good value and their support is second to none.
Reply
schmung
4 years, 1 month ago
Giant do a shop tool that is fairly readily available (in the UK at least) - not the cheapest, but it made doing the bearing on my reign and absolute doddle and have since used bits of it with some success on other bikes.
Reply
sospeedy
4 years, 1 month ago
Thought I’d be happy with bearings on my new bike, and not having to service the bushings on my recently departed Rocky Mountain Altitude. But this has me reconsidering that thought! Thanks for the tips, which no doubt will be handy when I dive into bearing replacements in the future.
Reply
dan_l
4 years, 1 month ago
Hello Cam,
Something that may help in the future is try warming up the aluminum part that holds the bearing. Aluminum expands more than a steel bearing and it makes removal much easier. On a Santa Cruz I will hit the links with a propane torch like I'm sweating copper pipe. If the machine work is good, the bearing should just drop right out with no tools needed. Otherwise just use your press like normal (wear gloves) and it will come out 10x easier than no heat.
For install, put the bearings in the freezer overnight. Also warm up the metal part you are installing the bearing into, maybe not as much this time as you don't want to smoke the grease out of the bearing. You will need to guide the bearing in with a drift or shaft because it may be loose enough that it will get catty-wompus on you if you just drop it in by hand. If it gets sideways on you the parts will immediatley cool on you and she'll be locked in their good and proper all misaligned on you. This method works every time 90% of the time.
If you really FUBAR disassembly you can always just crack the bearing races with a high quality chisel and hammer to take them out in pieces. One needs to be really careful not to nick the parts you won't be replacing. Only use this method in an emergency.
Reply
Cam McRae
4 years, 1 month ago
Thanks Dan! Great tips.
Reply
Cam McRae
4 years, 1 month ago
This comment has been removed.
Cam McRae
4 years, 1 month ago
A second addendum is that I spent some time today cleaning and degreasing the old bearings. They all came out usable, if not perfect. I will certainly keep them as spares. All the seized ones were dry, so grease is your friend!
Reply
Johannes Schmidt
4 years, 1 month ago
I´ve bought the "Giant Sixpack+1 Maestro Bearing Tool Kit" and it works perfectly fine (for all of Giant frame´s bearings at least) for extracting and pressing in.
https://www.giant-bicycles.com/gb/giant-sixpackplus1-maestro-bearing-tool-kit
Reply
Jonas Dodd
4 years, 1 month ago
Great article, Cam!
Coincidentally, I recently attempted to replace the frame and pivot bearings on my 2017 Transition patrol carbon, purchased in 2018. I realize that Transition advises to check and replace the bearings as needed every 6 months but I had left it until now because I felt like it was still riding great and I hadn't actually disassembled the frame to check the rotation of the individual bearings.
So... having determined that the bearings actually did need replacing I got a set of puller / installers from Rapid Racer Products and attempted to drive out a bearing but was unable to move it. At this point I threw in the towel and took the frame to North Shore Bike Shop who got the job done in less than 24 hours. It also turned out that the main axle had seized to one of the bearings but they had been able to free it up.
I will now check the bearings and axles every 6 months and hopefully be able to swap the bearings myself the next time they need it.
- - - -
It would be great to add a bearing removal and replacement segment to your bike reviews, to show the pros and cons of each suspension layout. It will be a consideration I take into account for my next bike purchase.
An article on how to check bearings would also be helpful!
Reply
Shinook
4 years, 1 month ago
I check mine with regularity. IMO the best way to do it is disassemble the linkage and spin the bearing, if they are gritty, or especially notchy or seized, then something needs to be done.
If it's only minor, you can remove the bearing seal and flush them with a degreaser or rubbing alcohol, let them dry, then re-pack with some type of grease. I usually use a marine trailer bearing grease. If the grease is too thick, then it won't distribute properly in a pivot and will result in it seizing again. If it's too thin, then protection is minimal and it'll wash or wear out. As an example, Polylube is too thin and doesn't work very well, but Red N Tacky is too thick. While I haven't used it, the Park high performance grease seems like a good option, so is Phil Wood.
If it's major, where the bearing is notchy, has play, or is to totally seized, then it needs replaced. Keep in mind that replacing a broken bearing is very difficult on some bikes, so you risk damage to your frame. I'd default to replacement whenever practical.
Keep in mind seized bearings will rotated on the axles and inserts, so prolonged use of seized bearings will result in silvering or wear on the axles that will require replacement.
To prevent your issue, I regularly pull the pivot axles out and re-grease the axles, especially on bikes where they are exposed more like Transition bikes. Use the same grease as you'd pack the bearings with, loctite the threads, and grease everything but the threads (axle surfaces, collet heads, bolt heads, etc). The tapered washers you see in a lot of linkages in particular are really important to grease, as they could get stuck otherwise.
In order of bearing durability, it's hard to lay out because a lot of brands use the same linkage design but with differences in implementation. I've found most VPP bikes (Santa Cruz, Intense) to have the best durability and longevity of the bearings/axles. They use dust covers and the bearings are mostly out of the way, along with most of them being in links. The Horst bikes are a mixed bag, Transition's bearing life is awful, but Specialized seems pretty decent because of some rubber seals over the bearings. I've looked at Norco, theirs seem better recessed and out of the way, but not as well sealed. The new Transition bikes have the bearings further encapsulated in the frame and covered by seals.
Typically, I look at the amount of exposure the bearing has (If I can see the face of the bearing seal, it's excessively exposed; this determines how much crap the bearing will pick up), if they are protected by some sort of cover (determines how likely the bearing is to hold grit and run it past the bearing seal), how many blind bearings exist in the frame (blind bearings are a pain to remove), and how many bearings are in links vs the frame (bearings in links are easier/safer to replace).
Reply
Hugo Williamson
4 years, 1 month ago
Great advice
Reply
Jonas Dodd
4 years, 1 month ago
Thanks for the additional and excellent tips, Chinook!
When I built the bike up in January 2018 I had to pull the rocker pivot axle out to get the dropper housing around it within the seat tube. At the time it slid in and out quite easily. When I recently removed the rocker I had to drive the axle out with a drift. I'll definitely pull this and the main pivot axle at least every 6 months to clean and regrease them henceforth. The taper nut for the main pivot collet was also tough to get out so as you mention, I'll regrease it too.
Reply
Cam McRae
4 years, 1 month ago
Thanks Jonas!
And more great tips Shinook!
I've already got some bearings and tools to work on the next projects so we'll be doing more of these for sure. I may engage Jeff Bryson on the checking aspect to get a little more expertise.
Reply
Cr4w
4 years, 1 month ago
Is that a tub of Bullshot? I still have the remains of a tube I bought In the 90s. It's actually one of my prized possessions.
Reply
Cam McRae
4 years, 1 month ago
Good eye! It’s a dollop of Bullshot I put into a cream cheese container about 35 years ago. It’s almost done.
Reply
Speeder1
4 years, 1 month ago
Fun writeup! Anyone who has wrenched on their car or maybe their bike has a story like this. For a first time through an unknown project, I usually add 50% to the estimated time experienced people report. I also try to remind myself not to throw a hammer at whatever it is I'm working on during the process when it doesn't go as planned.
I ride one of these exotics. I pulled the shock off to grease the SI last fall after about 2000 miles of riding, mostly dry but with a few mud days in there. All bearings were smooth turning without play except for one of the rocker link bearings that had become pitted. I took it too my local yeti dealer and had a new one pressed in for $16, including labor.
Rear end rebuild on some of today's bikes is a job I know I could do but I don't have access to 3 different bearing press kits. As such its one of those very few bike jobs I will pay my local shop to do for me. Hopefully I can milk another 2000 miles out of the rear pivots before it needs to get done! After reading this, I'll be sure tp drop it at the shop and pony up for the work.
Reply
Dave Tolnai
4 years, 1 month ago
I wrestled with that damned shock extender for 45 minutes in the Fromme parking lot doing a spring swap on the sb165. When it finally came apart I dropped a part and it rolled under my truck. Not simple. Not fun.
Reply
ChazzMichaelMichaels
4 years, 1 month ago
Are those Specialized bearing puller kits still for sale?
Reply
Cam McRae
4 years, 1 month ago
Here's a new one.
https://www.amaincycling.com/specialized-fsr-bearing-puller-press-tool-kit-9895-3035/p617793
Reply
ChazzMichaelMichaels
4 years, 1 month ago
Cheers. That was the only result google found me too!
Reply
Primož Resman
4 years, 1 month ago
Please don't tell me you actually pulled the two bearings into the Switch Infinity sled by pulling on the inner races?
Bearings should ALWAYS be pressed in by pressing on the ring being installed. If you are pressing a bearing into a bore, press on the outer raceway. Pressing onto a shaft, press the inner raceway.
Doing it the opposite way will load up both the raceways and the balls and can cause premature wear out of the bearings (through ball indentation in the raceways), vibrations, etc. While not critical with a suspension pivot, where a bearing invariably dies from dirt getting into it, it's just common practice to install them the right way.
Reply
Cam McRae
4 years, 1 month ago
You can see from the photos that I pressed them in using the inner bore. Since you can see that I don't have to tell you anything! If I'd had a tool to press on the outer races I would have used it because it's obvious this method is preferable in this situation.
I greased all the parts well and used very little torque to slowly press them in and I'm confident I didn't damage anything. If there had been excess resistance I would have aborted the task. Time will tell, however.
Reply
Primož Resman
4 years, 1 month ago
I saw that, yeah, it was a rhetorical question.
Next time at least use old bearings as an interface to press new ones in and put a spacer between outer races so the old inner race can move inwards and not put pressure on the new inner races.
And like mentioned, regardless, it won't matter much for pivot bearings, but pressing them in by the inner races is just something I can't get myself to doing. Even if they go in easy (unless they go in by hand) and even if I know it doesn't matter. It's just a sort of a PSA from a smartass on the internet. Turns out loads of people ignore said guys and function in the world just fine.
BTW, in some cases (DT 370/350/240 series of hubs) you need to press in BOTH races at the same time since you're pressing the bearing into the body and over the axle at the same time.
Reply
Cam McRae
4 years, 1 month ago
I was aware of your rhetorical question. ;) Just having a little poke back.
In this case the old bearings wouldn't have helped at all and probably would have been tough to align because the inner races extend beyond the bearing body to form a collar. Otherwise that's an excellent suggestion.
Cheers!
Reply
Ciego
3 years, 3 months ago
Where's the article? Can you re-post it?
Reply
Niels van Kampenhout
3 years, 3 months ago
Fixed! Thanks for the heads-up.
Reply
Sanesh Iyer
4 years, 1 month ago
My first suspension overhaul was a yeti 303 DH (two rails). What a trial by fire...
All bikes should have press kits available. They're not rocket science (or economics) to design and sell and make everyone's life so much easier. The next time I own a fully, I'll probably reverse engineer the bearing Interfaces to make my own.
Pressing in two bearings at once is a bold move, especially into a carbon frame!
Reply
Cam McRae
4 years, 1 month ago
Well TBF I was pressing the two into the Switch Infinity shuttle, which is likely aluminum, but everything lined up perfectly so it was a no brainer.
Reply
Marcel Almeida
4 years, 1 month ago
curious to why you gave up RWC tools, it looks like a nice set of press/removal tools that would do the job easily.
Reply
Primož Resman
4 years, 1 month ago
One point here is that RWC tools are designed to pull bearings out of mounts where you can get behind a bearing. If you have two bearings with a spacer pressed into your frame, into a hub or somewhere similar, heck, if you have two bearings in your chainstay pivot, the RWC kit wont help you.
It's designed to push the bearing out using a block on the back side, that is pulled out into a cup, covering the bearing hole. If you have a blind hole, a spacer with another bearing on the other side, etc., you can't install said block. The easiest way is to use a bearing puller (an expanding collet grabbing the bearing with a slide hammer to knock it out), but a screw type puller on the same principle could also be used. I'm not sure anyone sells those though, it also sounds quite expensive to make.
I really need a lathe in my life...
EDIT: slide hammer puller work great, but ideally you're pulling the bearing out from a heavy part. Like an engine block, electric motor housing, transmission casing, etc. With bike frames, we're talking about light parts. You can't really clamp them into anything (you'll bend the frame easily by just clamping it into a vice or at least when hammering away), so someone has to hold the frame or swingarm. Usually it's hard to do it by someone on their own. Using a screw-type blind bearing puller would mean there would still be a cup sitting on the frame right around the bearing, pressing nicely where you have the most material. This means a quick, easy, quiet bearing removal.
Reply
Marcel Almeida
4 years, 1 month ago
They do have bearing puller for SC closed link that I found when I was researching for some tools, not much different the SC collect bearing puller other than you won't need to hammer it out. but they are pretty expensive! I guess around $90 each bearing size kit and I think they only have for a couple of different bearing sizes.
https://www.enduroforkseals.com/products/tools/rear-suspension-tools/SBT-CLSD-7900.html
Reply
Primož Resman
4 years, 1 month ago
This is what I was talking about, I didn't know it exists already. Makes sense though. And yeah, expensive as hell, as expected.
I'd try to make it single sided only though for that true blind bearing removal capability (think about RM Slayer chainstay pivot bearings for example).
Reply
Cam McRae
4 years, 1 month ago
I didn't give up on them at all. I used them where I could but bearing tools are very project-specific and there is rarely a kit that will do everything on every bike.
Reply
Andrea Ferraresi
2 years, 5 months ago
Hey Cam,
would you mind writing down the rrp kit and the size of the collet punch you have used for this? Thanks
Reply
Cam McRae
2 years, 5 months ago
Hi Andrea.
I used a bunch of different bits and lots of collets. I’m not sure I could narrow it down to one kit j less you can be specific. I also used a Specialized bearing kit. Happy to help if I can though.
Reply
Andrea Ferraresi
2 years, 5 months ago
Hi Cam,
thanks a lot for answering: I think I found out that the rrp kit #2 and #11 plus an 8mm and an 11mm bearing extractor should cover everything except that one bearing that needs the yeti extractor.
Would you agree?
And, as an unrelated question: what bottom bracket are you using for the shimano cranks? I learned that CK doesn't makes pressfits anymore.
Reply
Cam McRae
2 years, 5 months ago
I have heard good things about the RRP stuff and hope to try it before too long. It sounds like you have it handled though!
I still have a Chris King BB to use when I switch back to Shimano but I have a DUB crank in there now with an adapter for 28.99.
https://nsmb.com/articles/aftermarket-bottom-brackets-dub-cranks/
Reply
Andrea Ferraresi
2 years, 5 months ago
thanks cam!
Reply
Cam McRae
2 years, 5 months ago
Prego!
lennskii
7 months, 4 weeks ago
Just went to a bike shop looking for an all-mountain/efficient enduro bike and they had a fleet of SB150s to move on. I asked about how easy it was to maintain (swapping bearings/servicing the Switch Infinity Link. Their response - super easy! Only 6 bearings to swap, must easier than most bikes. Thought I'd do some at home research to verify...
Googled and stumbled upon NSMB gold. Looks like a total nightmare to swap bearings, would drive me up the wall. Thanks Cam!
Reply
Cam McRae
7 months, 4 weeks ago
Despite my experience, I wouldn't call it a nightmare. Anything I've done since has been quite easy - at least with the right tools it has. Simple? Not exactly but not bad either. It also appears that the SB160 is easier to work on and has better bearings and shielding.
I certainly wouldn't steer you away from an SB150 because of the bearing procedures and there are better instructions available now.
Cheers!
Reply
Please log in to leave a comment.