How to pack a bunch of shit onto your bicycle
The Noobs Guide to Bikepacking - Part 1
This is the Introduction...
One of my character defects is that I seem to have absolutely no control over where my interests will take me, or for how long they will last. My general preference seems to be to wade in knee deep, and then to see if I am immediately proficient. If not, I’ll pretend that it never happened and quickly move along to something else. If I still have all of my fingers, I’ll dive in, but keep myself in the shallower end of the pool, comfortable with neither drowning nor winning the 50m freestyle. This is the true secret to my mediocrity.
These whims come from crazy places, and are often contradictory. I can look at something for years and think that it’s kind of stupid, and then it just clicks in my mind and I have to do it. One bizarre example would be the Smokey and the Bandit era Trans Am (2nd Generation). For years I thought this was one of the stupidest cars in existence. Then, somewhere around 2000, I decided that they were amazing and that I really wanted one. I imagined building some sort of matching trailer to haul my bikes around. It was going to be a marvelous, shuttle slaying chicken hawk. I went so far as look at a few in person, but never pulled the trigger.
Bikepacking followed a very similar trajectory for me. Honestly, the whole thing seems a bit silly. Why do you need so much gear? Who has time to ride their bike for days on end? A co-worker bought a gravel bike and asked me about bike-packing, and while we were on the phone I started looking up some routes to suggest to her. And then I thought “Hey, wait a second. That looks pretty awesome!” So there I was, hammering out e-mails trying to shepherd gear and scouting routes in my spare time. Is this shit gonna take? I have no idea. But I’ve waded in deep enough that I’m ready to talk about what I found out.
Why listen to a noob?
I can already hear many of you saying something along the lines of “Hold on a second. I can just write myself an e-mail if I wanted to read some ill-informed opinions on a topic that I don’t know much about.” This is fair. There are a lot of great bikepacking resources out there and they have a lot to say (as well as a few that suggest market saturation). However, just like a beginner probably wouldn’t look to Thomas Vanderham for advice on the best way down Expresso, I find that it can also sometimes be a bit difficult to unpack the advice given by people who think nothing of disappearing into the wilderness for a few weeks on their bikes. Yes, their advice contains wisdom, but it can also read like an article on how to do backflips. Further, a lot of the general backpacking advice isn’t tailored to mountain bikers (or full suspension bikes), and we have some specific needs that can change things up a bit.
I’m coming at these articles from a place of exploration, rather than a place of expertise. So far, I’ve done a few overnights, a couple of long day rides, and a bunch more short test rides. All told, I’d estimate about 150km ridden with my bicycle under various shades of loaded. This is definitely not enough mileage to make me an authority on the subject, but it is the start of a process. I return from each ride with a bunch of ideas on how I can fix things, what I would change and what I would probably leave at home. By the end of this process I hope to take my continually new-and-improved set-up on a 3 night bikepacking extravaganza deep into the wilderness somewhere. My goal is to have things fully dialed in by the time I hit that point. This is my process to get there, and you’re free to laugh at me, or challenge my findings, along the way.
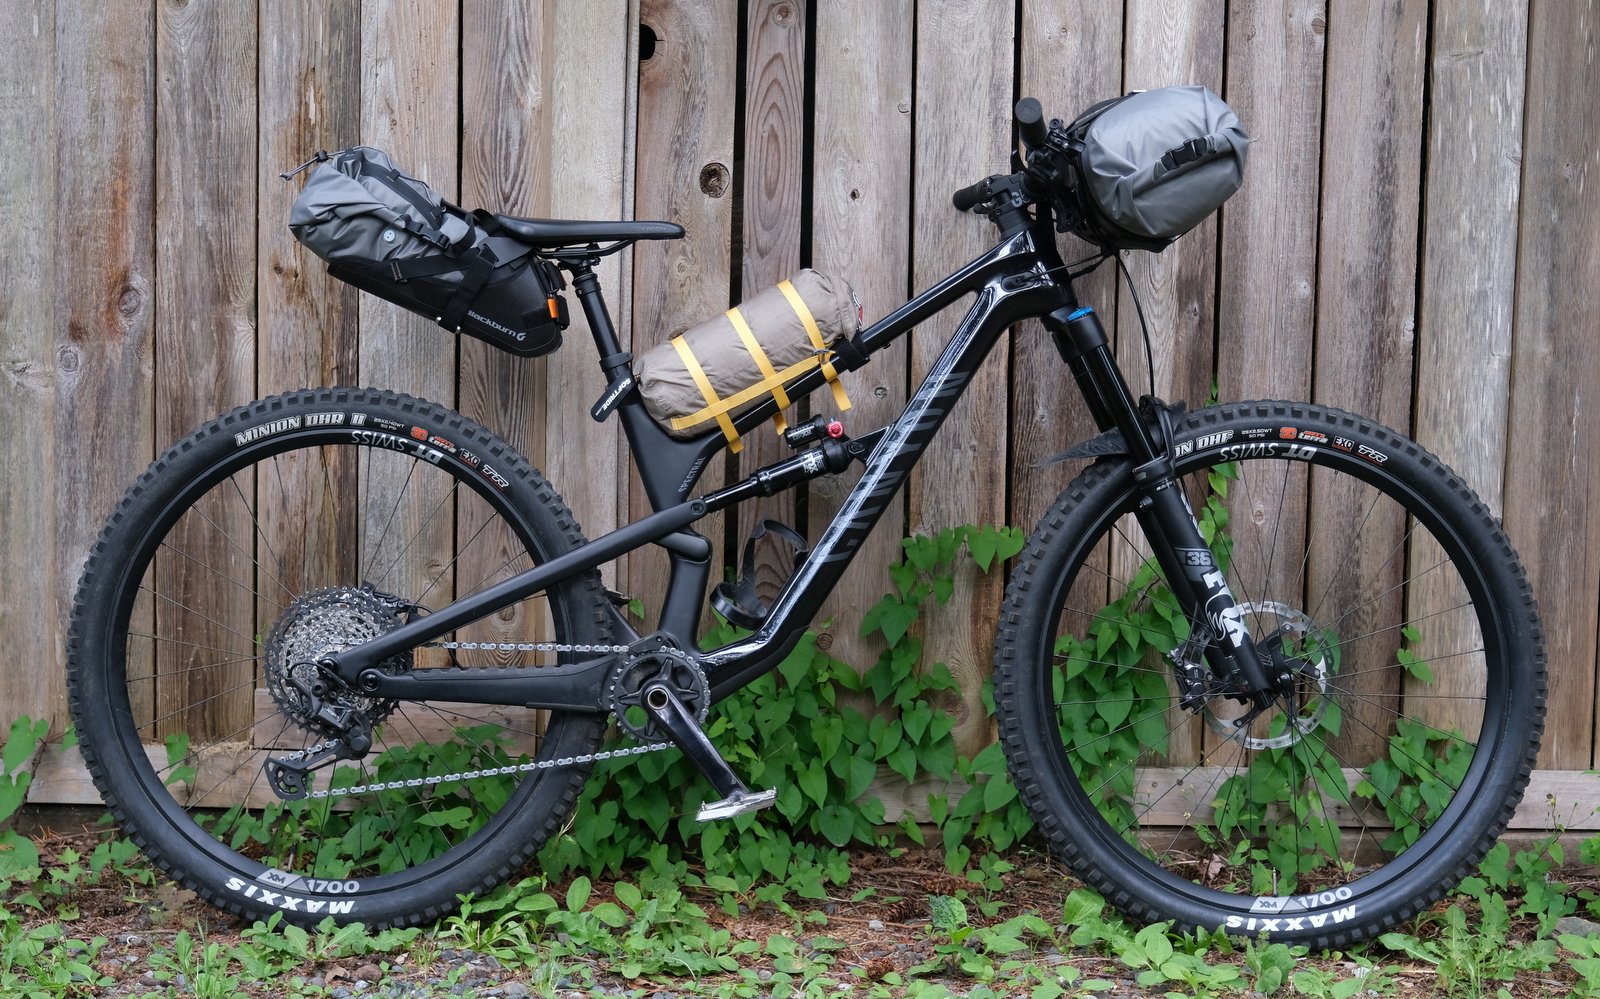
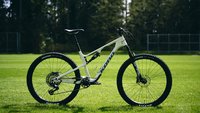
I think this qualifies as a bunch of shit strapped to a bicycle. A brief aside about how the bike looks almost brand new in this photo (I did do a fairly thorough, Cam-inspired cleaning right before I shot these photos) and how far from that it looked after a couple of days of bikepacking.
And Now... The Noobs Guide to Bikepacking
We’ll start by tackling the most important part of bikepacking (our first two articles are going to deal with this subject, because I couldn’t help myself). After all, is it really bikepacking if you don’t have a bunch of shit strapped to your bike? That’s really just a long ride. Anybody entering into the world of bikepacking should prepare to spend a lot of time stressing out about the best way to carry things, and then (potentially) spending a lot of money to do so.
And while it might not be backpacking if you don’t have a bunch of shit strapped to your bike, the next thing you will discover is the importance of how you strap that shit to your bike. It doesn’t matter if you have the best camping gear or the tastiest food if you have to spend 8 hours with a seat pack smacking you repeatedly in the ass.
But you don’t have to (and probably shouldn’t) spend a lot of money to get started. We’re going to start small, remember. You should be able dip your toes in by using stuff from around the house, or general purpose gear. If you decide that this is something that you’re into, then you can start dropping the serious money. Unfortunately, most bikepacking gear falls into the category of stuff that you want to spend a bit more on now to avoid having to purchase again later. This gear will be subjected to a beating. It will get spattered in mud. It will come in contact with moving tires and branches. It will get tugged on and tightened and pulled and thrown by a version of yourself not all that interested in future consequences. As well, when things go wrong out there, they tend to go really wrong. Don’t spoil this all for yourself by setting yourself up for a day or two of riding with aching shoulders and stuff flying off your bike every couple of km.
I’ve also discovered that it’s a bit of delusion to think you can develop a master plan of a packing strategy. Packing efficiently is so gear and bag specific, the only way you are really going to figure this all out is by trial and error. Enter into it with a plan, yes. But be ready and willing to throw it out fairly quickly, as things probably aren’t going to fit as cleanly as you expect. There’s a million ways to do things, and they all have their limitations.
So, with that, in a loosely ranked order of importance, here is a breakdown of the various ways that you can strap shit to your bicycle. I reserve the right to change my opinion on this as we move along.

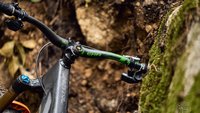
Set up on the Canyon, down low.
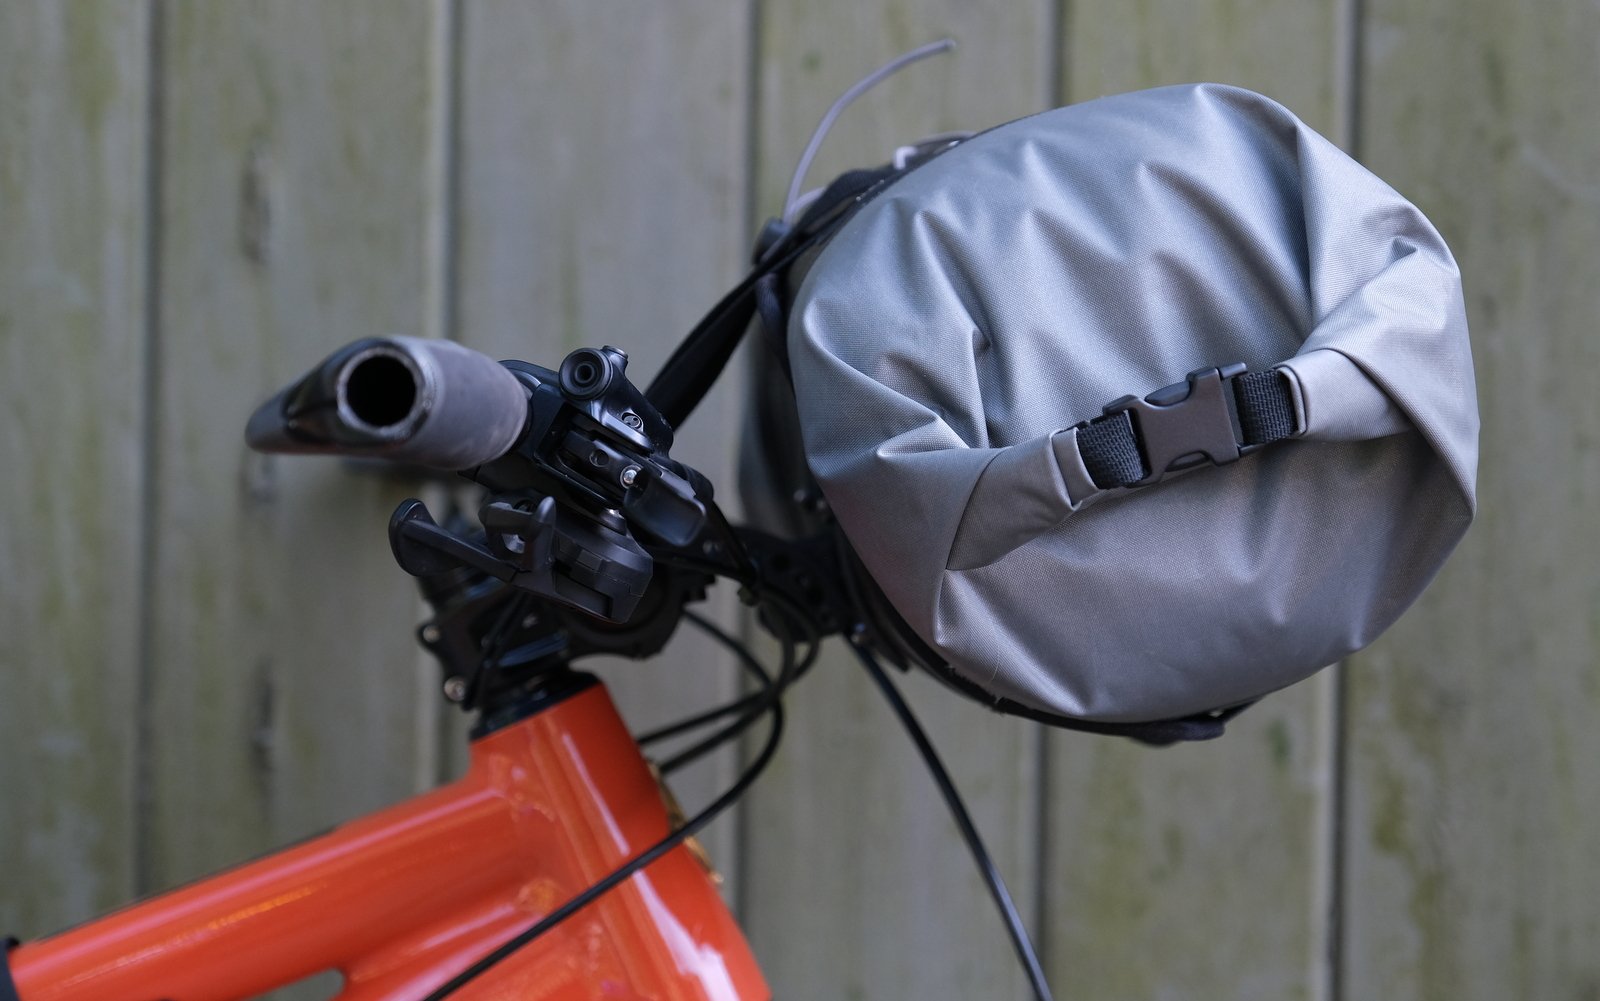
A higher set up on the Ibis. We'll get to that in a minute. And ignore the lack of bar plugs.
The Handlebar Bag
The handlebar bag is arguably the most important piece of bike-packing equipment. It seems like it would be nearly impossible to come up with an efficient set-up without strapping some sort of large bag to your handlebar. Lucky for you, this is probably the easiest system to cobble together on the cheap. Or spend a small fortune on.
The Strategy – Carry high volume, low weight items in a stable platform on the front of your bike. General guidance is to max out at around 5 lbs. or so, but I think that with our slack angles and short stems, we can get away with a pound or two more without any difficulty. I’ve filled mine with my sleeping bag, my camp clothes, my tent poles and my ground cloth, but I may play around with heavier items.
The Cheap Option
Strap a dry bag or stuff sack to your handlebar.
My Option
The Blackburn Outpost Elite Handlebar Roll and Dry Bag
Blackburn gear is a common sight here at NSMB. They make quality goods at a reasonable price, with great support available from most shops. This felt like the right call for my first bikepacking bag.
This bag is 2 pieces, really. There’s the “Handlebar Roll” which bolts to your handlebar and acts as the receiver for the second part, the dry bag.
The dry bag is well made. It’s thick, waterproof coated ripstop nylon. It’ll hold 14L/8 lbs. of gear, has openings at both ends, a valve for venting air, a large chunk of Velcro to hold it in place while you strap it in to the handlebar roll, and some cords and lash points if you want to go even crazier (potentially a great place to keep your bear spray handy).
The only small challenge that I had comes while trying to fill it with gear. The opening is just a teensy bit too small for me to get my sleeping bag in a stuff sack through (the body is larger, so it would fit easily if I could get it through the opening). Lots of people tell you not to bother with a stuff sack for your sleeping back and to just cram it into your bag any old way, but the interior of the Blackburn bag is quite grippy, so it’s hard to pack something like a sleeping bag very densely. These are nitpicks though, and once packed, the handy vent makes it easy to roll it all up into a tight package.
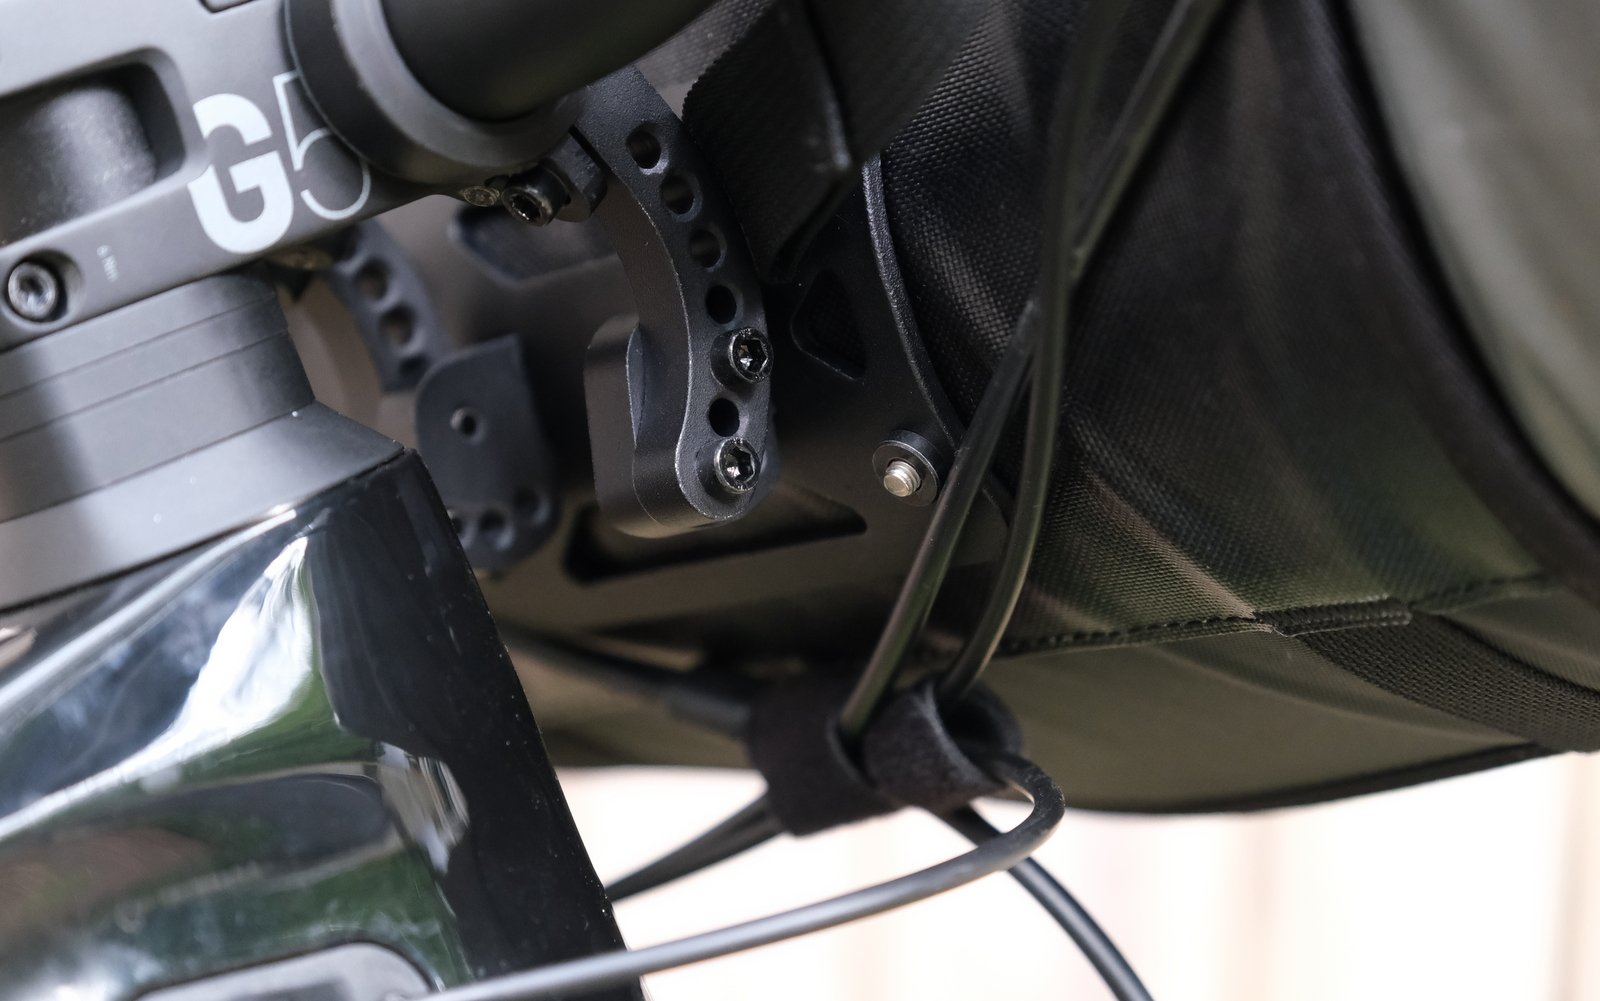
Moving along, the “Handlebar Roll” portion of the system is where you’ll get the most benefit over just lashing a bag to your handlebar. What you end up with is something that looks like a large number plate bolted to your bike with two sturdy brackets. There’s a piece of Velcro on the front (which corresponds with the one on the dry bag), and a couple of straps. One end of each strap attaches to the handlebar roll, and one end loops around your handlebars. It usually takes me 2-3 tries to get the right orientation on those straps, but once in place, it’s incredibly easy to cinch the dry bag down so that it is held solidly, both relative to the handlebar roll and to your handlebar itself. The straps do need a tug every once in a while throughout the day.
Setting up the brackets is fairly easy, but I discovered that it’s possible to mess it up. The first time that I set up the brackets I caused wanton bicycle destruction that pains my soul. The instructions from Blackburn are fairly short, so I was mostly just looking at photos and adapting what I saw to my bike. Simply wrap the two clamps around your handlebar, make sure that you have enough clearance to your headtube and to your front tire (with your fork fully compressed), and you’re good to go. Seemingly.
The problem with this method is that the two clamps will then act as steering stops against your frame. Looking back at the photos, it doesn’t look like this was immediately a problem, or even noticeable. At some point during my first 60km day, the brackets shifted, and I managed to carve a couple of nice little chunks into each side of my head tube. They didn’t shift much, but I was so focused on keeping the weight tight and low that I put them in a position where it didn’t take much of a shift to cause some damage. By mounting the brackets at a higher angle, you can put the dry bag in a position where it is the first thing that contacts your bike. Add a bit of extra torque to your bracket bolts, and you should be good to go. Lesson learned by me, and it could be wise for Blackburn to update their instructions.
At the start of the ride, you can see plenty of clearance, but I probably would have done some damage if my handlebar swung all the way around.
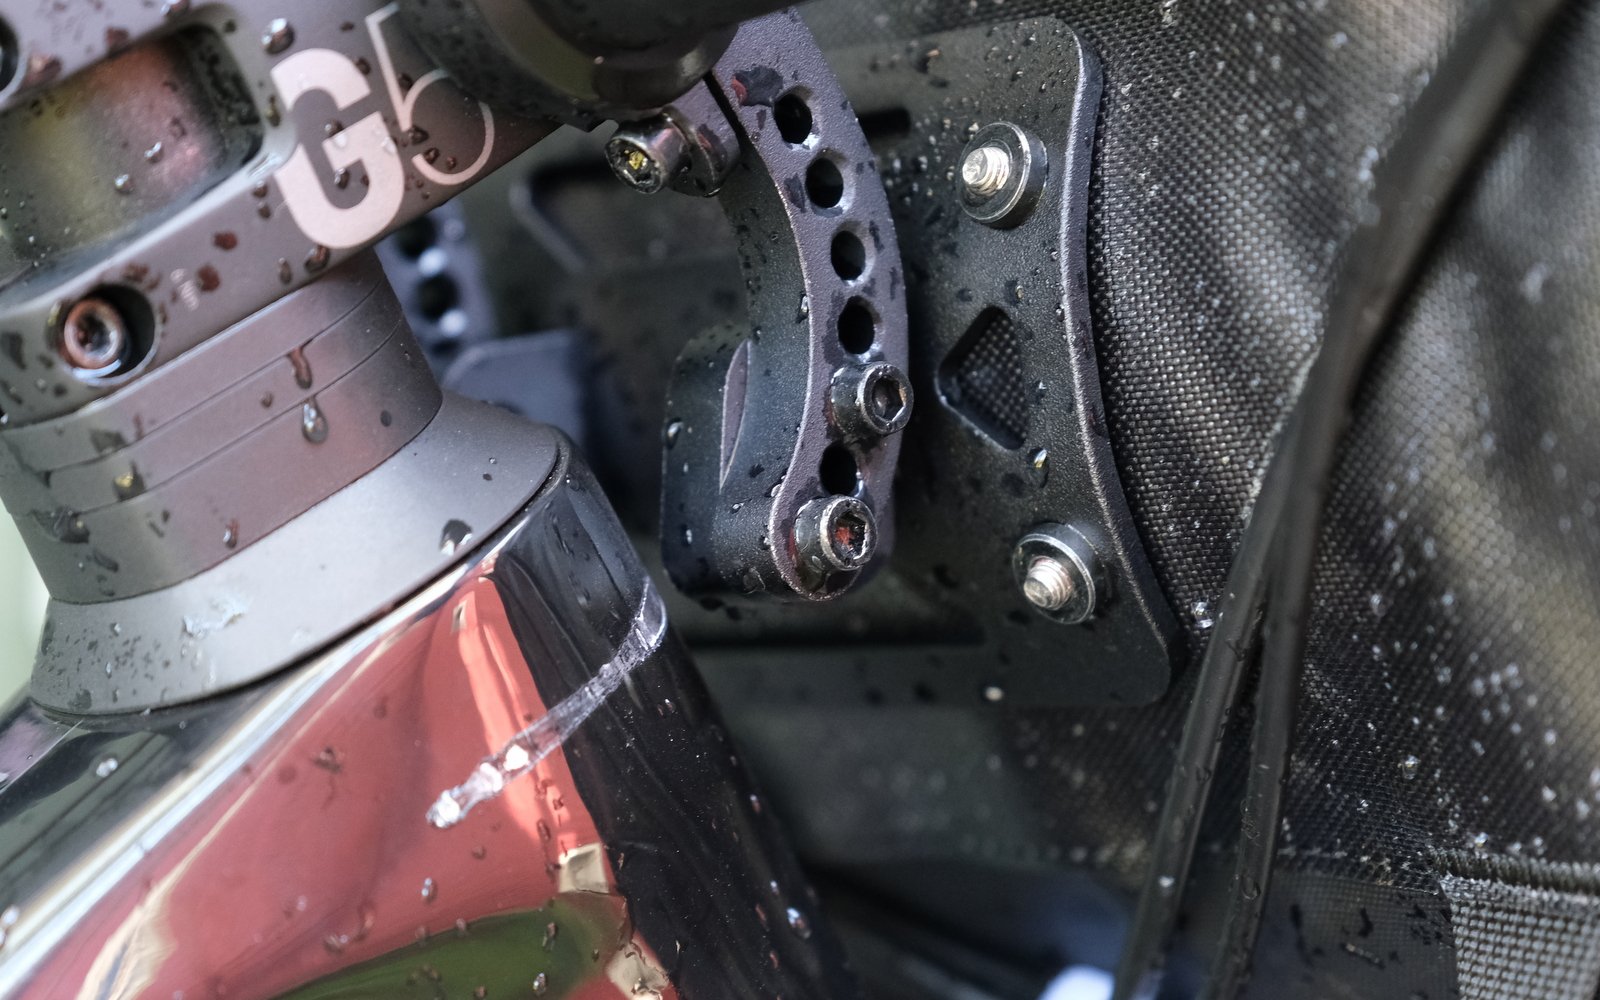
By the end of the ride, the bracket had shifted somewhat and I damaged the headtube. I'm not overly worried about this leading to a catastrophic failure, but I hate myself for doing this to a bike.
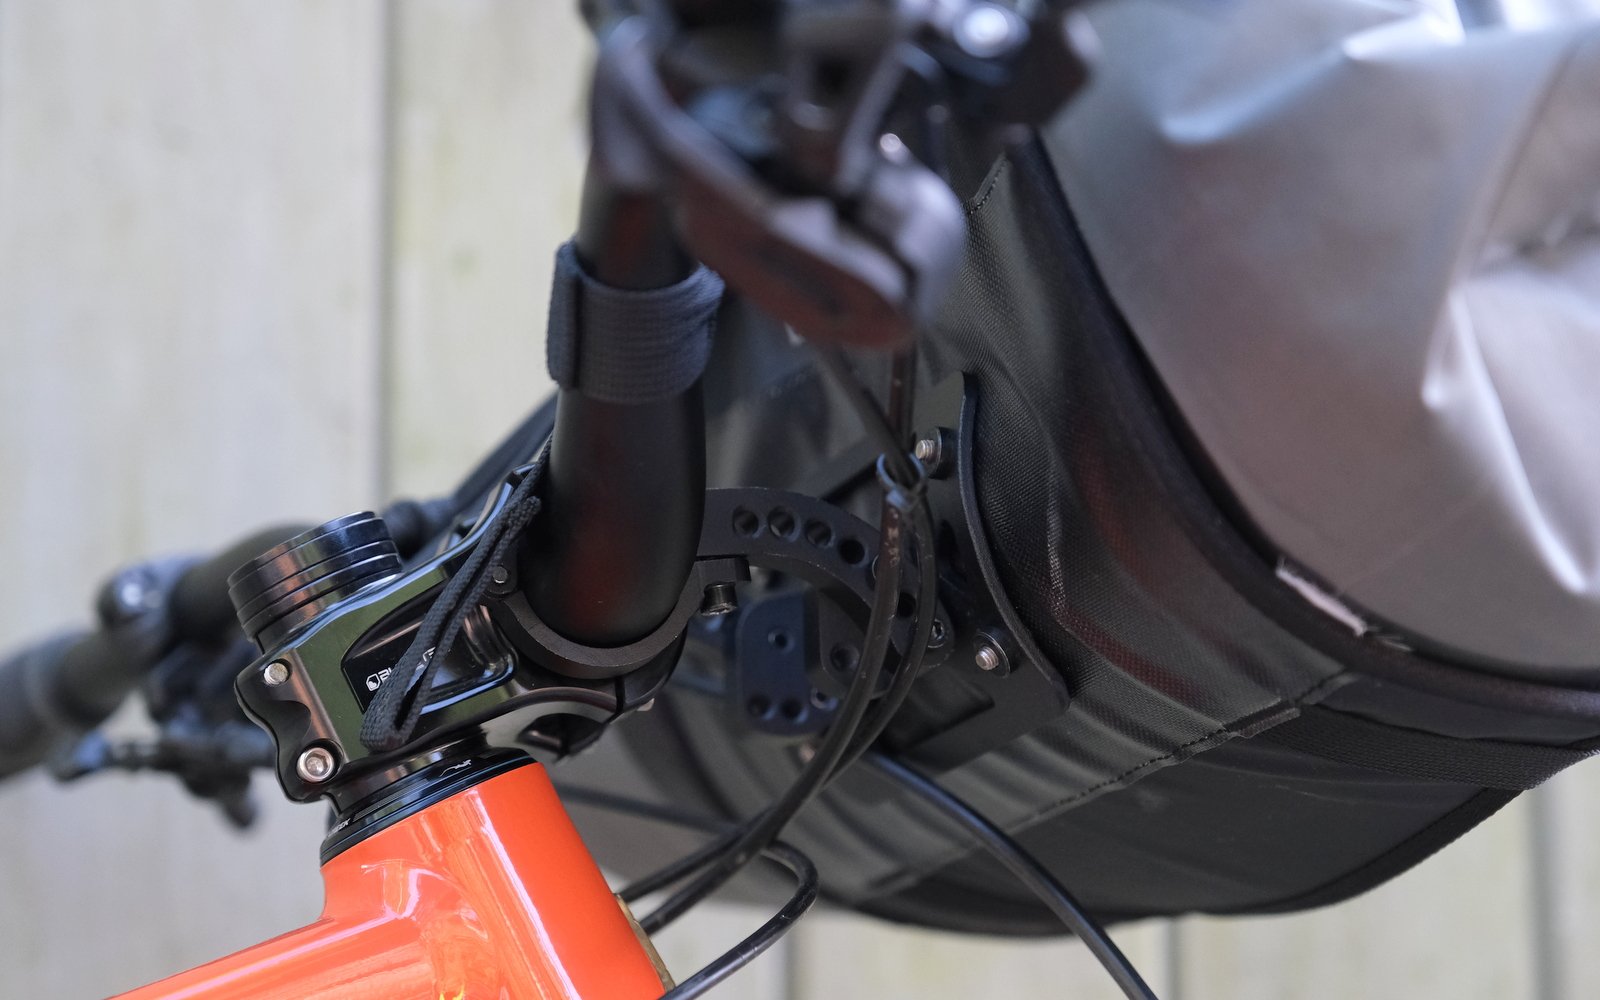
I'm going to play around with this more, but my last few (shorter) rides, I've set it up much higher. I will probably lower this somewhat, and may even put the load slightly closer to the handlebar. Cable clearance is also much better when set up like this.
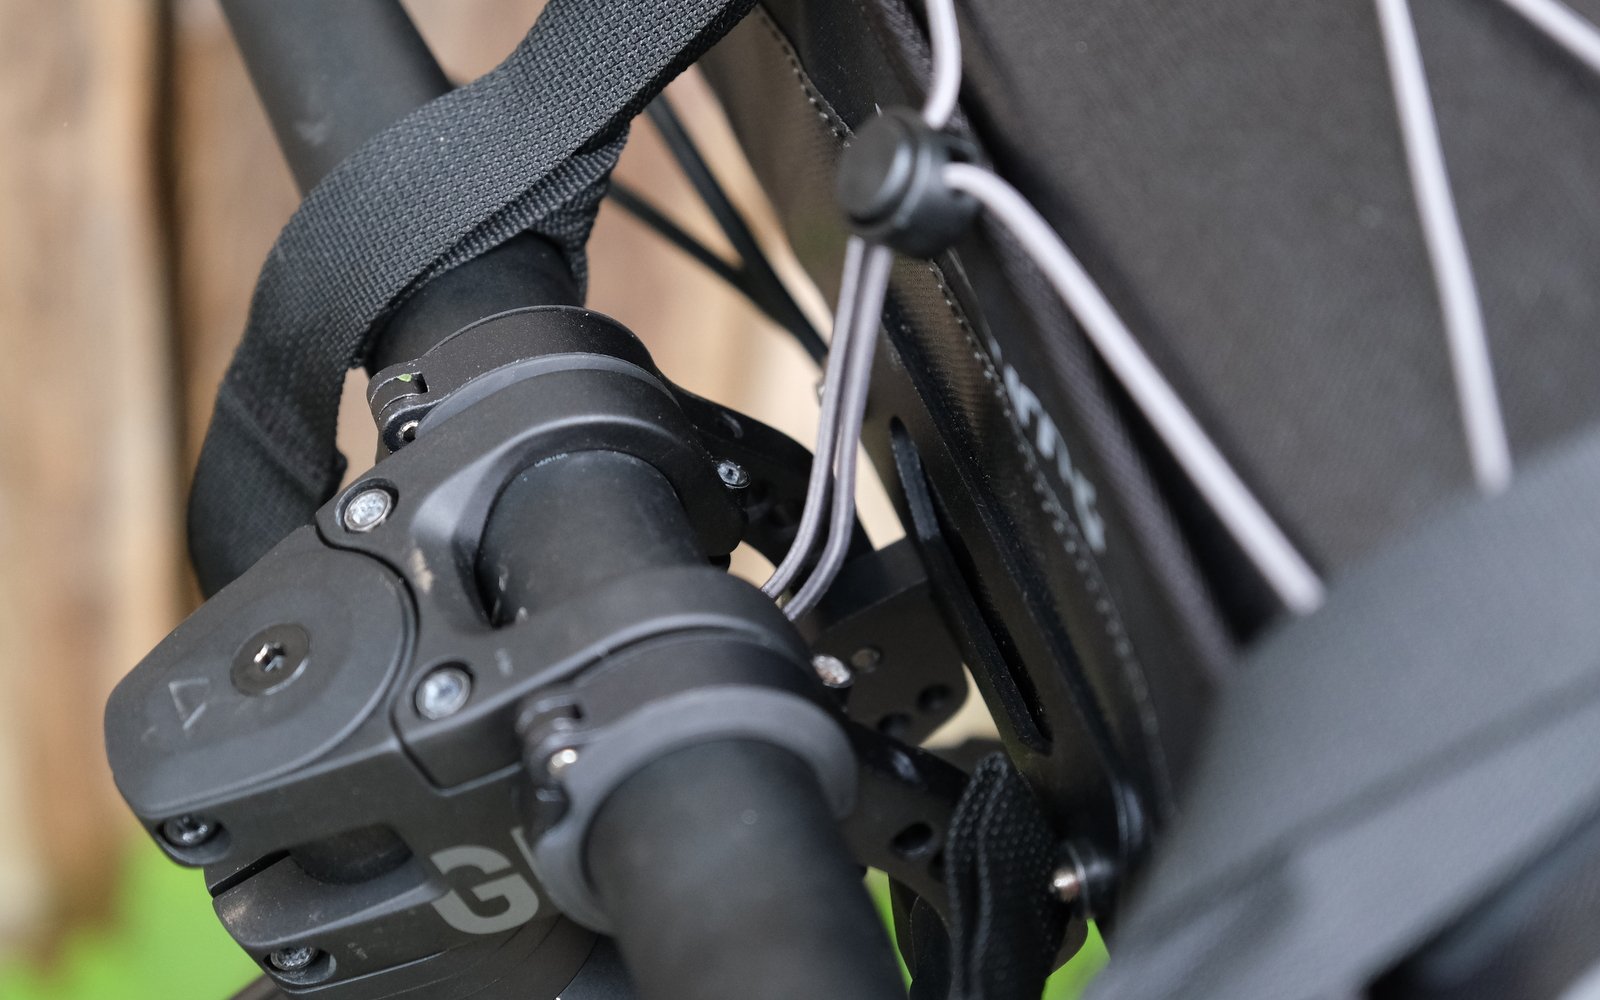
A closeup of the brackets and handlebar straps
Once set up, this system works very well. Riding with this bag was much easier than I expected. It was rock solid, even through rough terrain. It did slow my bikes steering down somewhat, but this added a lot of stability to the bike. The only time I did notice the weight is when I was off the bike, either while laying the bike down on the ground, or walking with it and/or lifting it over obstacles. The front end definitely flops around a bit and reacts in un-expected ways.
Once I solved my set-up issues, I was really happy with this system, and I can see it staying with me for the long haul. It’s very robust, hauls a load easily and securely, and doesn’t take much futzing about either at the beginning or end of the ride. This bag will run you US$175.
Lessons Learned
As a mountain biker, there are only so many ways to strap things to your bike. Your frame (probably) has a shock and weird design choices. Your seat is attached to a dropper. The handlebar is the easiest place to move some product, but there’s a lot going on up there that is competing for real estate. Cable management and load location can be pretty challenging, so a system that is easy to use and secure, is very valuable. Just be a bit cautious with how you set it up (both with handlebar swing and fork travel). You can probably get away with some basic systems here, but a solid set-up will feel like a good investment as you drop into a fast and rocky trail.
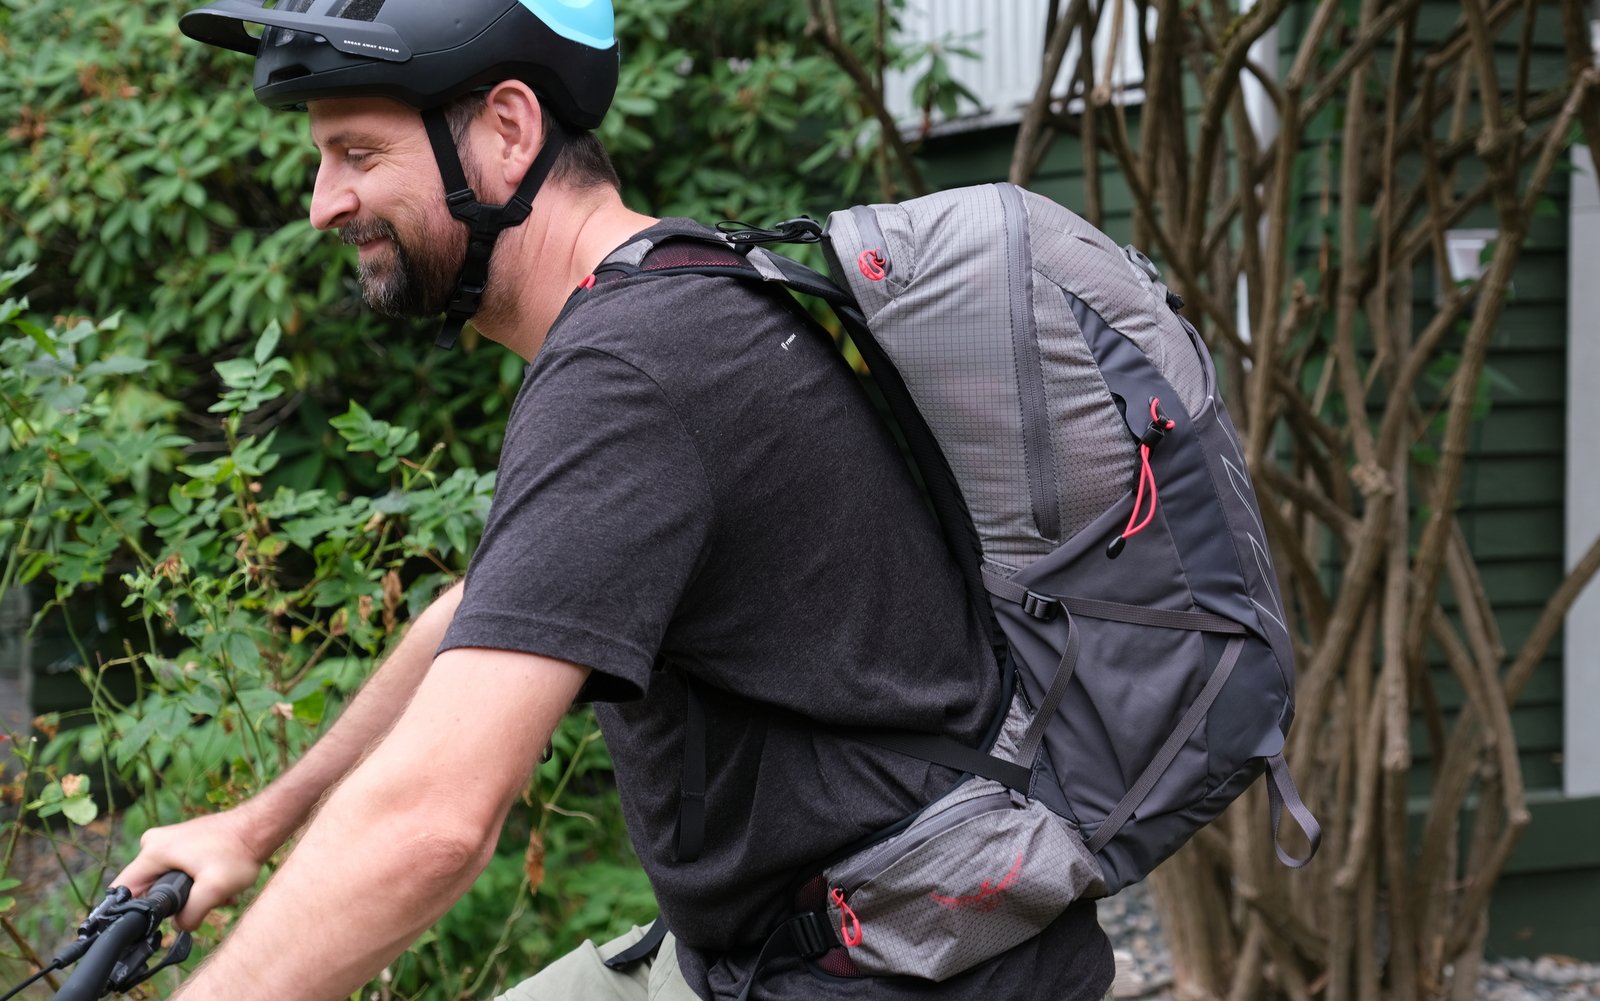
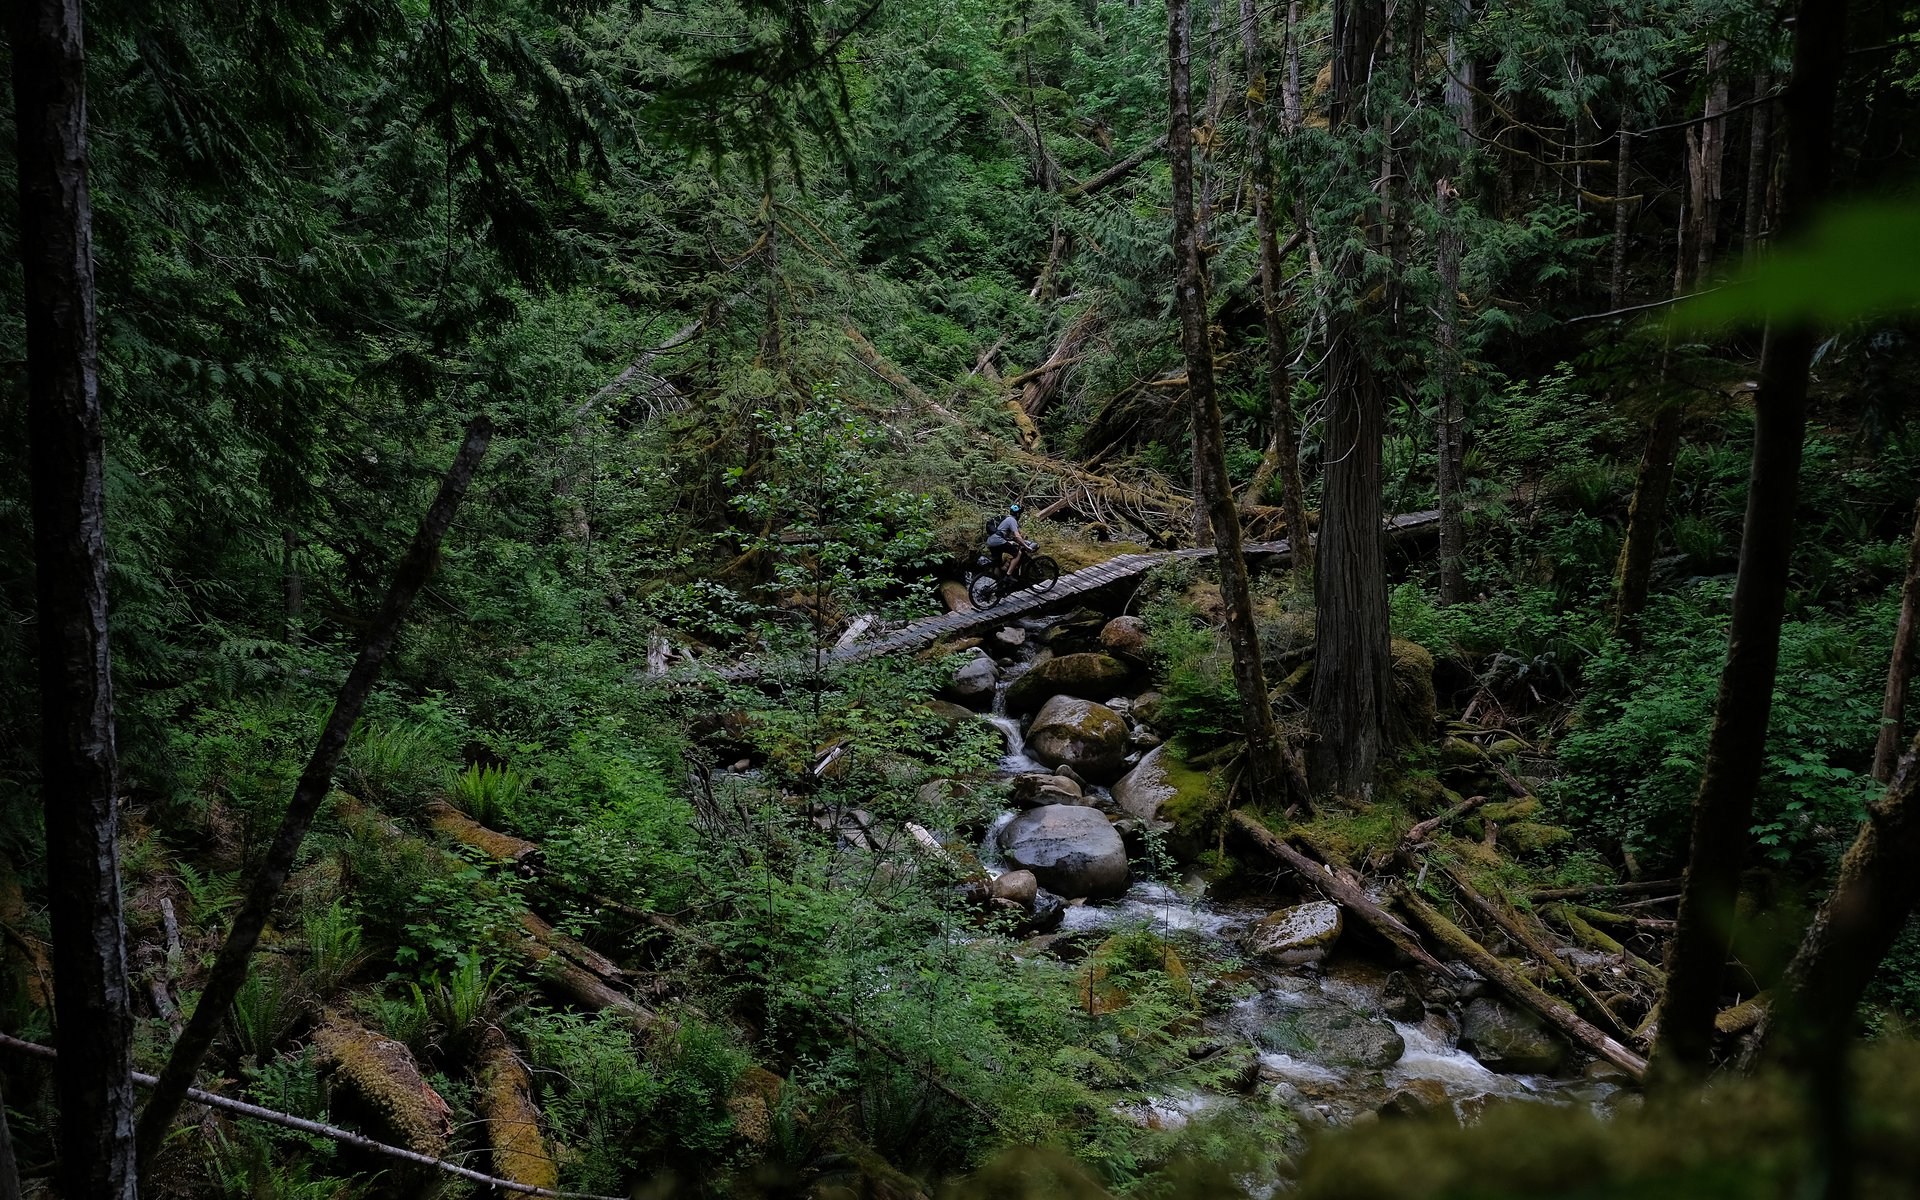
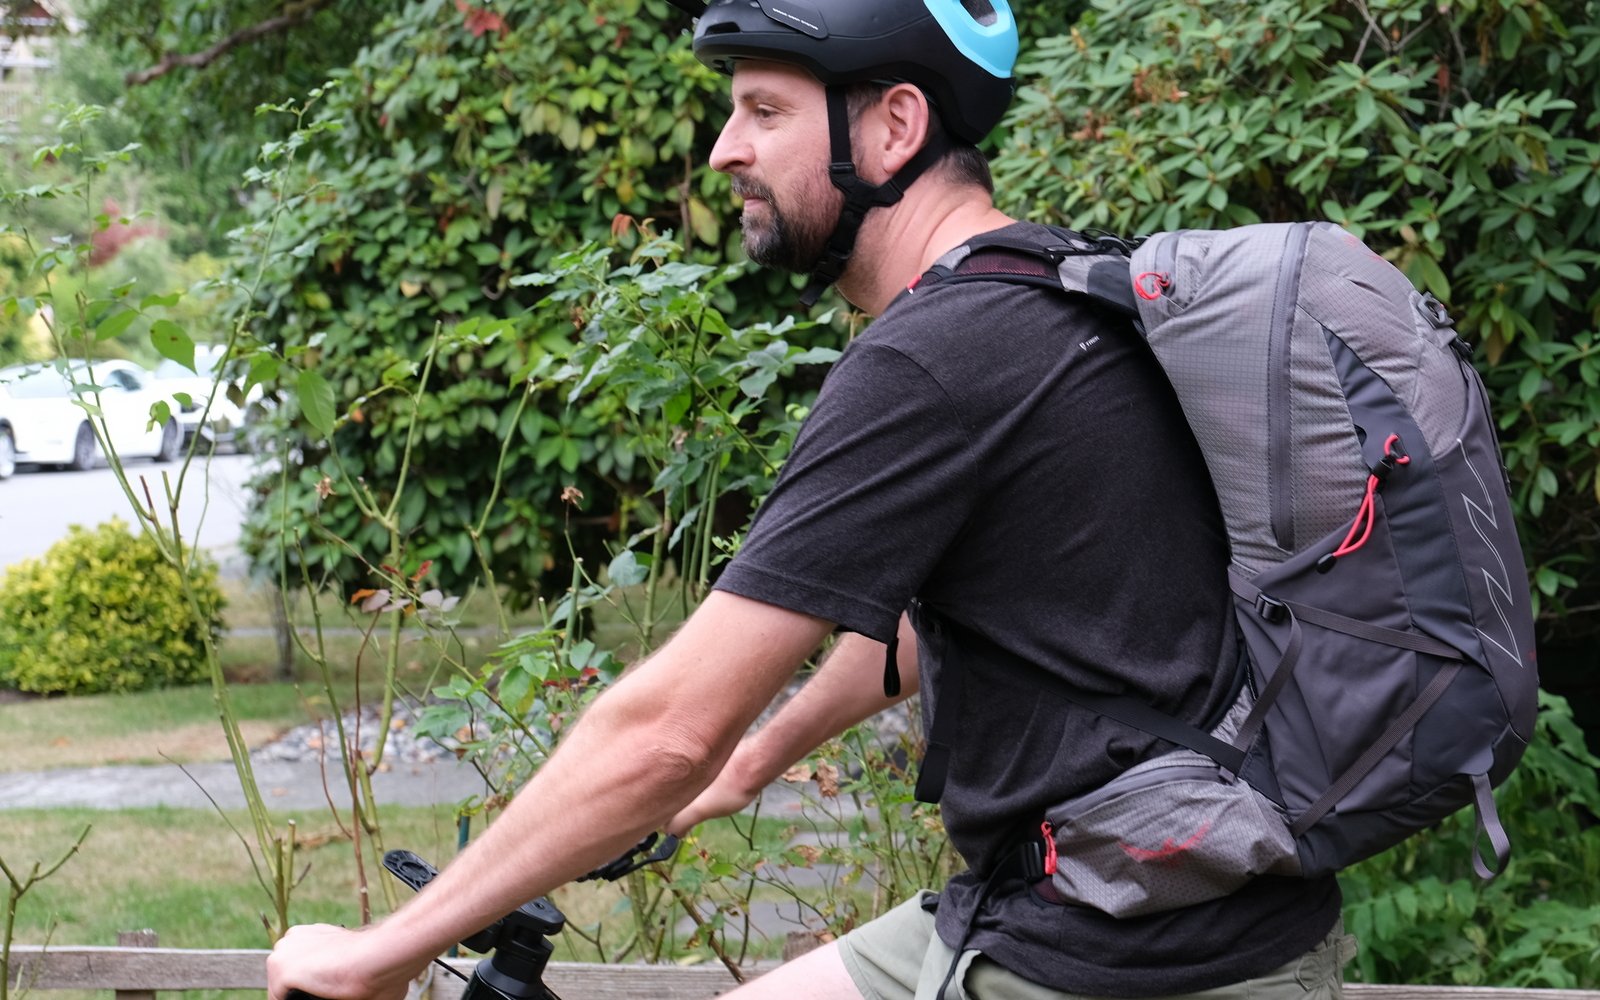
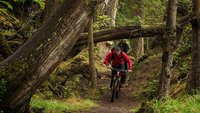
What a handsome, non-dorky-looking man, out for a genuine bike ride.
The Backpack
The goal for many a bikepacker seems to be to avoid riding with any sort of backpack. A bum bag may be acceptable, but a full backpack seems to go against the ethos of strapping as much shit to your bike as you possibly can.
I get it. Once you get used to riding without a pack or bag of some kind, it can be liberating. However, if you’re doing some run-what-you-brung mountain bike based bikepacking, chances are quite good that you’re not ready to splurge for expensive frame bags, so you may just have to accept that you’re going to have to carry something on your back. For me, (often stupidly) lugging camera gear around, a backpack is almost a requirement.
Post Covid, I’ve spent a lot more time exploring on my feet with a backpack, and I’ve learned a lot about how to comfortably haul a load on my back. I’m starting to think that we cyclists may have a few things to learn from our angry cousins, the backpackers.
The Strategy – Carry all the stuff that you can’t fit on your bicycle, comfortably on your back. This might include food, water and electronics. An alternative strategy could see it carrying high volume, low weight items while you strap heavier stuff to your bike.
The Cheap Option – Any one of the backpacks sitting in your closet right now.
My Option
When I received the e-mail about this packpack, I held off on responding for a good week or two. I read so many things telling me not to bikepack with a backpack, and I’ve gotten in the habit of riding without one over the last few years, that it seemed like it might be an unnecessary piece of equipment. Committing to long days in the saddle with not just a backpack, but with a freaking 20 L backpack, seemed like heading in the wrong direction.
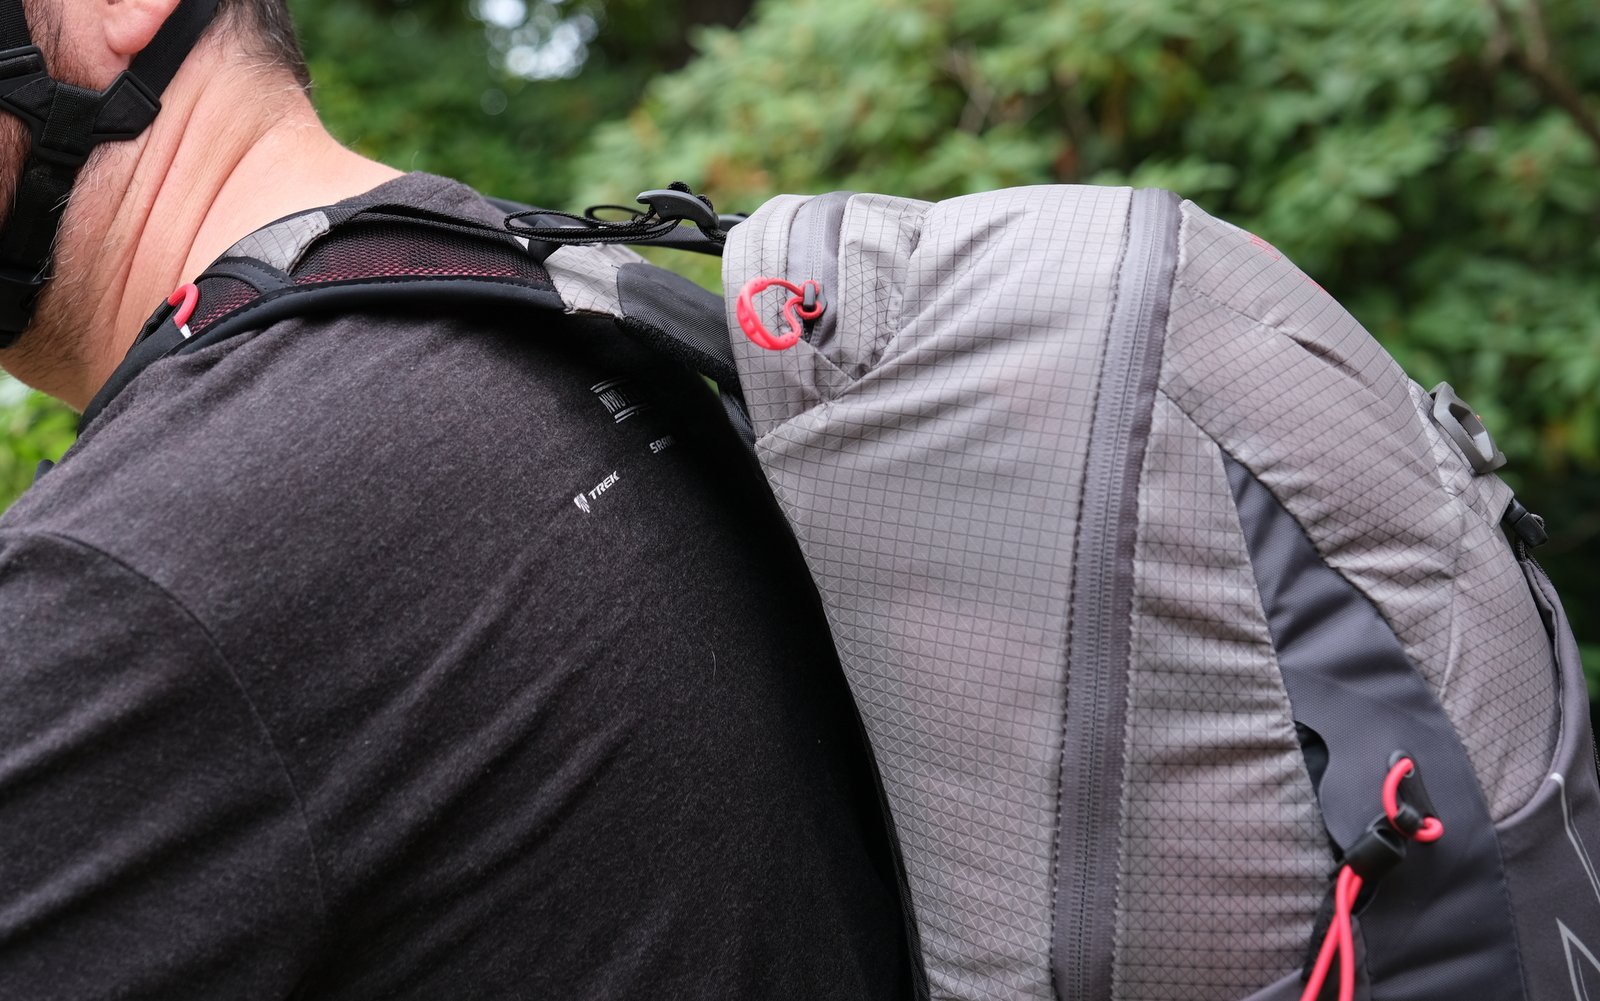
Worse, the first time I tried riding with this pack, it hurt like hell. The straps dug into my neck, forced me into a weird position, and caused me a lot of neck strain. It was great as a day pack for hiking, but there was no way I was going to commit to riding with it on my back for any period of time.
Necessity caused me to re-visit. I was heading out on a long day ride and my 10L hydration pack did not have enough capacity, so I gave the Osprey another shot. The key lied in the adjustable torso length. I not-so-intuitively shortened it up a bit (shorter than what is suggested for my height), which changed the orientation of the straps and pulled the weight off my neck and shoulders. Once I figured that out, things really turned around.
There are several things going for this pack over the average cycling specific hydration pack. First up is that large, backpacking style hip belt (and adjustable torso length) that allows you to cinch it tightly around your hip bones. This keeps the pack tight to your body and takes much of the weight off of your shoulders. This does place the hip belt pockets in a place where they might get in the way if filled all the way, so you may want to keep them relatively empty.
Next, the rigid back panel creates a very solid platform for carrying a load. The bag acts as one solid piece, which keeps your load from flopping around and directs all of the forces to the right areas. Ventilation is great, as well.
After that, you’ll notice the simplicity of the pack design. I have several 10L hydration packs that come nowhere close to carrying half the volume of this thing. By getting rid of bladder compartment limiting the amount of secondary pockets (you still have one internal pocket and a few external pockets to choose from), you wind up with one, gigantic compartment that will hold a whole lot of stuff. I can easily get my tent, sleeping pad and sleeping bag into this pack, and carry it comfortably (this weighs about 3.5kg). I would struggle to get even one of those items into my 10L hydration pack.
Even though it’s a very simple pack, there are places to carry things. In addition to the large main compartment, you have 2 smaller stash pockets on the side, one large stash pocket on the back, the two hip belt pockets, a zippered external pocket on the top, which shares space with an internal zippered pocket, and lastly, there’s even a space to stash a hydration pouch between the back panel and the body of the bag. If I had to nitpick I would wish for a couple more internal pockets to put tools, keys and other small items. These could probably be added without compromising either weight or your ability to haul larger stuff.
This functionality doesn’t come cheap though. The Talon Pro 20 will run you CAD$250 or US$180. Osprey also offers the regular Talon for a fair amount less (I think the big difference is heavier materials and a simpler back panel and harness system), and I’m sure if you hunt around a bit you can find a similar 20L day hiking pack in your price range. Honestly though, I get a little bit excited each time I get to use this backpack. It’s just that nice.
Lessons Learned
Many of us have gotten away from riding with backpacks. For the average 1-2 hour long ride, this makes sense. However, committing to something larger just might be the ticket for re-considering riding with a backpack. There are lots of other ways to haul water and tools, but there aren’t all that many other ways to haul 20L worth of gear along on your mountain bike. A good backpack can solve a lot of your bikepacking problems.
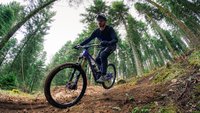
There's a tent, sleeping pad and sleeping bag in there and the load is totally manageable.
With the hip belt cinched down, you can take much of the load off of your shoulders.
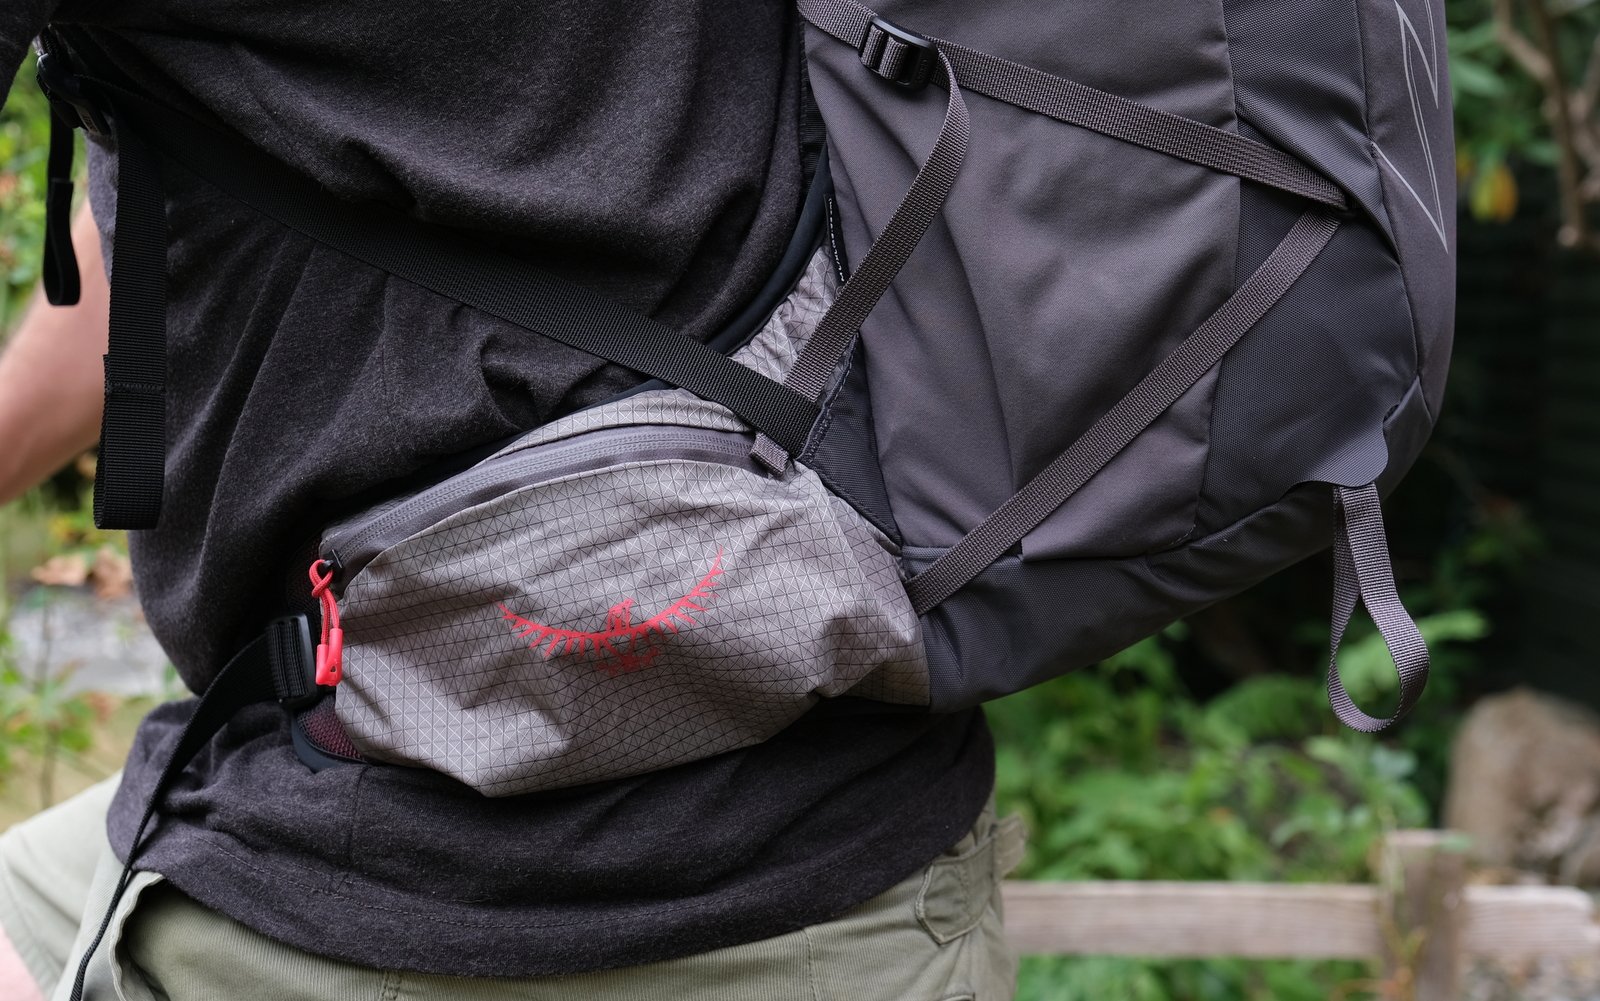
The hip pockets are generous, but you can feel them a bit on your legs as you pedal.
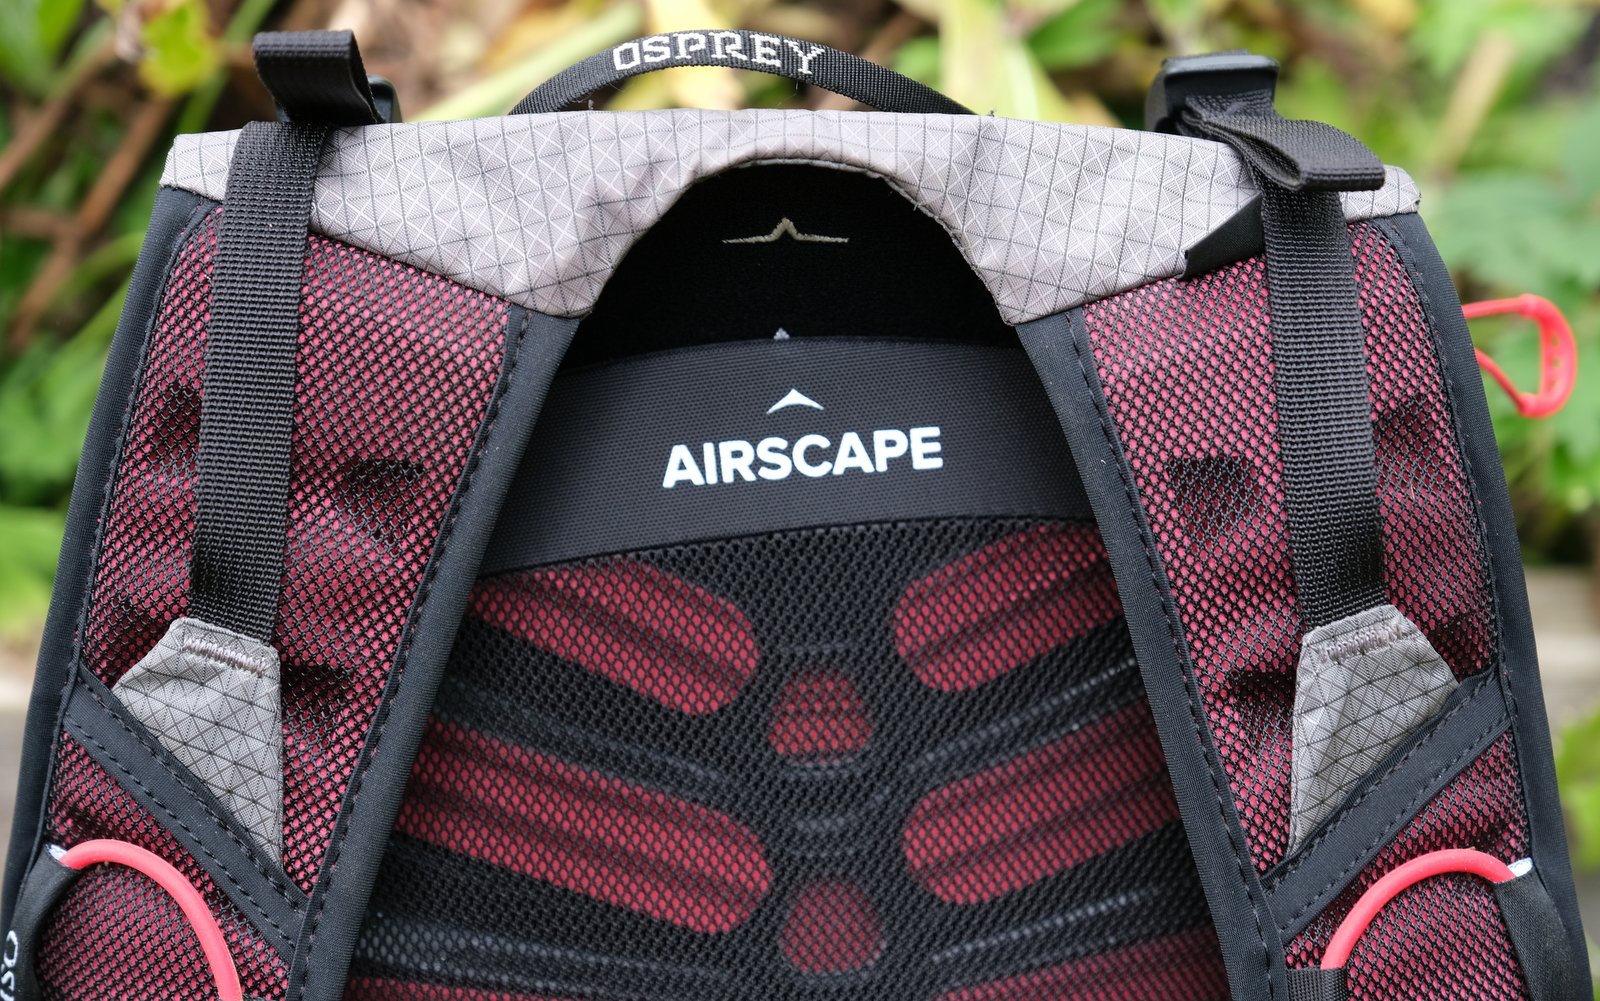
There's a lot happening here. The space between the straps is narrow, so best if you keep it off your neck. This is easy to achieve with the velcro adjustable back panel (which also does a great job of distributing the load).
In Conclusion
These two bags (not these two specific ones, but a backpack and some sort of handlebar bag) are probably all that you really need for your first bikepacking trip. Use a largish backpack that is comfortable while riding a bicycle, and then figure out a way to strap some more stuff to your handlebar. Find a nice little route with a campsite somewhere along the way and plan out an easy little overnight bicycle ride.
Summarizing our lessons learned to date, we have:
1 – Start really small.
2 - Bring way less shit than you think you need.
3 – Carry a lot of water.
4 – There is no “perfect” set-up. They’re all just trade-offs that make certain things less bad.
5 – Shit can go very wrong, very easily, and seems to at least once each ride. When it does, take a moment, think, then act.
6 – Do not rely on Trailforks for navigation.
7 – Test, and then test again.
Stay tuned for Part 2 where we talk about more ways to strap a bunch of shit to your bicycle.


Comments
Vik Banerjee
3 years, 7 months ago
Funnily I'm anti-backpack for my trail rides, but pro-backpack for bike camping trips. I tend to carry my food in the backpack. That way on shorter trips it's not that much weight and it gets lighter everyday. On longer trips where I am likely to resupply going into a store to stock up is easy when your food storage is on your back. When it comes to bear safety and stopping critters from getting at your food it's all in one spot for easily hanging or storage in a bear locker, etc... Most of my tours involve some significant hike a bike. Having some weight on your body makes moving over rough ground/fallen trees easier in my experience vs. all of the weight on the bike.
At the end of a trip if I know I have a big decent coming up heading back to the trailhead/civilization I'll move some gear from the bike to the now empty-ish pack to make the bike handle better and allow me to have more fun on the way down.
For the rest of it the only way to really fail at bikepacking is to not ever do it because you are waiting for the perfect setup. Use whatever you have. Set the route/distance goals modestly. You'll get better/more dialed each trip.
Reply
taprider
3 years, 7 months ago
I completely agree with you about being pro-backpack for actual bikepacking on mtn bike or hiking trails.
Initially bikepacking was defined as multi-day self supported rides on trails, and multi-day rides on gravel or pavement was just called "bicycle touring". But over the past 5 to 10 years, "bikepacking" has increasingly been redefined to mean gravel biking with luggage (so how is that different from what bicycle touring was back in the 1960s and 70s?). To me it feels almost as bad as how e-biking is being pushed as being real mountain biking.
Bikepacking on actual mtn bike, hiking, horse or game trails is really dammed hard and likely only appeals to the strongest and weirdest 10% (kind of like Red Bull Rampage appeals to lots of mountain bike riders, but less than 0.01% can actually do it).
So does the original definition of bikepacking need a new term to distinguish it from "gravel"? Enduropacking or something? ;-)
Reply
Deniz Merdano
3 years, 7 months ago
Braappacking comes to mind...
Reply
khai
3 years, 7 months ago
E-packing! Bikepacking on an e-bike pulling a little trailer with a genny so you can charge at night!
Reply
Vik Banerjee
3 years, 7 months ago
I've heard of one guy who e-bikepacks with a generator in a trailer so he can recharge!
Reply
Mammal
3 years, 7 months ago
That's extremely sad.
Reply
TristanC
3 years, 7 months ago
I started riding with bikepacking bags last year, but then did a 180 away from fancy bags that are hard to pack and access and went to a rack, panniers, and a drybag. I can carry a ton of unnecessary stuff this way and I find it affects the bike handling less. I especially didn't like how weight on my handlebars felt.
Reply
Dave Tolnai
3 years, 7 months ago
I don't mind the weight on the handlebars. Obviously, there's a limit. I think if you're running a hardtail, racks and panniers make a lot of sense. As does running a hardtail for bikepacking makes a lot of sense, too.
Reply
Sanesh Iyer
3 years, 7 months ago
All my bikepacking involves a Chromag and the most technical trails I can ride (I still don't understand gravel). As a result I prefer the backpack and barbag setup. I always ride with a framebag for tools and such. I've since got my packed volume down a little bit. I'm down to ~35L packed volume with my hammock tent, large tarp, whisperlite, and 3 days of food.
Reply
Deniz Merdano
3 years, 7 months ago
Gravel is the road you take to the actual MTB trails..you can also have after MTB trail beers on said gravel...
I am mostly worried about the amount of food and water I'd have to carry with my bikepacking. I'd practically be towing a bakery behind me..
Reply
Sanesh Iyer
3 years, 7 months ago
Daal (lentils + spices) and oatmeal. Ultralight.
Water is an interesting game. I have a 6L dromedary. Sometimes I strap it full to the outside of my pack. Other times I go lean and fill at a creek. Depends on the trip.
Bikepacking MTB is a tricky game. You are going to be somewhat near to society so refueling is fair and part of the fun on certain trips. Sunshine coast has some great beer. Fanny Bay Oysters is a very rideable distance from some good MTB on the island. Nothing like a day of riding followed by oysters for dinner.
I have yet to ride a gravel road I'm BC that has.me thinking "wow I really wish my bike had skinnier tires."
Reply
taprider
3 years, 7 months ago
Find or make your own route that you hit a town late afternoon, load up with a hot meal and wrap left overs in tinfoil or put in a sealed pot, beers in your bladder (with ice if needed) then climb a trail out of town and camp high and enjoy your beer before sleep. The next day will hopefully be mostly single track along a ridge or on a high plateau, before dropping downhill to the next town at the end of the day and repeat.
Reply
Dave Tolnai
3 years, 7 months ago
I can imagine any European reading this site wondering what the hell we're talking about. "You mean, you can't just ride by trail from one village to the next, stopping at hotels, pubs and restaurants along the way?"
Reply
Cr4w
3 years, 7 months ago
Bikepacking is what happens when your addiction to strapping stuff to your bike goes too far.
Reply
Dave Tolnai
3 years, 7 months ago
Man. I've gone the other way! Bikepacking is inspiring me to strap more stuff to my bike.
Reply
Greg Bly
3 years, 7 months ago
I do plenty of bike packing to explore Vancouver and the gulf islands . I most definitely ride dirt whenever I can. Sometimes semi teck , compared to the Shore, trails. The idea of stuff hanging from my bike plus the extra weight would not inspire me to ride trails.
I use a 60 litre back pack . If I load the back pack properly it feels quite natural except for the extra weight. But that weight is centered on my back . Not an extra five pounds on my handle bars. My bike with extra air in the fork and shock behaves the same as the bike had not changed in weight.
Usually my pack and gear , including camera, weighs about 15 kilos before I factor in water. And I bring a filter. I also frequently bring my DSLR camera gear in a back pack when I ride so I'm used to riding with a heavy pack.
Frame bags to me appear to be fancy bike accessories to give you that bike packing look.
A 60 litre back pack is easy to keep water proof, mud proof. Easy to carry over streams. Much more convenient for pushing bikes up steep terrain.
Bike touring with a credit card ? Drive your bike to your destination , put on those cute looking frame bags and have fun!
Thinking about a multi day grunge fest into the wilderness with your bike and camping gear. Get a good back pack. Packs designed for climbing are best .
Reply
Dave Tolnai
3 years, 7 months ago
This experience has gotten me dramatically re-thinking backpacks. However...I can't see myself heading down the 60L backpack game. Yes, lots of weight on the bike sucks for certain things, but I've been surprised at how little I notice it in other respects. I think there's a good balance somewhere between weight on the body and weight on the bike, though. Glad to hear from your experience that I can probably deal with more weight on my body than I think I can.
Reply
Mammal
3 years, 7 months ago
Yeah, I top out at my 40L bag, but rarely pack it full. I think the most important part is to make sure you don't have much bag sitting behind your head, like the kind with a closing flap on the top with additional huge pocket in that flap. Once you're pointed downward, the can lift slightly and you're knocking yourself in the back of the head and pushing your head forward.
Reply
WeTYC...
3 years, 7 months ago
An older pic of descending LotS after an overnight trail-maintenance session (also rode/pushed up Lots as OtR was snowed in at that point) Sleeping bag is on bar, tarp/sleeping pad on right fork leg, bivvy sack on left. Gear stored vertically on the legs has a much lower moment of inertia and will impact steering less than across the bars. It also has a lower CoG. With this setup, I was almost able to keep pace with the rest of the crew who were handicapped by having their trail tools strapped to their packs.
Reply
taprider
3 years, 7 months ago
+1 for not having a dangle mug
Reply
Sanesh Iyer
3 years, 7 months ago
Some tips:
Reset your suspension for your new weight distribution. 5-10LB overhanging your fork really changes things.
Find a good way to separate wet from dry gear (clothes, sleeping bags, rain jackets, tarps...). I keep wet gear outside bags.
Mudhugger fender has a nice amount of rigidity to prevent bag/tire contact in case of bag slip
There's such a thing as underfilling your bags (if they sag they bounce more)
My packed volume has since come down thanks to a new sleeping bag (3L packed size! WTF!)
Reply
snorris
3 years, 7 months ago
And, if inflating tires a few psi higher to compensate for the additional loaded weight, do it *before reaching trailhead*.
I pumped mine up at the trailhead once and the sealant plugging old holes immediately failed with the higher pressure.
Reply
khai
3 years, 7 months ago
I'd have to double check the timeline but suspect that your Trans AM dreams were heavily influenced by Brandon Semenuk and "Life Behind Bars"...
OK - now on to read the rest of the article.
Reply
Dave Tolnai
3 years, 7 months ago
Naw. 2000-2001. Semenuk wasn't even at "grom with leg stuck in fork" levels until late 00's.
https://www.pinkbike.com/photo/2348654/?s4
Reply
Mammal
3 years, 7 months ago
Major fork in the road here, but I found this after searching for old Hemlock bike park info... 2004 update from Pique Mag on Brandon Semenuk beating the pants off the XC U-15 field at 13 years old. Given all that he's up to these days, it's crazy to think he was kick-ass XC racer.
Reply
cyclotoine
3 years, 7 months ago
I like the drybag strapped to the top tube. My new bike has a really low top tube so I have absurd standover and a large seatmast to I think I can do this pretty readily with some sacks I already have. I also think I'd rather move up to the 40ish litre range or backpack (I also have a first generation ortlieb waterproof 45L backback that I get questions about all the time) and keeping the bike bags smaller. I think I'd choose to bikepack with my fat bike in it's 29+ configuration normally but I'm headed to the chilcotins this month and the program is yet to be determined (i.e. moving camp vs. set-up on camp and base out of it). We still have to get out (any maybe in.. TBD) with all our stuff on us though.
Reply
AndrewR
3 years, 7 months ago
Saddle bag - I am not sure that the extra weight constantly on the dropper shaft is going to help seal longevity at all and it is not something that I would really want to fail mid way through a back country adventure.
Topeak Tetrarack seems like a better option.
Reply
mikeynets
3 years, 7 months ago
In some moments, the handling of my bike while loaded has been better than unloaded. Definitely slower steering, but planted!
You touched on it a bit here and maybe you'll delve deeper in the follow up articles, but securing your handlebar load is key. I prefer as low as possible taking into consideration fork travel and cable routing. I use a Rockgeist Barjam harness which is similar to the blackburn harness you use and it accepts almost any dry bag. But the best part to me is that it uses voille straps that go around the fork crown. Bag is not going anywhere! I don't know if that's unique to the Rockgeist design, but def worth looking into modding this for other bar bags if not already a part of the design.
Reply
Please log in to leave a comment.