
Suntour Durolux R2C2 Teardown
Compared to the competition the Suntour Durolux R2C2 isn’t light. And it isn’t pretty. It doesn’t front any cool proprietary technology and it isn’t backed up by a bunch of sweet trademarked words trying to sex up features that adorn every fork on the market.
If that sounds critical, it’s not. The Durolux R2C2 claims to be what a lot of riders claim to be looking for; a durable, no-nonsense, easily-serviced, affordable, and great performing fork. I’ll examine those promises in this teardown article, with Jeff from Bikeroom, and then in a follow-up ride review.

The beginning and the end: some mild soap in a spray bottle. A huge thanks to Jeff Bryson from Bikeroom for helping out with this teardown. Suntour forks are built on being user serviceable but if you aren’t sure where to start Jeff’s courses are a great resource. Not local to the Shore-to-Sky? Sounds like a great excuse for a riding vacation!
You’ll pay ~$1 (CAD) per gram to make up the weight difference between the Durolux and a Fox 36 Float RC2. If you’re weighing tires in the shop, to be certain that your carbon superbike is lighter than your buddy’s carbon superbike, that will be a problem for you (but then you probably aren’t reading this Suntour fork review).
I’m not usually (ever) one to focus on the riders a company sponsors in terms of what it says about products or development but I think when you look at the stable of Suntour athletes (James Doerfling, Garett Buehler, Ryan Berrecloth – and the rest of Team Knolly – not to mention the first family of Funduro) you could make the claim that their most aggressive single crown fork comes by its extra girth honestly.
When I hold all the components individually it is very obvious that a lot of that extra weight is in the crown steerer assembly (CSU). I’ll happily take some extra weight here if it reduces the all too common creaking that can develop in the stanchion-crown press fit interface of single crown forks.
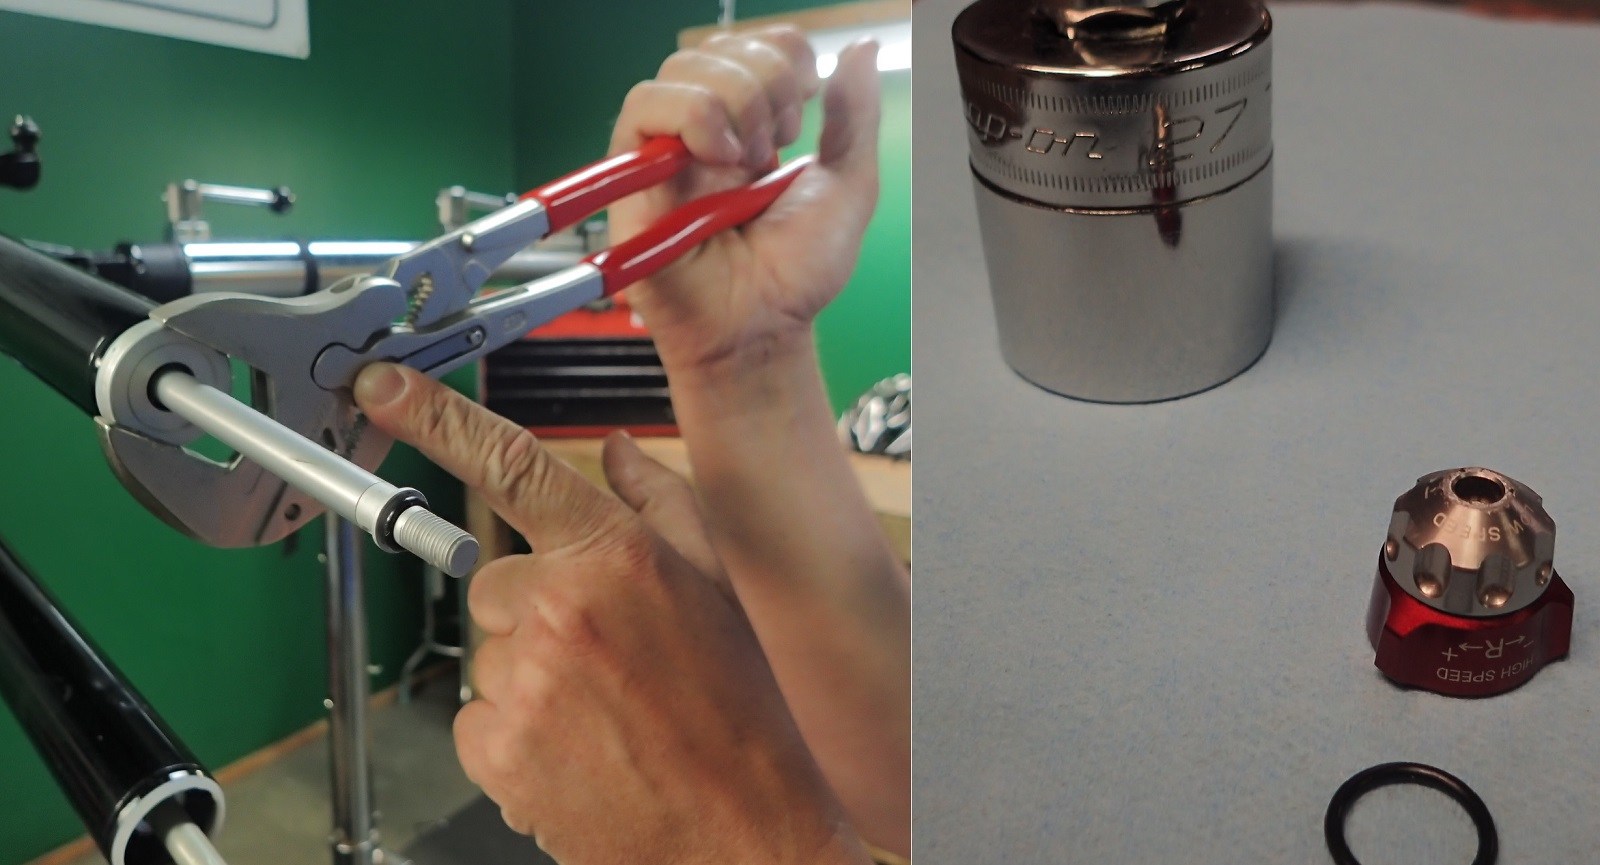
In before Knipex was the tool to own. Jeff points out what is so great about the no-slip locking function of what is certainly not your daddy’s crescent wrench. Suntour uses 27mm sockets for the damper and air side of the Durolux R2C2.
Tools
The only special tool you need for servicing the Durolux R2C2 is a chamferless 27mm socket (needed for both the air and damper side top caps). In this case, your best option is going to be to buy a 27mm socket and make friends with someone who can turn it down for you. Even Abbey Tools doesn’t offer this size.
Jeff, like my friend James at SuspensionWerx who also helps me with teardowns, has been recommending Knipex Plier Wrenches for some time. An awesome product that is getting a lot of press lately, they seriously reduce the number of wrenches you need to own – in a similar promise to crescent wrenches – but lock in place and do not spread open in use the way even the best crescent wrenches do.
Durolux R2C2 Air System

Durolux R2C2 air system. Big negative spring for smooth initial performance. Ridiculously easy travel adjustment. The fork is marketed as a 180mm, 170mm, and 160mm model but it’s really a question of how low you want to go. Slickoleum on the air seals.
The Durolux R2C2 uses a straightforward air system with a one way U-Cup seal on the air piston and a large coil negative spring to make the fork smooth off the top. Adjusting travel is easy via clip-on spacers and this can be done with very limited disassembly.
The fork is marketed as a 180mm, 170mm, and 160mm platform; however, it’s really a question of how low you want to go. There are a number of riders using the previous generation Durolux 26″ forks as 100mm street/dirt forks and if you need the fork to be more progressive the coil negative spring means it’s friendly to adding oil to the air system to reduce volume.
Speaking of air volume: gone is the easily but permanently modified bumper of past performance Suntour forks. The Air system top cap now features two swappable and stack-able volume spacers allowing the owner to easily experiment with the progressiveness of the air system.
Durolux R2C2 Damper
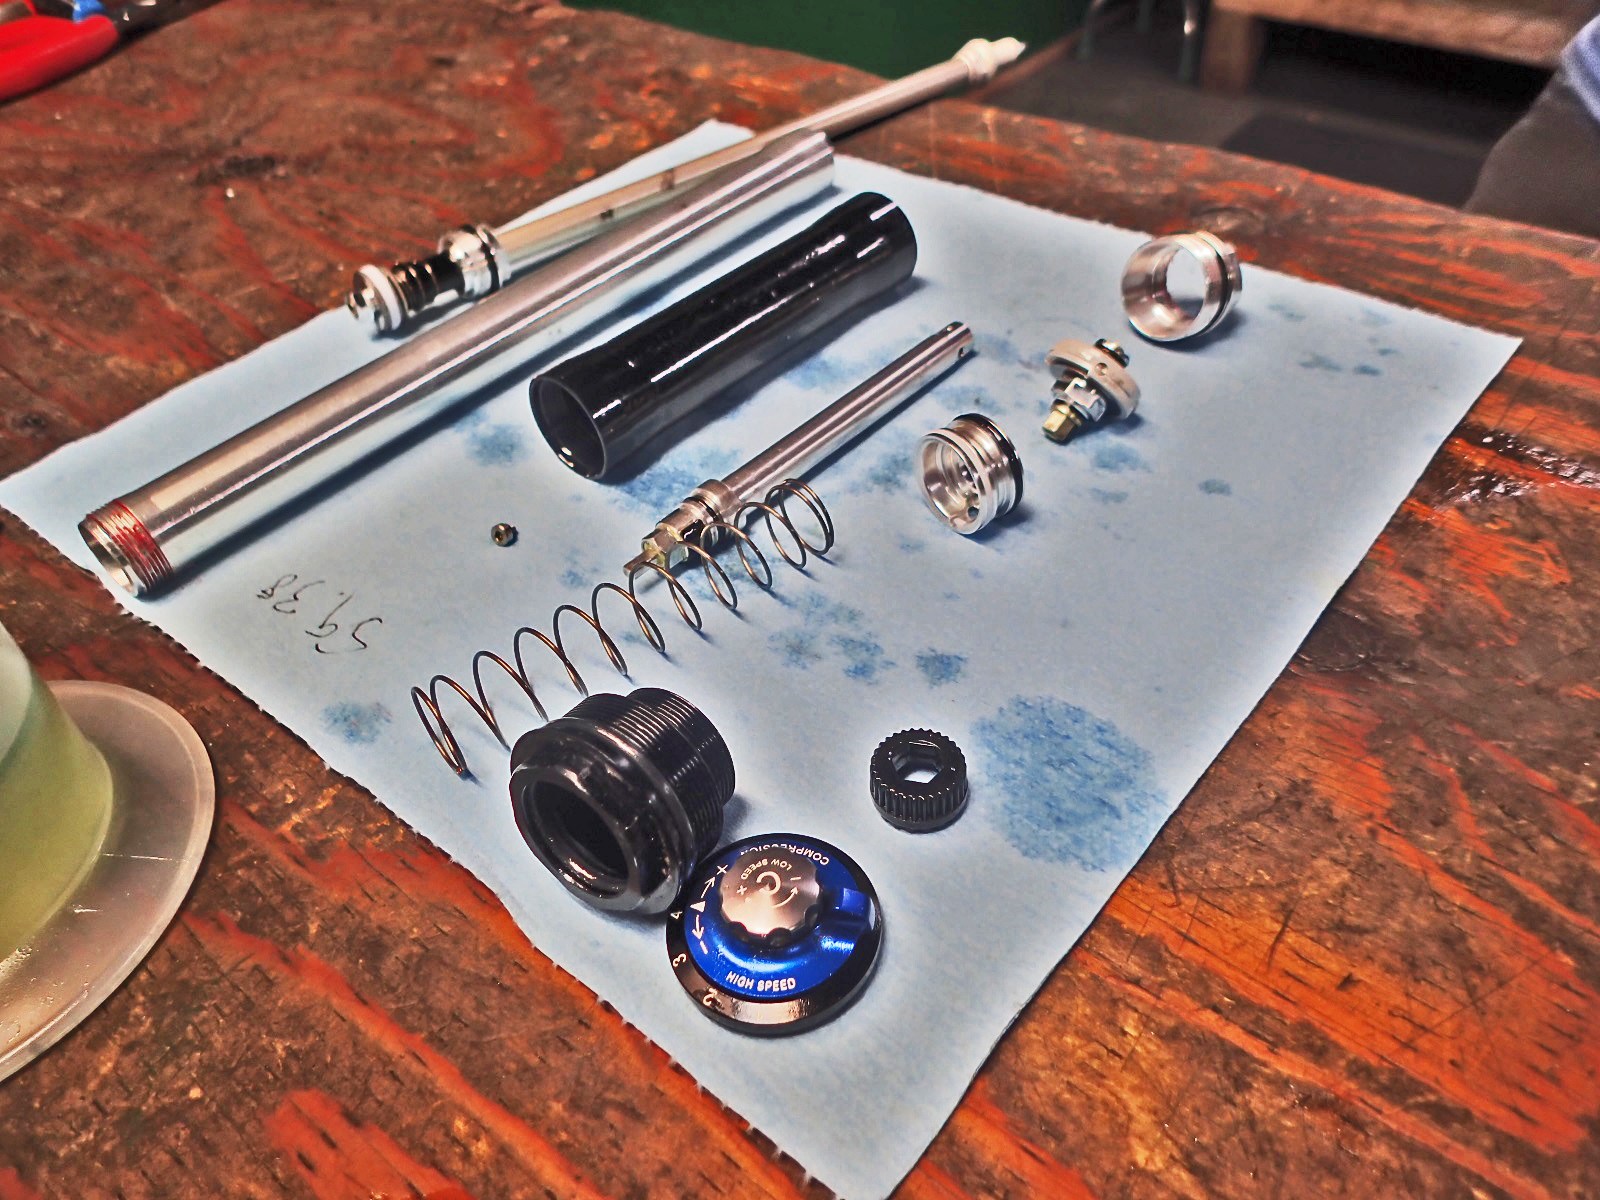
All the bits. The Durolux R2C2 damper features high and low speed compression and high and low speed rebound. Rebound and compression circuits feature spring backed valving.
The most notable difference comparing the new Durolux R2C2 to the past generation fork, other than how damn smooth it feels out of the box, is the huge range of usable adjustment the damper offers. I’m not talking about the number of adjusters – there is a reason no other brands are offering adjustable high speed rebound on forks – but rather how usable I find the range of low speed compression and low speed rebound.
Having spent a lot of time on the first generation Suntour Auron I noticed right away how much quieter the damper is, especially running slower rebound speeds. I’ll talk more about setting up the fork in the future ride review.
Before I get into the bleeding the damper itself I’d like to note that there is a significantly easier way to freshen the oil in the damper than the tear down that Jeff is doing here. Suntour will have a video available in the future showing their QSP (Quick Service Product) method of bleeding the cartridge which can be done by simply removing it from the fork and then opening a bleed screw, pumping out the old oil and slowly filling the damper while cycling it.
In addition to allowing me to show you what’s going on in the new Durolux R2C2 damper, taking the extra time to do the tear down as shown lets you thoroughly clean out the insides of your fork and virtually guarantees no air bubbles will be trapped in the damper post-service.
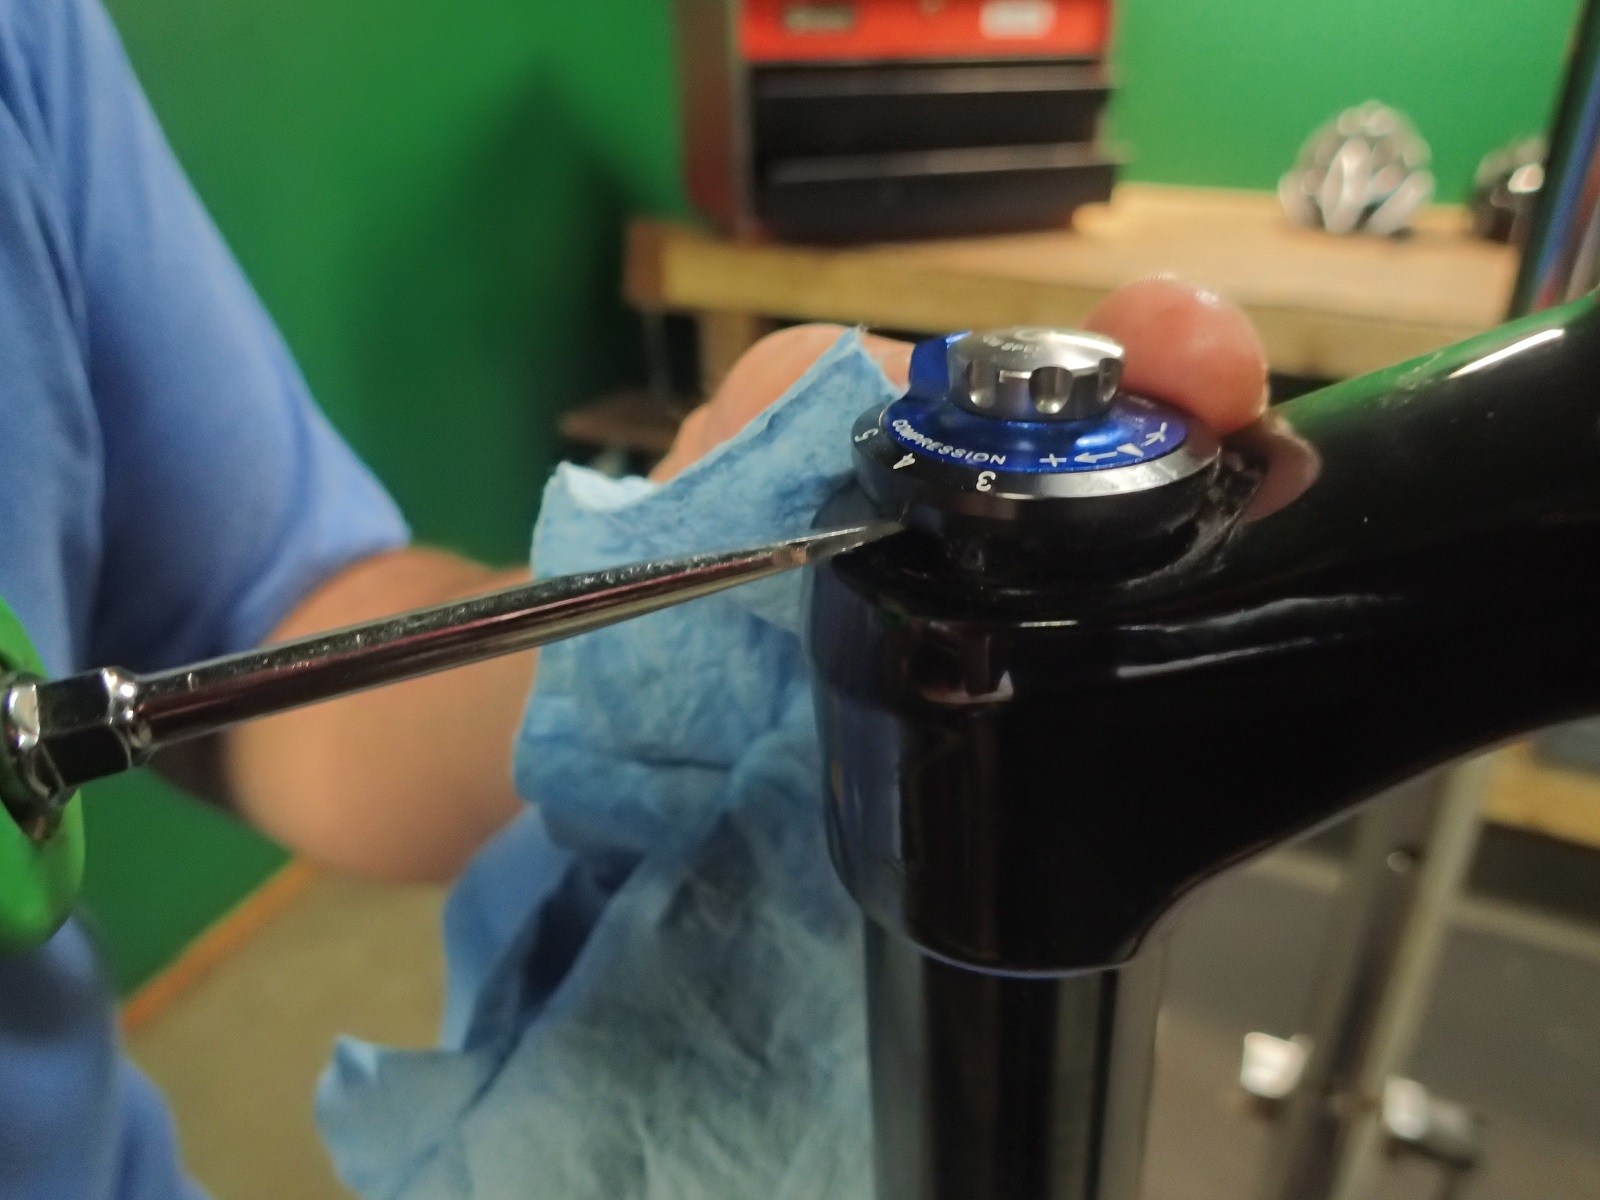
Be. Very. Gentle. Prying up the damper adjusters may actually be the trickiest part of the whole process.
I want to talk about warranty for one second as there is a giant, and in my opinion redundant, sticker on the Durolux R2C2 damper that states “warranty void if opened.” I would think that two things would be obvious here: 1) This is referring to the warranty on the damper cartridge itself and obviously doesn’t negate coverage of manufacturer’s defects regarding, for example, the chassis. 2) If you f**k your damper up taking it apart that’s obviously on you. Seriously. Don’t be that guy (it’s always a guy by the way) demanding a free replacement after your vice-grip the sh*t out of your suspension fork.
And now, the pictures:
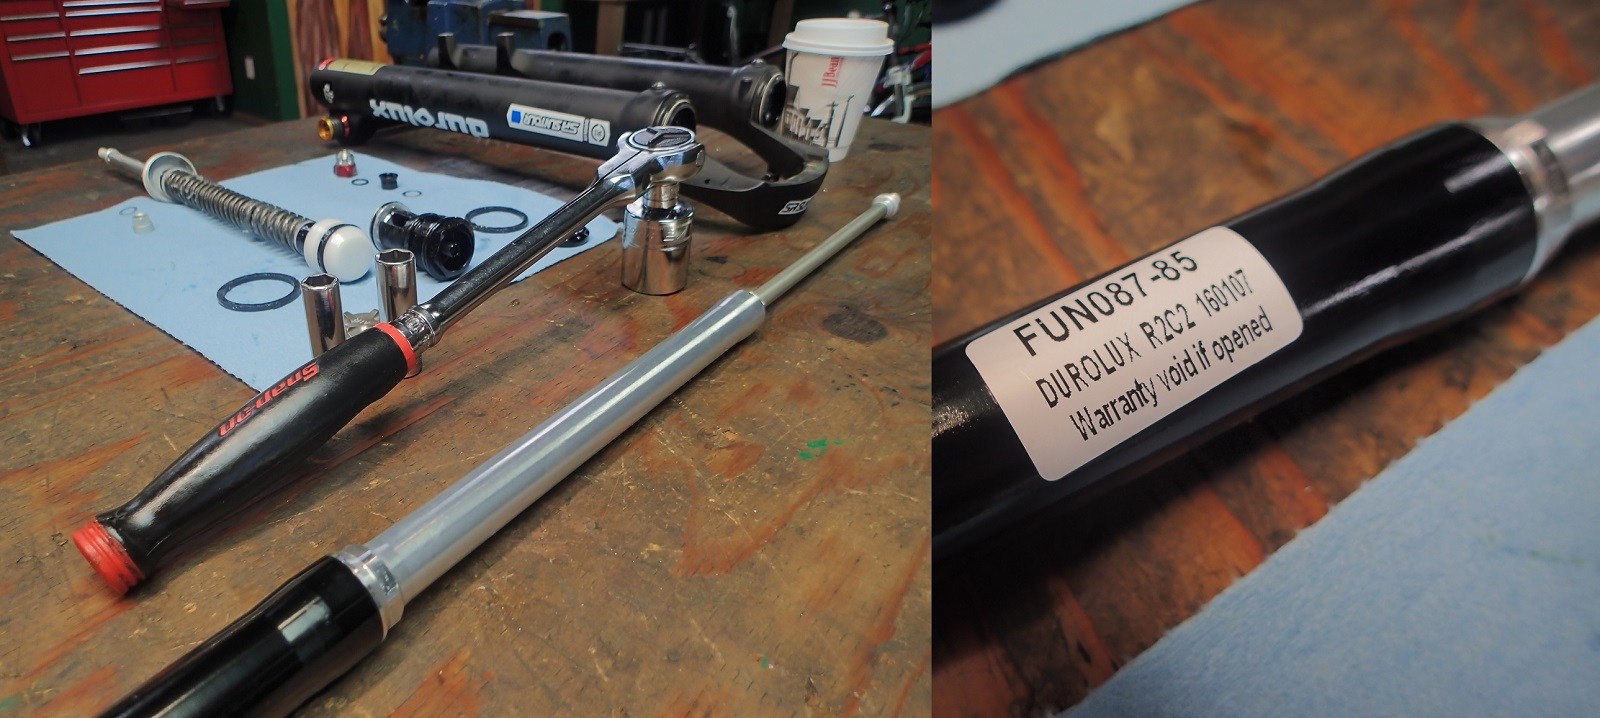
Damper time. This sticker doesn’t mean anything to you because you’re either going to do it right, pay someone to do it right, or pay for a replacement if you f**k it up. Right?
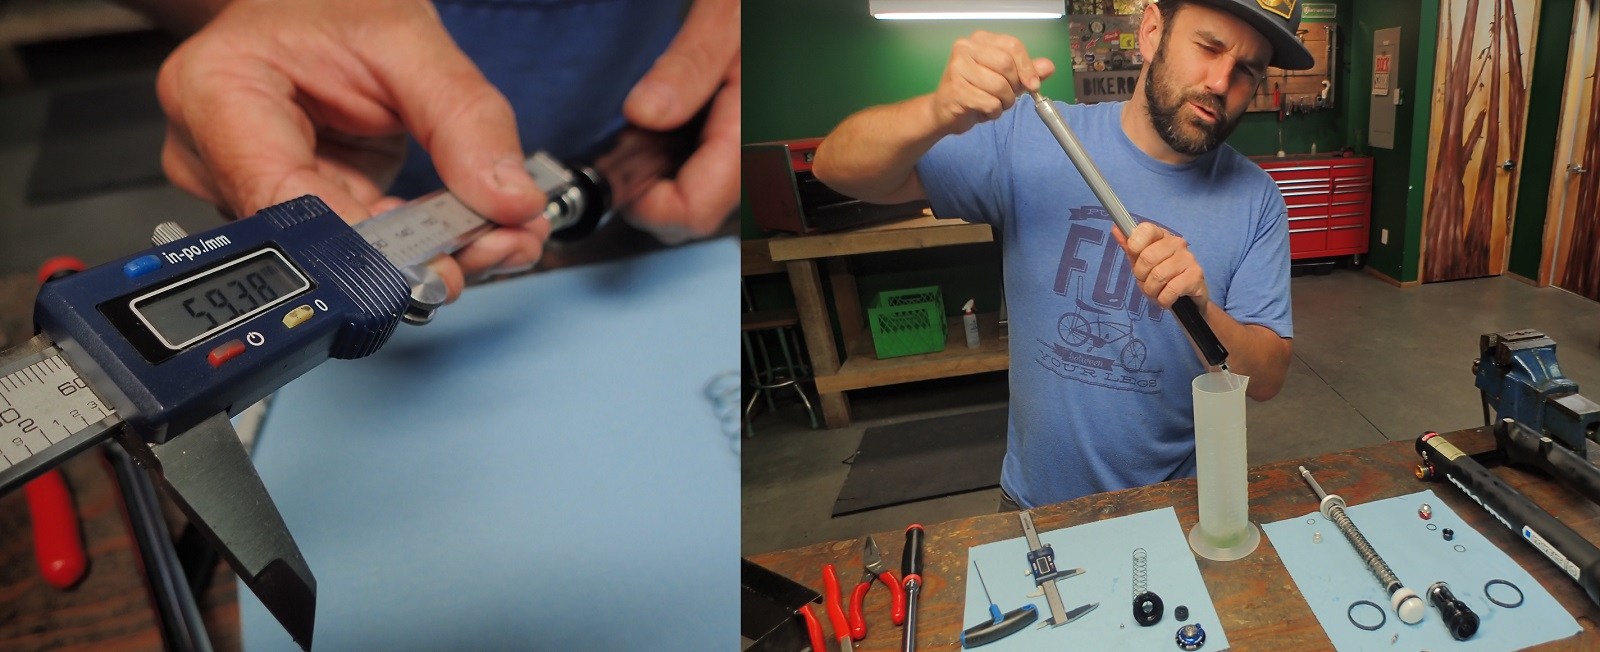
Regardless of the brand it’s important to take measurements of any depths or volumes you may need when you reassemble the fork. Here Jeff is measuring the IFP depth and the stock oil volume – which is not necessary in this particular case – just in case.
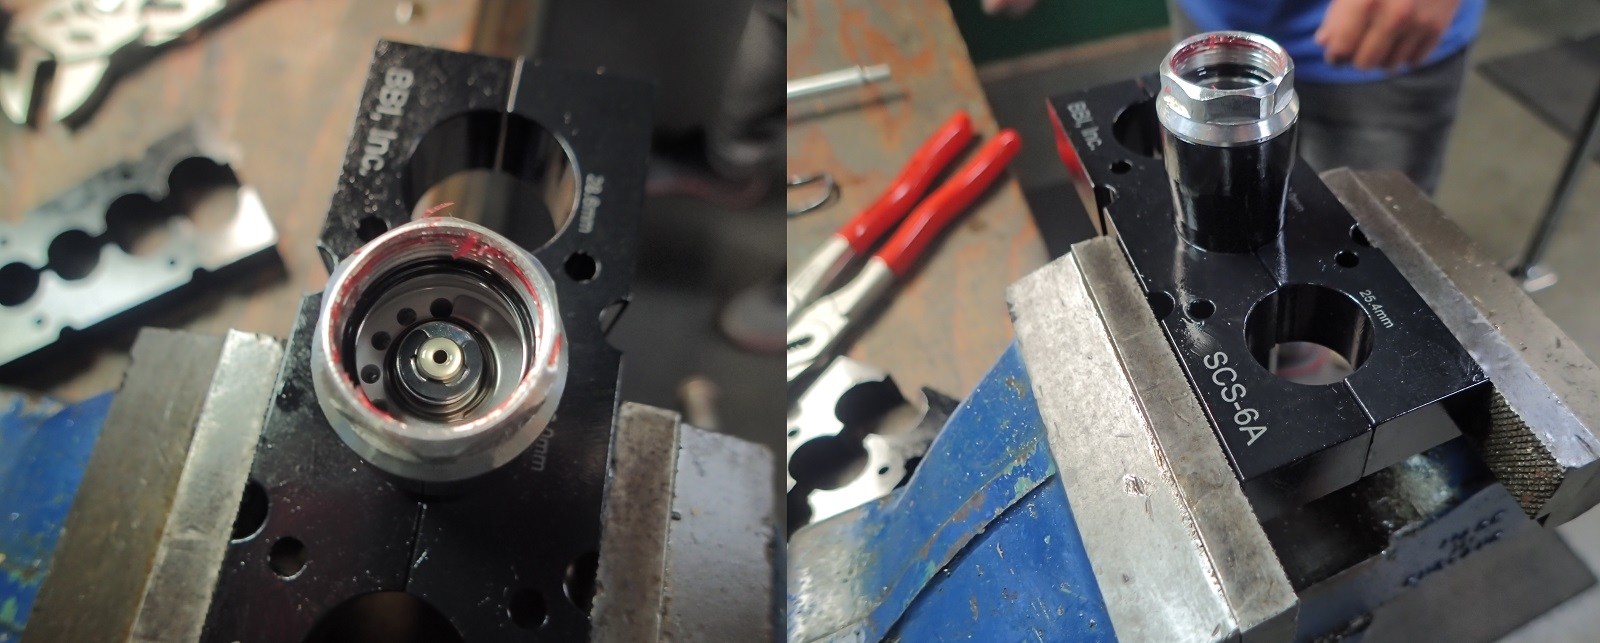
Barnett Bicycle Institute Universal Shaft Clamp Set. $115 USD of must have BBI clamps if you’re working on suspension forks. If you don’t want to go this far into the fork you can remove the bleed nipple and replace the oil without this level of disassembly.
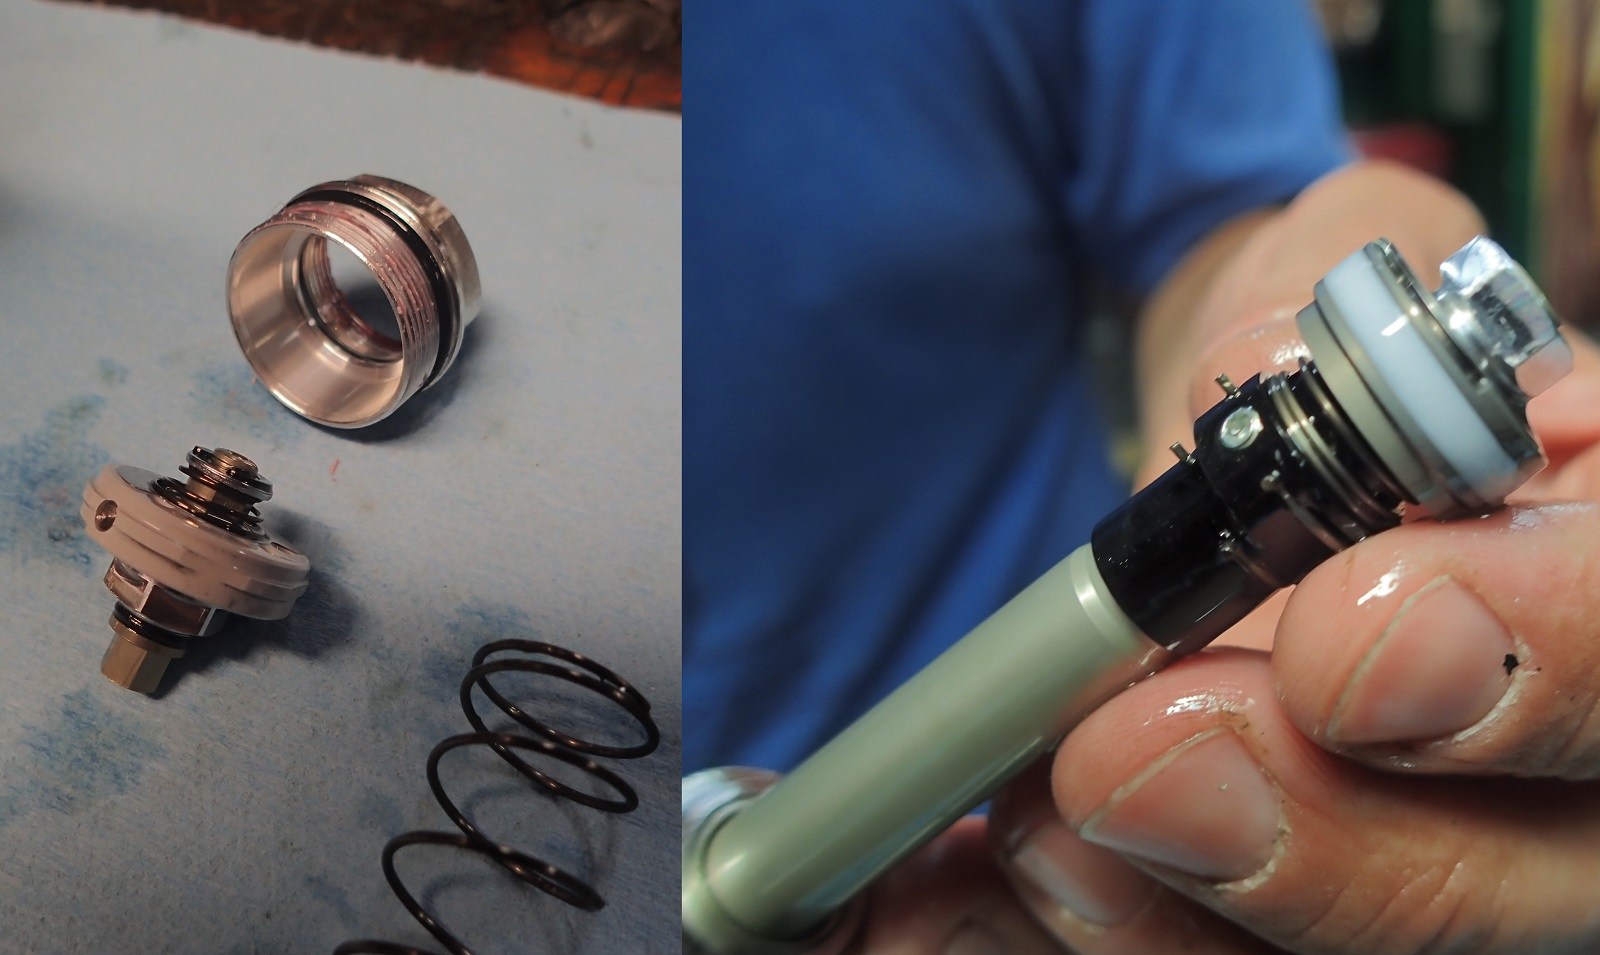
One of the first things Jeff noticed once the damper was apart was the very smooth new seal head Suntour is using in the Durolux R2C2 cartridge. Fox and RockShox have burned a lot of copy lately talking about their – frankly awesome – new low friction damper seal heads which are, in reality, very worthy upgrades to their past FIT and Charger forks. Suntour is sporting a similarly friction reduced sliding system.
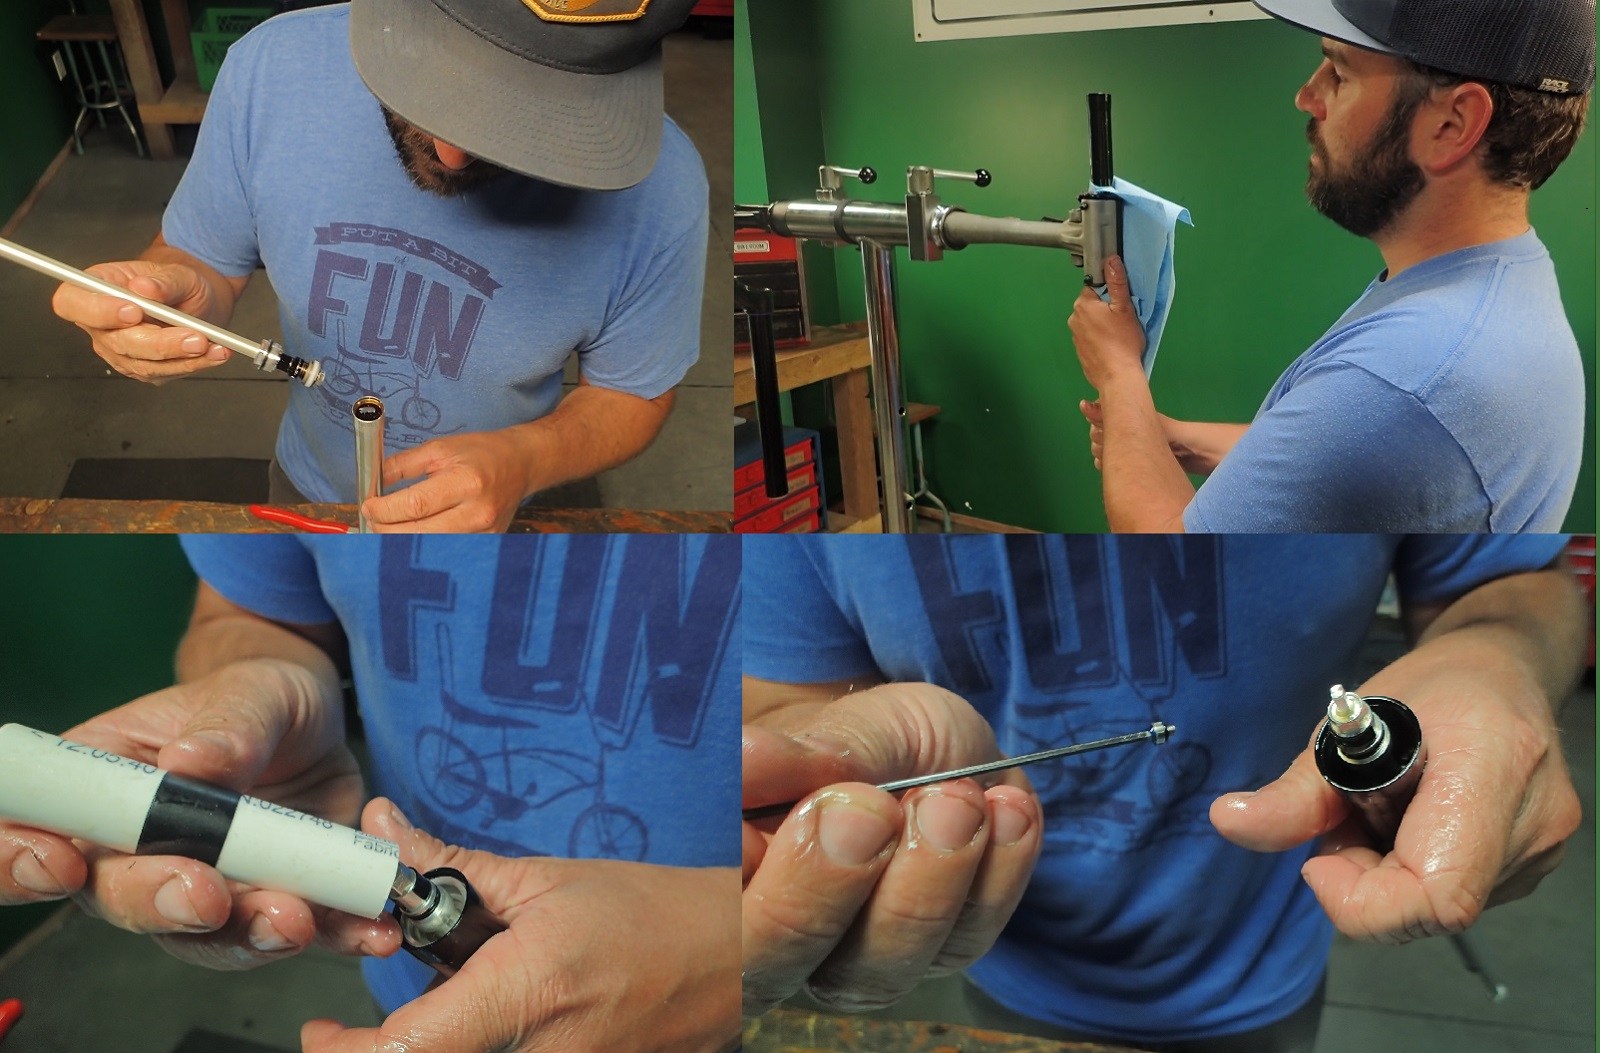
The major advantages of fully disassembling the damper, versus using the easy access bleed port, are ensuring everything is nice and clean inside and minimizing the amount of air in the damper. Here Jeff fills the damper and then inserts the damper the damper shaft (there will be some spillage).
Then he cycles the damper. He’ll actually leave it oriented vertically and go back to rebuilding the rest of the fork – coming back periodically to cycle the damper shaft – in order to allow any air bubbles time to rise up to the top. Once he’s satisfied that all the air has been purged he uses his custom made bullet tool (PVC pipe) to reset the internal floating piston (IFP) depth, re-insert the bleed screw, and then pour out any excess oil that may have been purged when the IFP was pushed down.
It’s a great idea to install the air system (with a bit of pressure) and the damper (with the compression turned up) to help guide the lowers on. If you’re ever had a truly frustrating experience sliding fork lowers on its obvious someone at Suntour has as well: the tapered ends of the stanchions make it a breeze to get everything lined up.
Since this fork is using a coil negative spring, Jeff adds some heavy oil (Fox Float Fluid or RockShox RedRum both work great) for lubrication. A few drops – about the size of a piece of small change if you dripped them on your work bench – is perfect. Suntour’s forks are technically lubed by grease (Slickoleum) but most riders find they feel a lot smoother for longer with a bit of oil in the lowers. Jeff recommends 10cc of full synthetic 0w30 per side. I’ve personally also had great experiences with Fox 20W Gold in the lowers of my Auron.

“A dime” of heavy oil in the air system for lubrication, replace valve core, tighten down the tops caps, add some air, slide on the lowers, add 10cc of 0W30 to each side, tighten down the foot nuts, and ride!
Spray it all down with some mild soapy water solution, mount it up, and it’s time for me to get back on the trail. Check back in a few weeks for a ride review.
If only the fork was as purdy as Jeff? Does the brand name matter to you?





Comments
Tristan P
8 years, 6 months ago
Any update on a review yet Andrew?
Reply
DrewM
8 years, 6 months ago
Hi Tristan,
Apologies for the delayed response; I didn't get a notice of your comment.
I've enough hours on the fork I've started to write the review. Should be up around the end of the month.
Thanks for reading!
AM
Reply
John Canfield
8 years, 8 months ago
Knipex wrenches. Zee Germans make 'em, and they are worth every damn penny.
Reply
Nopow
8 years, 9 months ago
Plier Wrench really? ? ?
Reply
mevp
8 years, 9 months ago
I want to know more about those pliers!
Reply
Rachid Nayel
8 years, 9 months ago
It's funny that Andrew's name is at the top of the article but Jeff is doing all of the work.
Great write up guys, well done.
Reply
DrewM
8 years, 9 months ago
I know right?!
Now if I can just get Old-Man-Pete Morin and Chris Dekerf to start crediting all their work to me as well I'll be a great mechanic, a prolific trail building icon, and a legendary Vancouver frame builder (Drewkerf Cycles).
Reply
Takáts András
8 years, 9 months ago
Motorex/Manitou PrepM grease and Motorex Supergliss lube is good too?
Reply
DrewM
8 years, 9 months ago
Absolutely.
Reply
Jakub Miros
6 years, 11 months ago
This comment has been removed.
Please log in to leave a comment.