
The Bicycle Wheel
Jeff Bryson from the Bike Room is back with another tech piece, this time disassembling bicycle wheel building. Check out his last piece, Teaching the Principle, which has a look at the similarities between brake calipers no matter what the age…
“The bicycle wheel is a remarkable piece of engineering. A wheel may weigh well under 1 kilo yet is capable of carrying bike and rider thousands of miles, with little maintenance, and can be built by a competent mechanic from its basic components using simple hand tools in less than one hour.
Wire spoked wheels are a mature technology, well over one hundred years old. In the first part of the 20 the century wire spoked wheels were used on the fastest cars and motorcycles and remained common on performance road cars into the 1960’s and longer for motorcycles. Therefore spoked wheels are well understood; every conceivable spoke pattern has been tried and tested to destruction. Advances in material science has led to significant improvement in bicycle wheel properties. That is wheels can be made lighter, much more aerodynamic and yet still be adequately durable. However the basic principles which hold together a deep section 16 radial spoke carbon rim wheel, are the same as the 36 spoke 3 cross box section rim of fifty or more years ago.”
– Andy Wardman, Lynn Valley Bikes, North Vancouver, BC
I’ve been building wheels for almost 20 years; Ya! I can build a motorcycle wheel. Opening up the Bikeroom next to a motorcycle shop I’ve been asked to build a couple of wheels. Moto Concept is known for their service, I am glad they trust me to be a part of that. They gave me a dented up front and a rear wheel, two rims and two boxes of spokes. Before I walked away I quizzed them, “oil, grease or spoke prep?…tension?”. All they said was “Ya”.

easterndirt.com has some pretty sexy tech articles. They believe all service should be done by the bike owner.
After researching motorcycle wheel building on the internet I learned that it’s pretty similar to the bicycle wheel. 3 Cross, 4 sets, with different length spokes on the rear and always loosen the spokes before removing them because you can damage the hub.

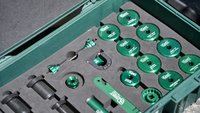
Before starting I always like to have everything out in front of me. Always making sure the parts are compatible, count spokes, spoke holes and number of crosses.

I need to detension the old wheel before I can remove the old spokes. To make it easier I always lube the nipples first. Spit works great in a pinch.

If you don’t make sure the spokes are loose before cutting, you can damage the hub. As you cut the spokes from one side of the wheel all the tension gets overloaded to the opposite side of the wheel. This overloading of the tension can damage the spoke seat in the hub.
Before building I always like to get my work area set up for the build making sure all parts are clean, spokes are prepped and everything is laid out in front of me. The wheel I am building is a straight pull wheel so the spokes can only go in the hub one way. If you take your time and set up, take pictures before both mentally and digitally, breath, and start slow; anybody can build a wheel from start to finish. There are lots of steps to building a wheel; I always tell people to start with small steps and fine adjustments until you understand the Art. A wise man told me once to “get good then you get fast”.

I always try to have my bench clean and only the parts and tools I am using out. This keeps my mind focused on the task at hand.

This Motorcycle rim has only one specific way the rim can be laced. Spoke holes point forward, back, left and right where on a bicycle rim they usually only point left and right.

Building a straight pull spoke bicycle wheel there is only one way you can put the spokes in.

When building a straight pull wheel I always put all the spokes in the hub first, and then line up where I want the valve hole. Making sure I put the spokes coming from the right side of the hub to the right side of the rim and same for the left side.
Note: Some mechanics get really specific on where the valve hole, rim stickers and hub logo line up. Me, I just ride it!
Once you have all the spokes in the rim and nipples threaded on a couple of threads you have to start bringing her up to tension. I always do this evenly, a couple of threads or a couple turns of the nipples at a time. As I do this, some spokes will seem too tight and some will seem too lose. As long as you bring the wheel up to tension evenly the wheel will eventually come to terms with being straight, even though it wants to sway from side to side. In the eye of small adjustments the wheel will come straight and all the spokes will evenly tension.

Bring her up to tension evenly. Small increments; 4 threads showing to 2 threads showing all the way to no threads showing.

I love my late ’70s Snap On tool chest, got it from my Uncle when I turned 16.

All the spokes at 0 threads showing.
Once my wheel starts getting up to tension I find it easy to get ahead of myself truing and make too big of adjustments at one time. It’s hard to turn a spoke only a quarter of a turn when it’s out of true by so much. I have to remember that when I make an adjustment on one side of the wheel it affects the other. Always small adjustments.

My true tolerance is 0.5 of a Millimeter. This sticker shows Rocky Mountain Bikes wheel truing tolerance. If their wheel tolerance is tighter than a RCH, just think of what their engineering department is doing!

Always small adjustments. Tightening a spoke on the right side of the wheel will put the rim to the right, same for the left. I always go back and 4th working with 4-6 spokes on a side before moving to the other side.

Tightening a spoke will pull it closer to the hub. When you tighten one spoke pulling the rim closer, it also pulls the rim to the left or right. You always have to counter this action by tightening the spokes on either side by half the amount.
Taking my time, actually, even before that; making sure I have the time. If I get frustrated I walk away and come back 10 minutes later. When I first started building wheels it was the better part of a day. Now I can build a wheel in less than 30 minutes. The first Motorcycle wheel took me lacing it 4 times before I noticed I was putting the short spokes in the wrong hub flange. But now I know for the next time and every time after that.
“Anyone who has never made a mistake, has never tried anything new.” – Albert Einstein
I love working on my bike as much as I love riding my bike. I love trying new ways of doing things and seeing how it performs or lasts out in the field. It’s hard to always be finding time to hang out and maintain my bike. A lot of the time when I am riding her, I know deep down our relationship needs some personal time (just me and my bike). Over the years we have now developed a great give and take relationship. At the end of the day, the more love I give off the bike the more love I get on the bike.

I love my bike. I wonder if Sam Hill isn’t riding Specialized because he heard the Clan wasn’t riding Specialized anymore.
This article is brought to you by the Bikeroom, a Bicycle Mechanic Training Facility for everyone located right here on the North Shore. Visit us at bikeroom.ca or on facebook.
Are you a seasoned wheel builder or do you leave it to the pros? Any questions for Bryson? Chime in below…


Comments
Jeff at the Bikeroom
11 years, 3 months ago
Hey
I like the wheels. I rebuilt them to get some spoke prep on the spoke threads. They are basic workhorse wheels that will last a long time.
When you get the bike, sign up for a wheel building course and rebuild them with some spoke prep;)
Jeff
Reply
barnz0rz
11 years, 3 months ago
hey jeff, how are you finding those straight pull wheels strength wise? I have an Altitude coming and I've been considering a wheel upgrade/swap once I get it
Reply
Dirk
11 years, 3 months ago
Great advice. I've only built wheels for the road so far and I've just done them dry. Next time I will use spoke prep.
Reply
Jeff at the Bikeroom
11 years, 3 months ago
Hey Dirk
Oil, Grease and Spoke Prep all help the wheel come up to tension without the super loud creaking of the nipple or twisting of the spoke.
All will help with corrosion of the spokes threads, oil will wash off the easiest while grease stays put a bit longer. Spoke prep is good for a long time and also helps keep the spokes tight. It acts like a loctite.
Before I moved to the Shore I always use oil. Coming from the prairies this is all you needed. The first wheel I build for myself once moving to the Shore detention-ed easily on the first ride. Since then I always use spoke prep.
Reply
Dirk
11 years, 3 months ago
Hey Jeff.
You mention oil, grease and spoke prep. Could you give a brief rundown on what you usually use and what the effects of each are?
Thanks.
Reply
Please log in to leave a comment.