Teardown and Service
Shimano Derailleur Clutch Service
Every choice we make on our bikes involves balancing pros and cons. Something like durability often comes at the cost of a few extra grams or a few extra dollars, and some higher-priced items require more maintenance to keep them running as intended. When it comes to drivetrains, both SRAM and Shimano systems have their benefits and drawbacks, leaving us to pick one that best suits our preferences.
Shimano provides some great value with their 12-speed transmissions, particularly when you dig into their Deore (M6100) or SLX (M7100) options. Saving money while still getting great performance is something riders can’t argue with. However, something that’s likely to cause more debate is Shimano derailleurs, specifically, the clutch, are serviceable. Some of you may find this an advantage but for riders not used to servicing a rear derailleur, it’s a head-scratcher and might be enough to cause you to stick with a SRAM equivalent. You can't service a clutch from big red.
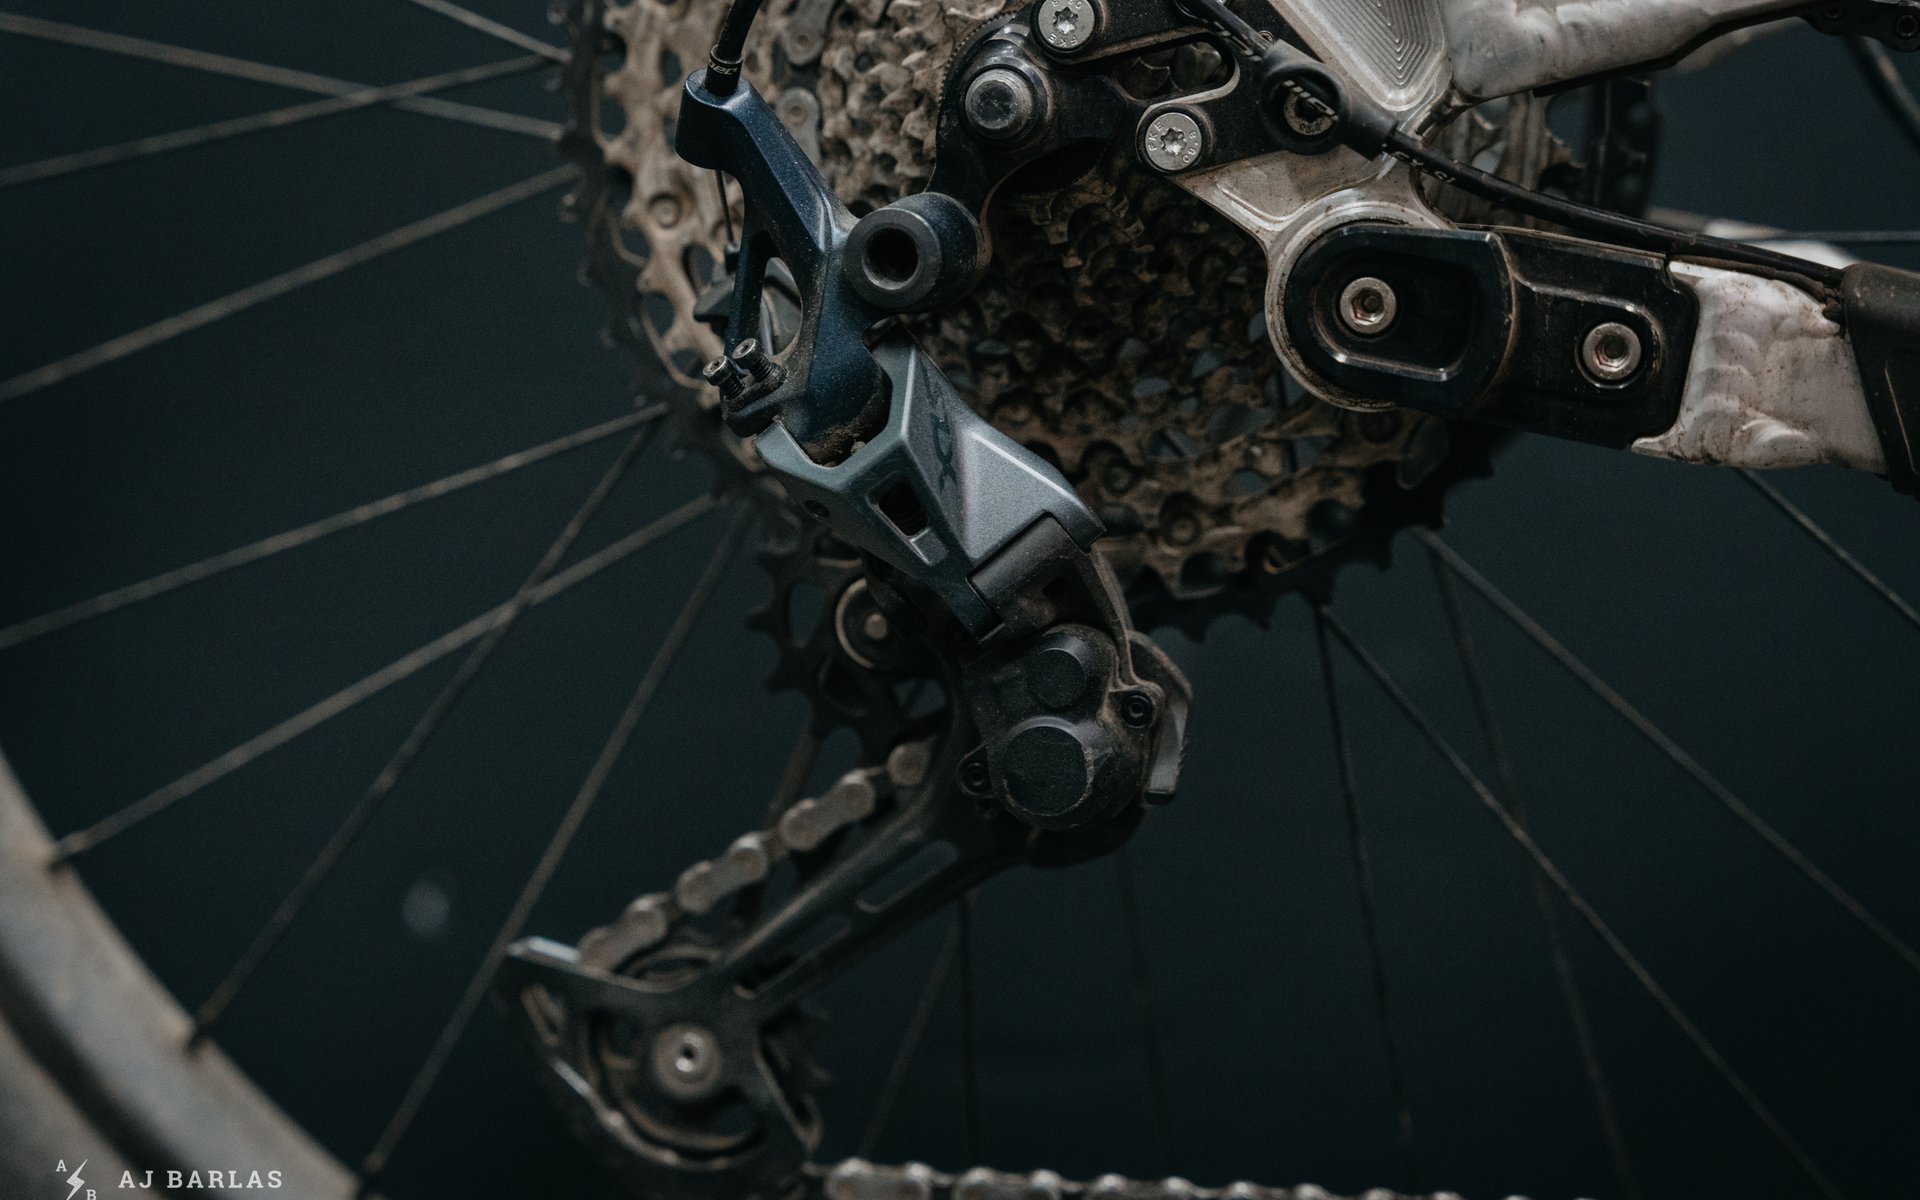
Recently, I found my Shimano shifter sticky, particularly when moving up the cassette into an easier gear, and my shifting was acting foolishly in either direction. The cable hadn't been replaced since the drivetrain was mounted so I replaced the inner and outer, but the problem persisted. I checked the chain and hanger only to find no issues but while doing so, I noticed the shifting was great when the clutch was off, only to become so-so when it was switched on again.
With help from the Shimano Rear Derailleur Manual, I performed a more involved service than I was previously aware of. I've worked on the clutch mechanism in the past, but never knew the axle that it sat on required further attention from time to time. The back of the ‘plate axle’ that the clutch sits on is susceptible to moisture from a small hole in the back of the outboard lower cage. I assumed that after autumn and a solid span of the winter, water ingress had started to cause issues with this piece, causing the shifting issues I was experiencing.
So it was time to pull it apart and give the ol' girl a freshen up. I thought it may be helpful to share the process with riders who already have Shimano derailleurs or those still planning to make one their next. It’s a relatively easy job to do but there are a few crucial steps that may cause issues if you aren't careful.
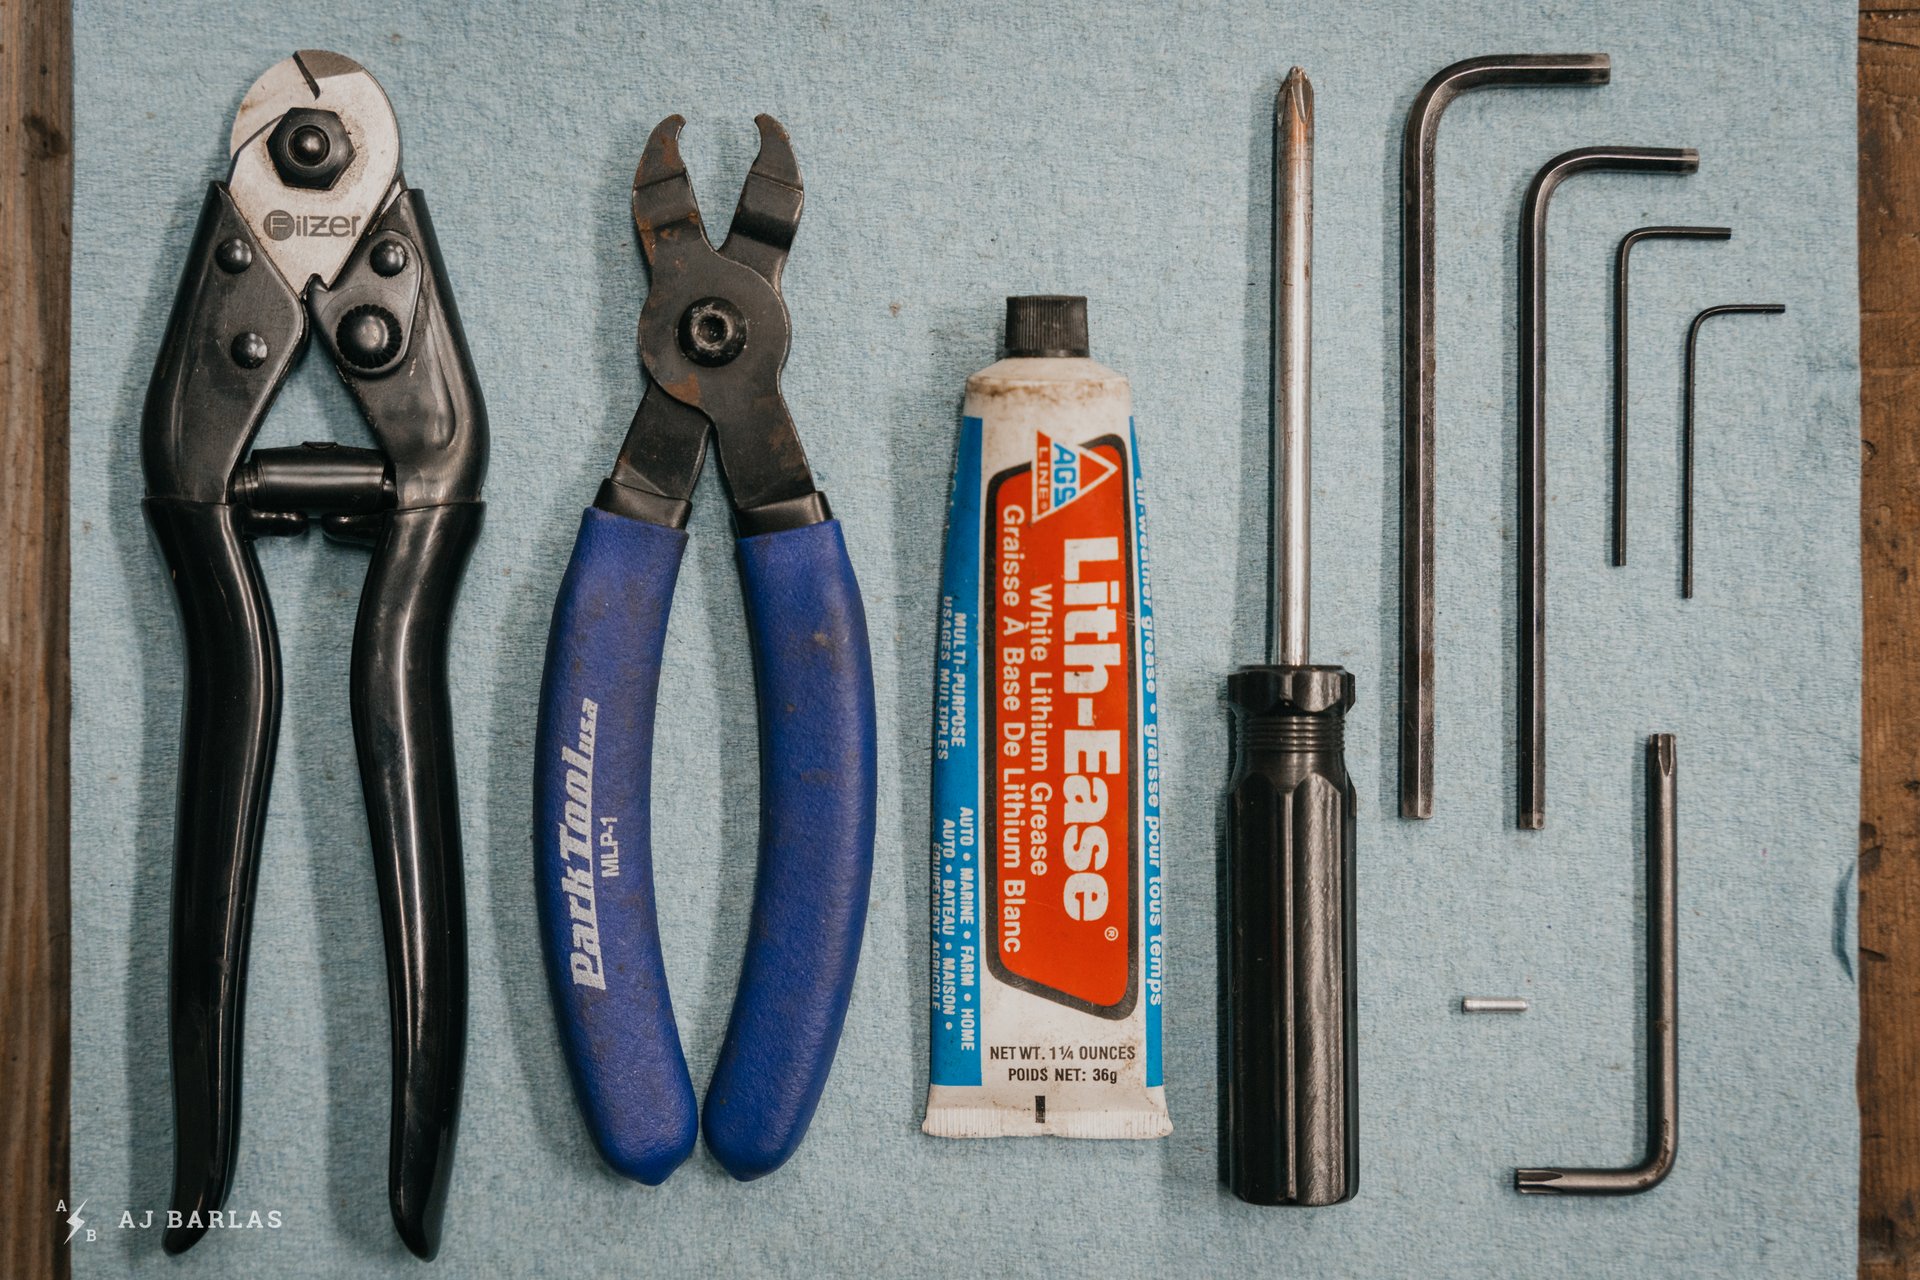
Shimano lists the tools necessary for derailleur maintenance as; 2mm, 3mm, 4mm, and 5mm hex keys, Phillips Head Screwdriver, T27, and a set of (their) cable cutters. I added the lithium-based grease, which is needed for the back of the plate axle, and the quick-link breaker (the derailleur needs to be removed from the bike).

These are the tools I ended up using to perform this service (minus the grease). I didn't service the jockey wheels (they'd been done recently and spun fine). 2mm, 4mm, and 5mm hex keys, Phillips Head screwdriver, flat head screwdriver, a pick, T27, a torque wrench and quick-link breaker.
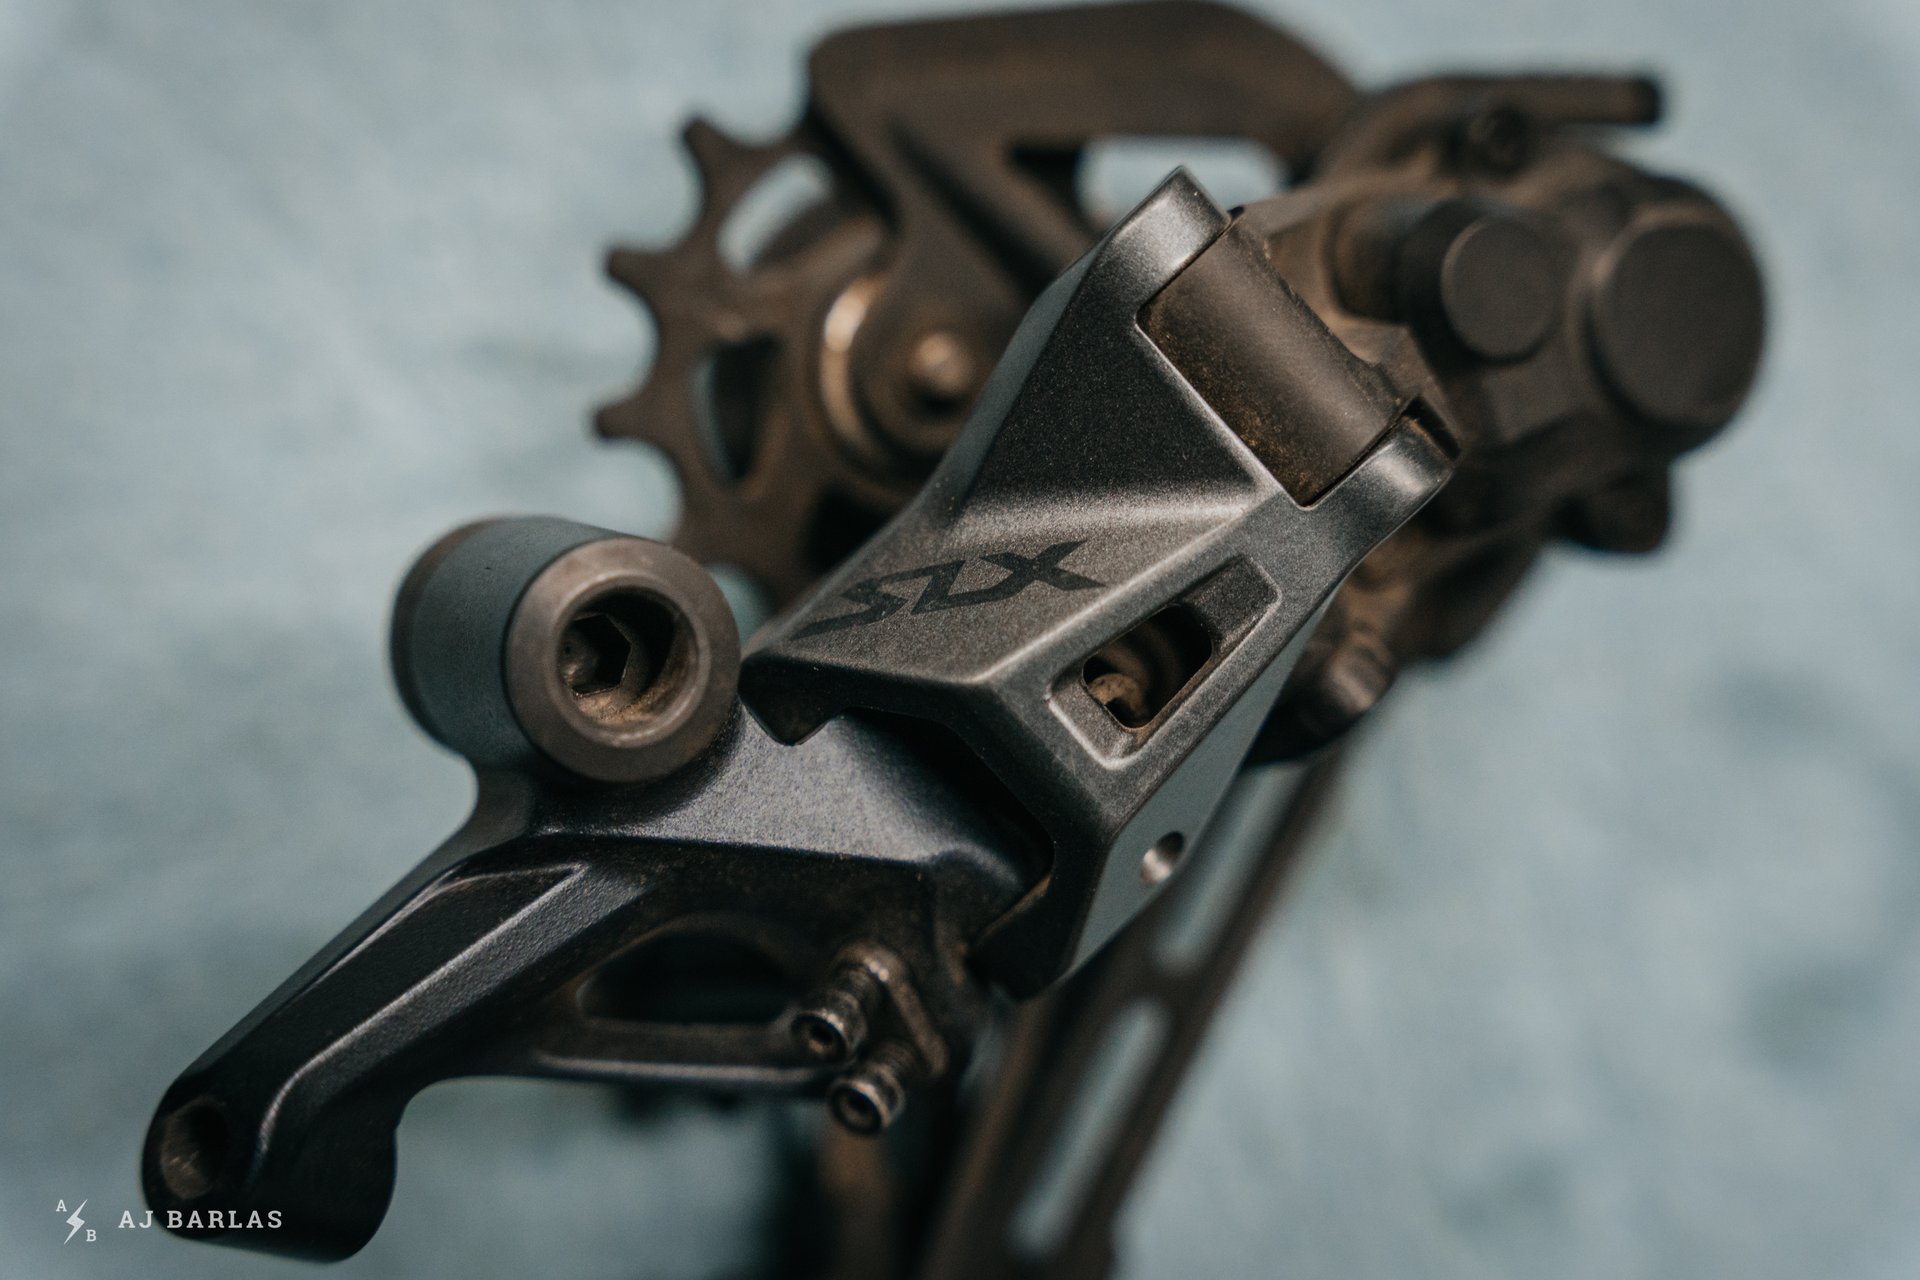
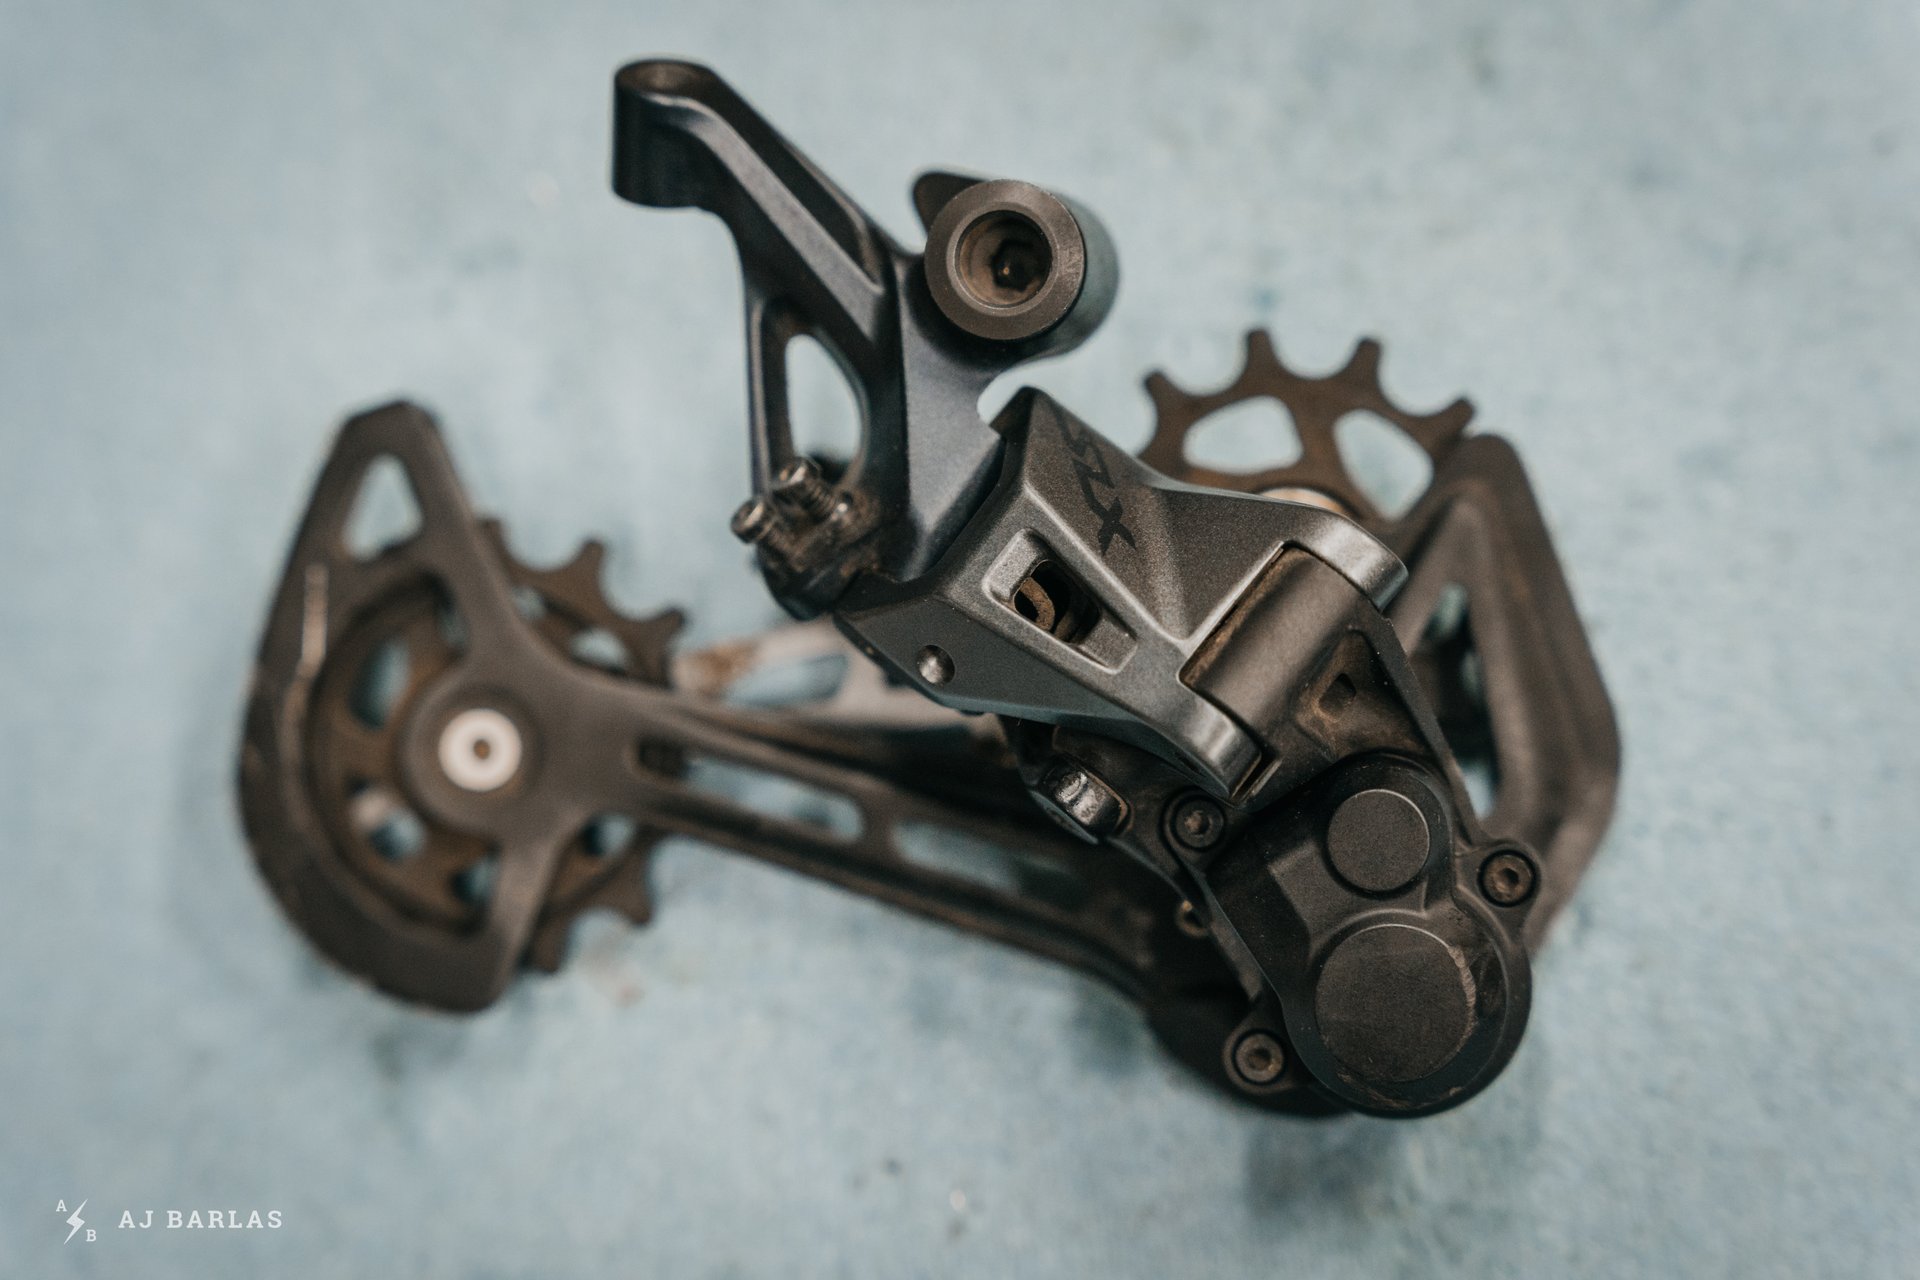
The derailleur serviced here is the 12-speed SLX I reviewed during the 2020 summer. A difference when it comes to the clutch mechanism is the lack of external adjustment for the SLX. I assume that it's the same with Deore as well. Note: Using the 5mm hex key, remove the derailleur from your bike before moving on with the procedure.
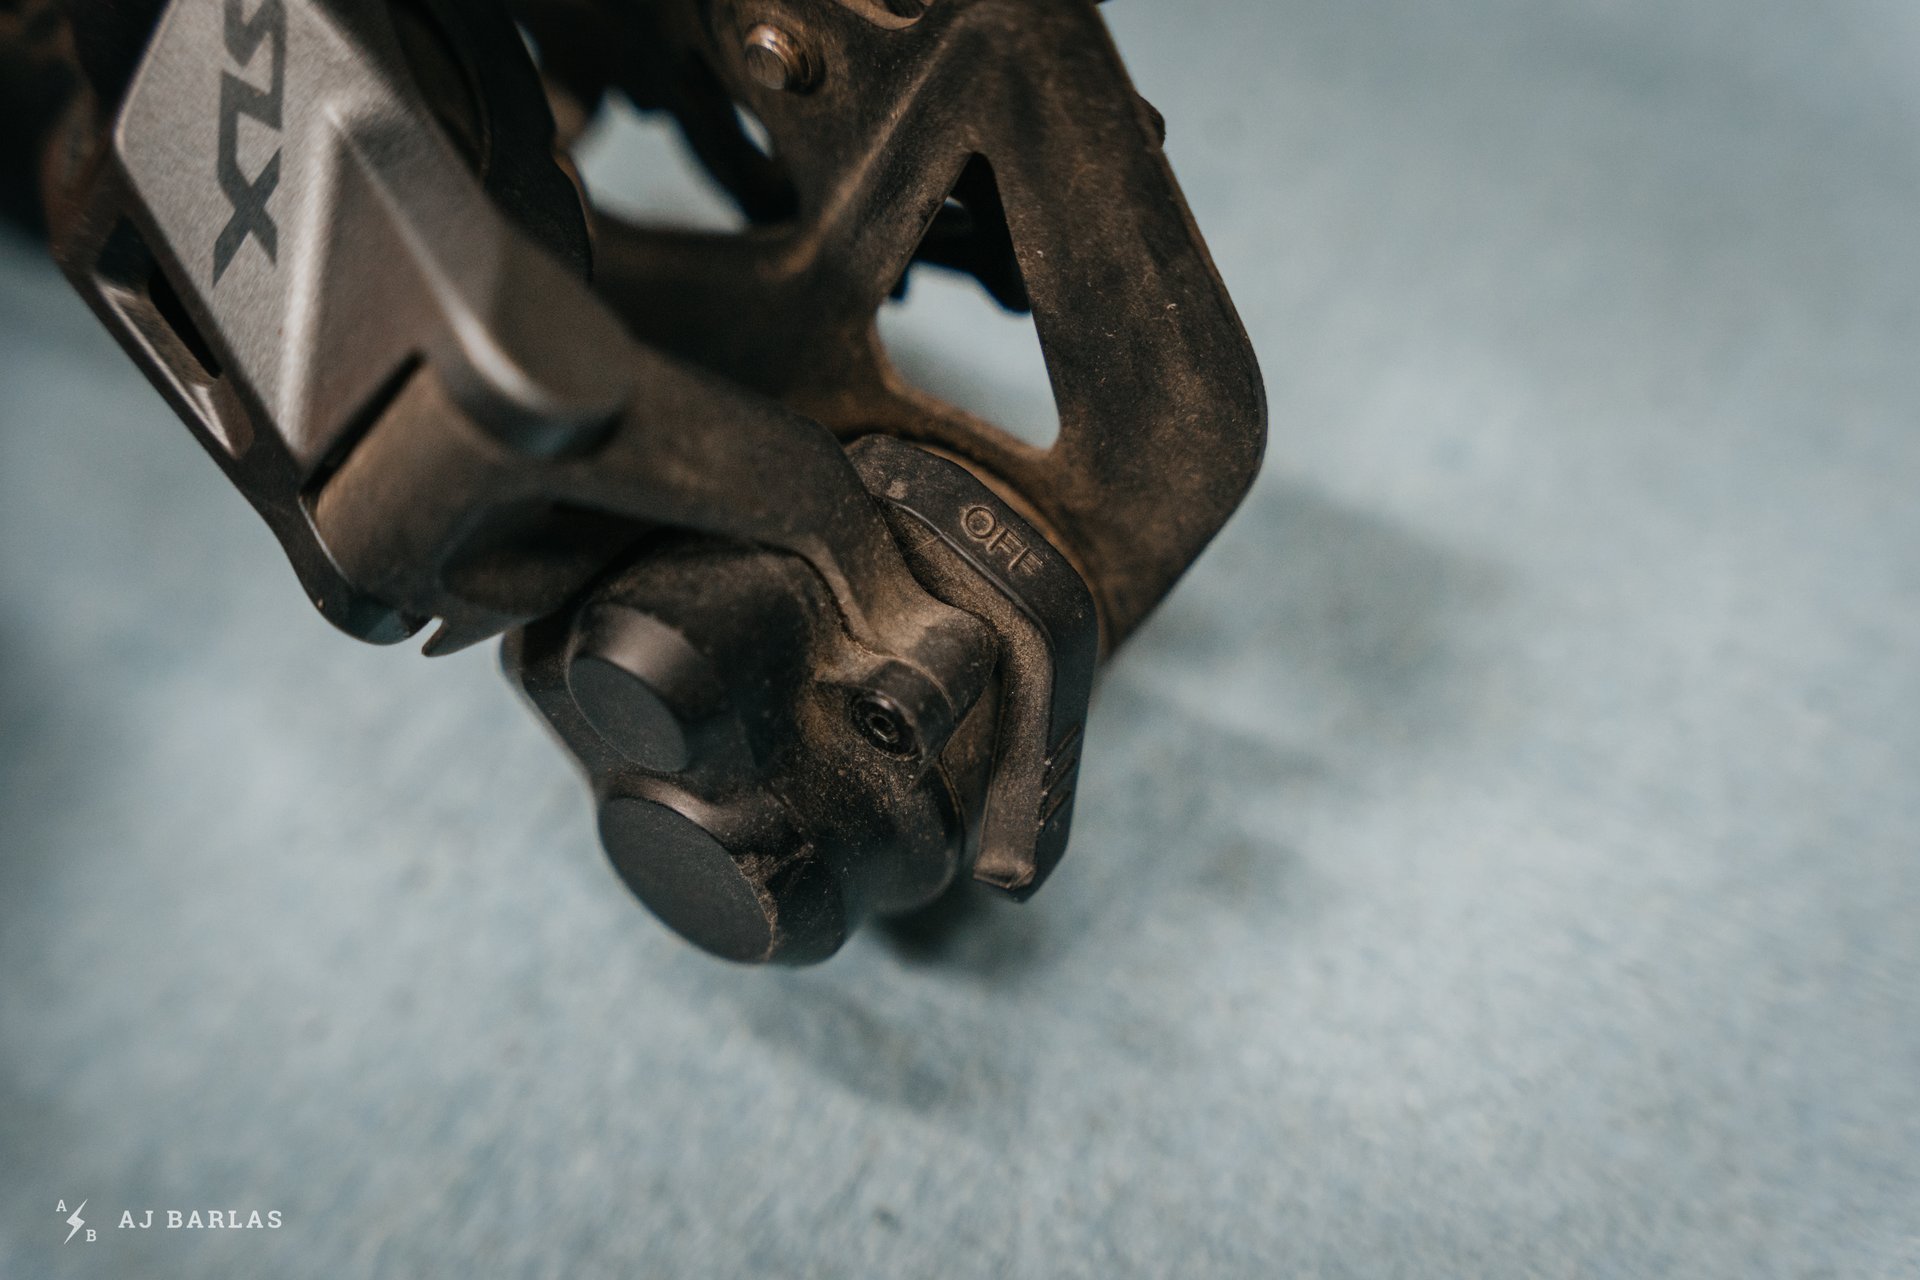
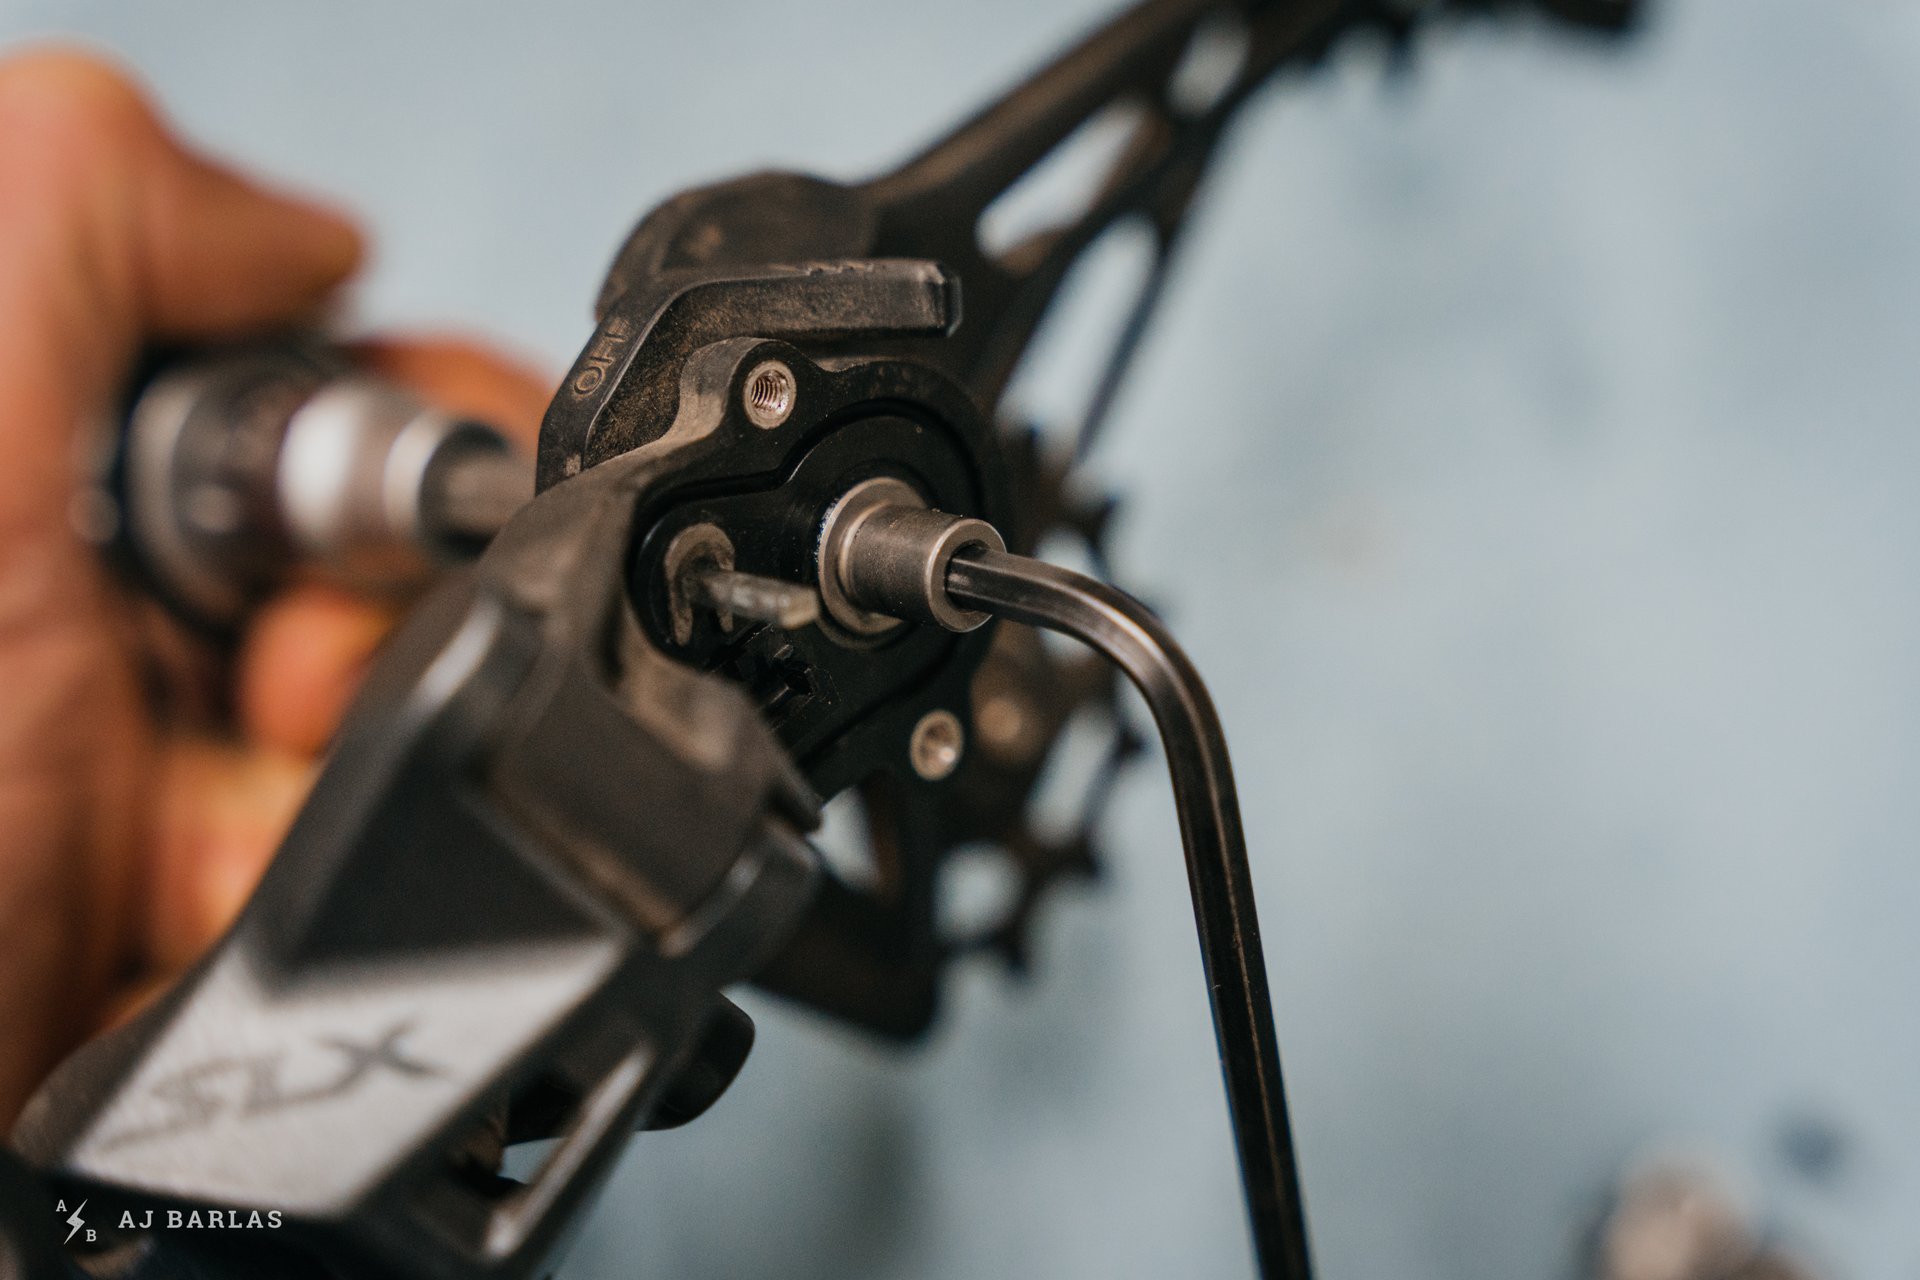
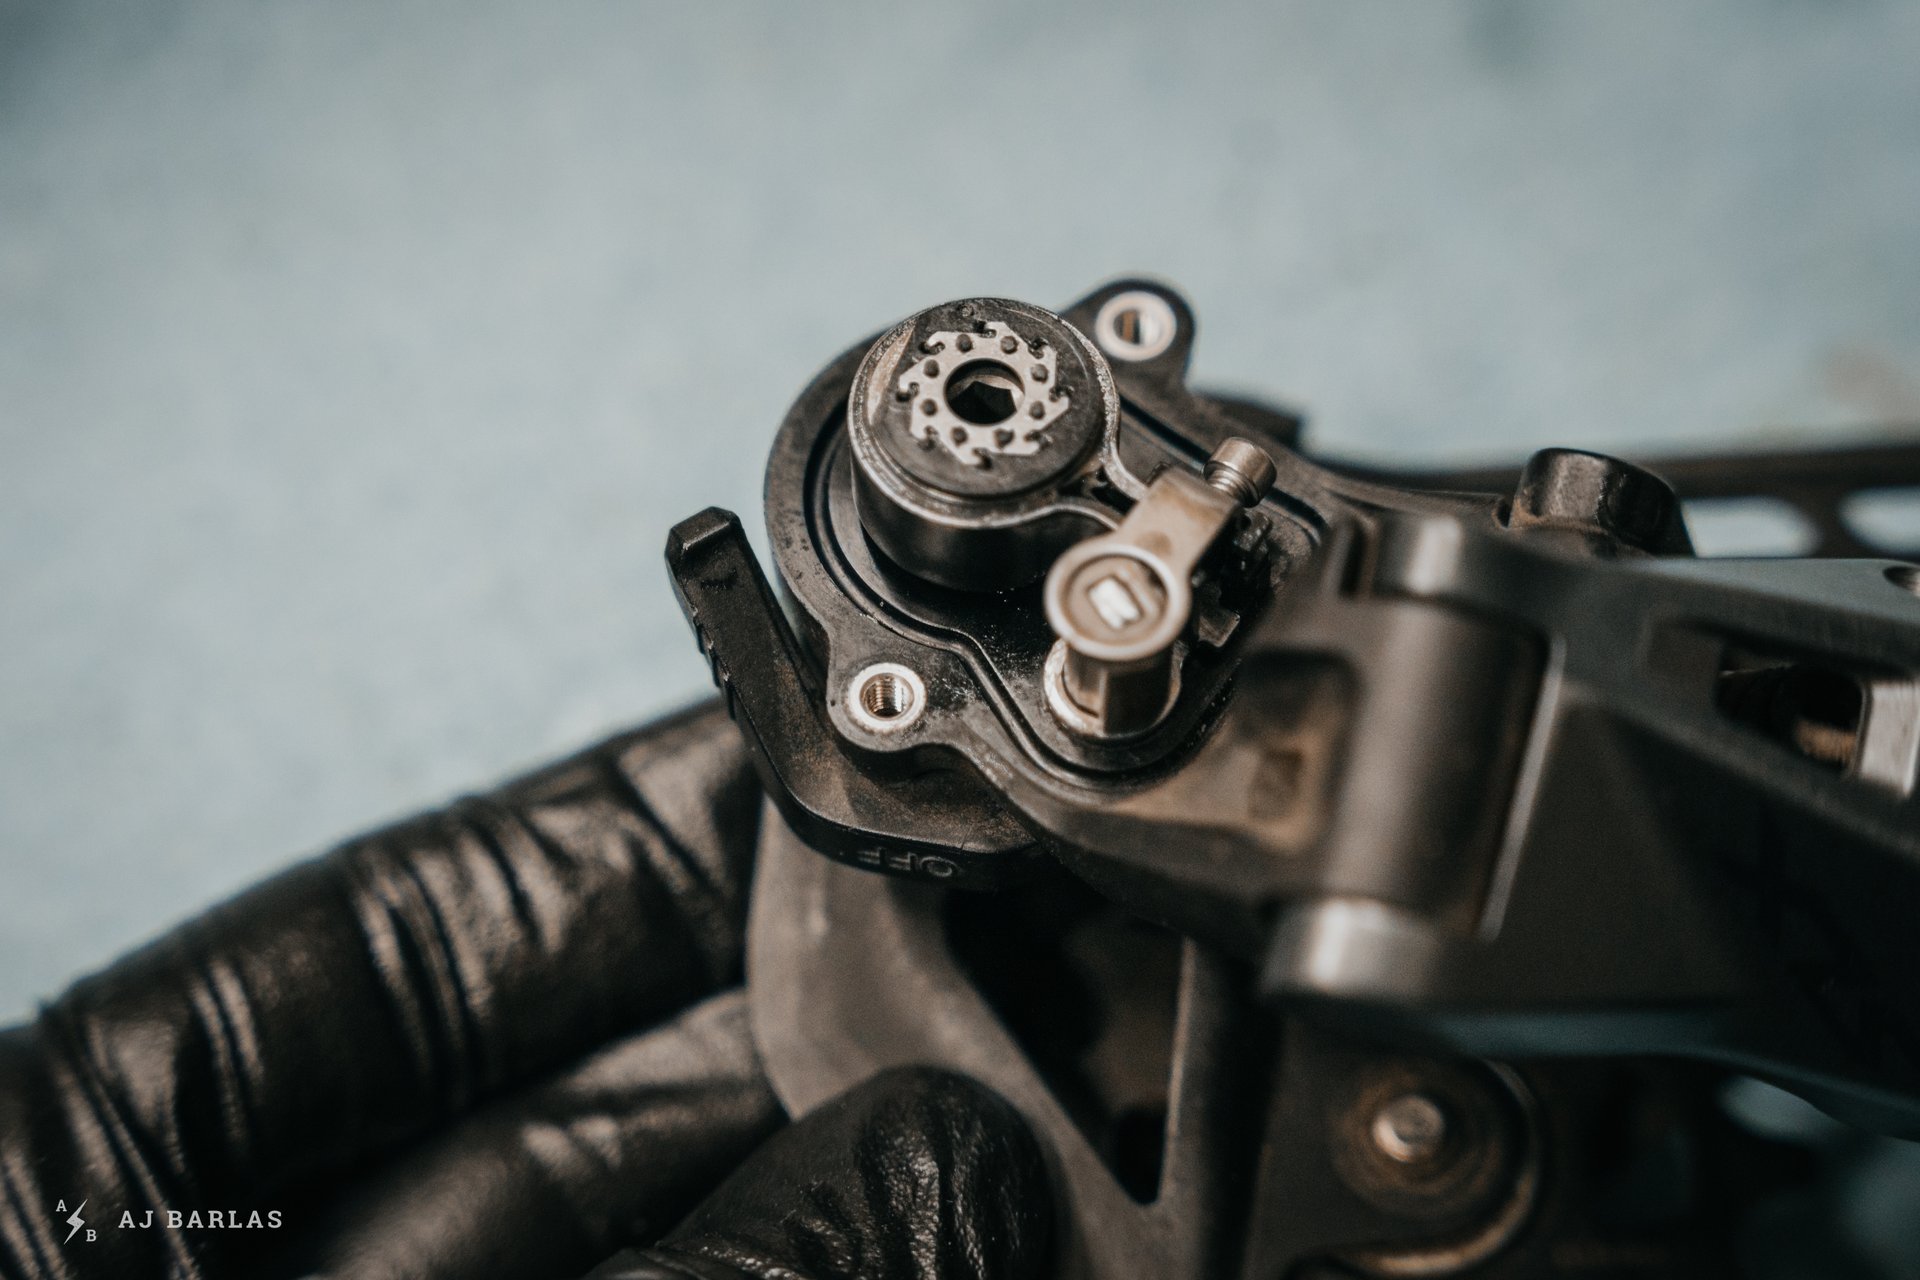
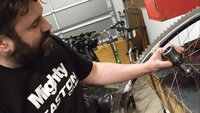
Turn the clutch off (lever position as shown). I could have spent more time on the initial clean. I continued to remove dirt where needed while taking the derailleur apart.
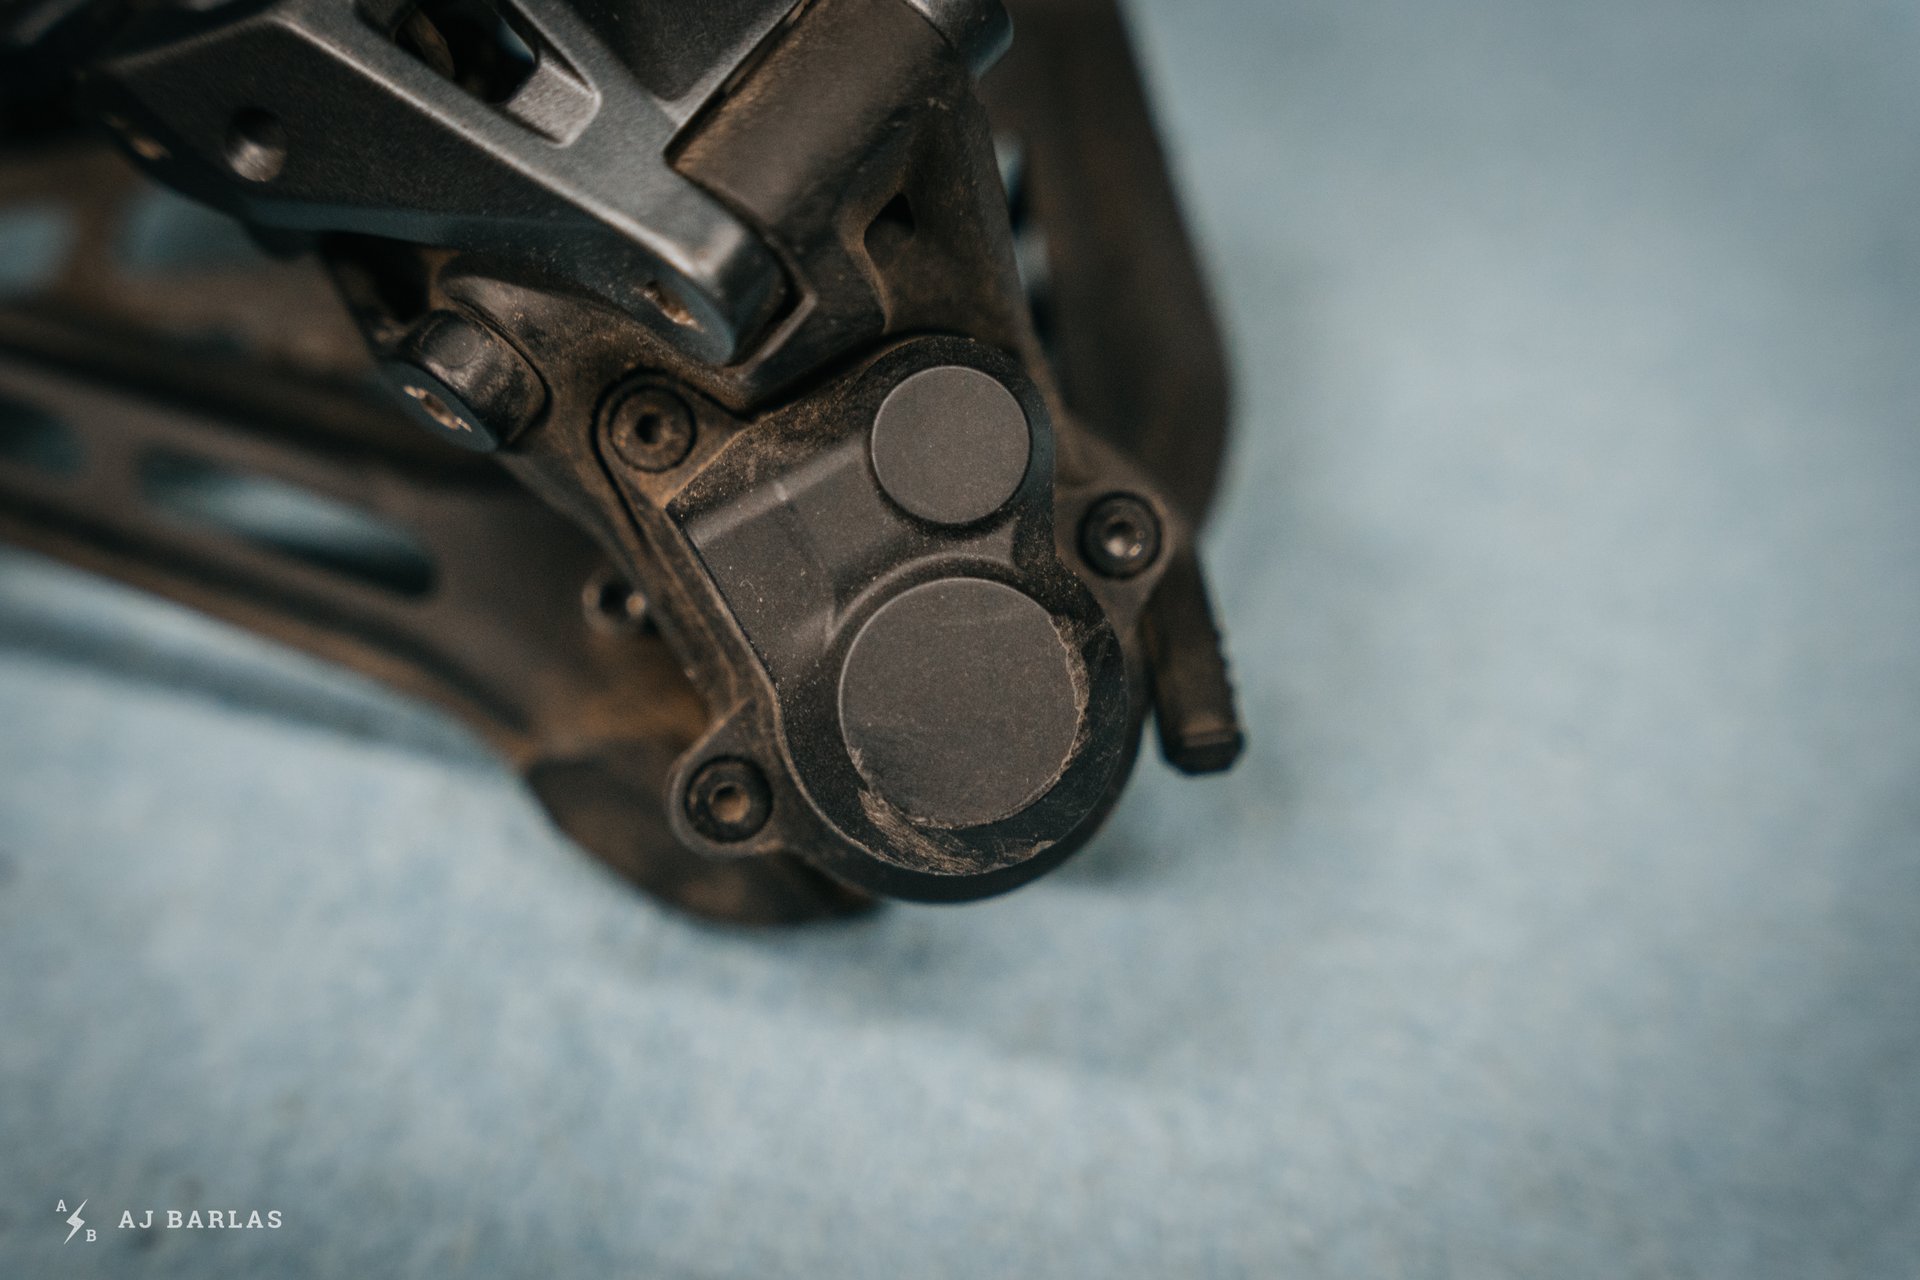
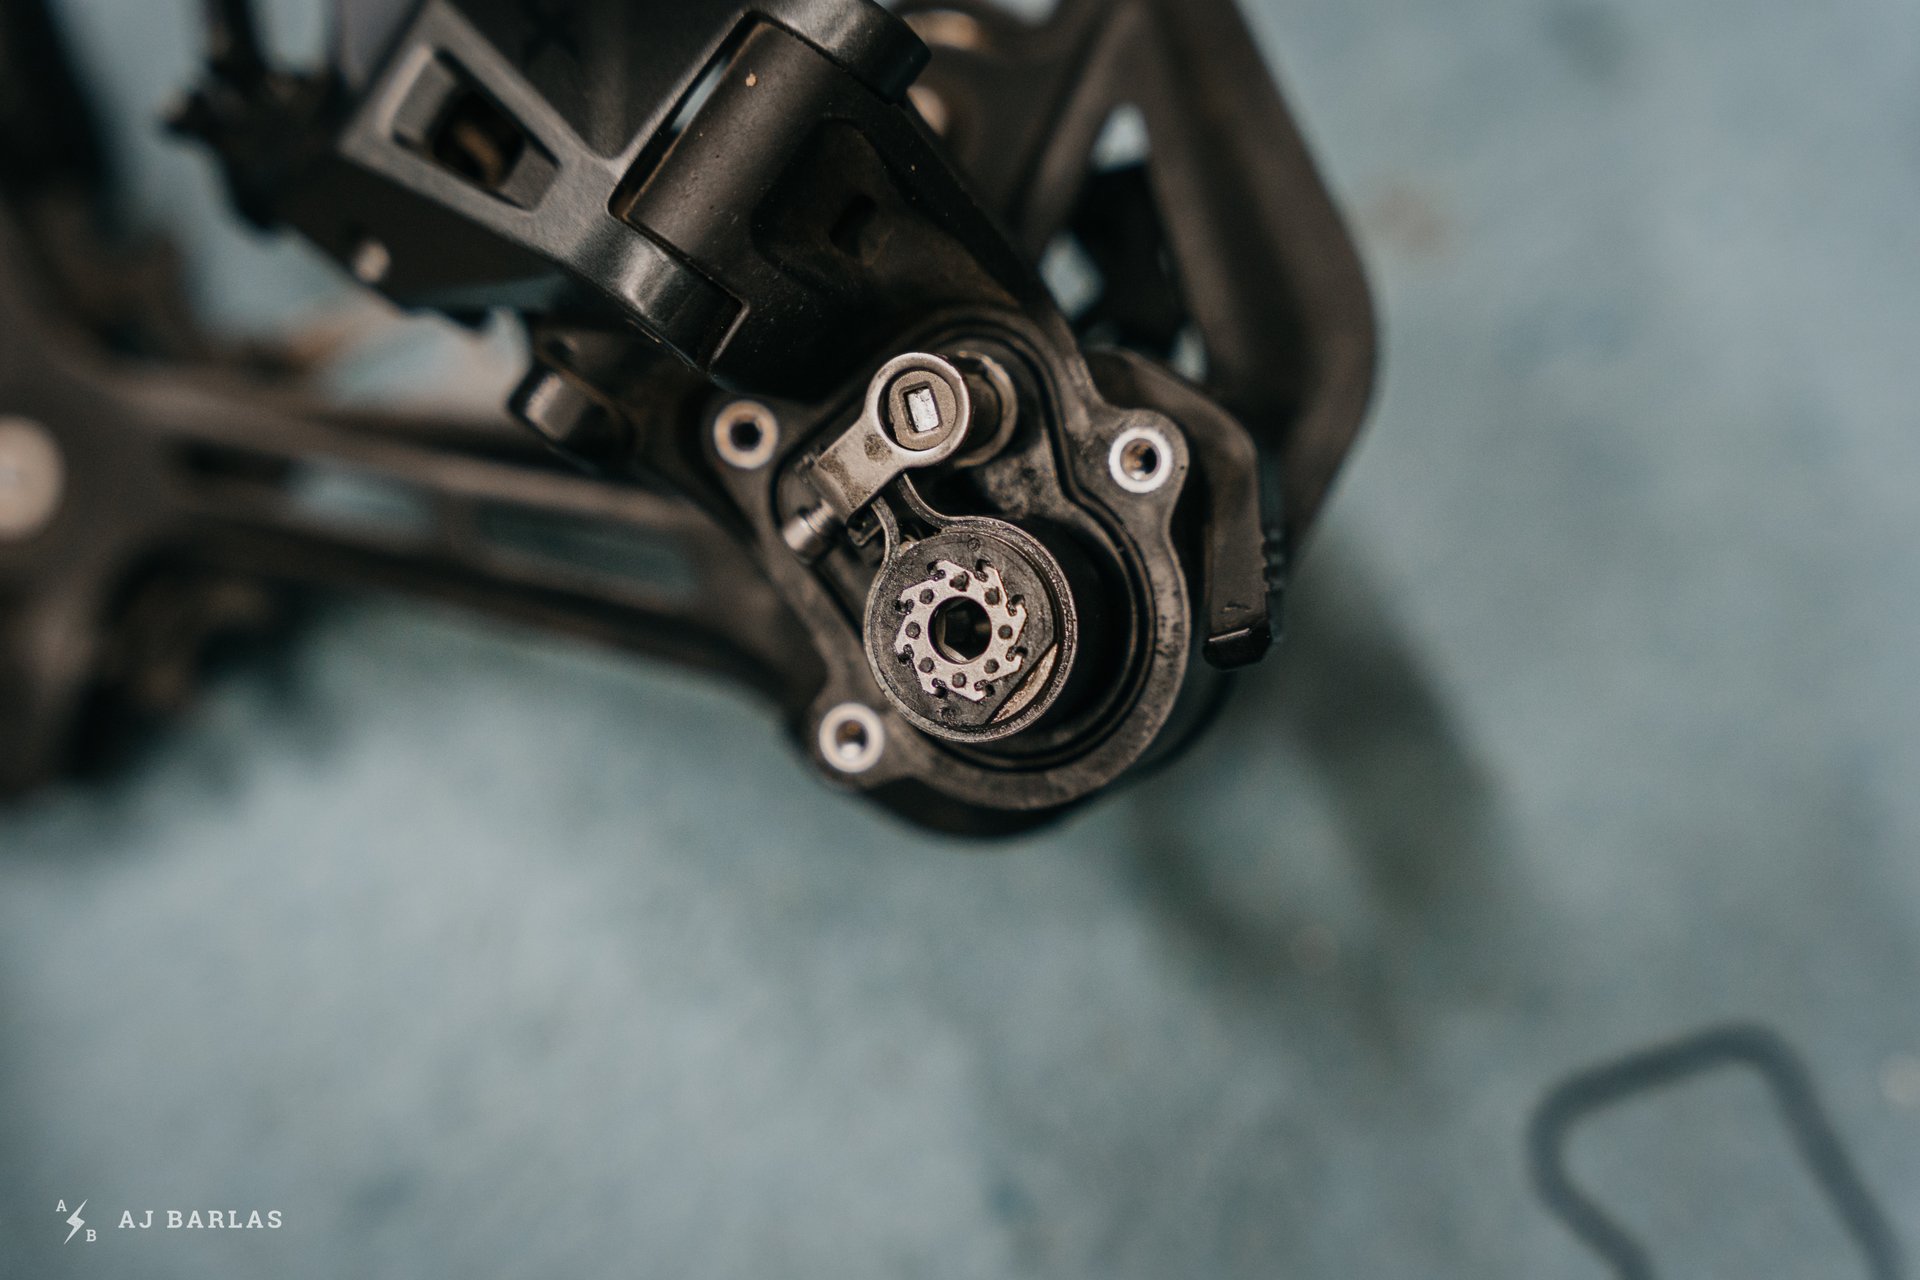
Behind this little cover is where the clutch magic happens. Three bolts hold it in place and they're removed with a 2mm hex key.
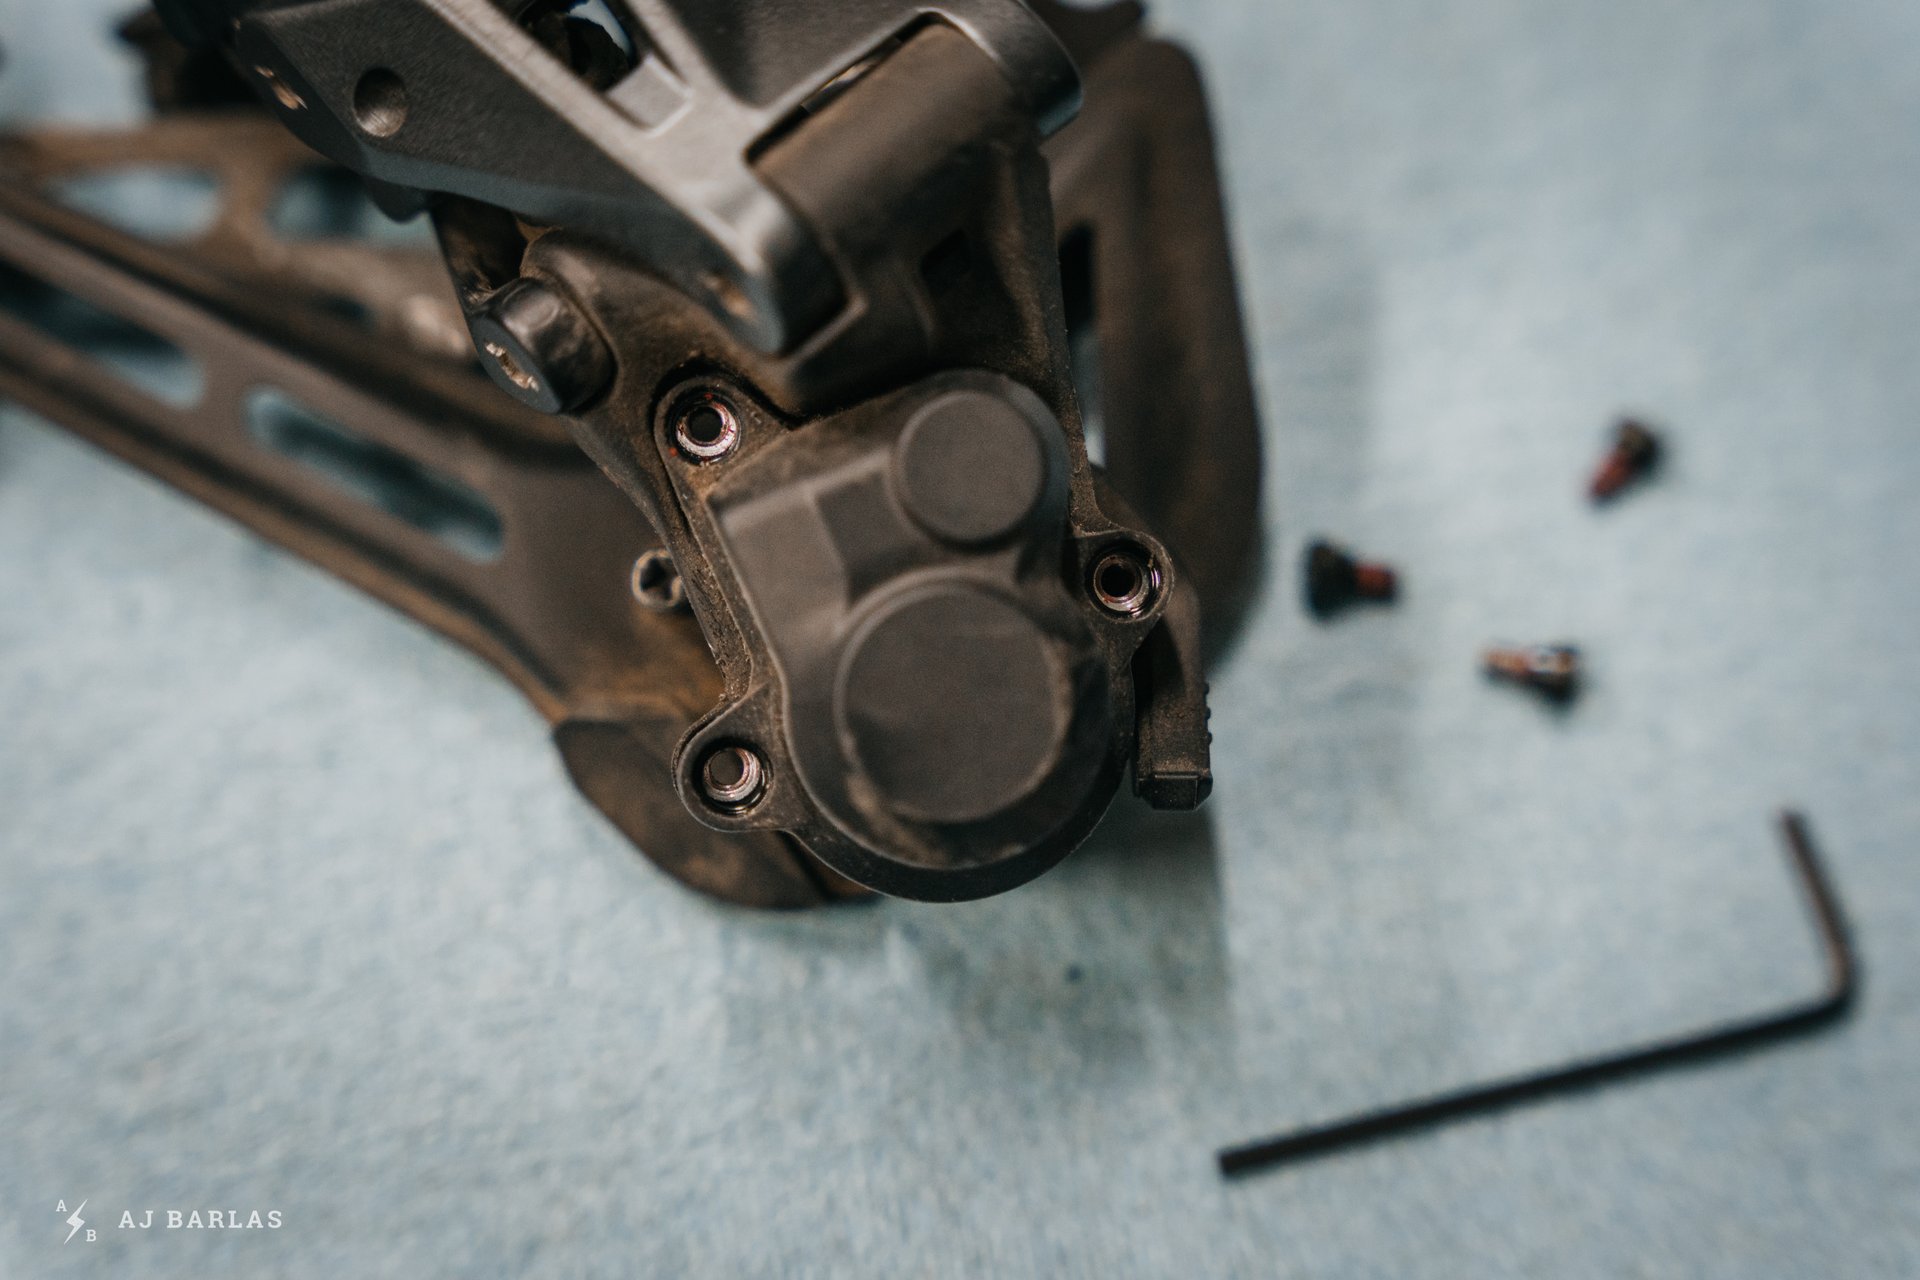
With the bolts removed the cover is ready to be taken off, revealing the inner workings of the clutch.
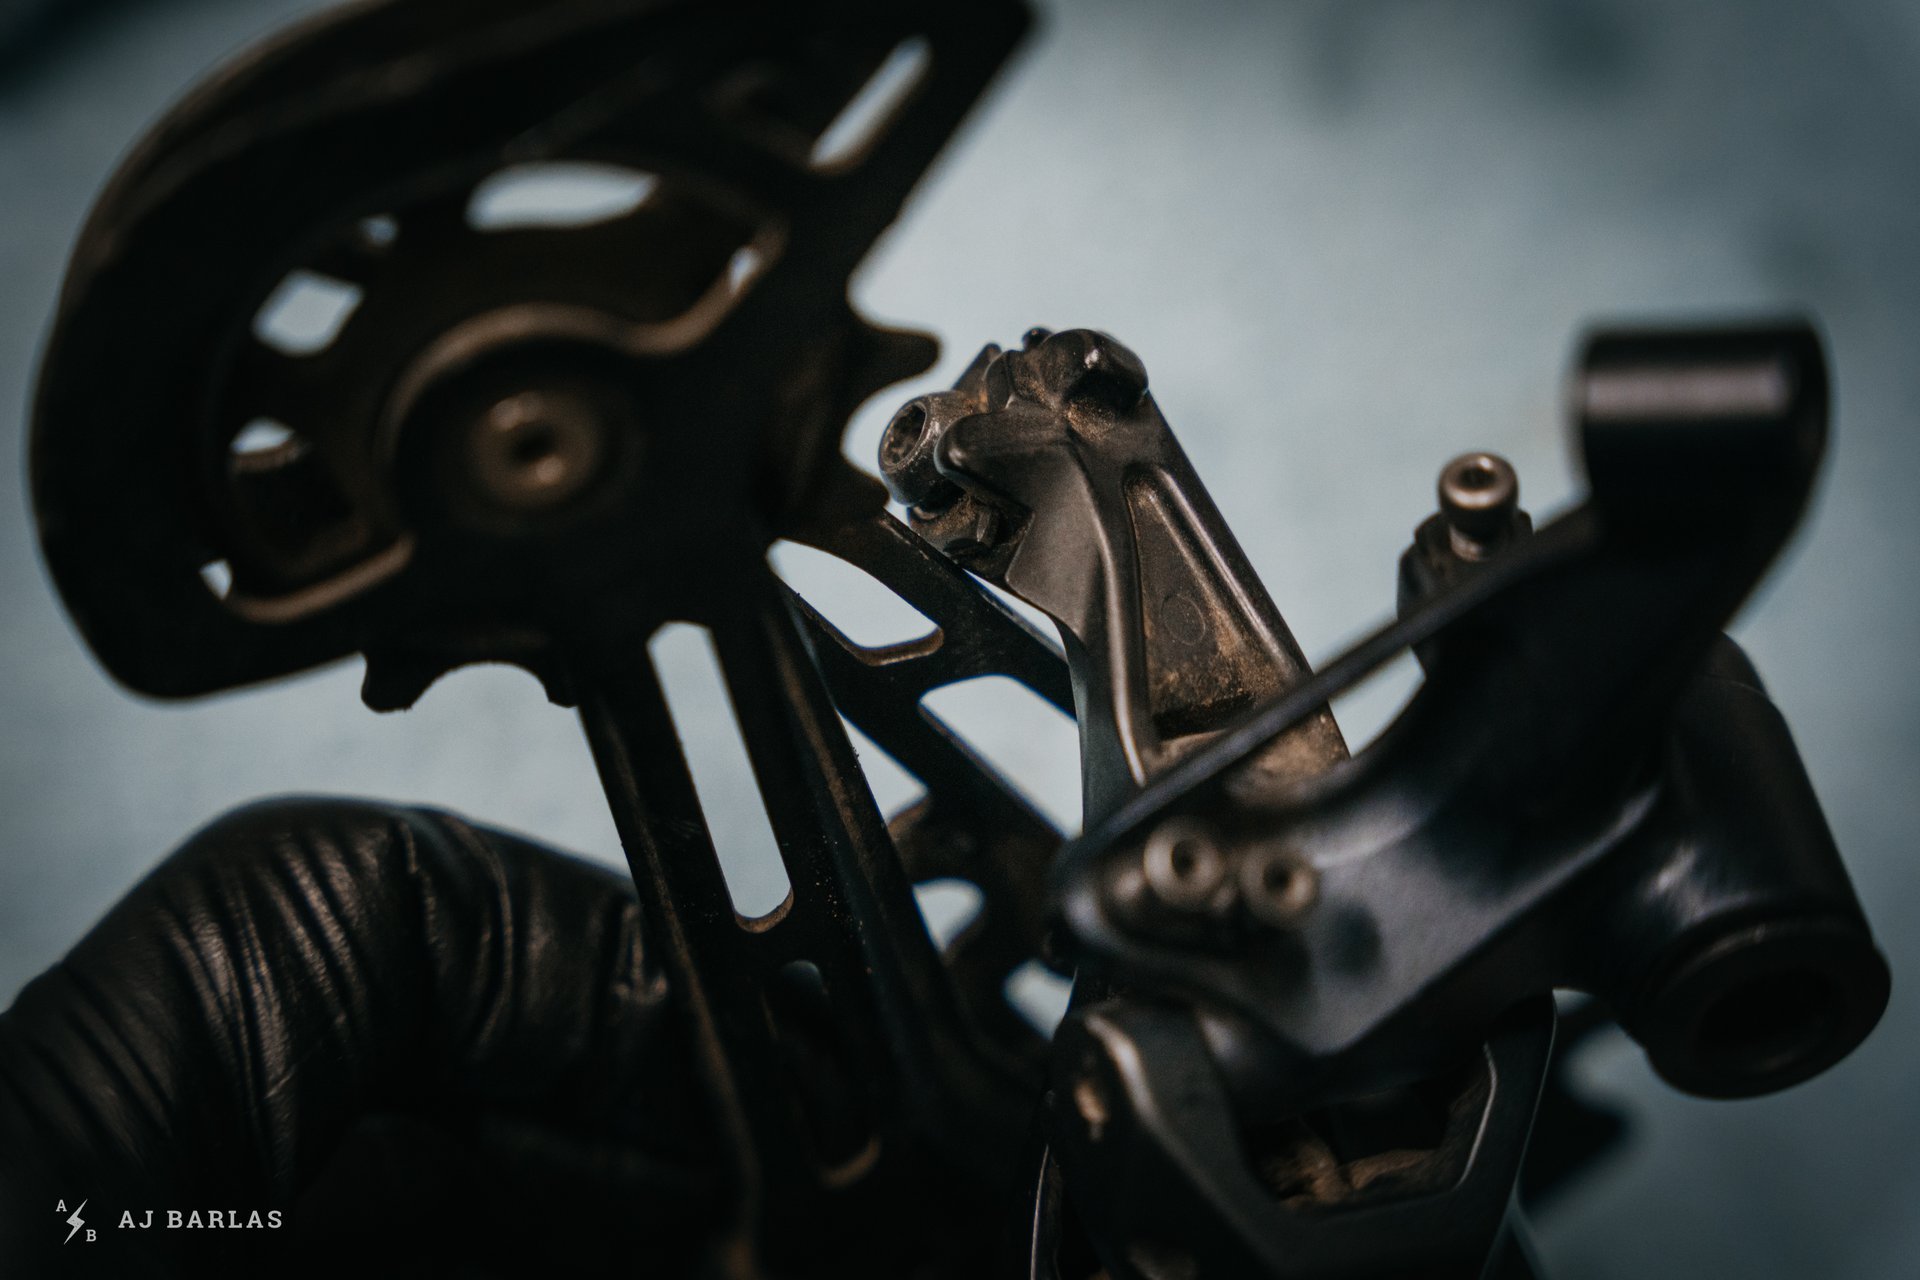
It's a relatively simple mechanism but boy, does it ever keep things quiet on the trail.
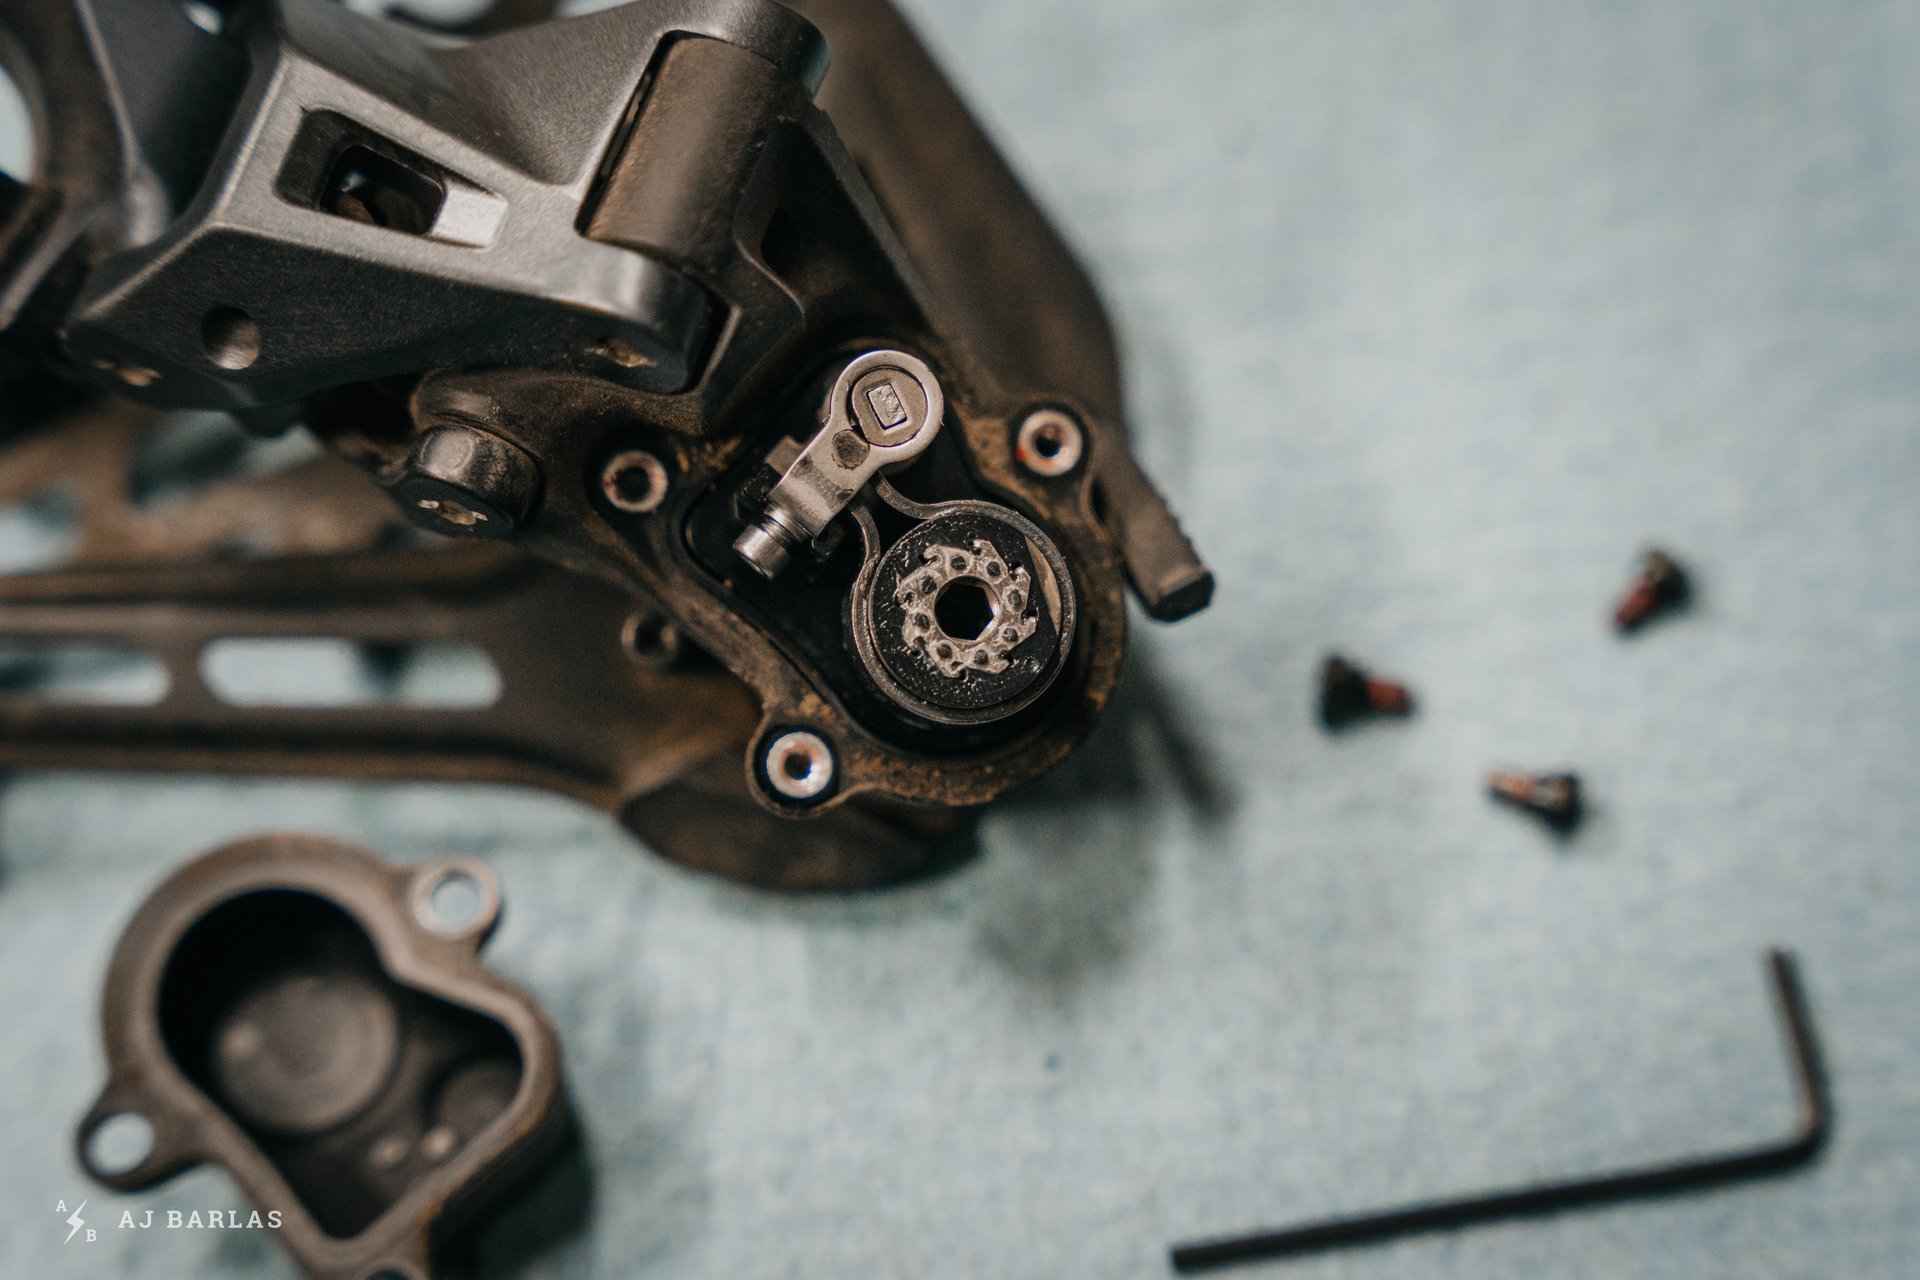
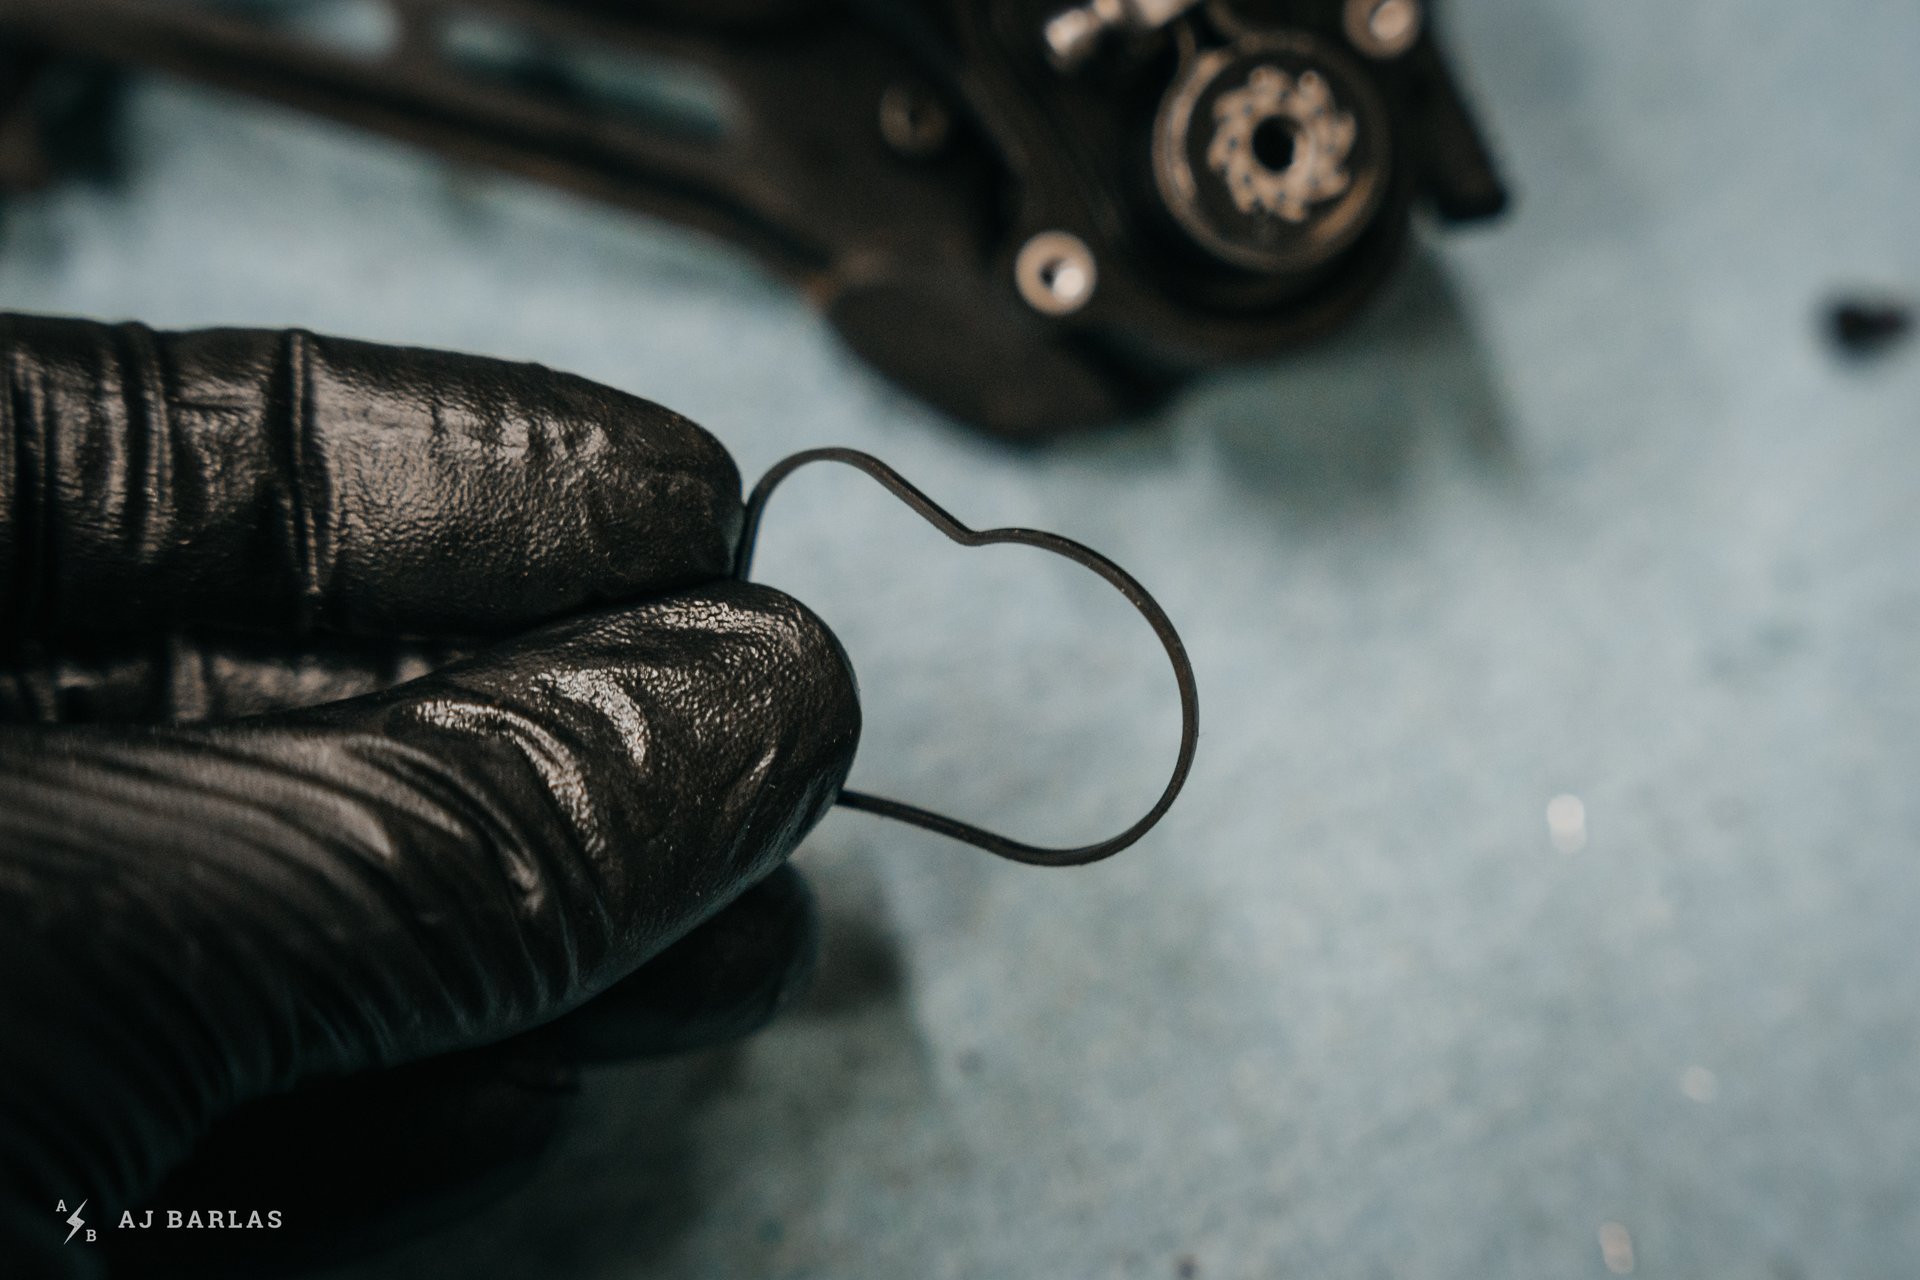
This side of the clutch is quite well-sealed thanks to a rubber gasket between the cap and the derailleur knuckle. Carefully remove this gasket from the groove it sits in.
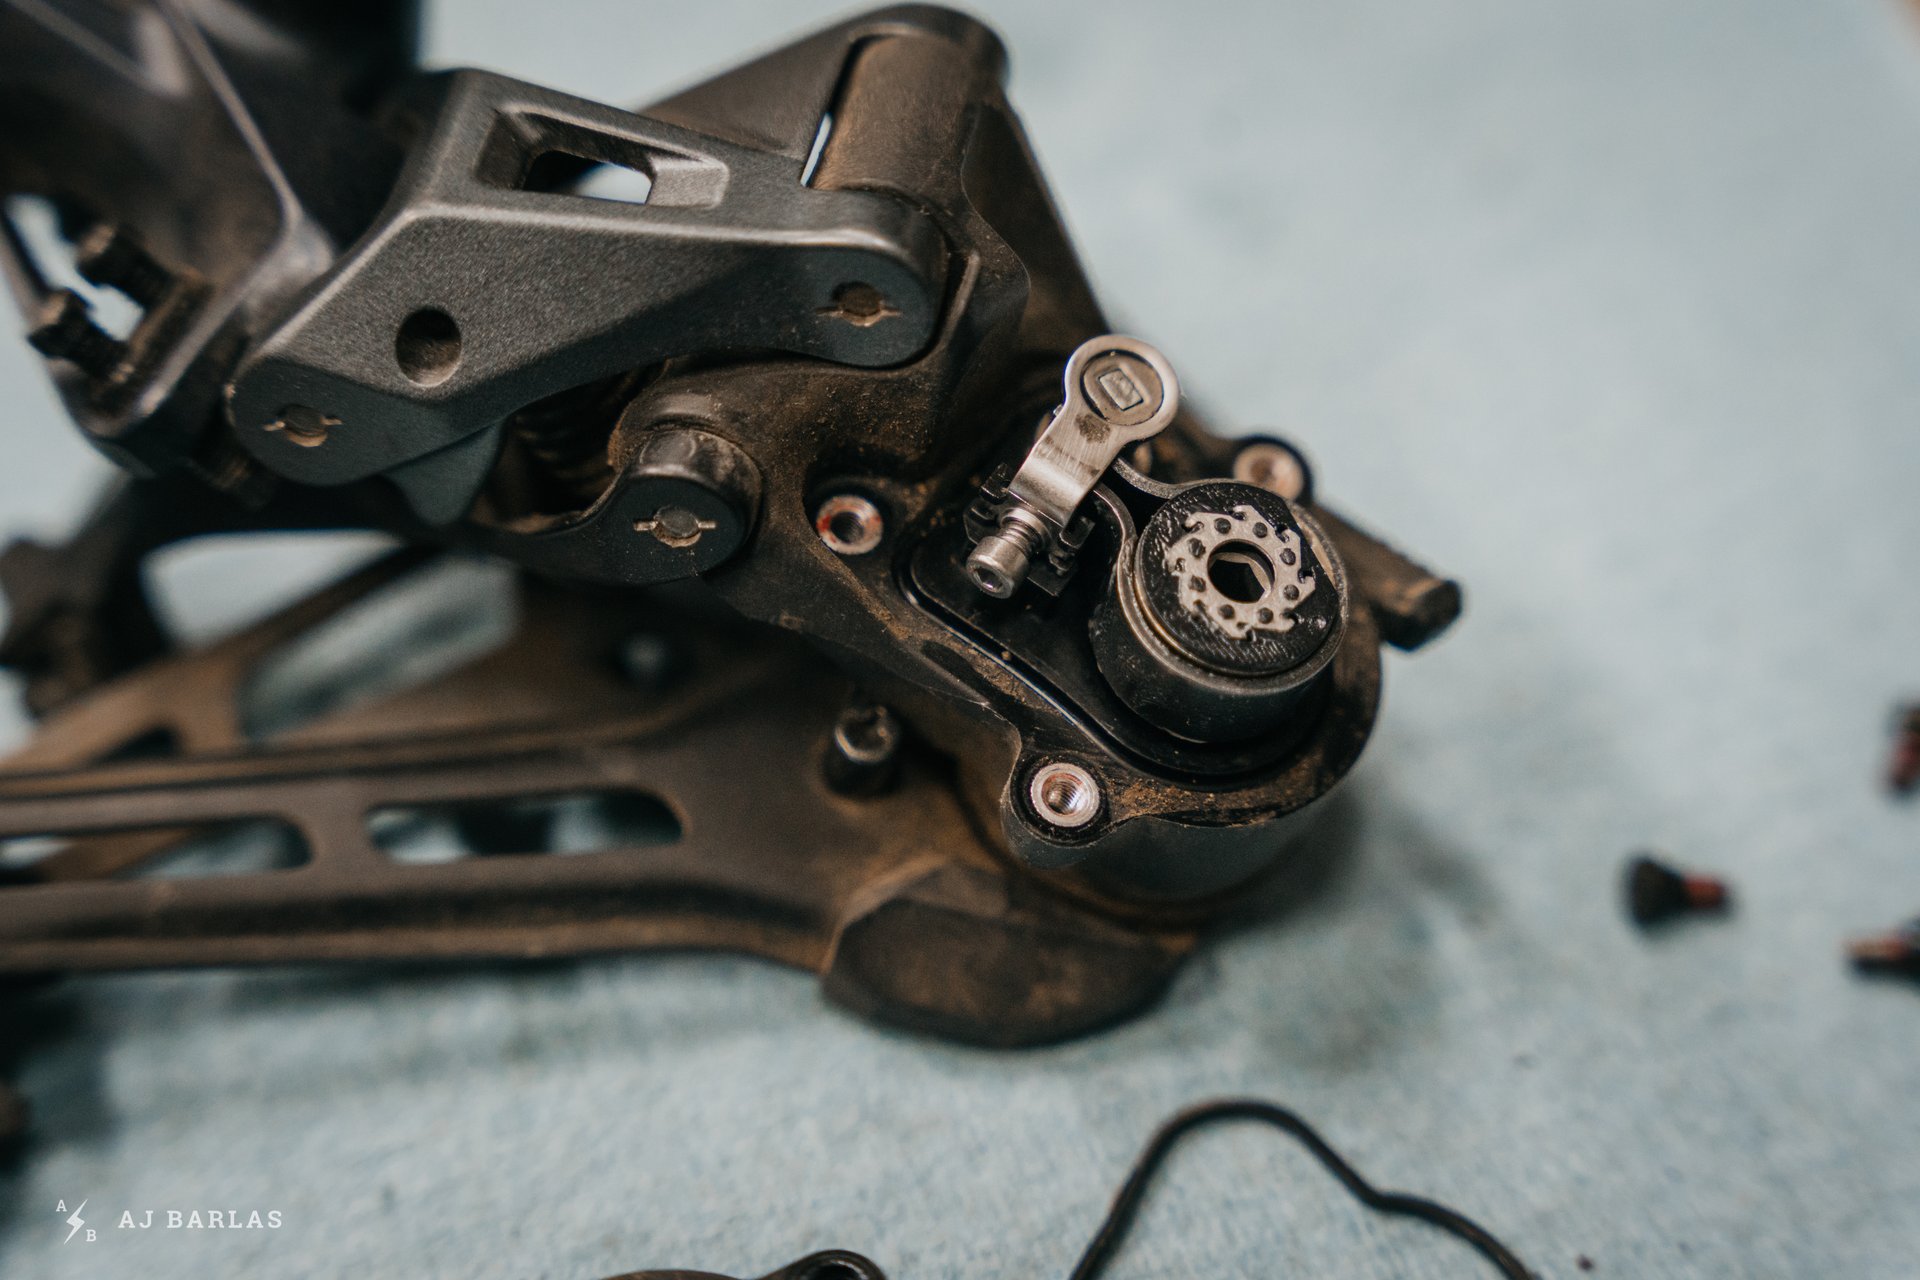
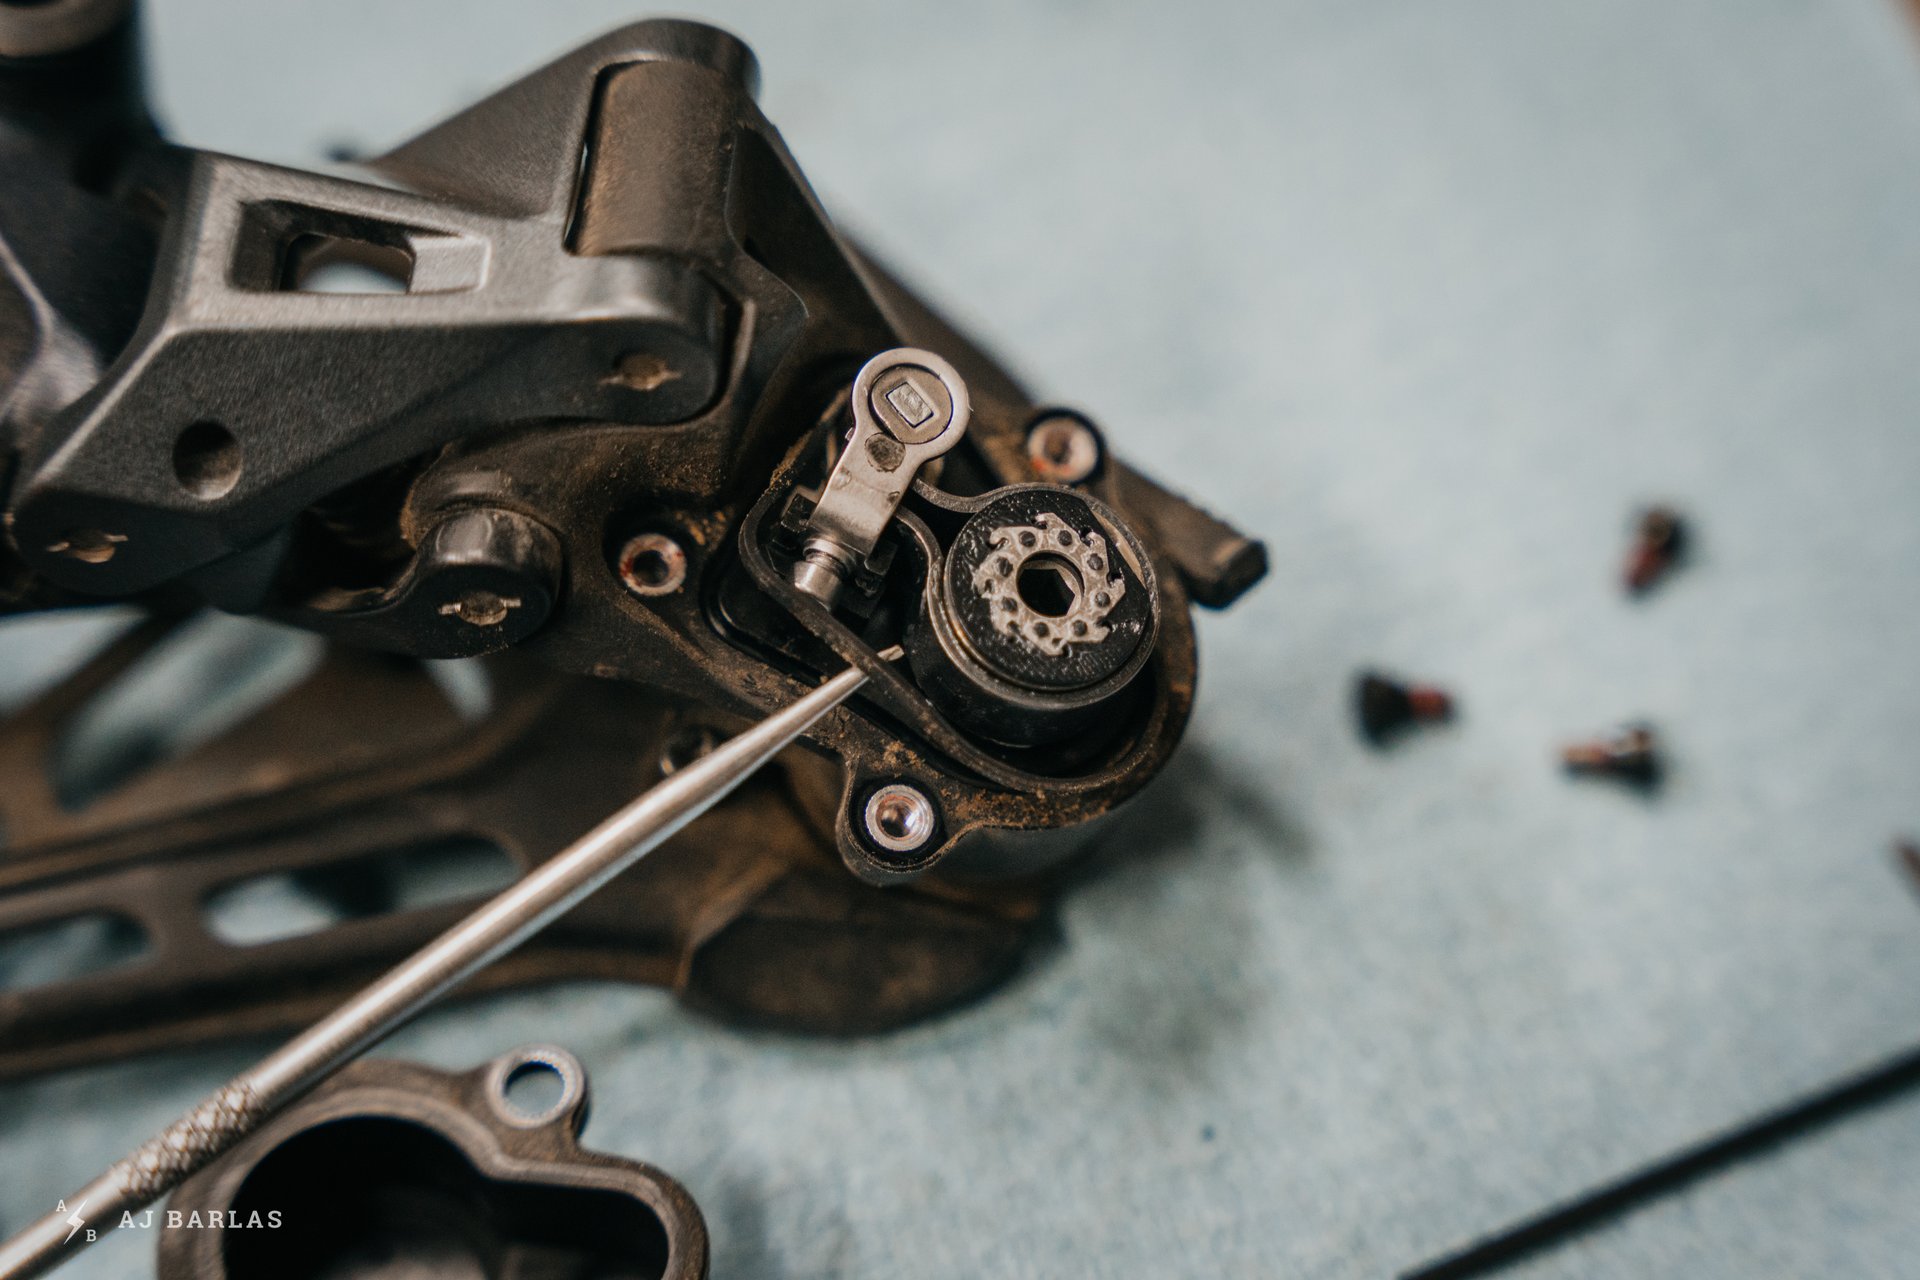
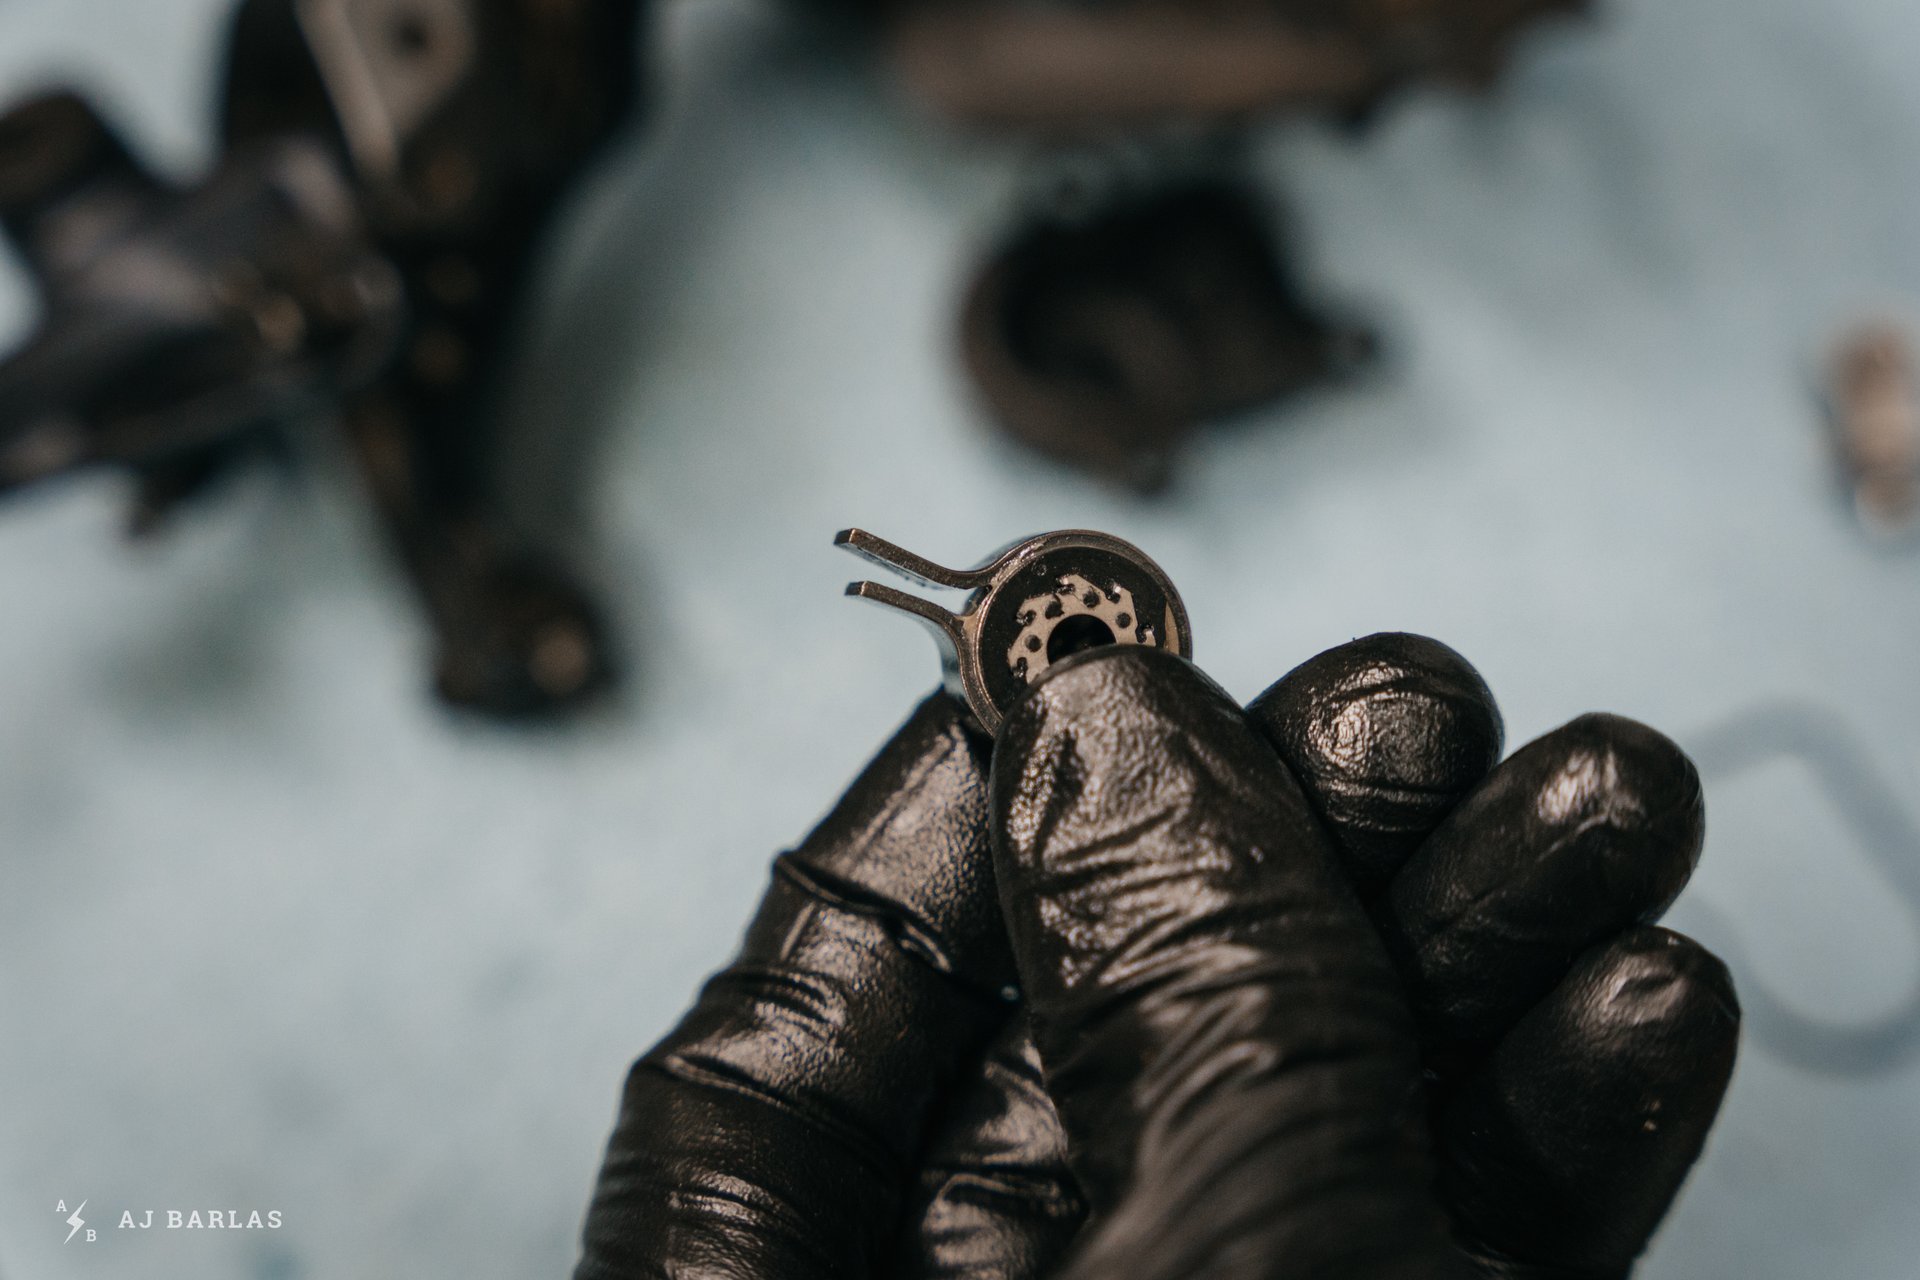
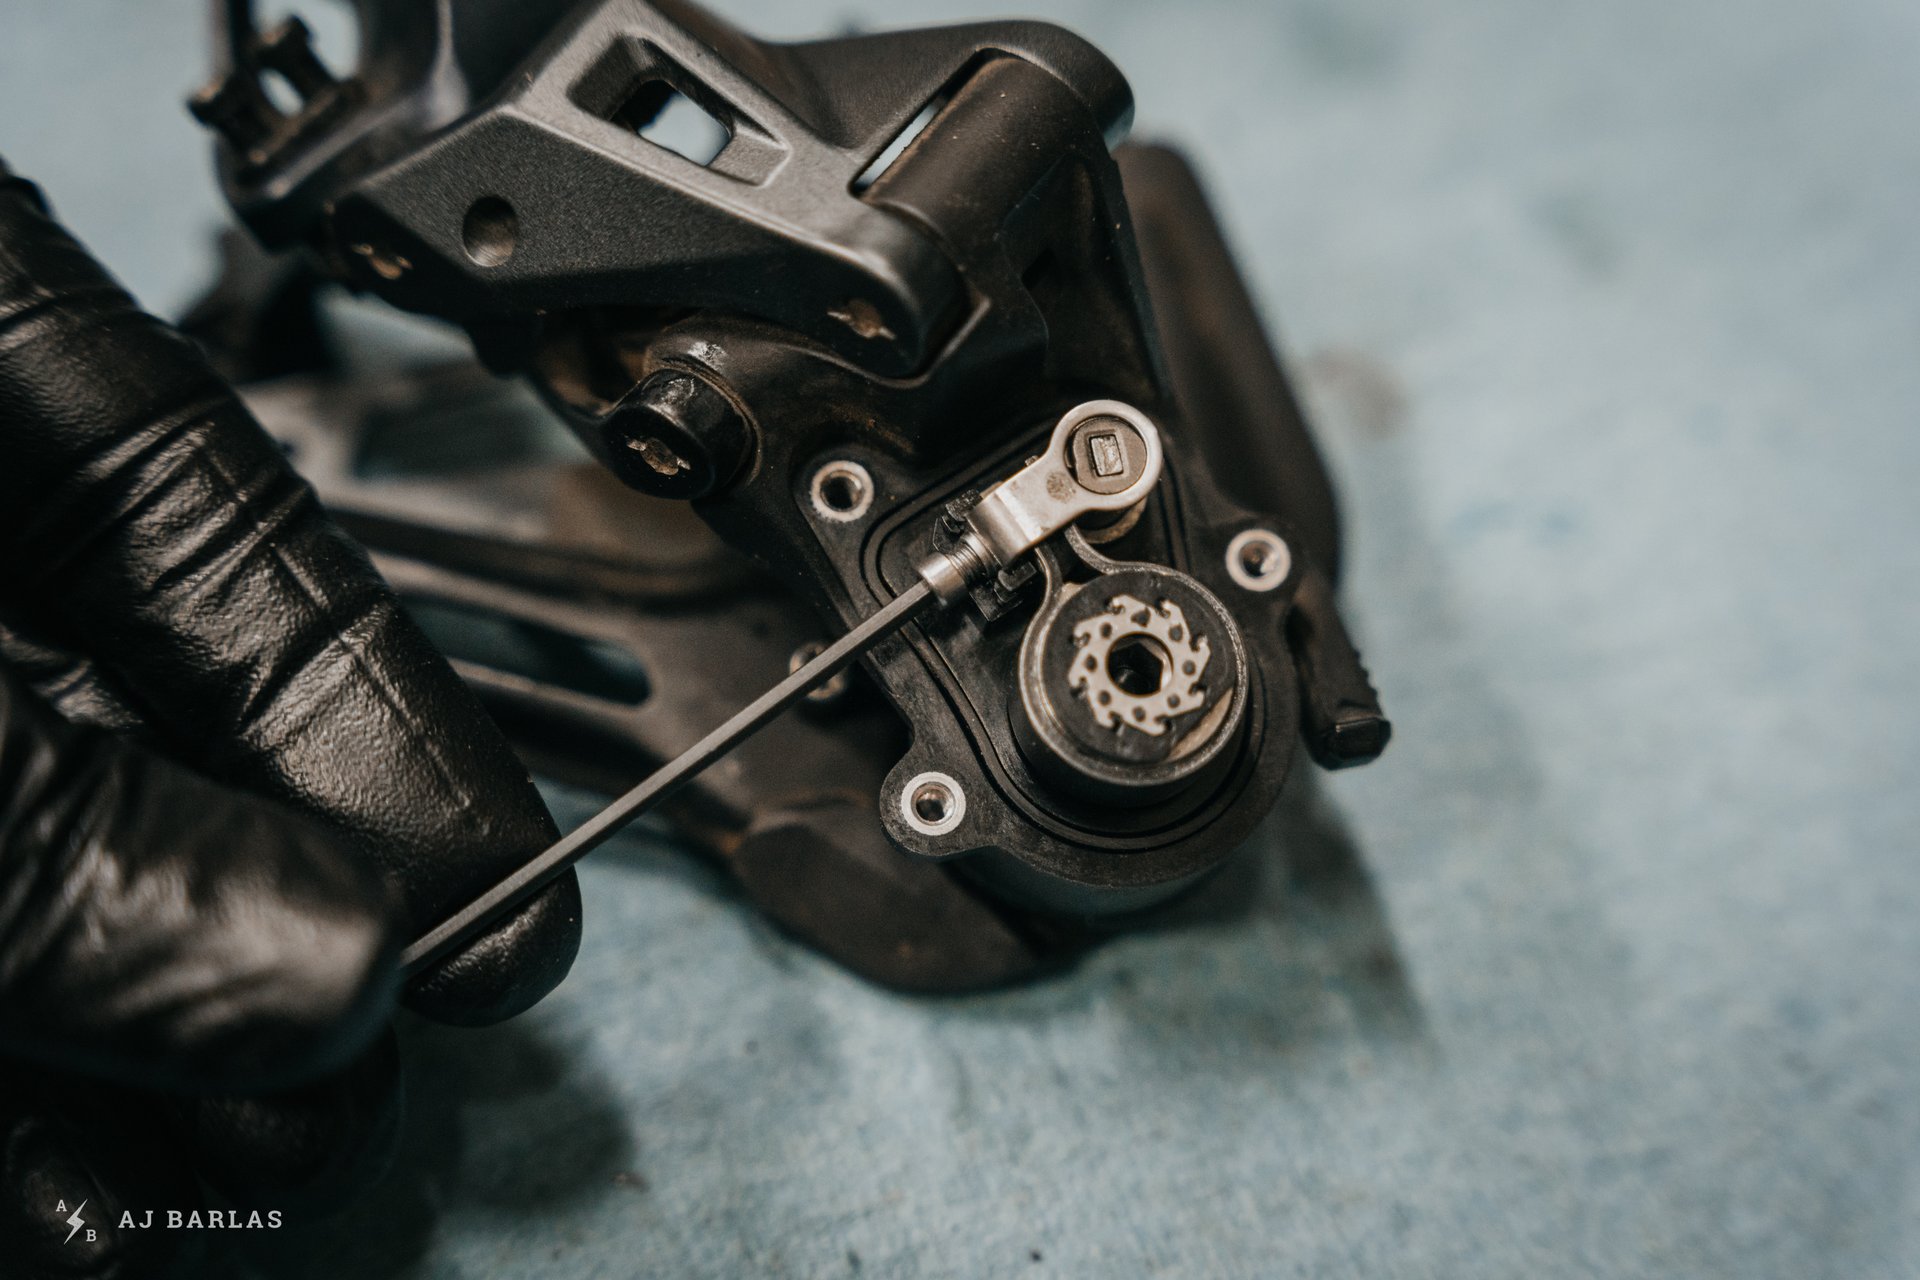
With the gasket removed, it's time to carefully remove the 'chain stabilizer' – the round part – and the cam unit that sits to the left. Using a 2mm hex key, back off the cam screw a little to free up the parts.
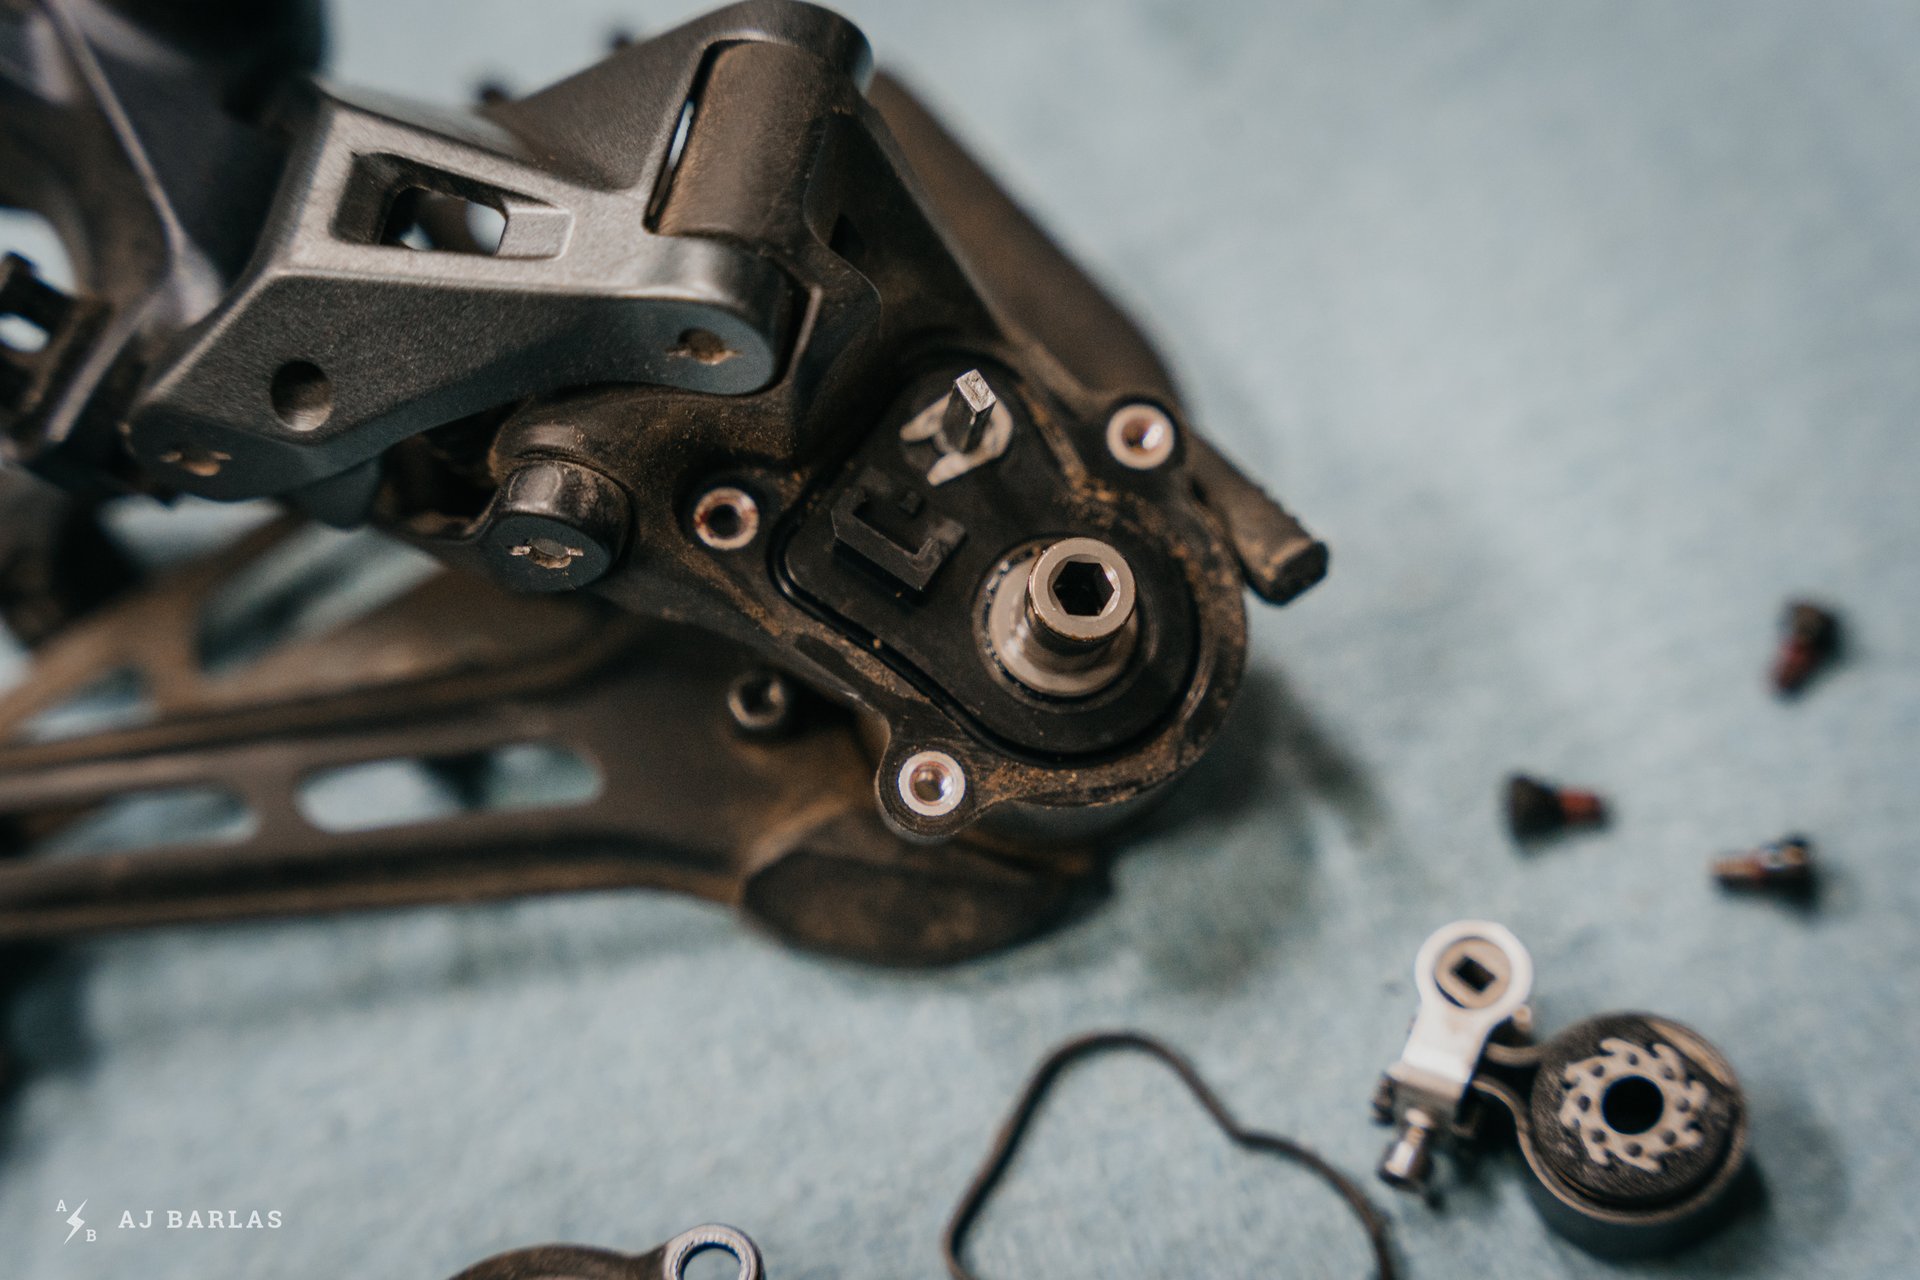
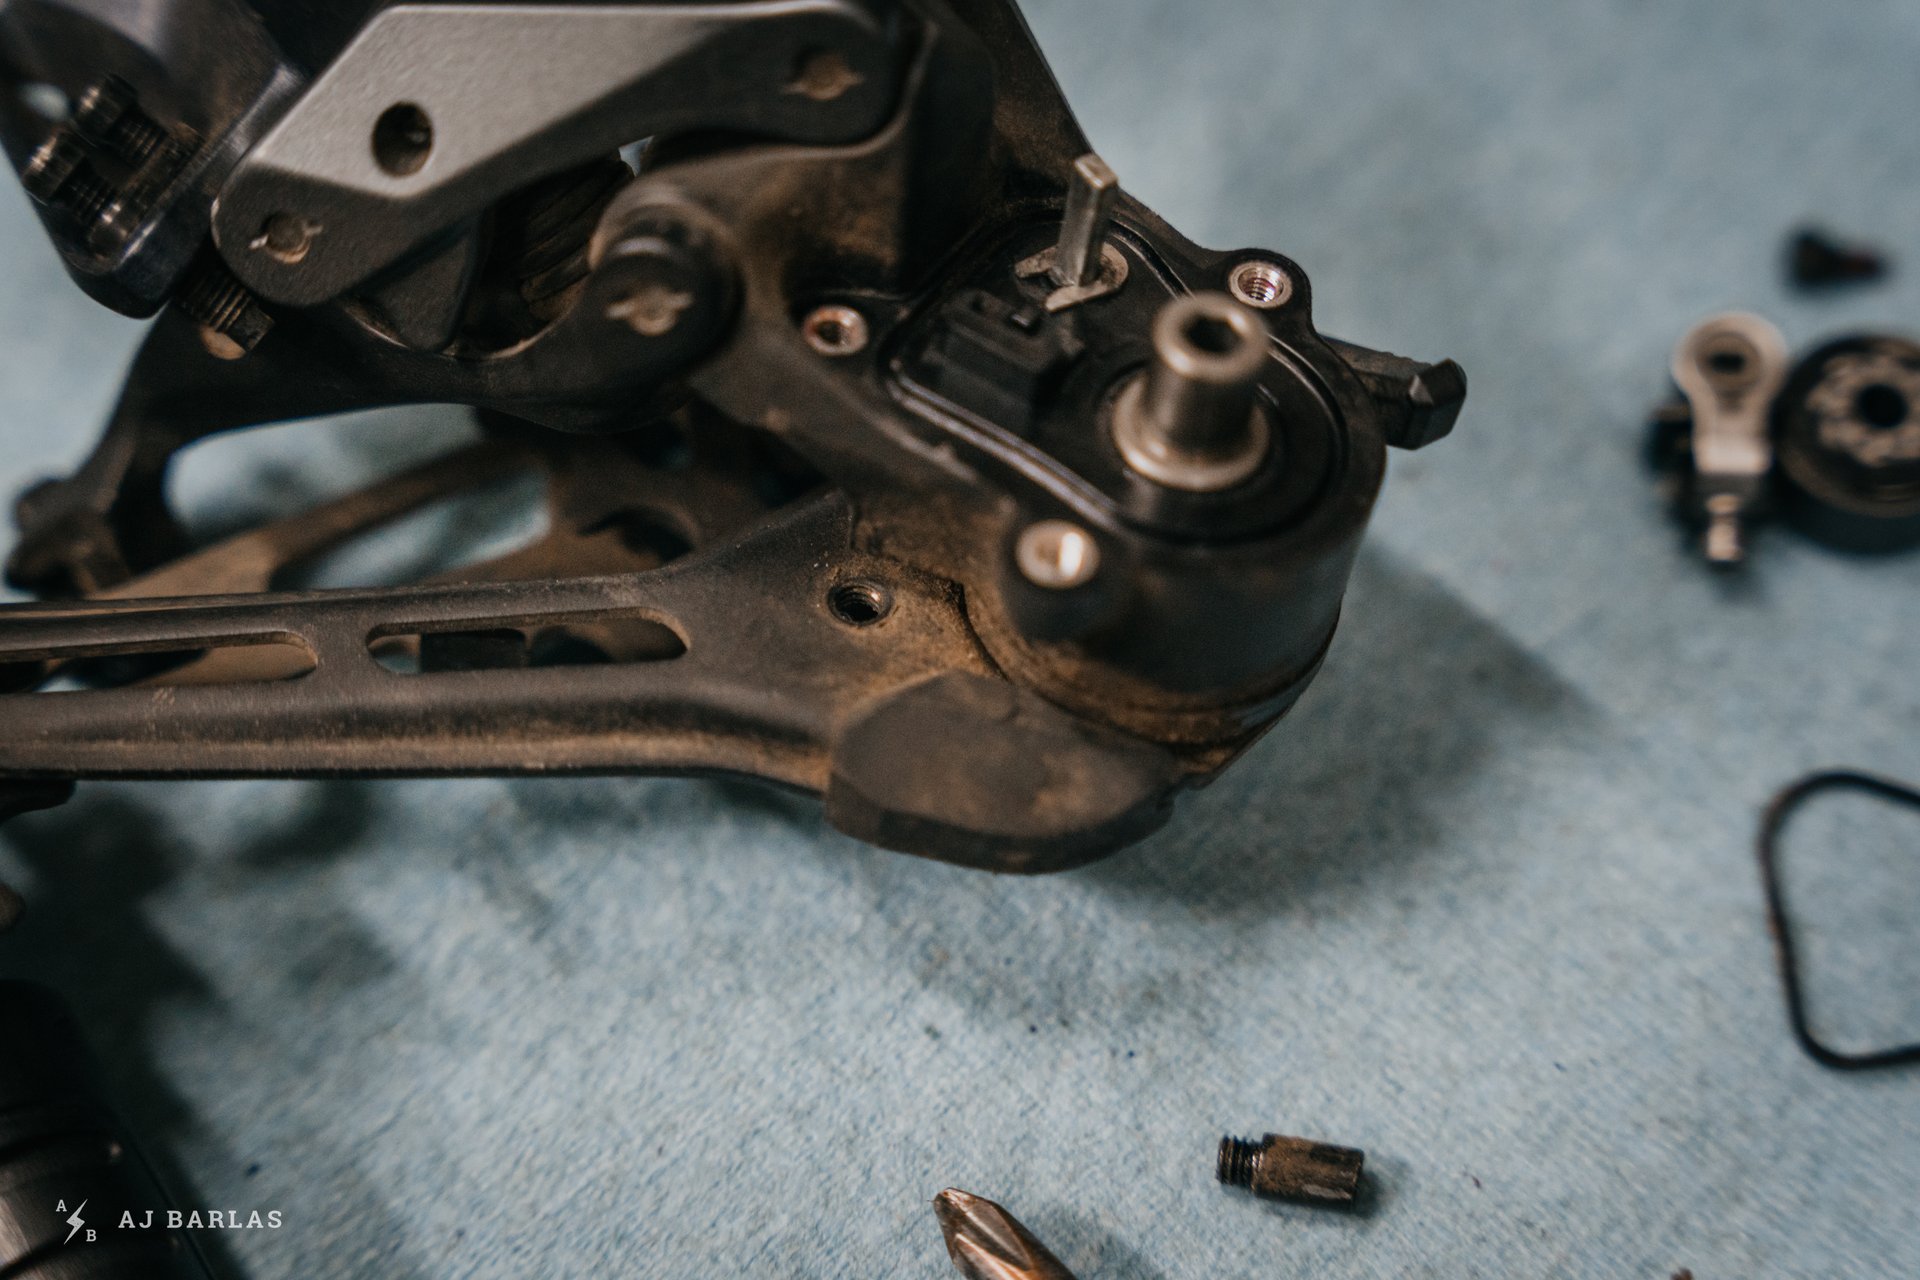
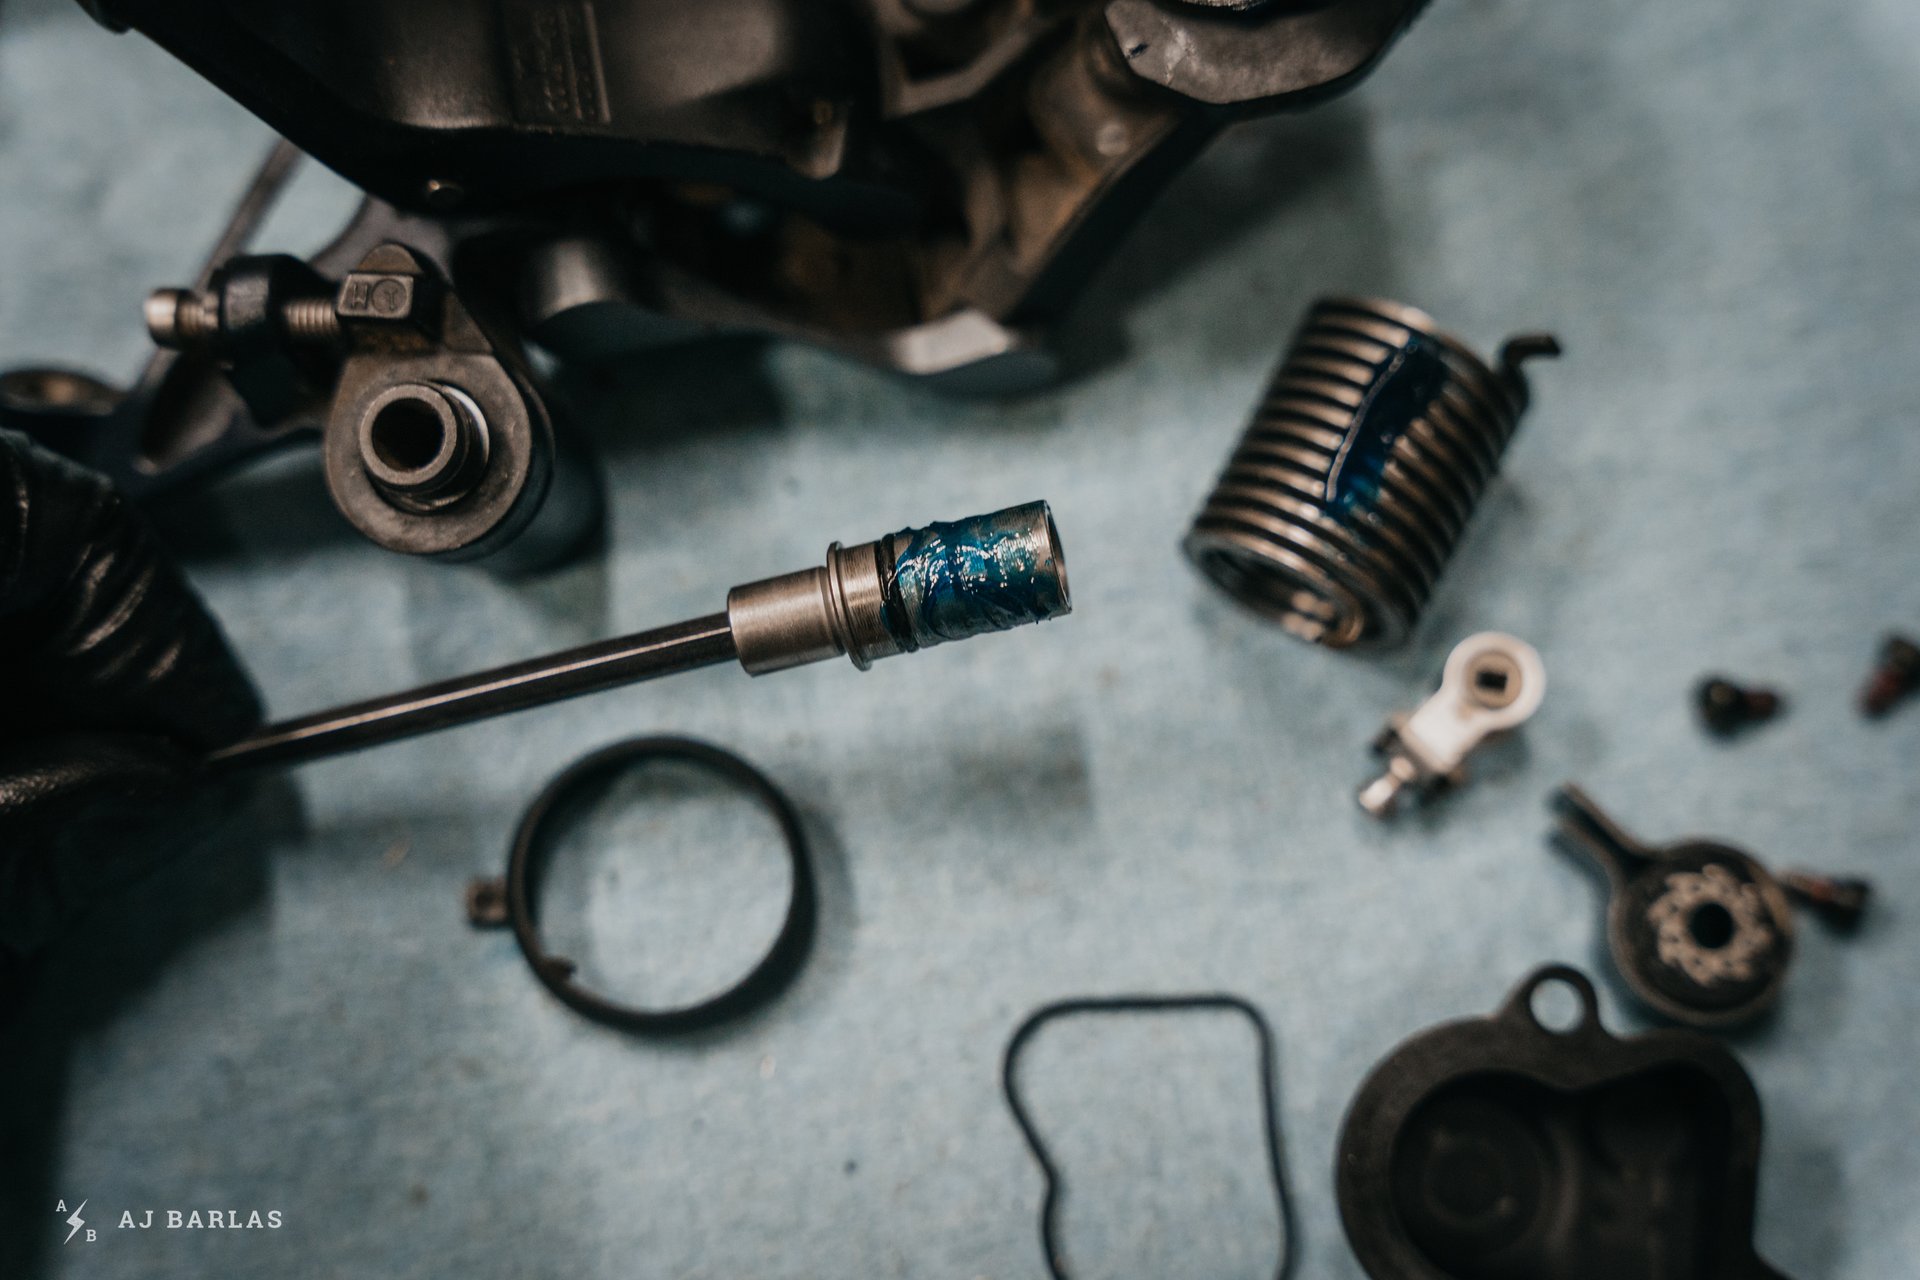
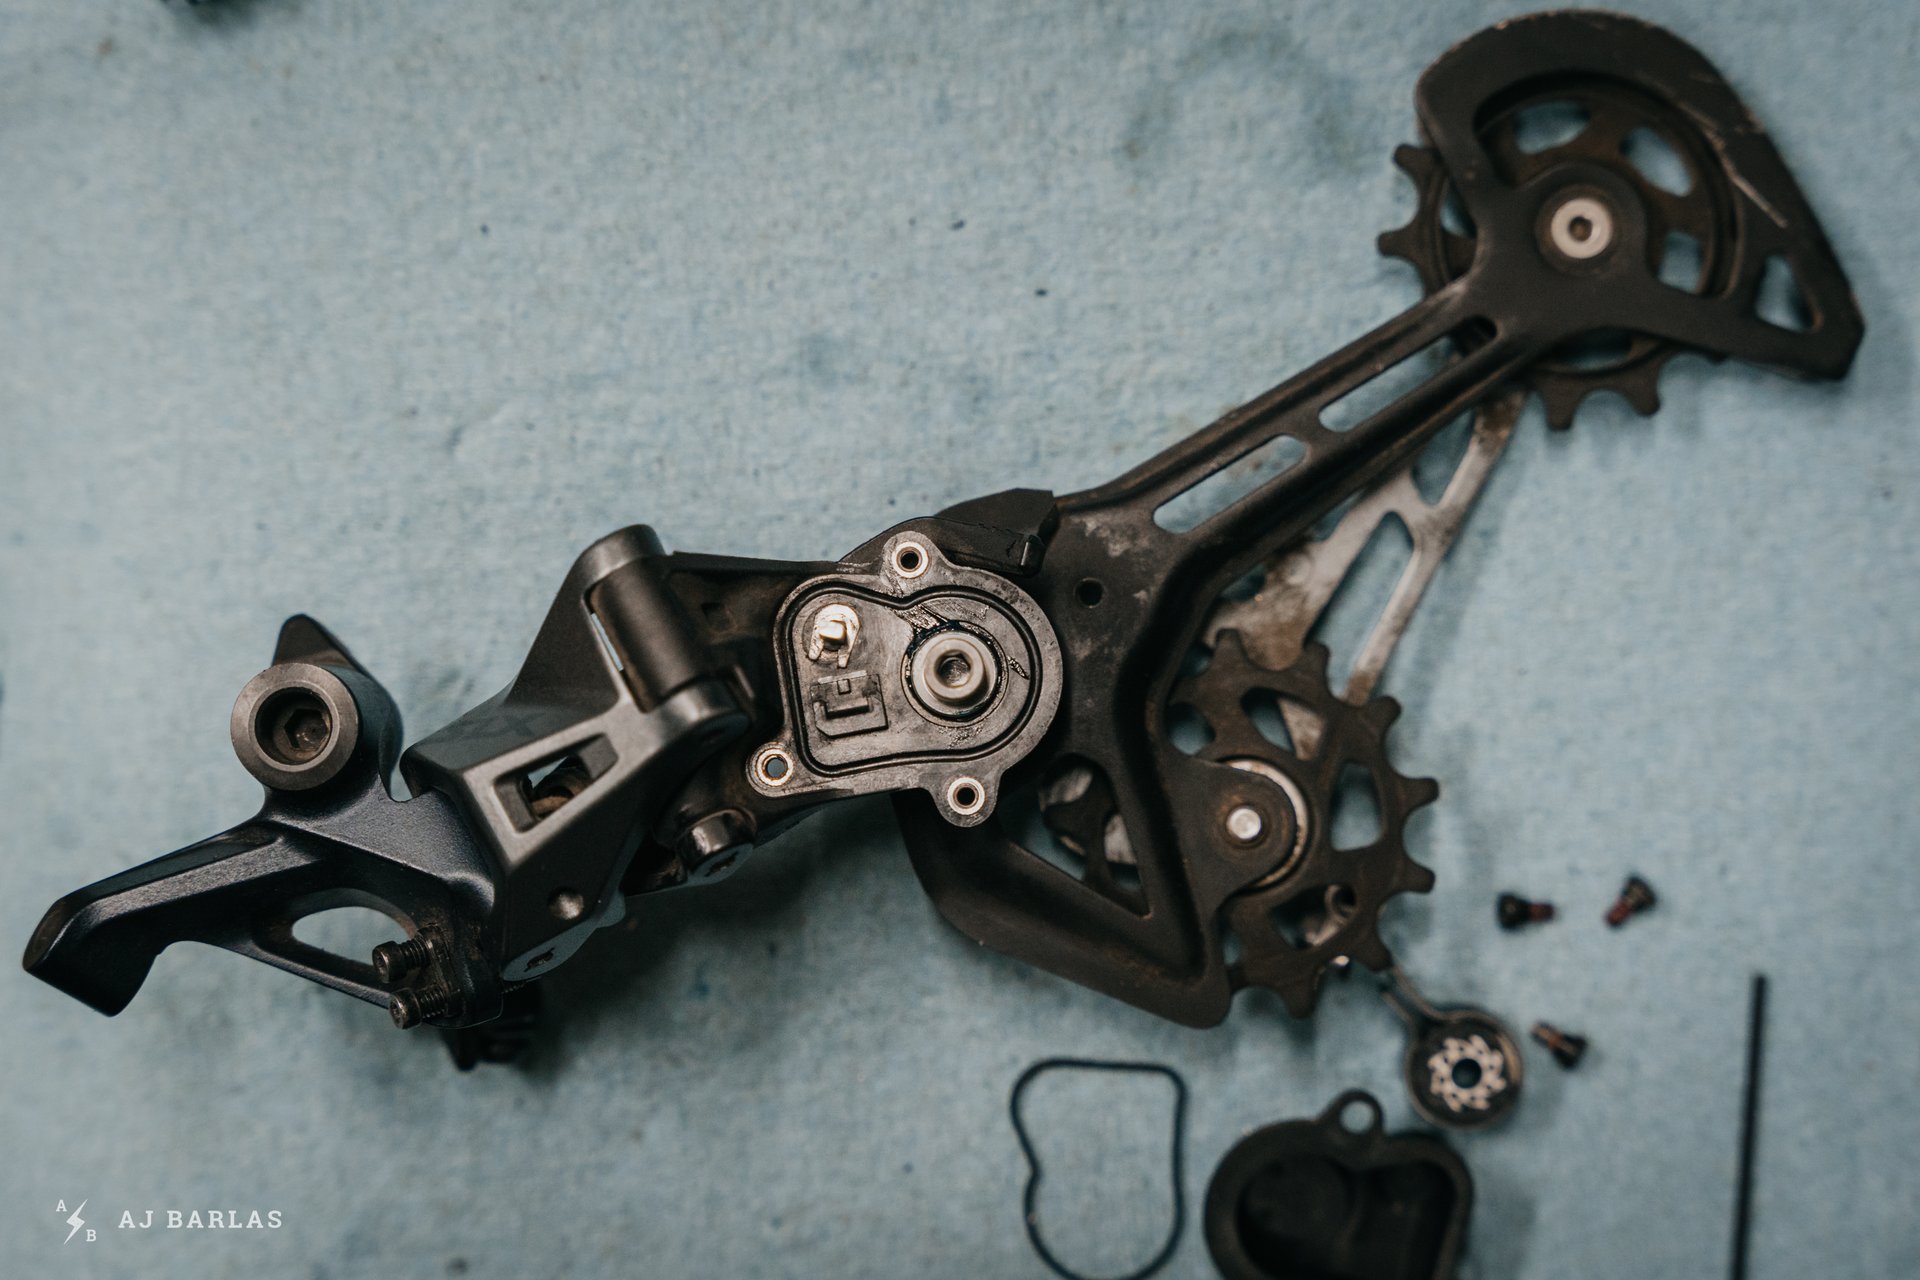
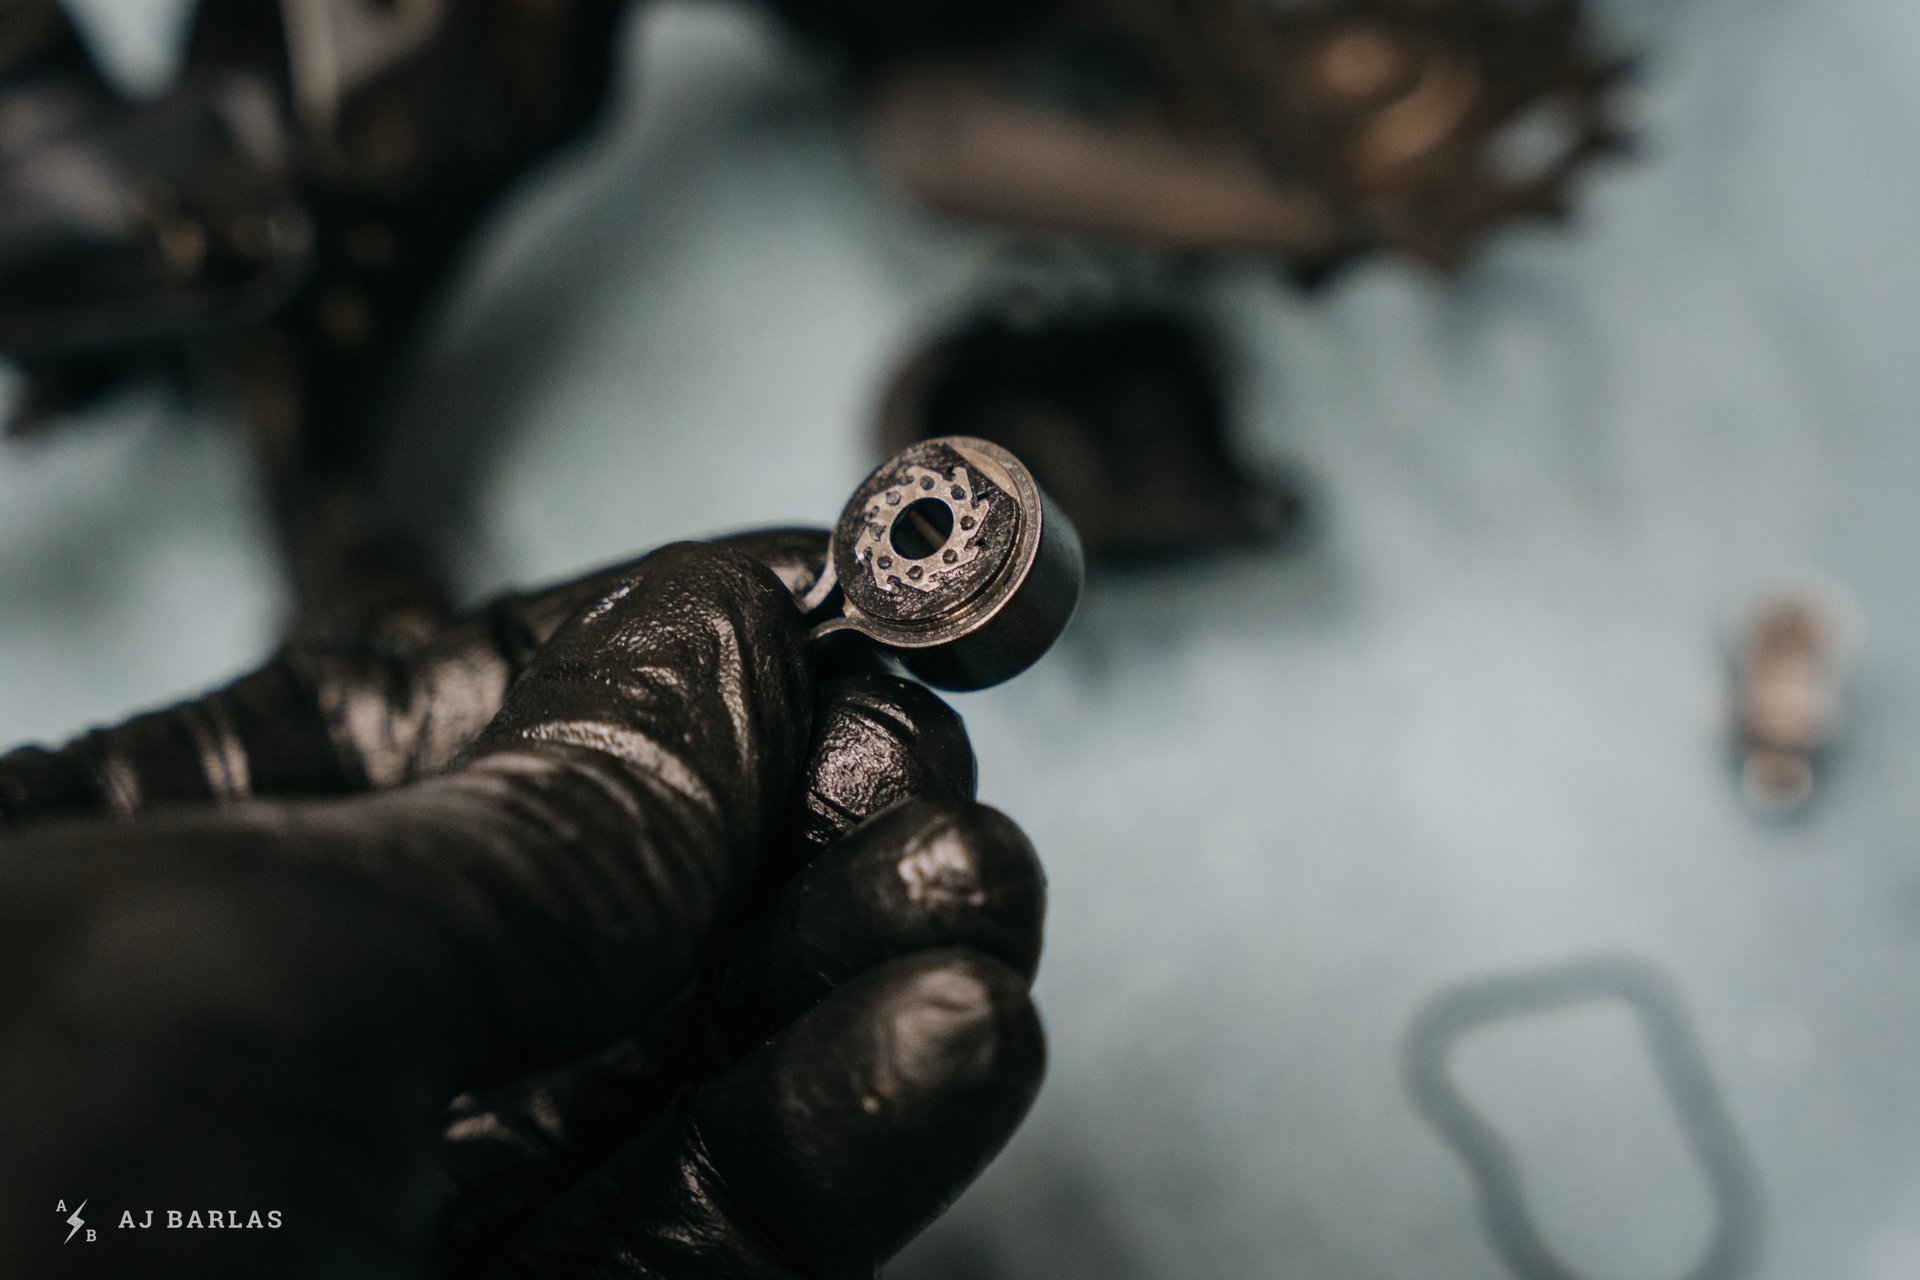
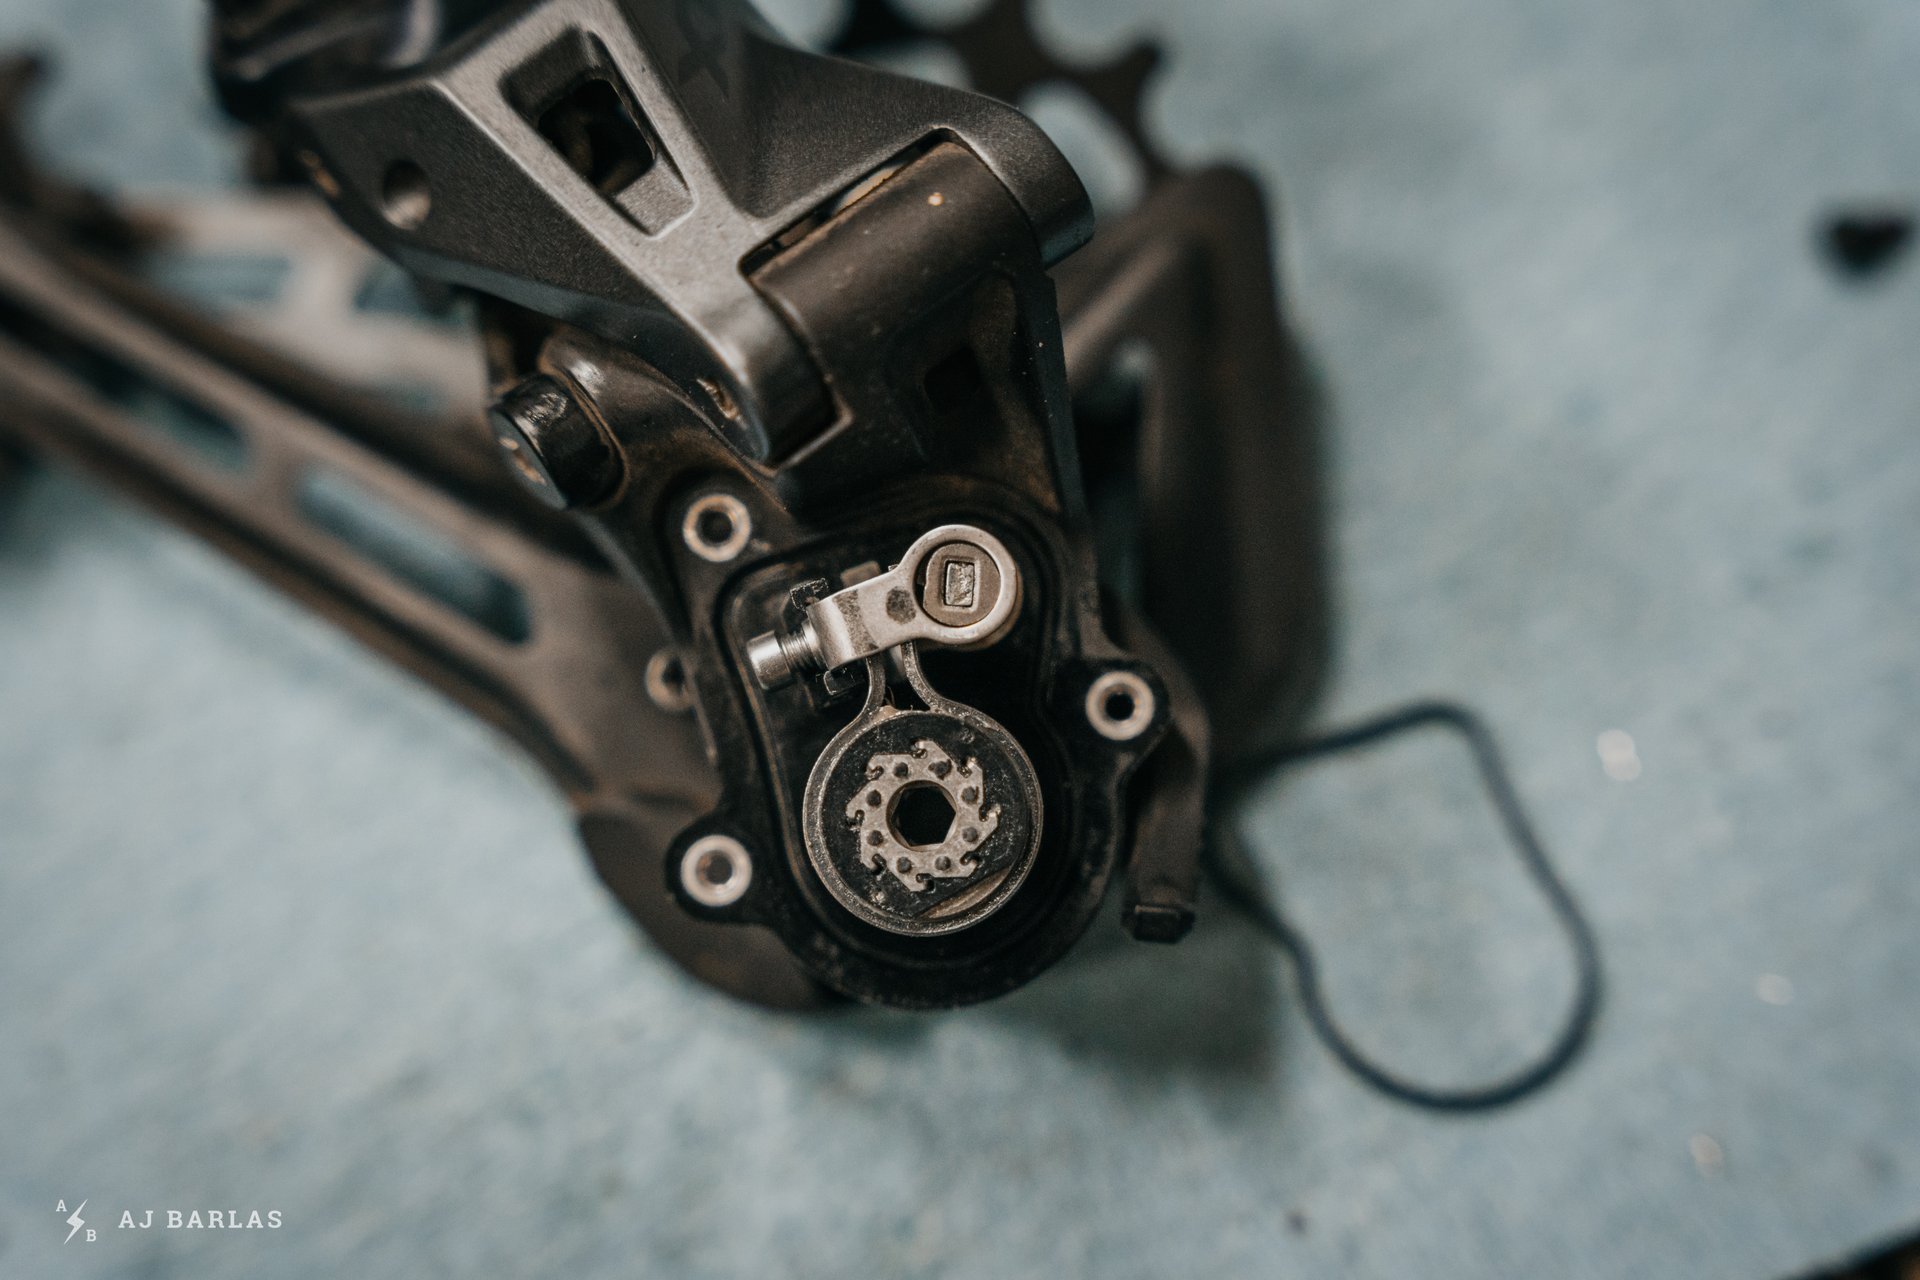
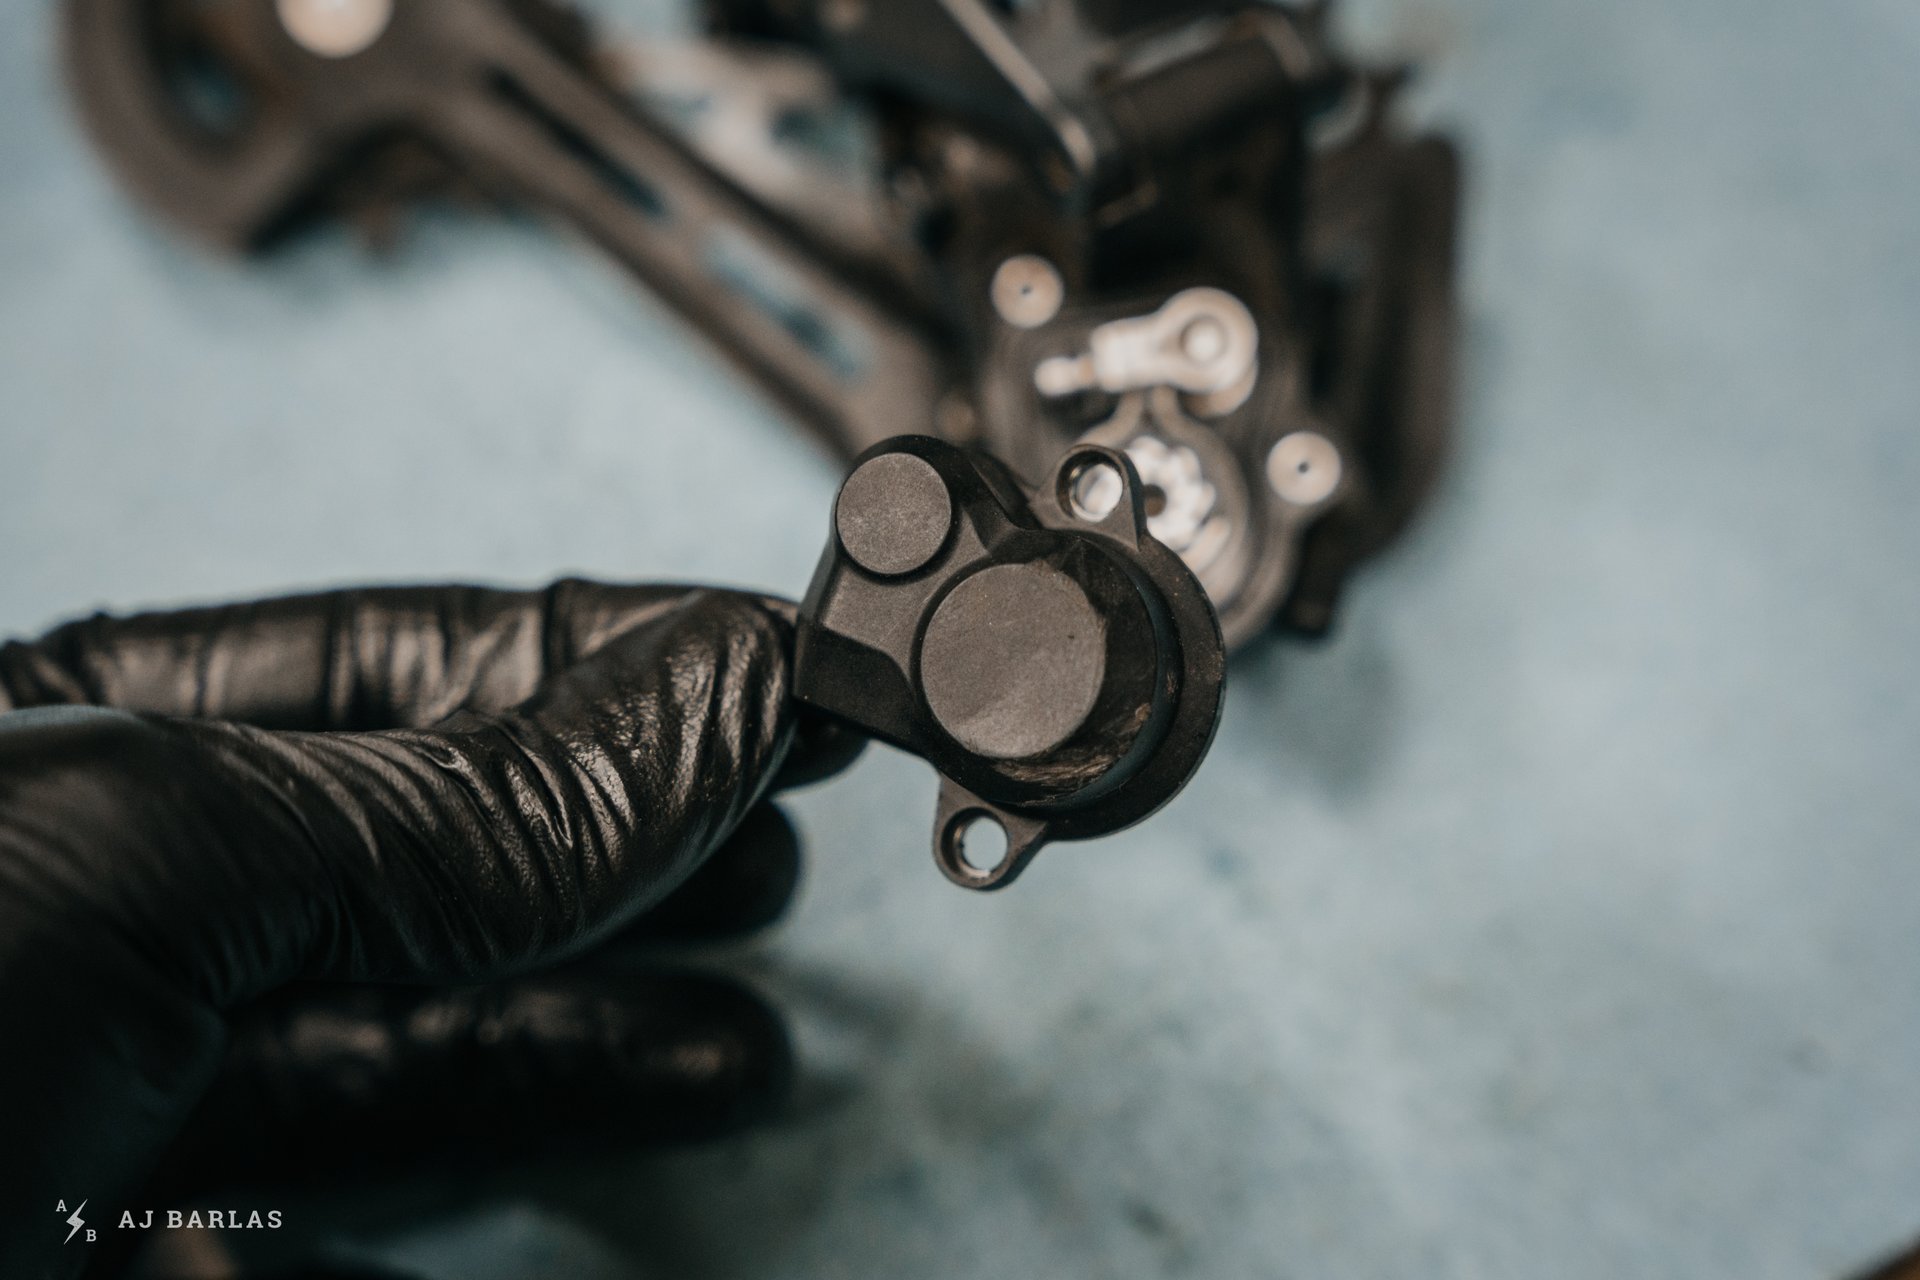
With the clutch now removed, we get a better look at the plate axle (hollow piece that the chain stabilizer rested on). It's important not to get any grease on this part of the axle, or the clutch won't work.
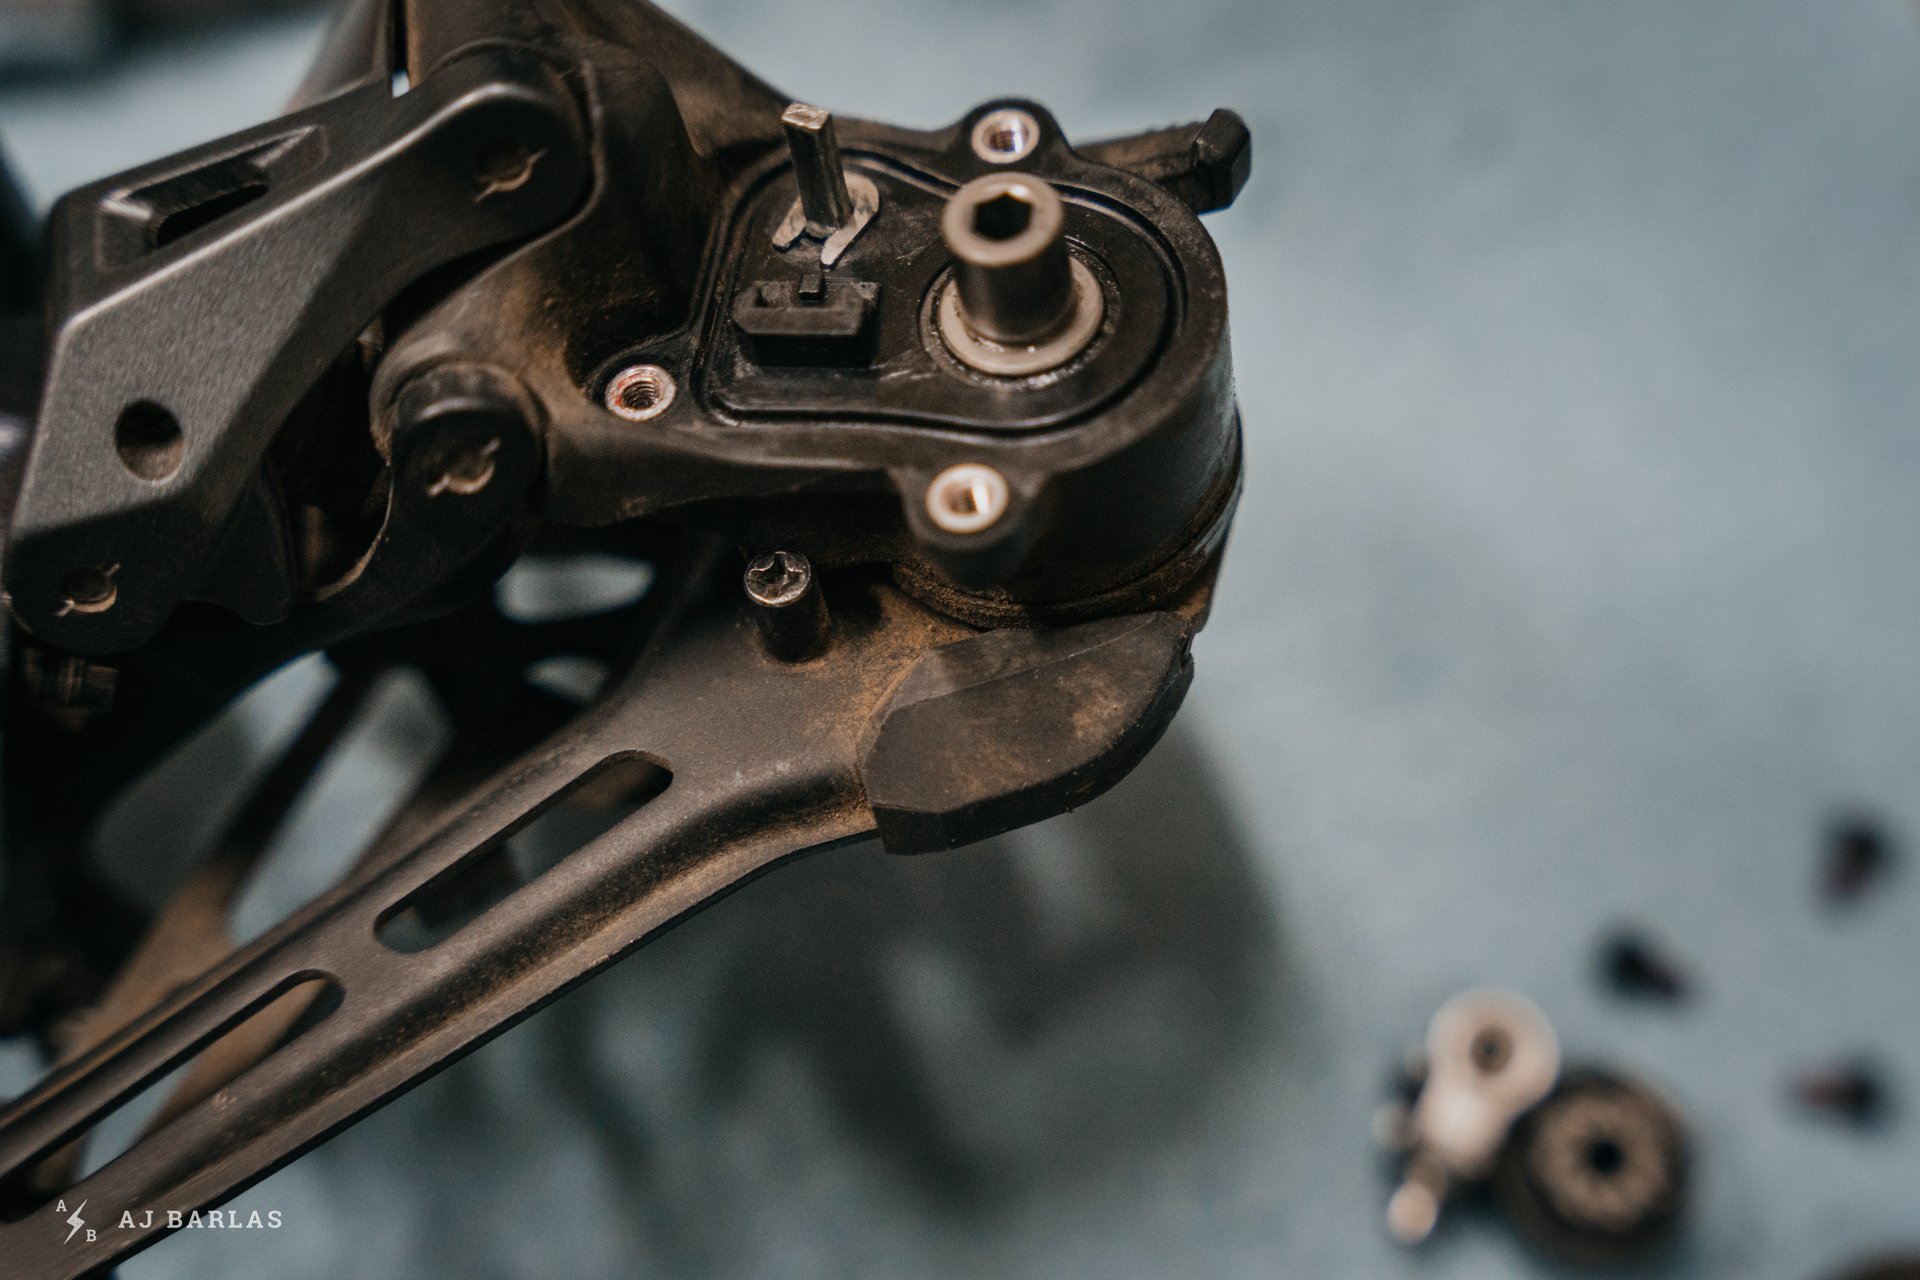
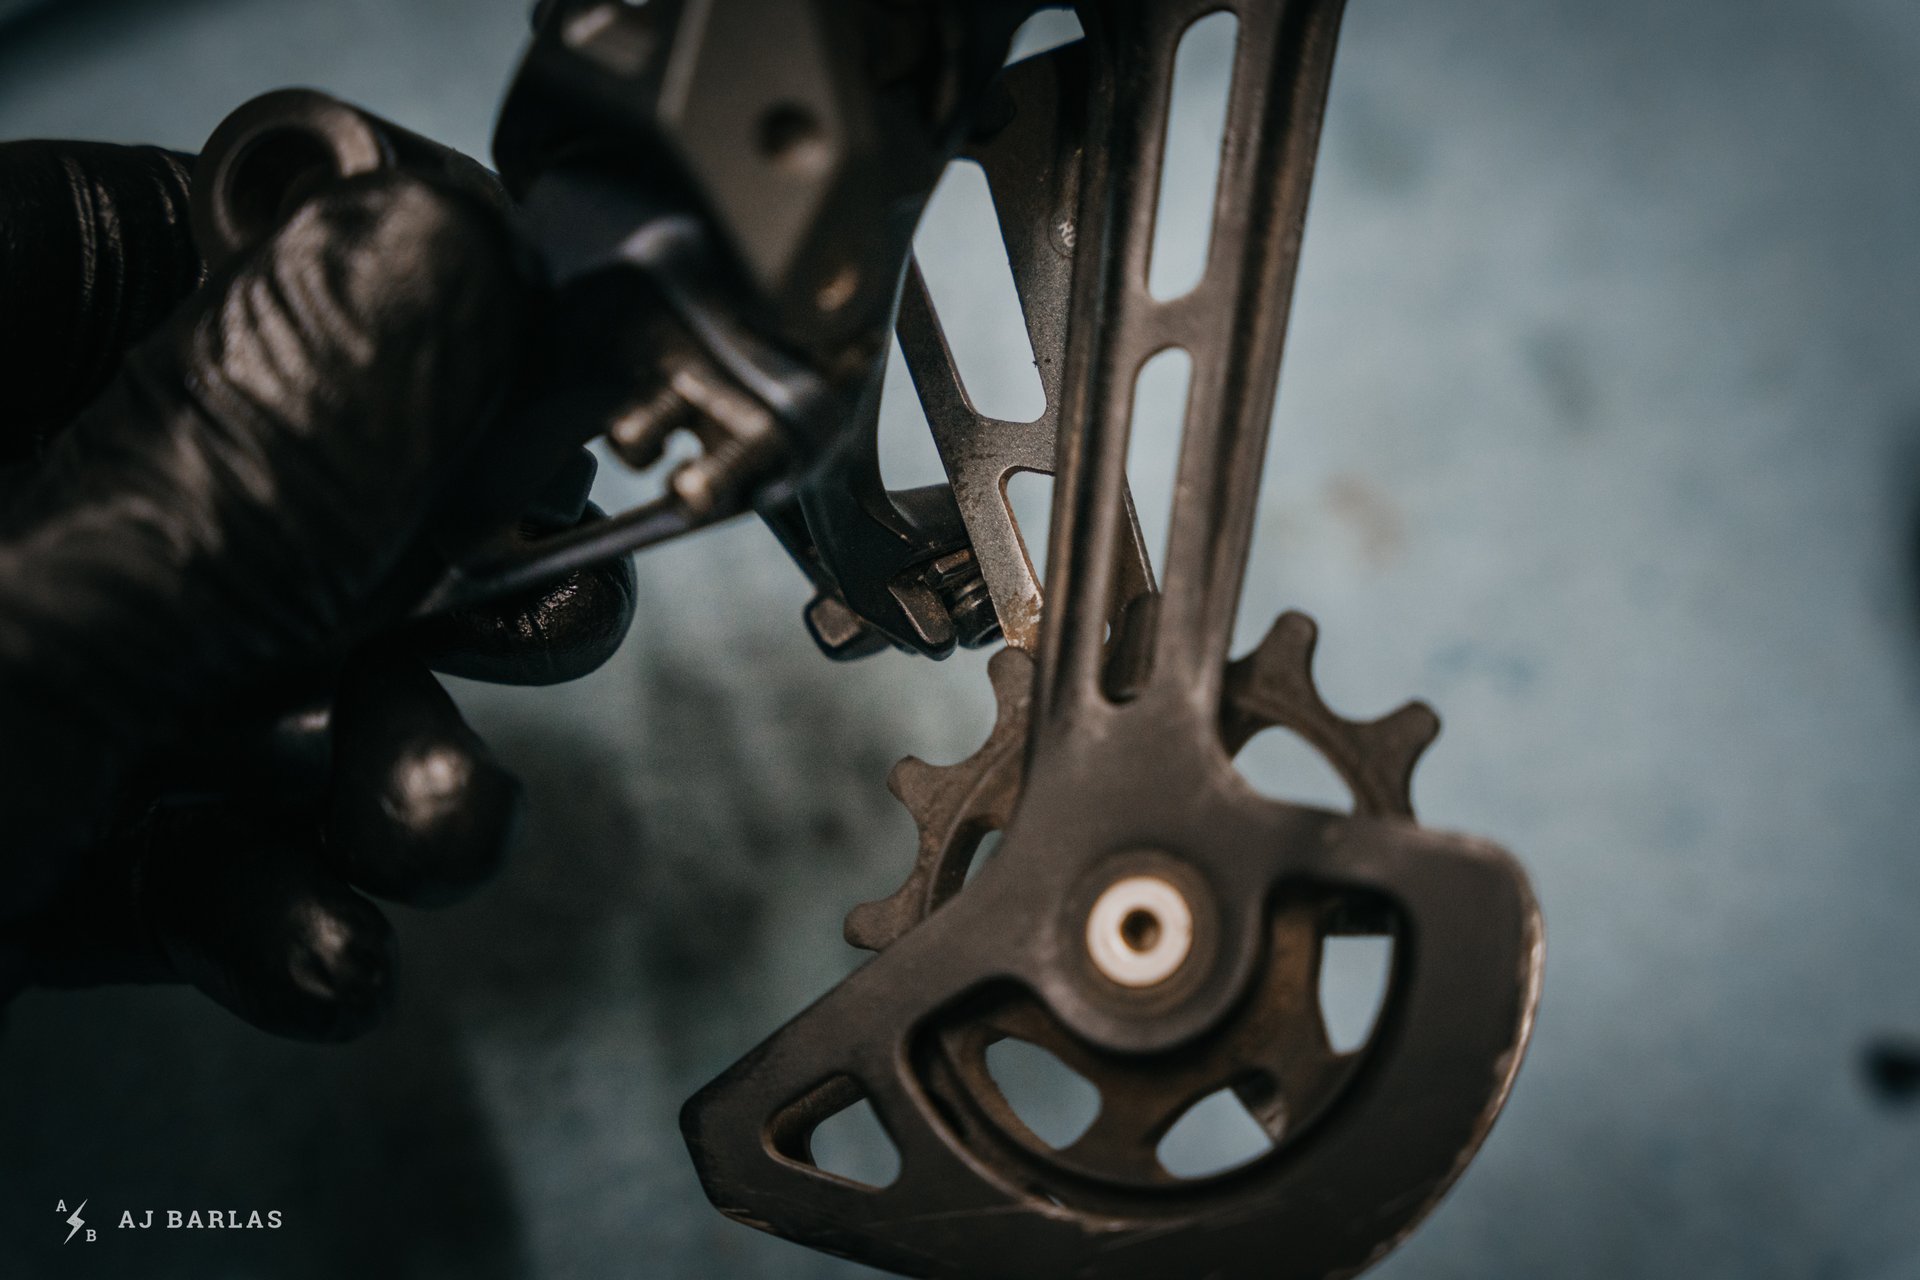
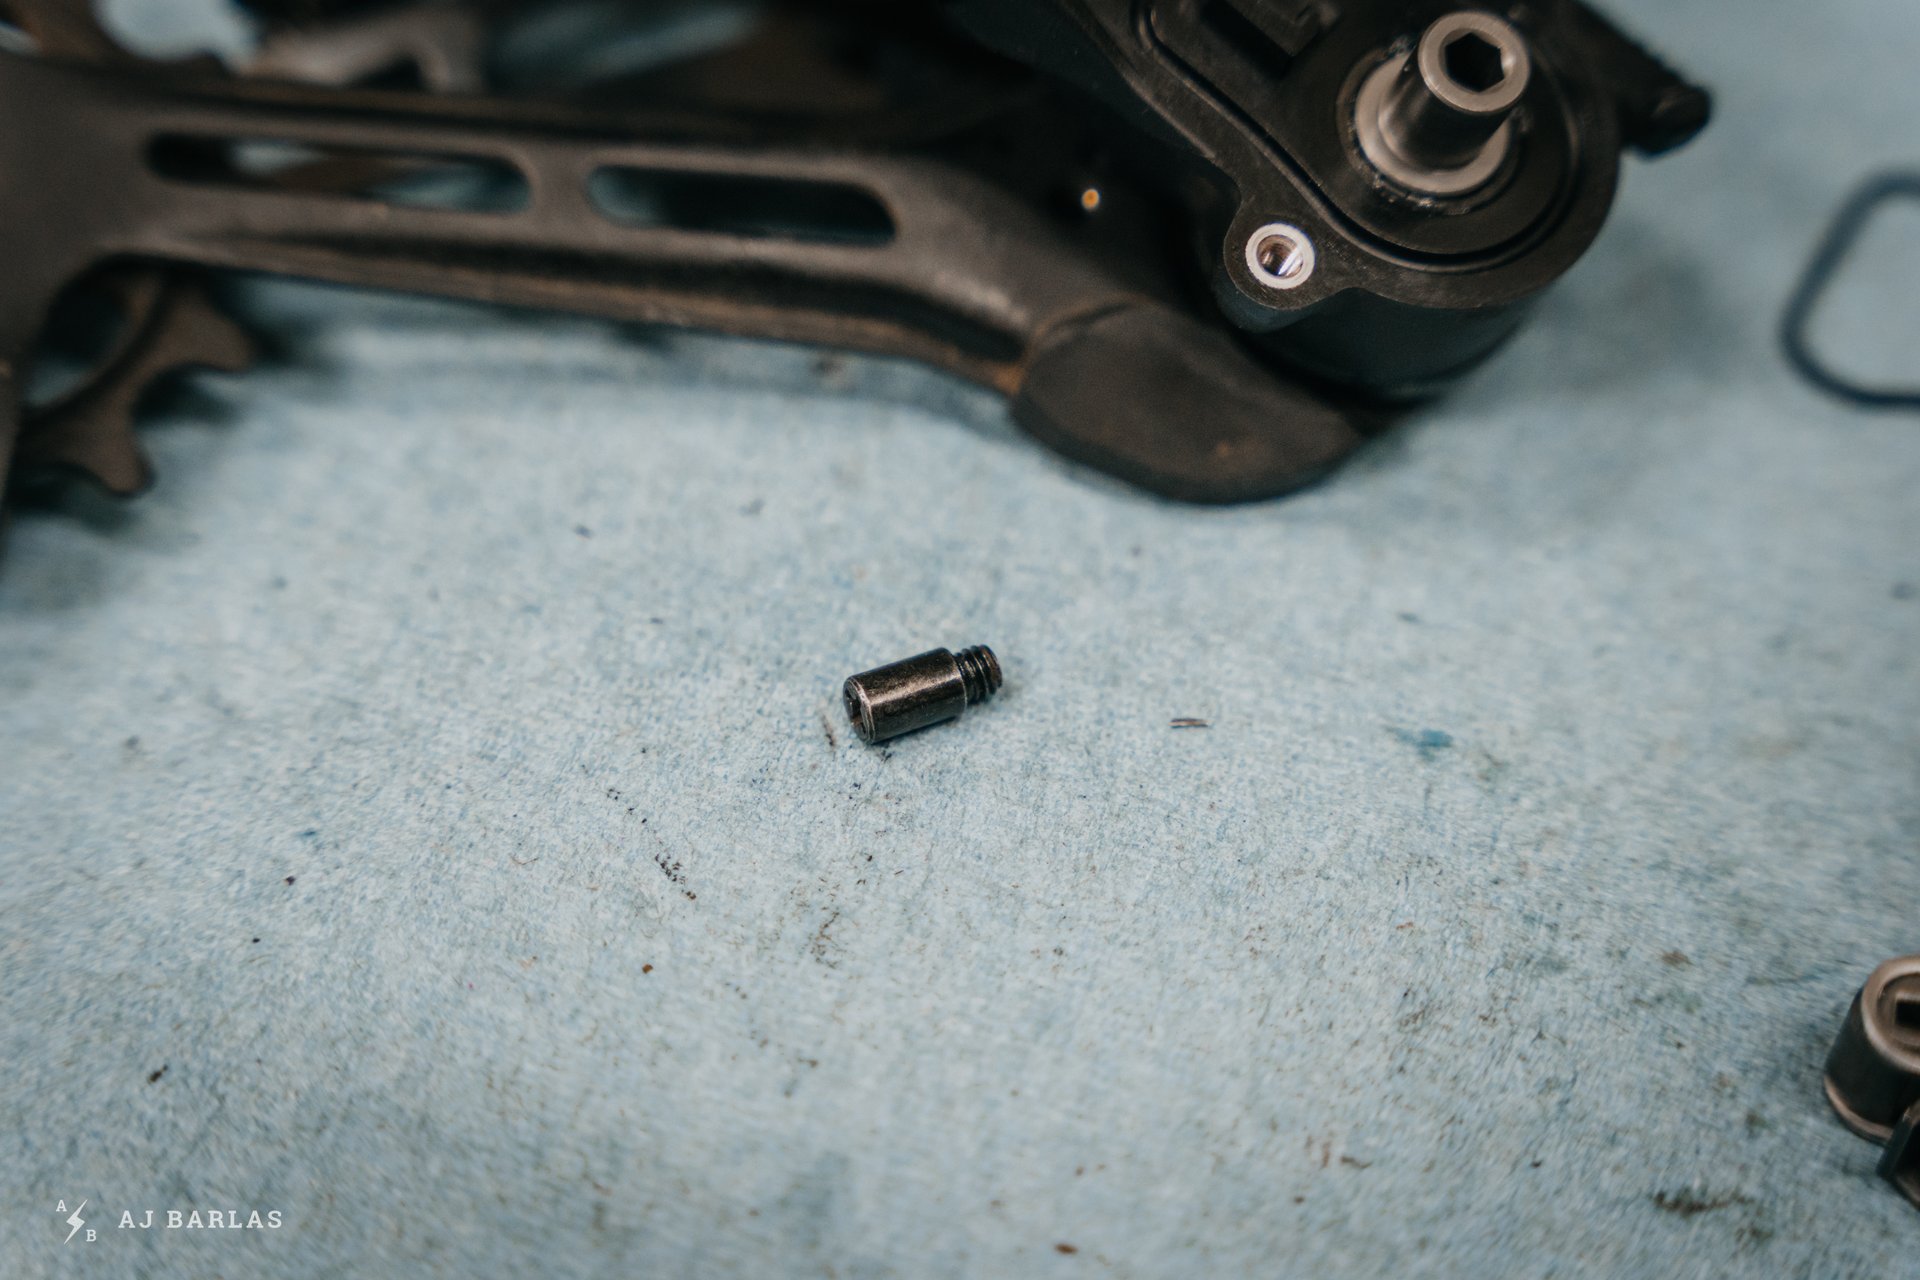
The lower cage of the derailleur is under reasonable tension from a loaded spring and we need to remove it to access the 'plate axle.' To unwind it, start by removing the 'plate stopper pin' using a Phillips Head screwdriver. The pin sits on the lower cage just below the knuckle of the derailleur, where the clutch was just removed from.
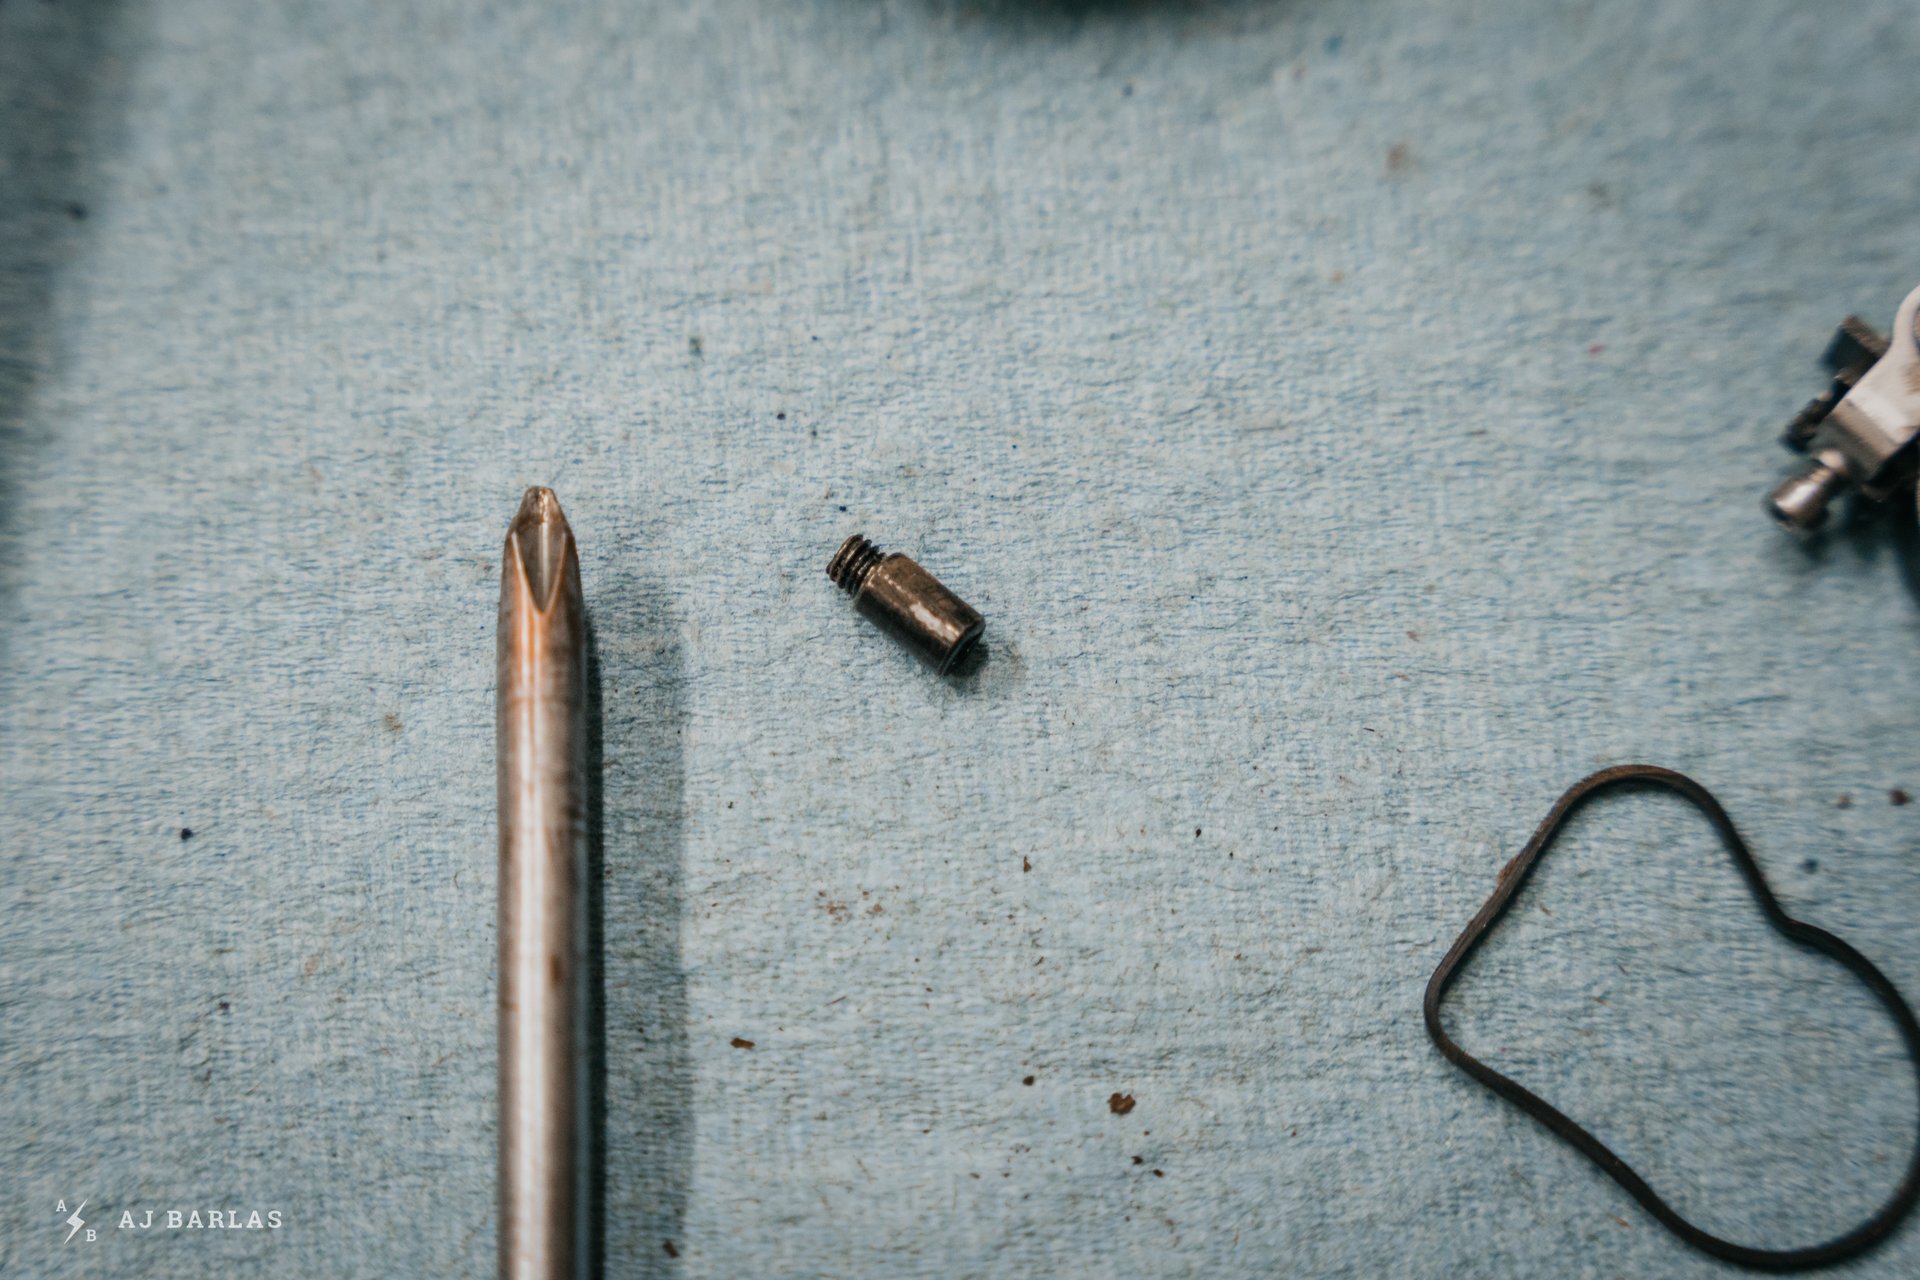
With the pin removed, we can prepare to unwind the spring.
The lower cage with the pin removed.
The lower cage is stopped from automatically unwinding itself by the top of the derailleur. This is quite helpful when working on the derailleur with the stopper pin removed.
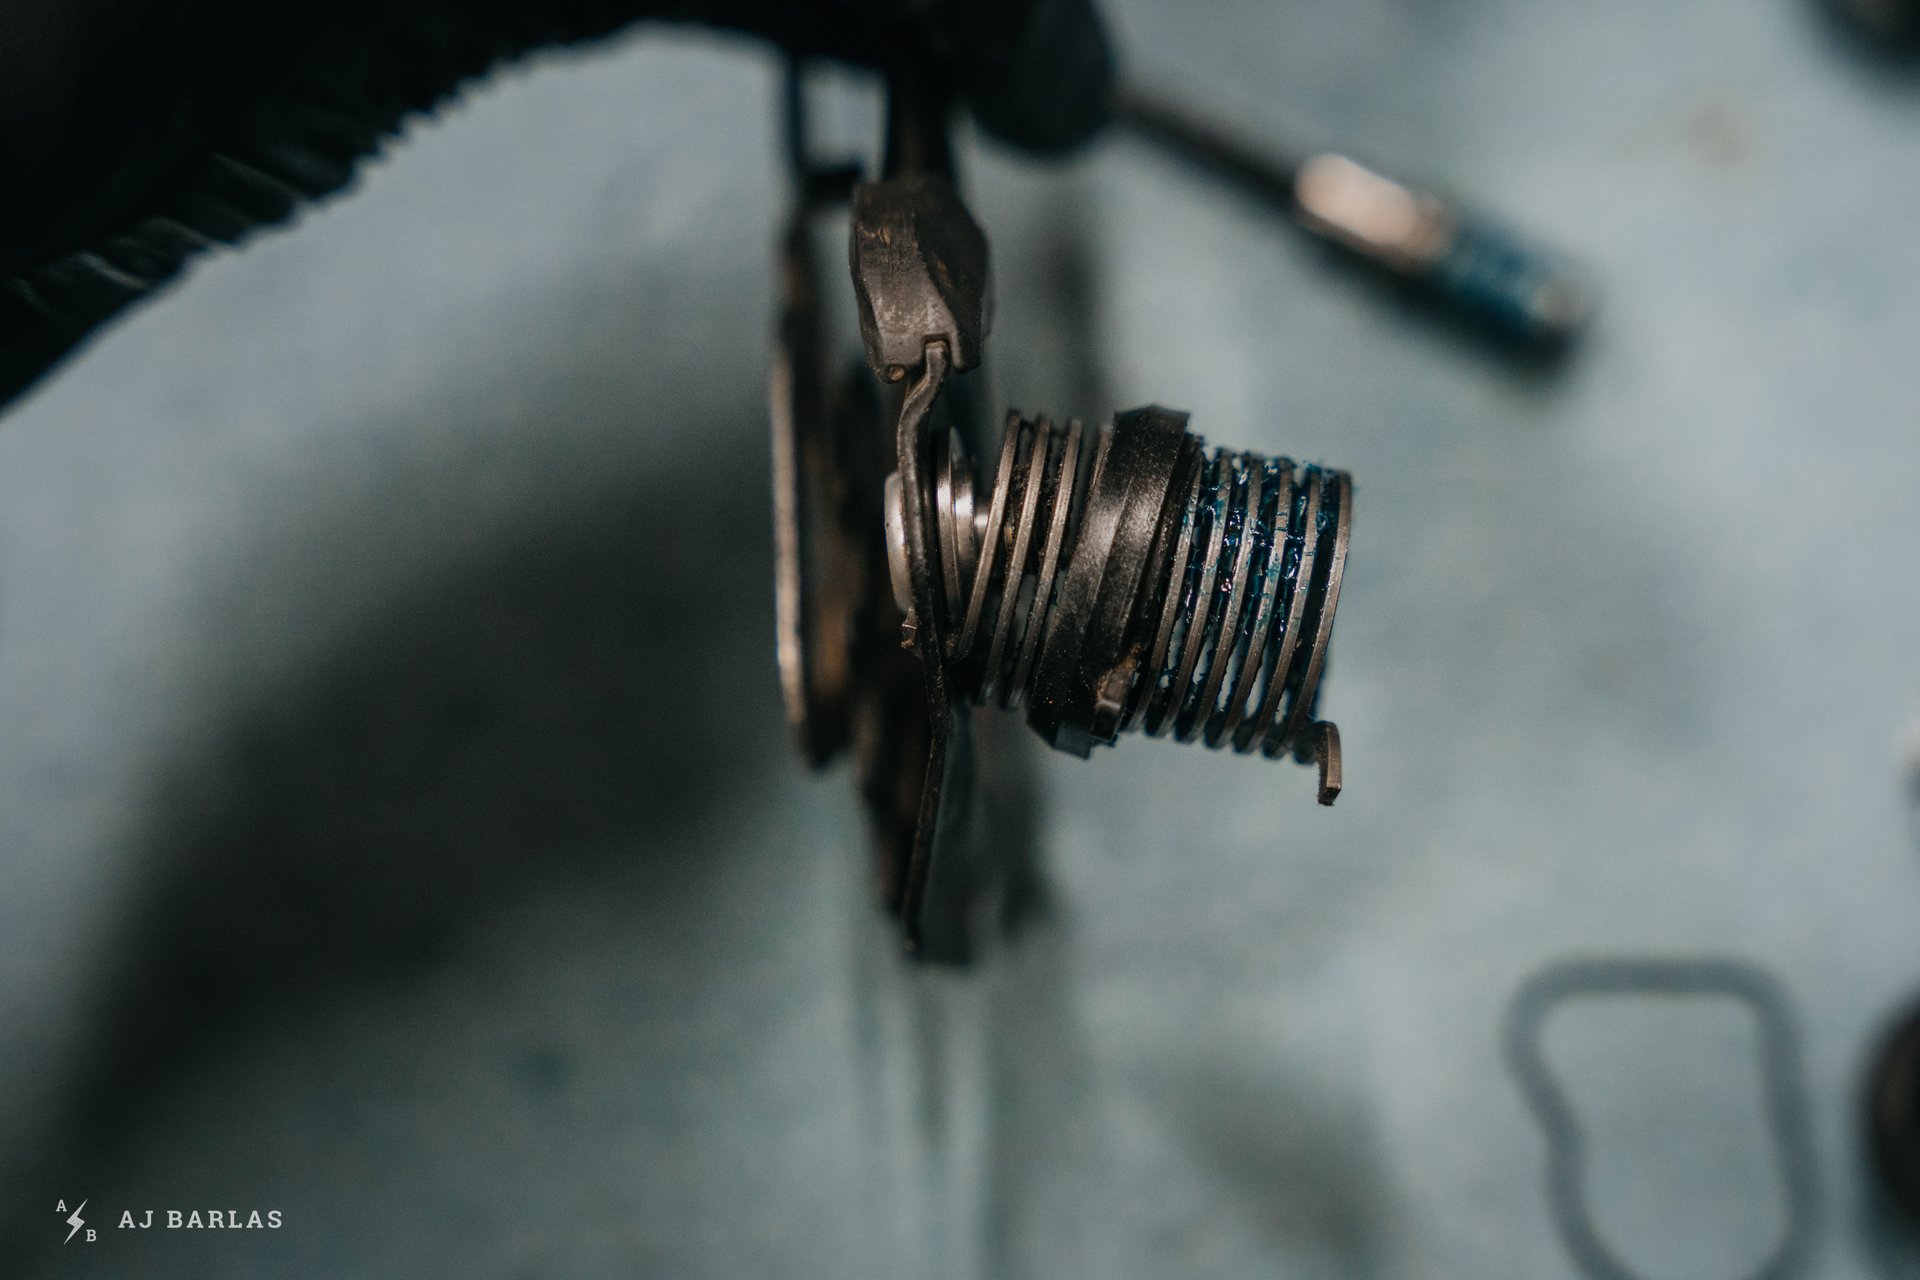
Carefully extend the upper cage of the derailleur while holding the lower stable to prevent getting caught from the spring unloading. Once the lower cage clears the upper section, it will begin to unwind, clockwise, and you will be left with this.
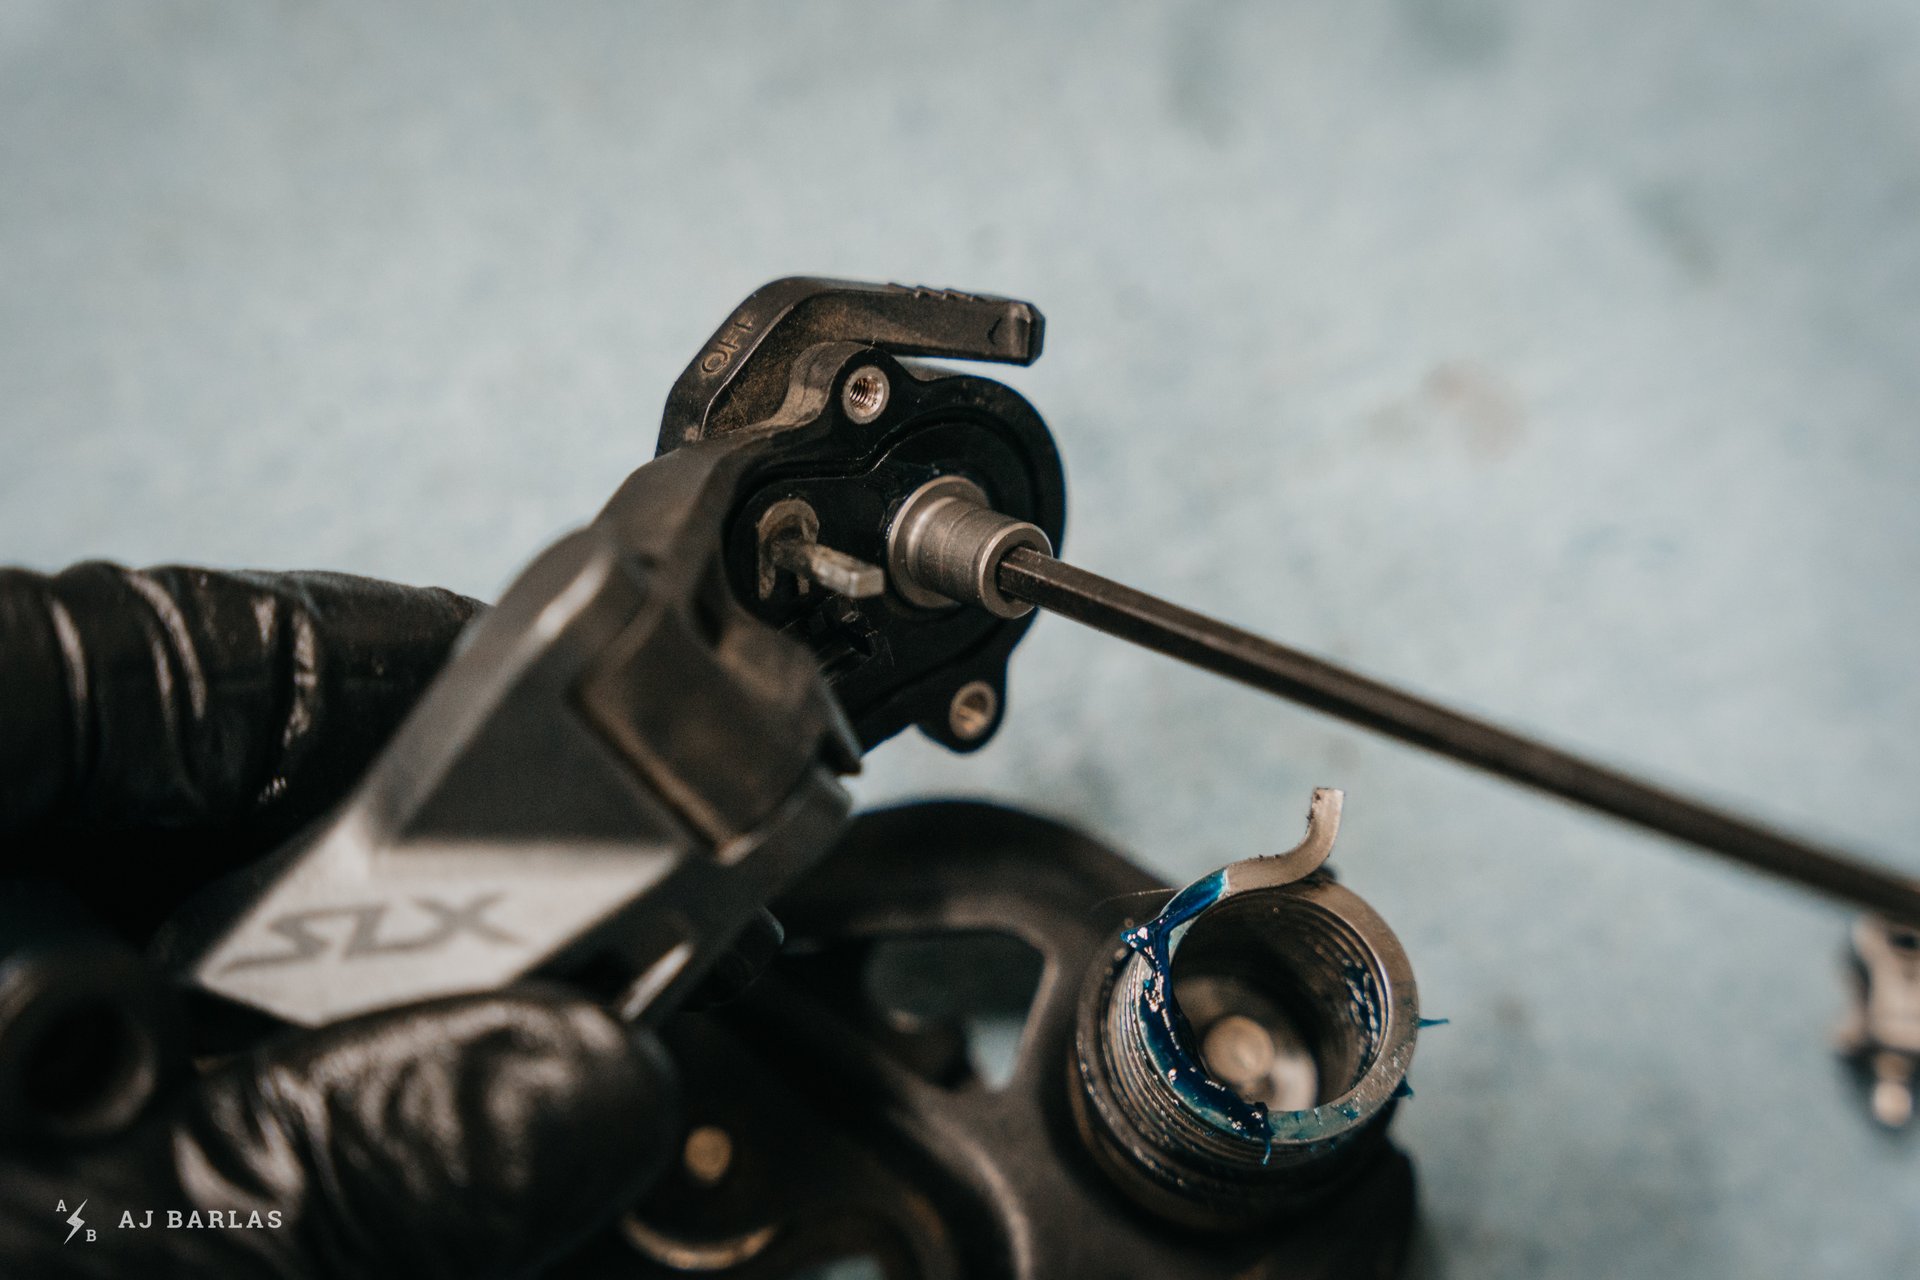
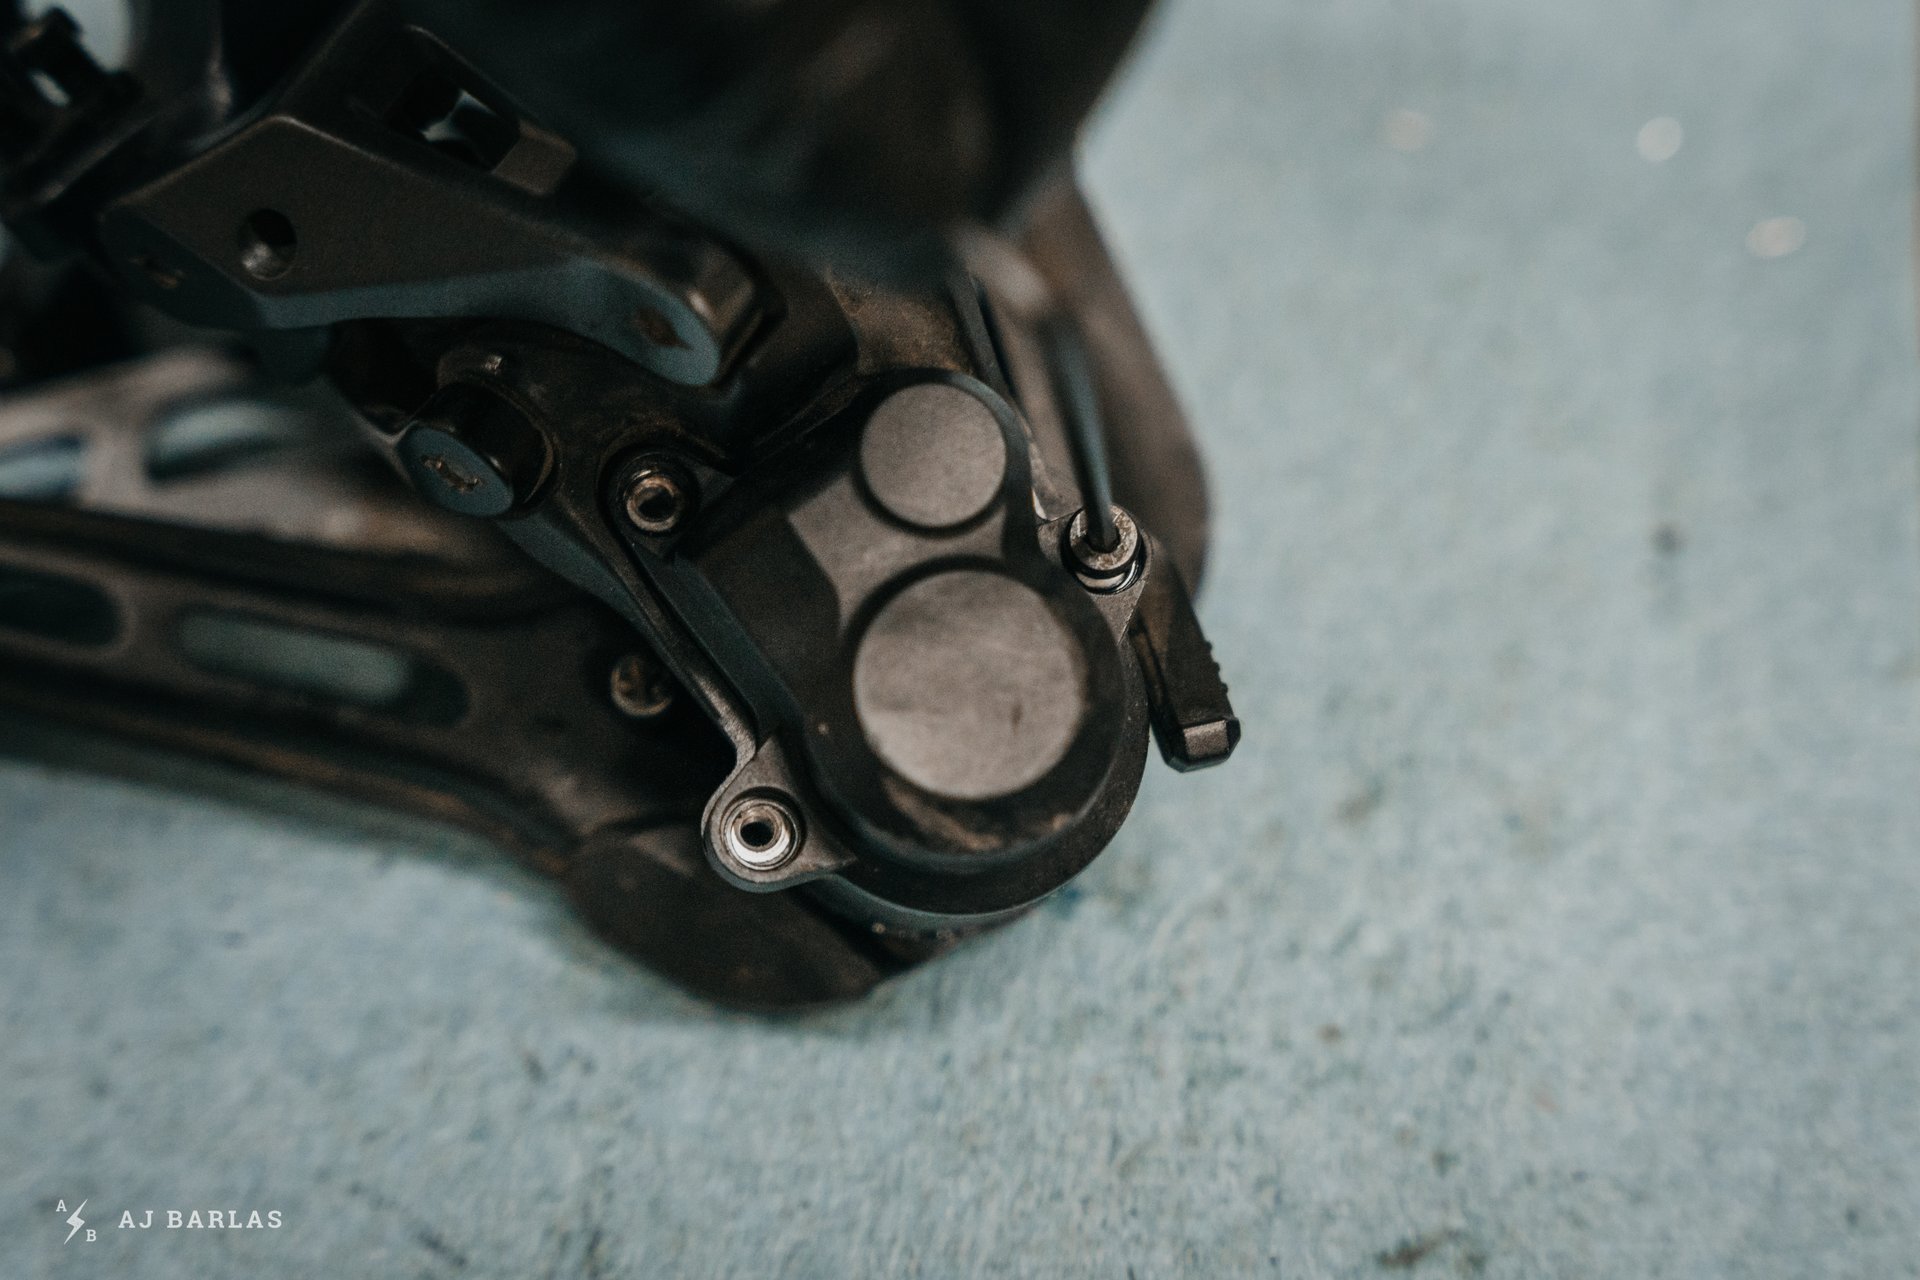
Now we can remove the plate axle. Using a 4mm hex key…
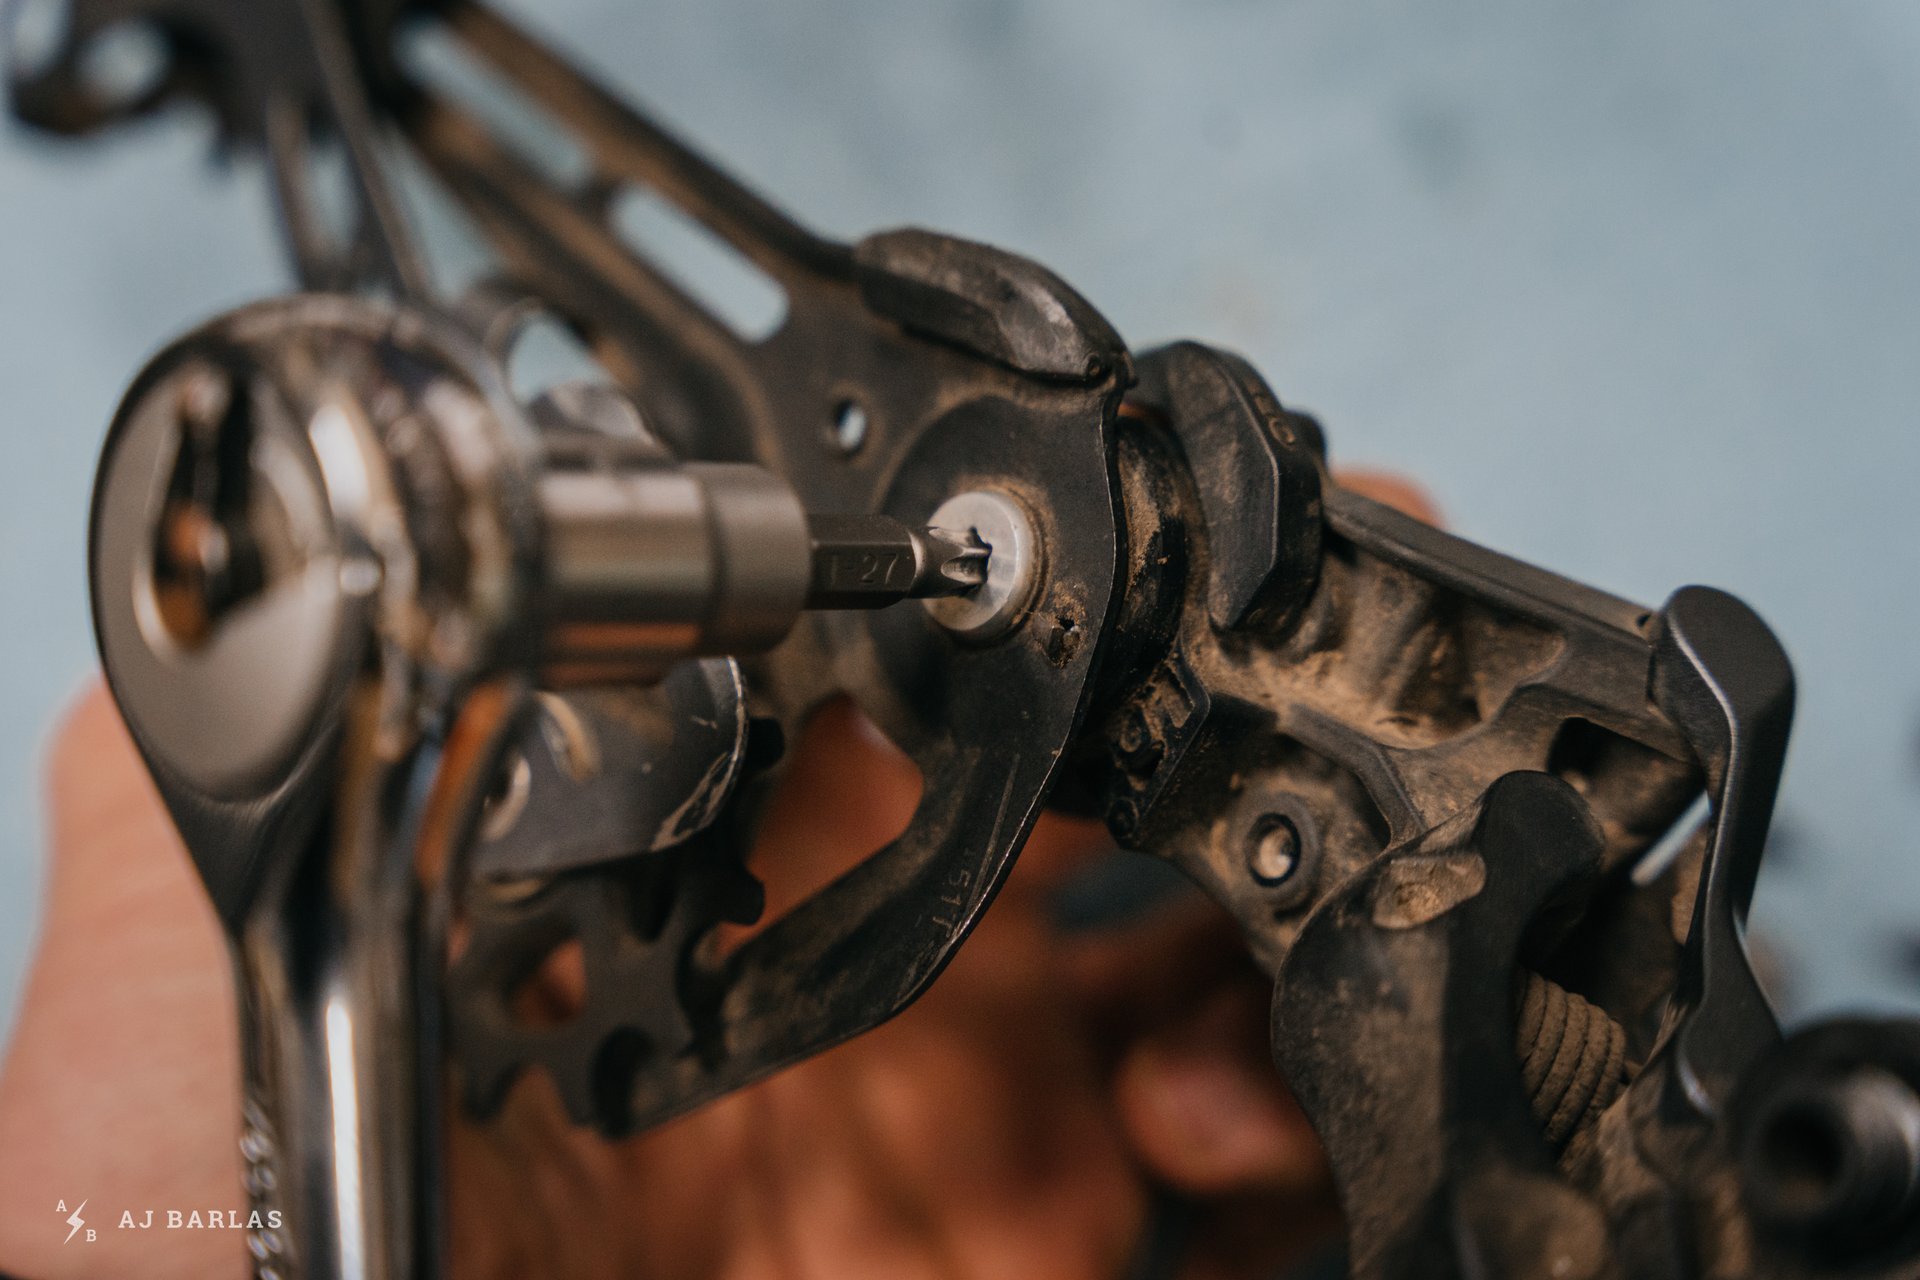
And a T27, undo the two sides. This disconnects the upper and lower halves of the derailleur.
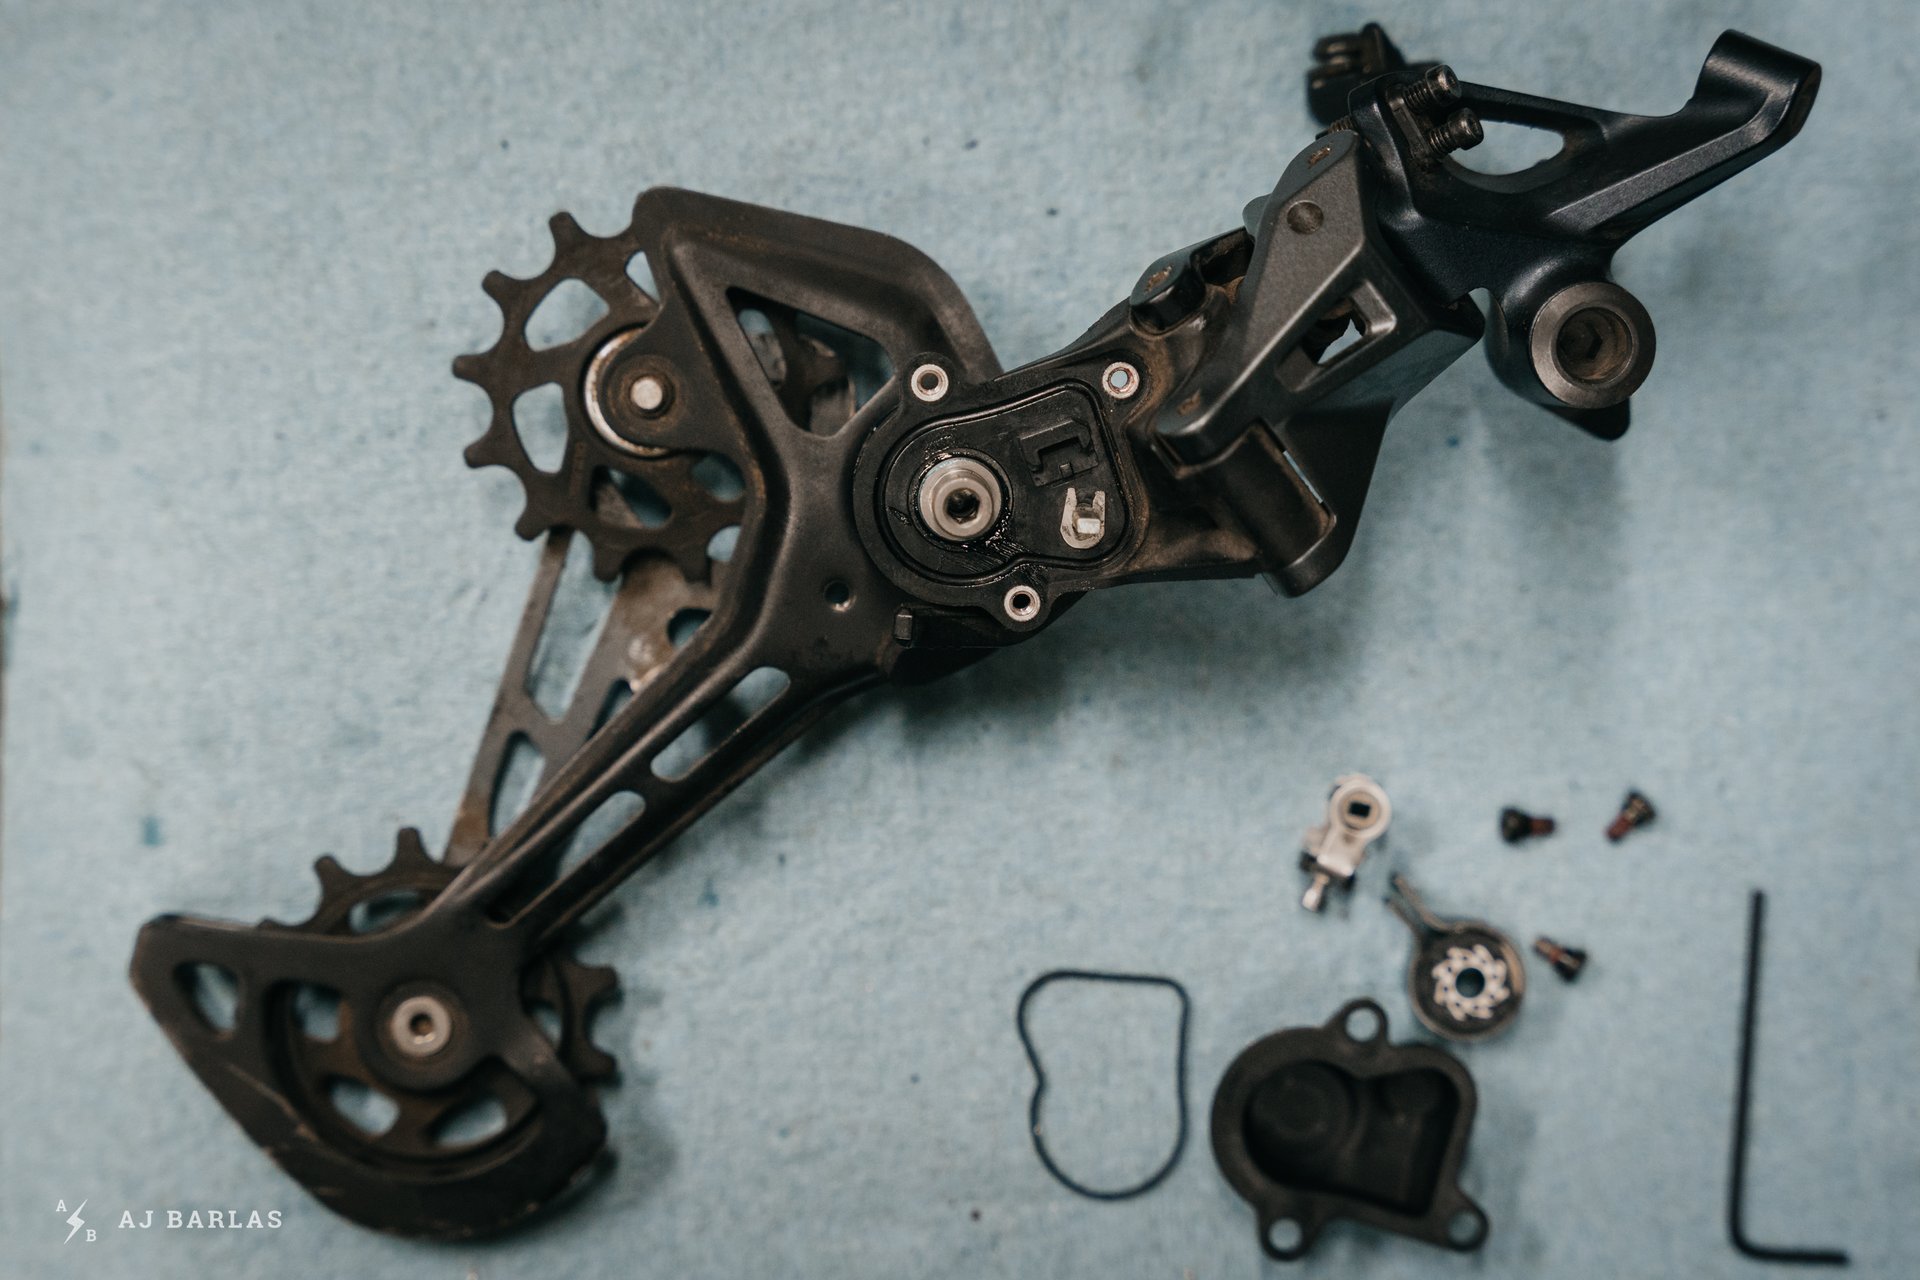
With the plate axle removed we're left with two halves of a derailleur. The lower cage…
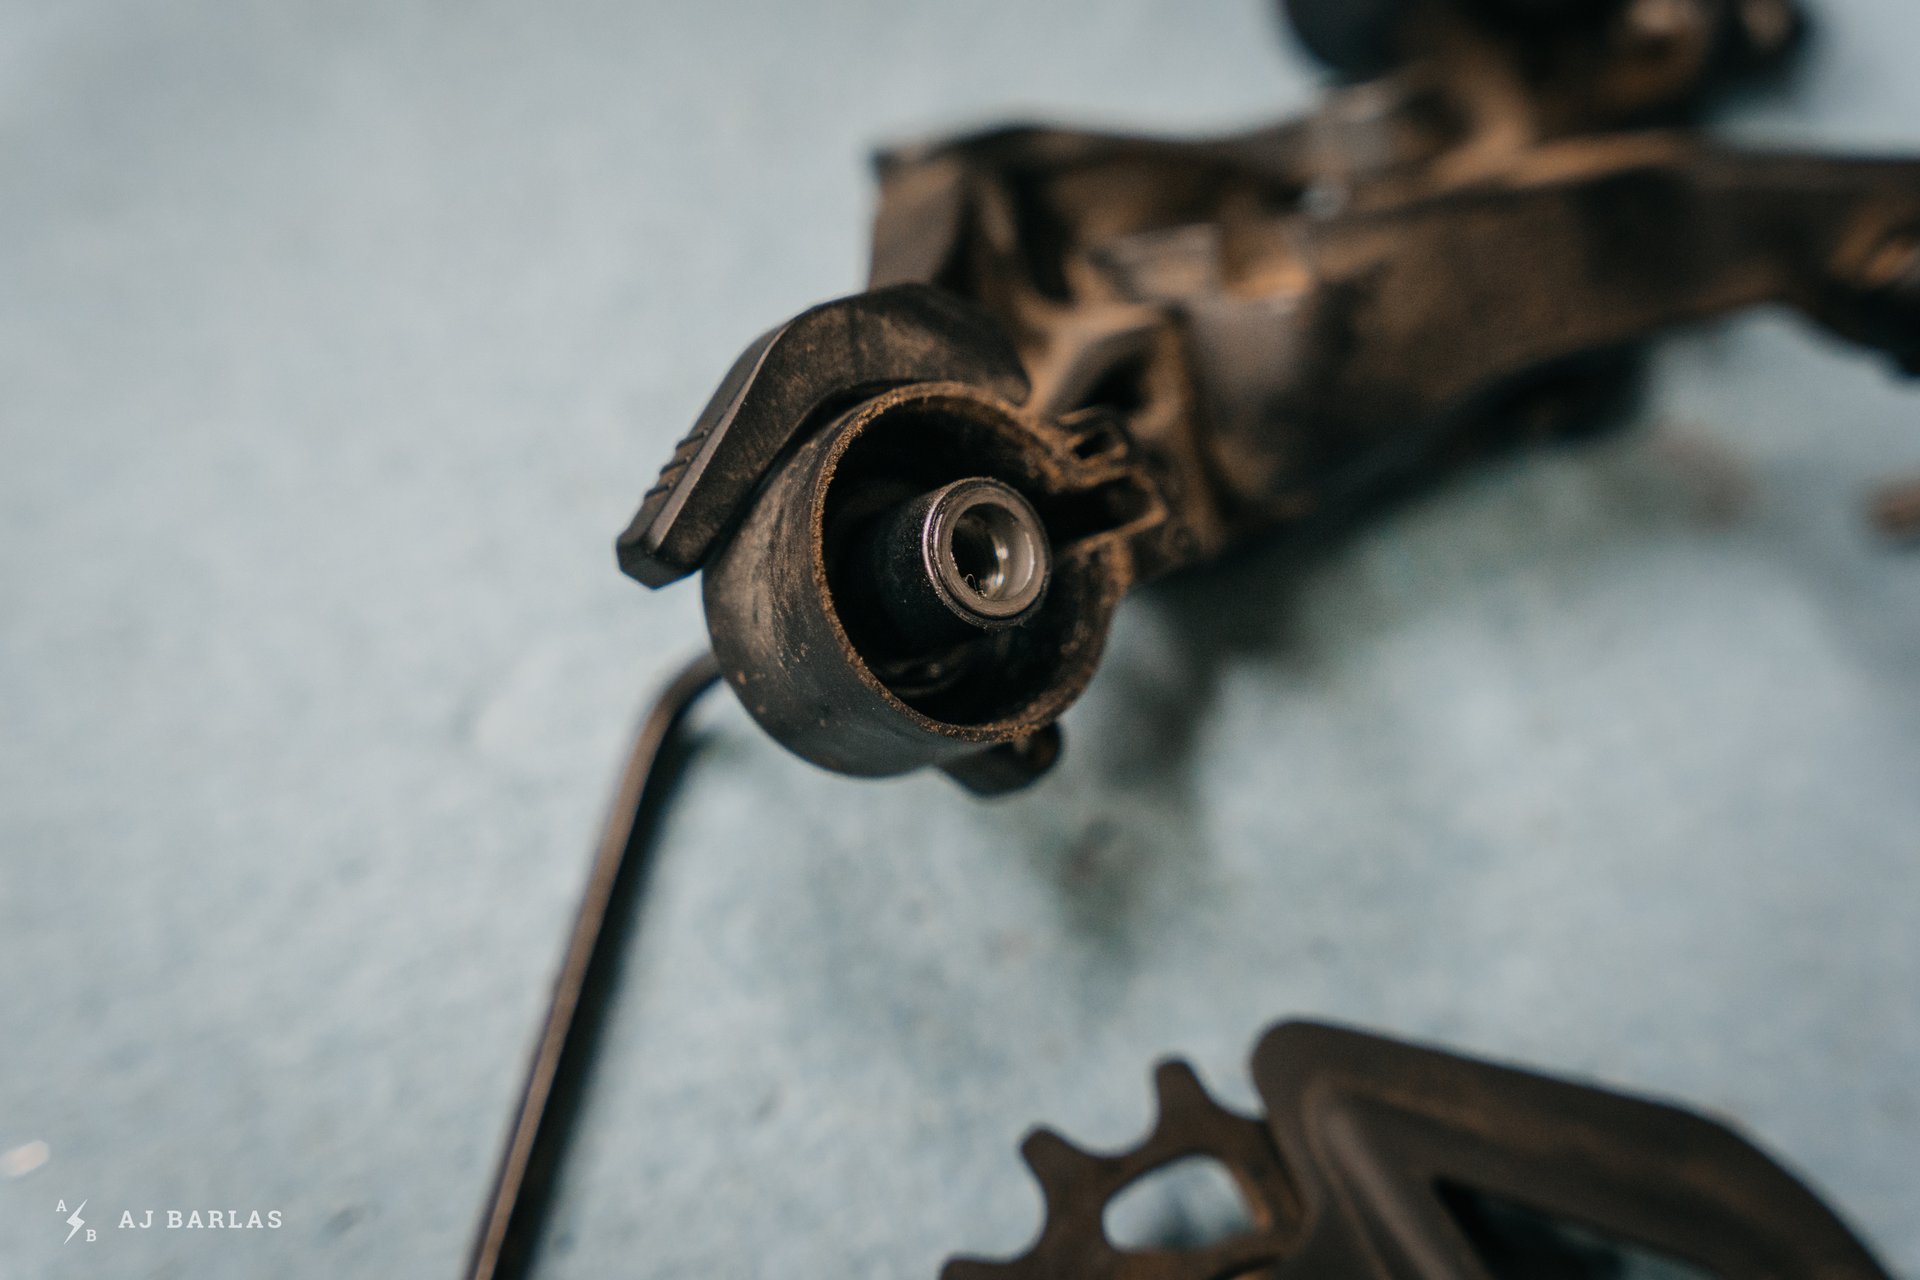
And the upper. It's a good time to clean the spring and the housing it's wound up in.
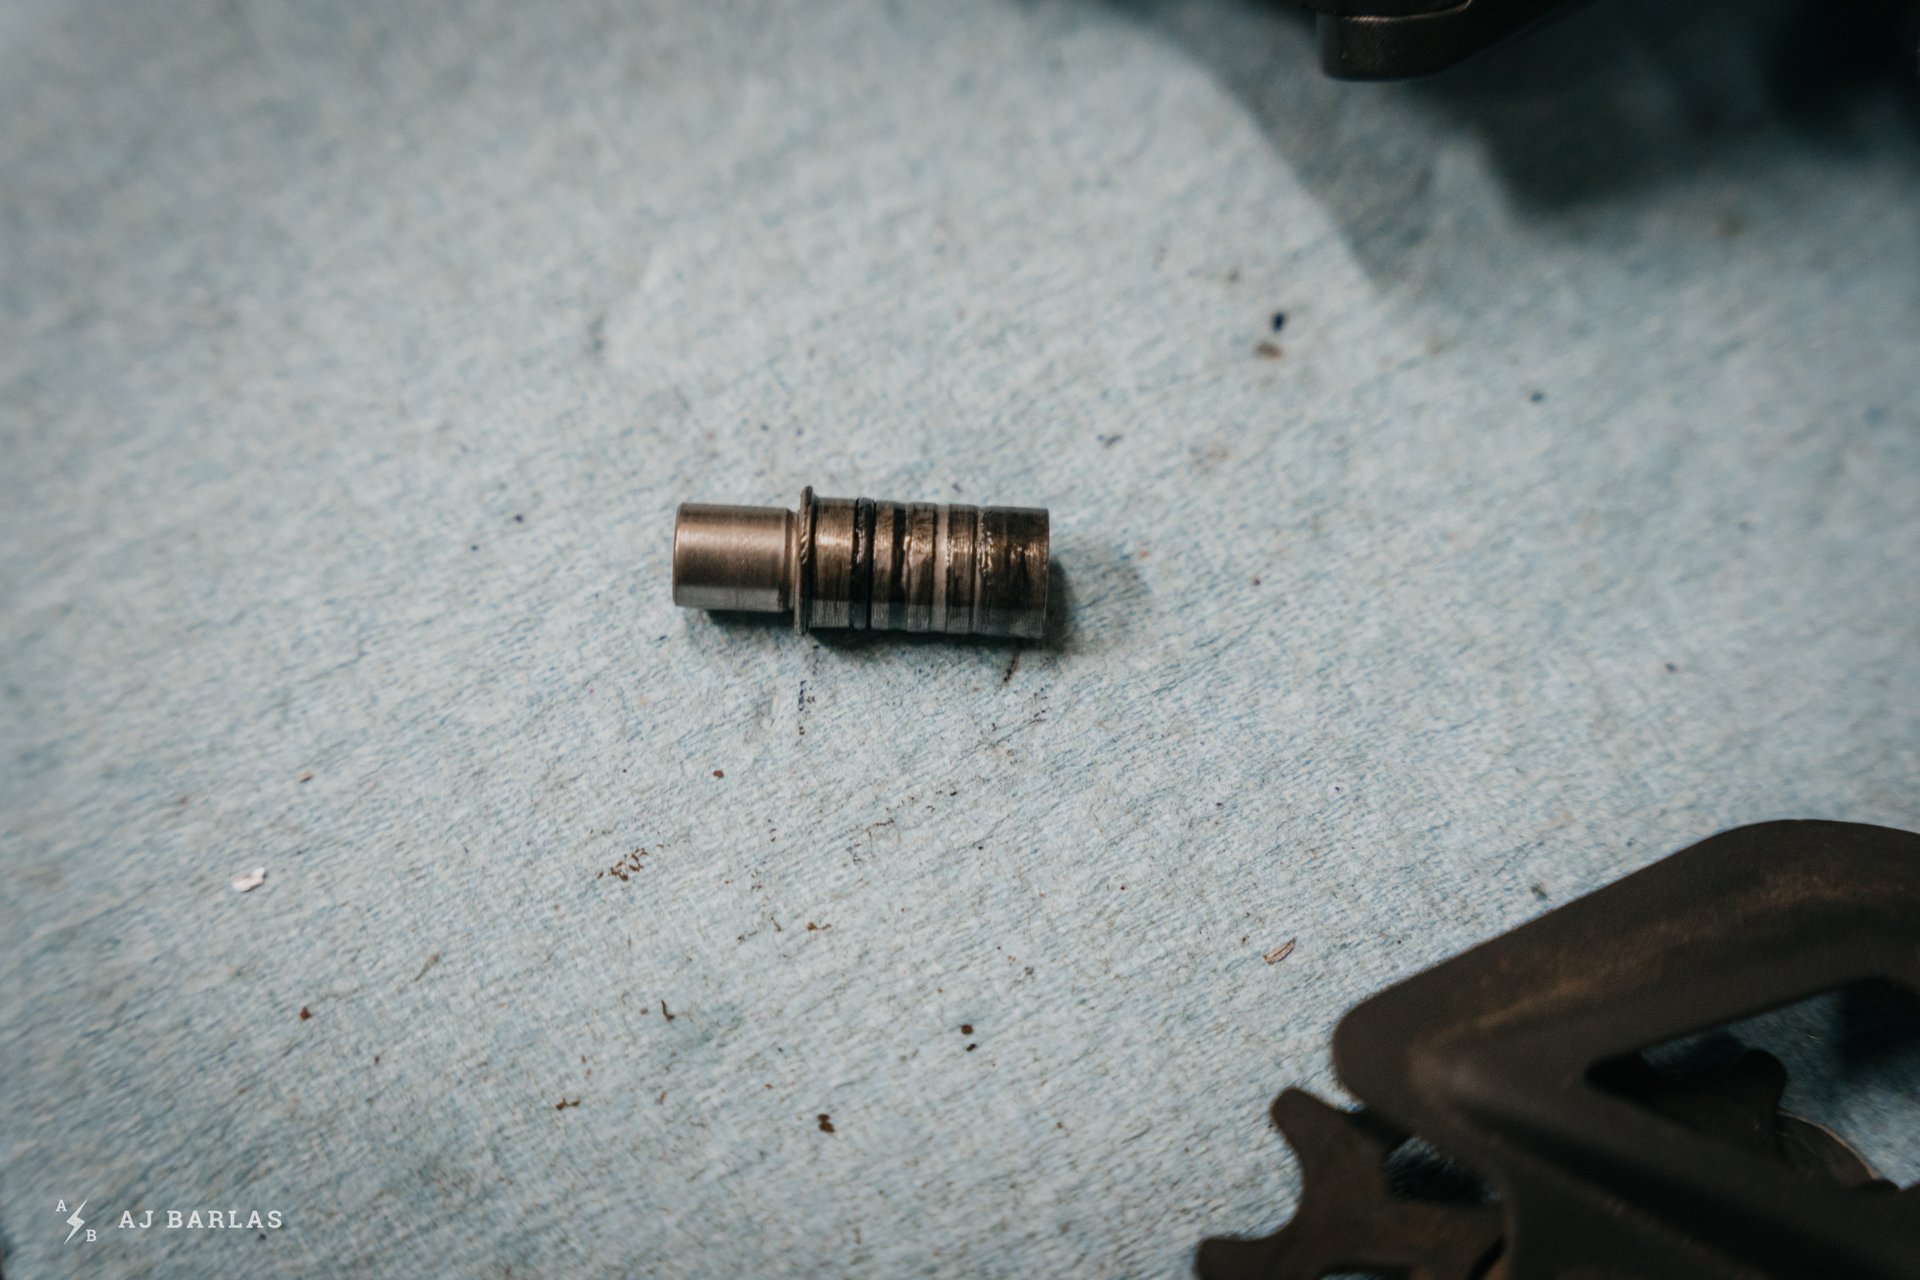
The plate axle. The shorter, smooth portion to the left is where the clutch rests and should be kept clean from grease. The right side is where a freshen-up is needed. This isn't looking too bad though.
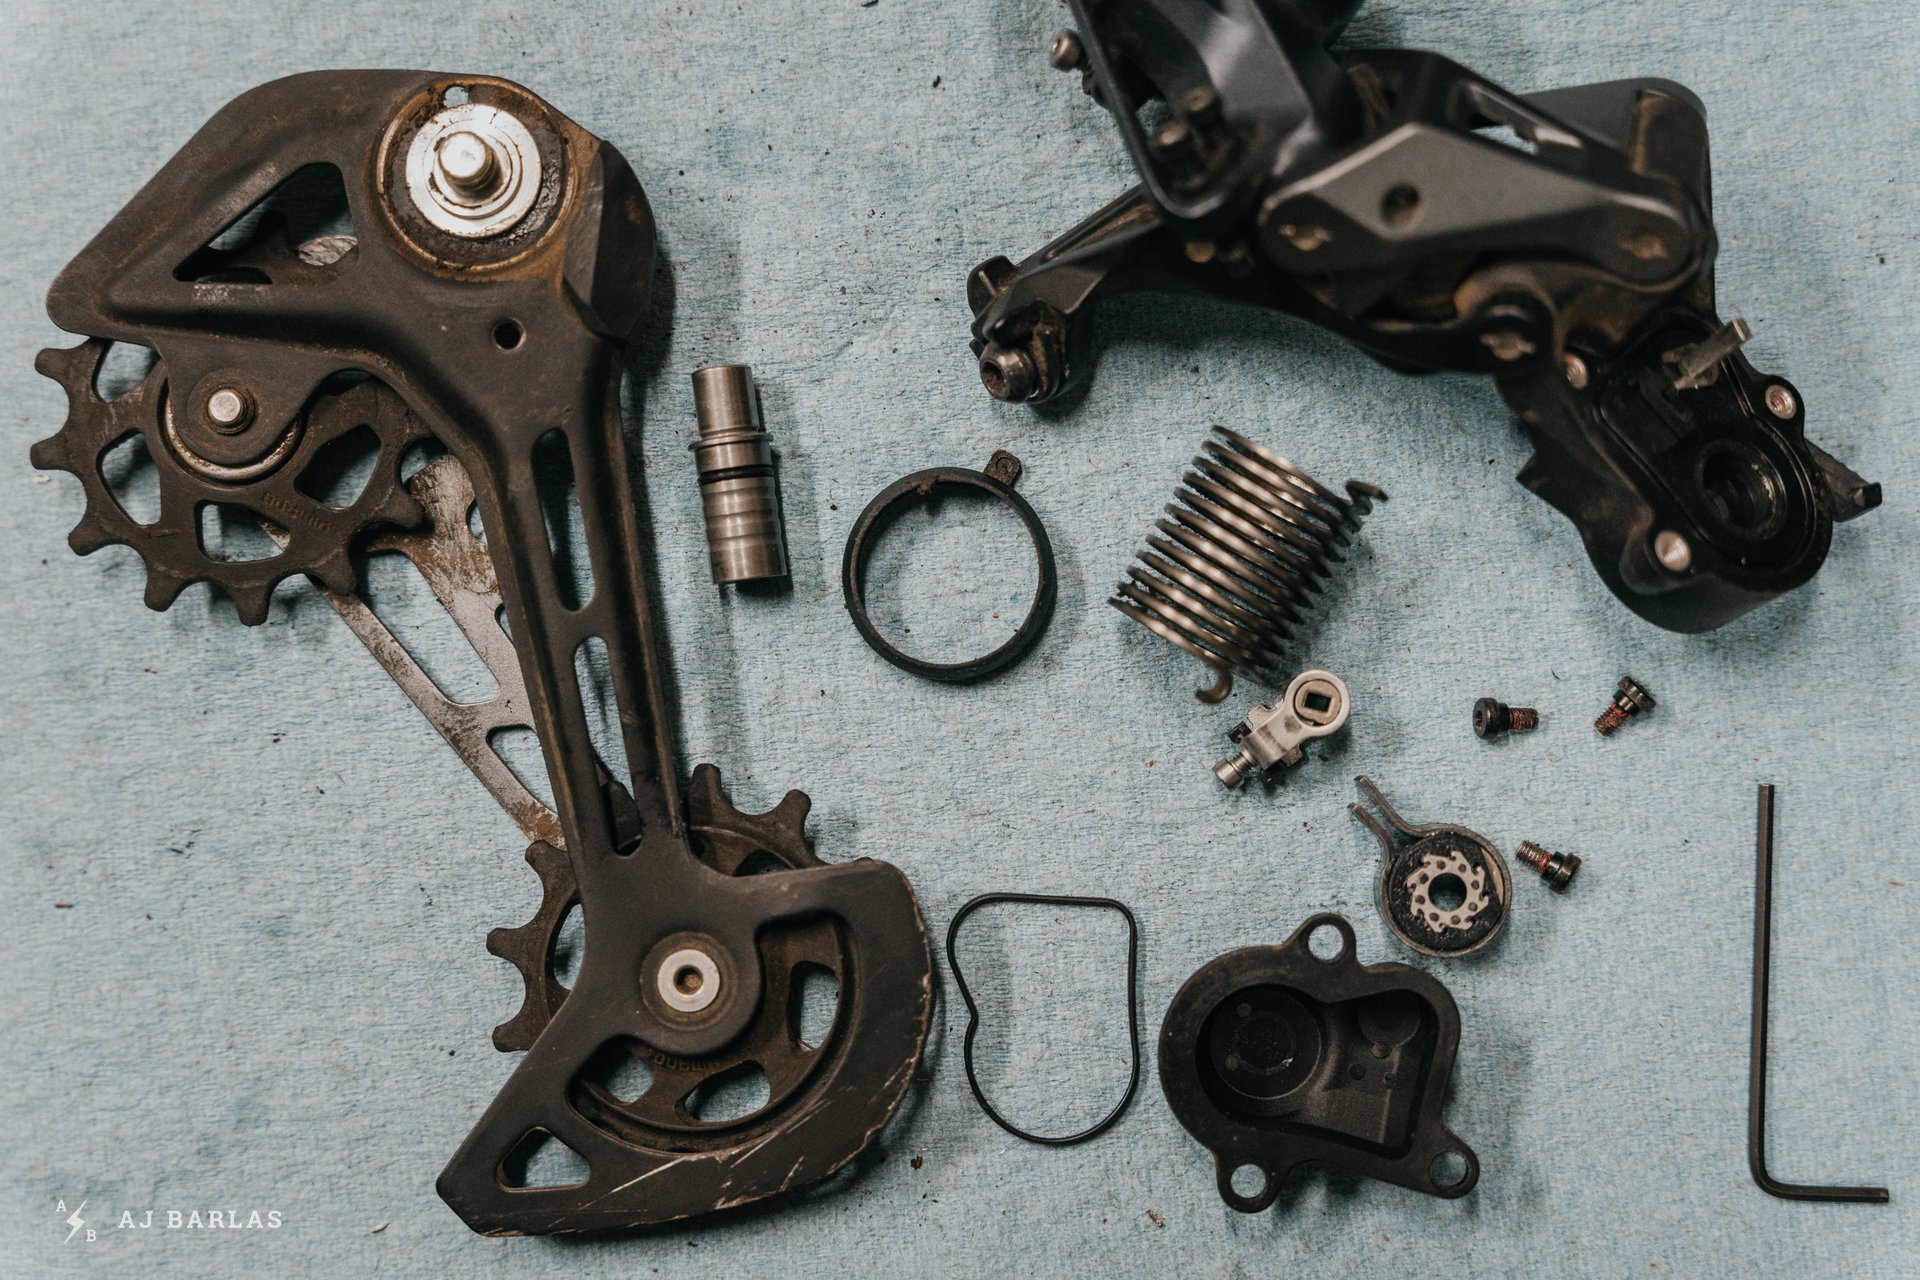
All the parts ready to be cleaned and put back together.
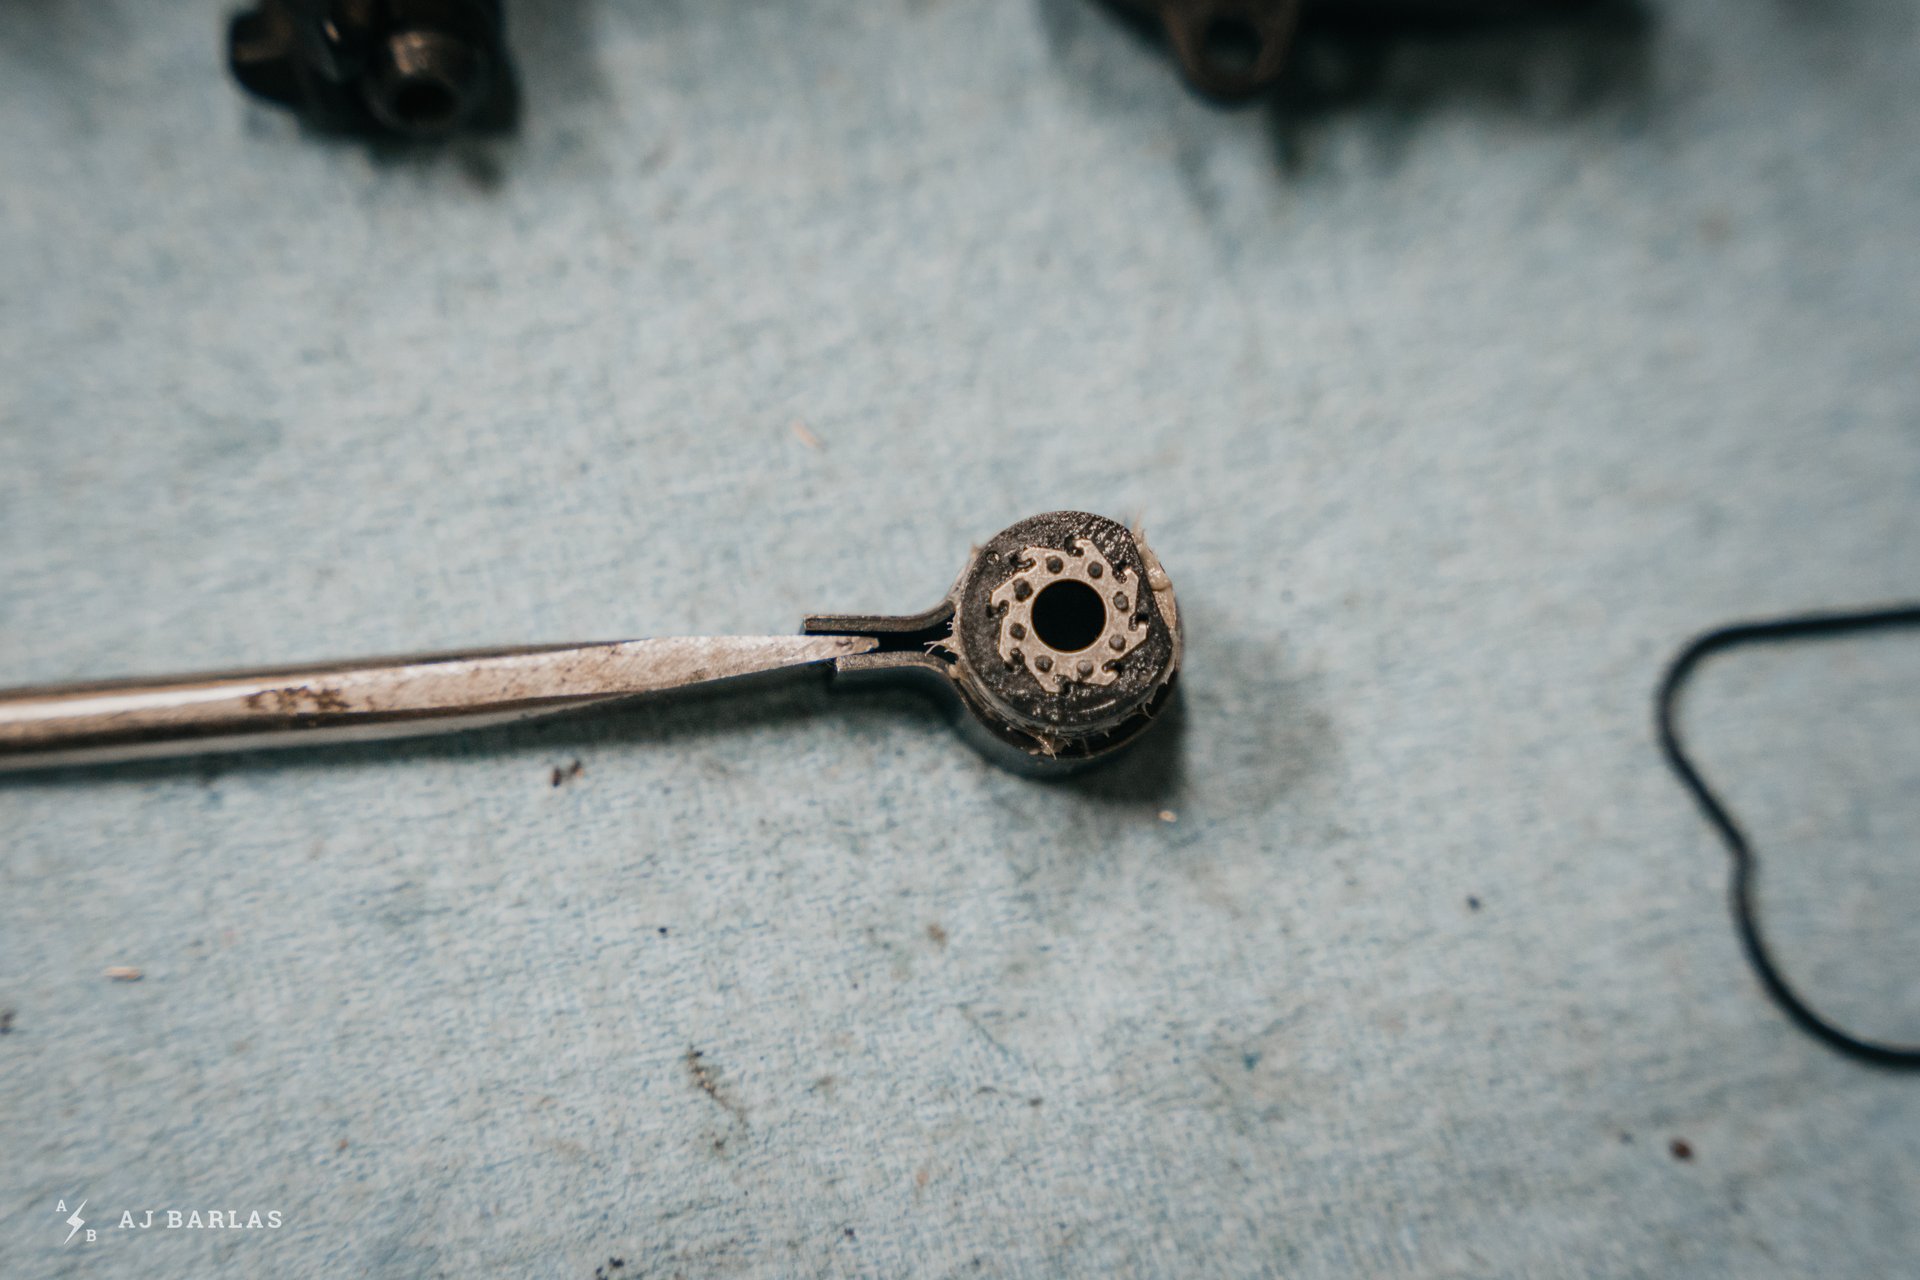
Using a flathead screwdriver, carefully pry apart the tension clamp, a small amount, and slide out the roller.
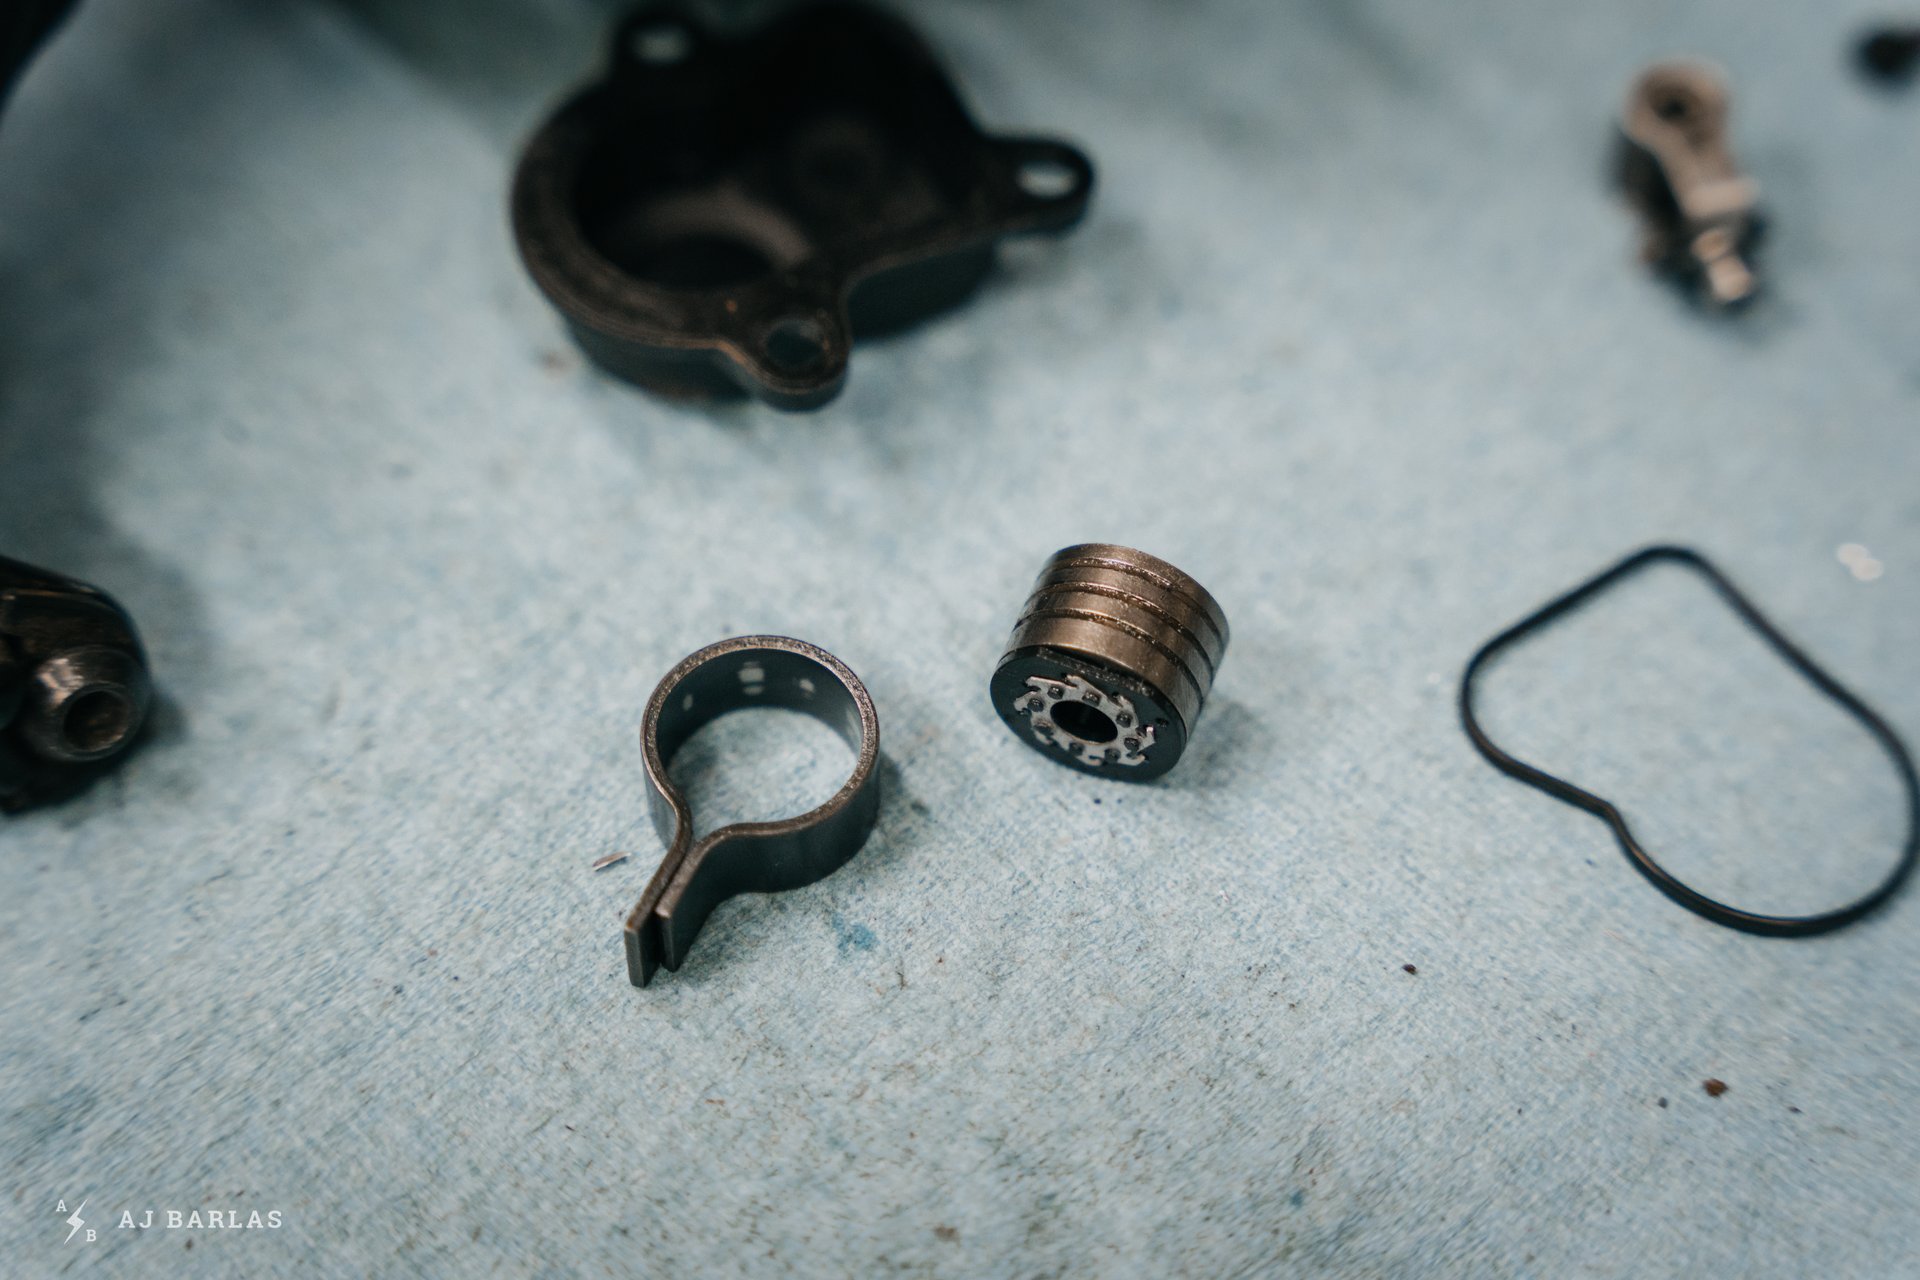
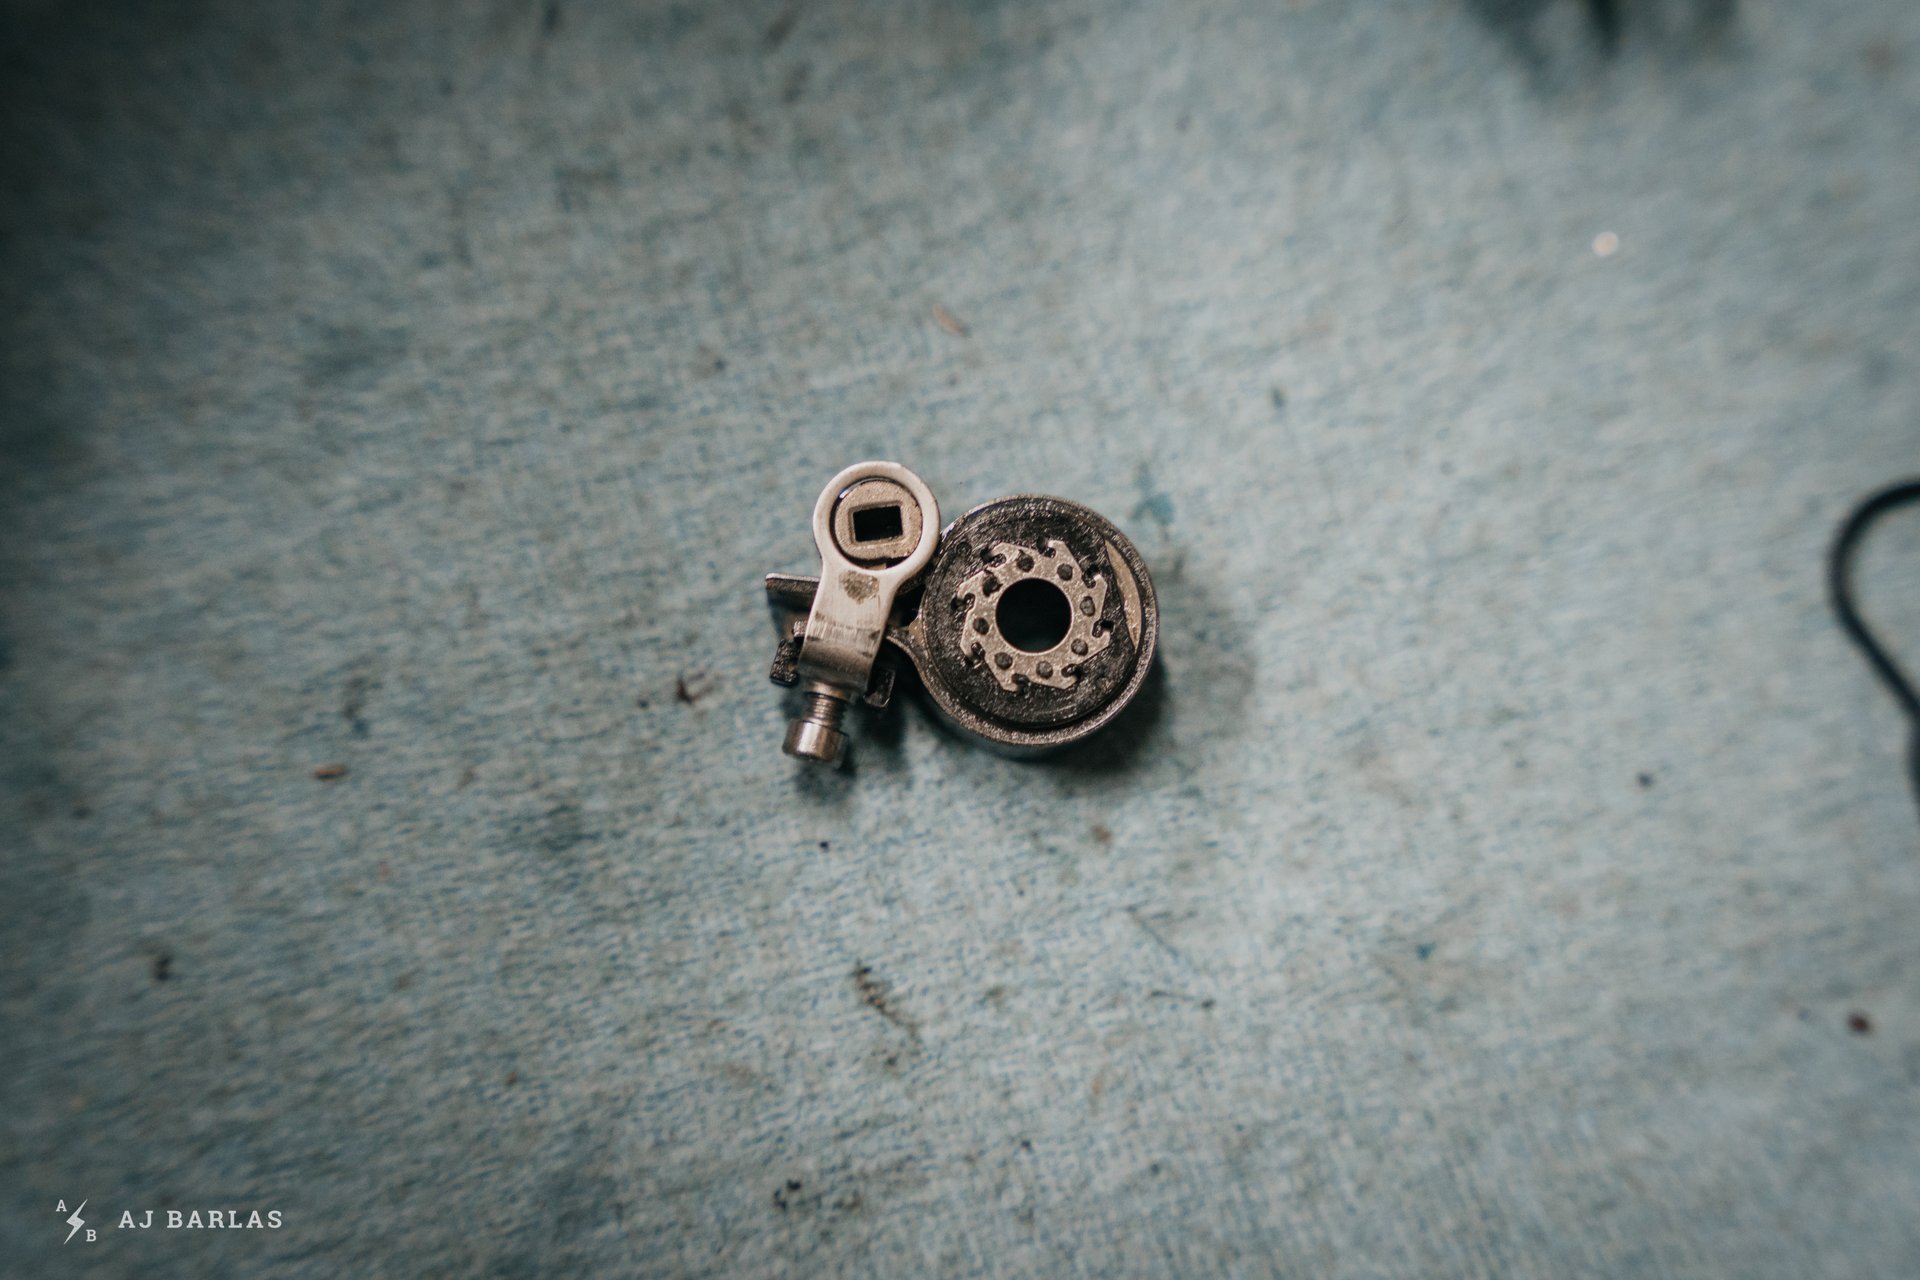
With the two parts of the clutch apart, give it a clean.
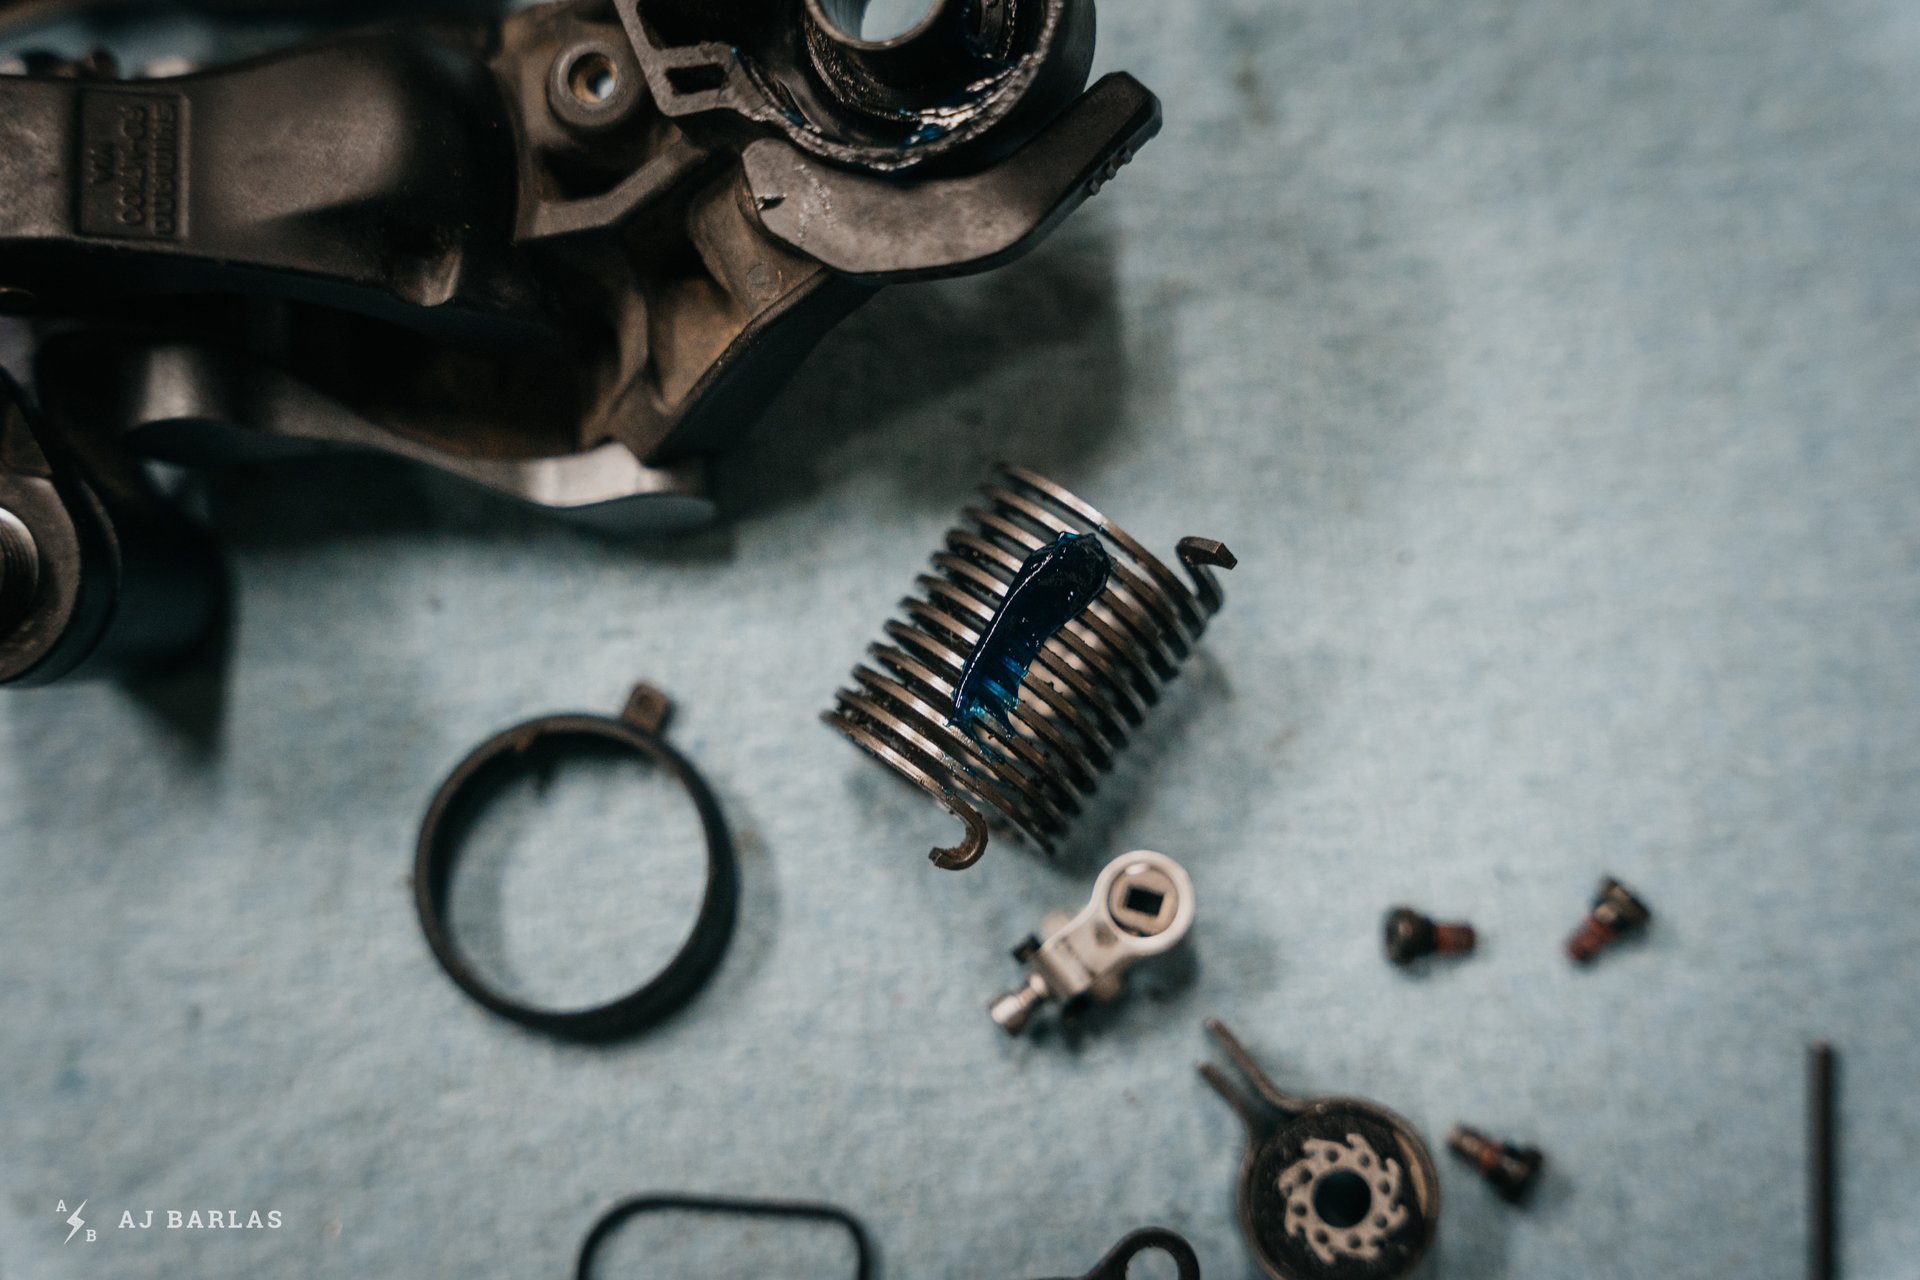
Add some grease to the spring. This is to prevent corrosion as it sits wound inside the derailleur.
Carefully grease the backside of the plate axle (the section with the ribs). Remember not to get any grease on the smooth surface that the clutch sits on. If you do, carefully clean it.
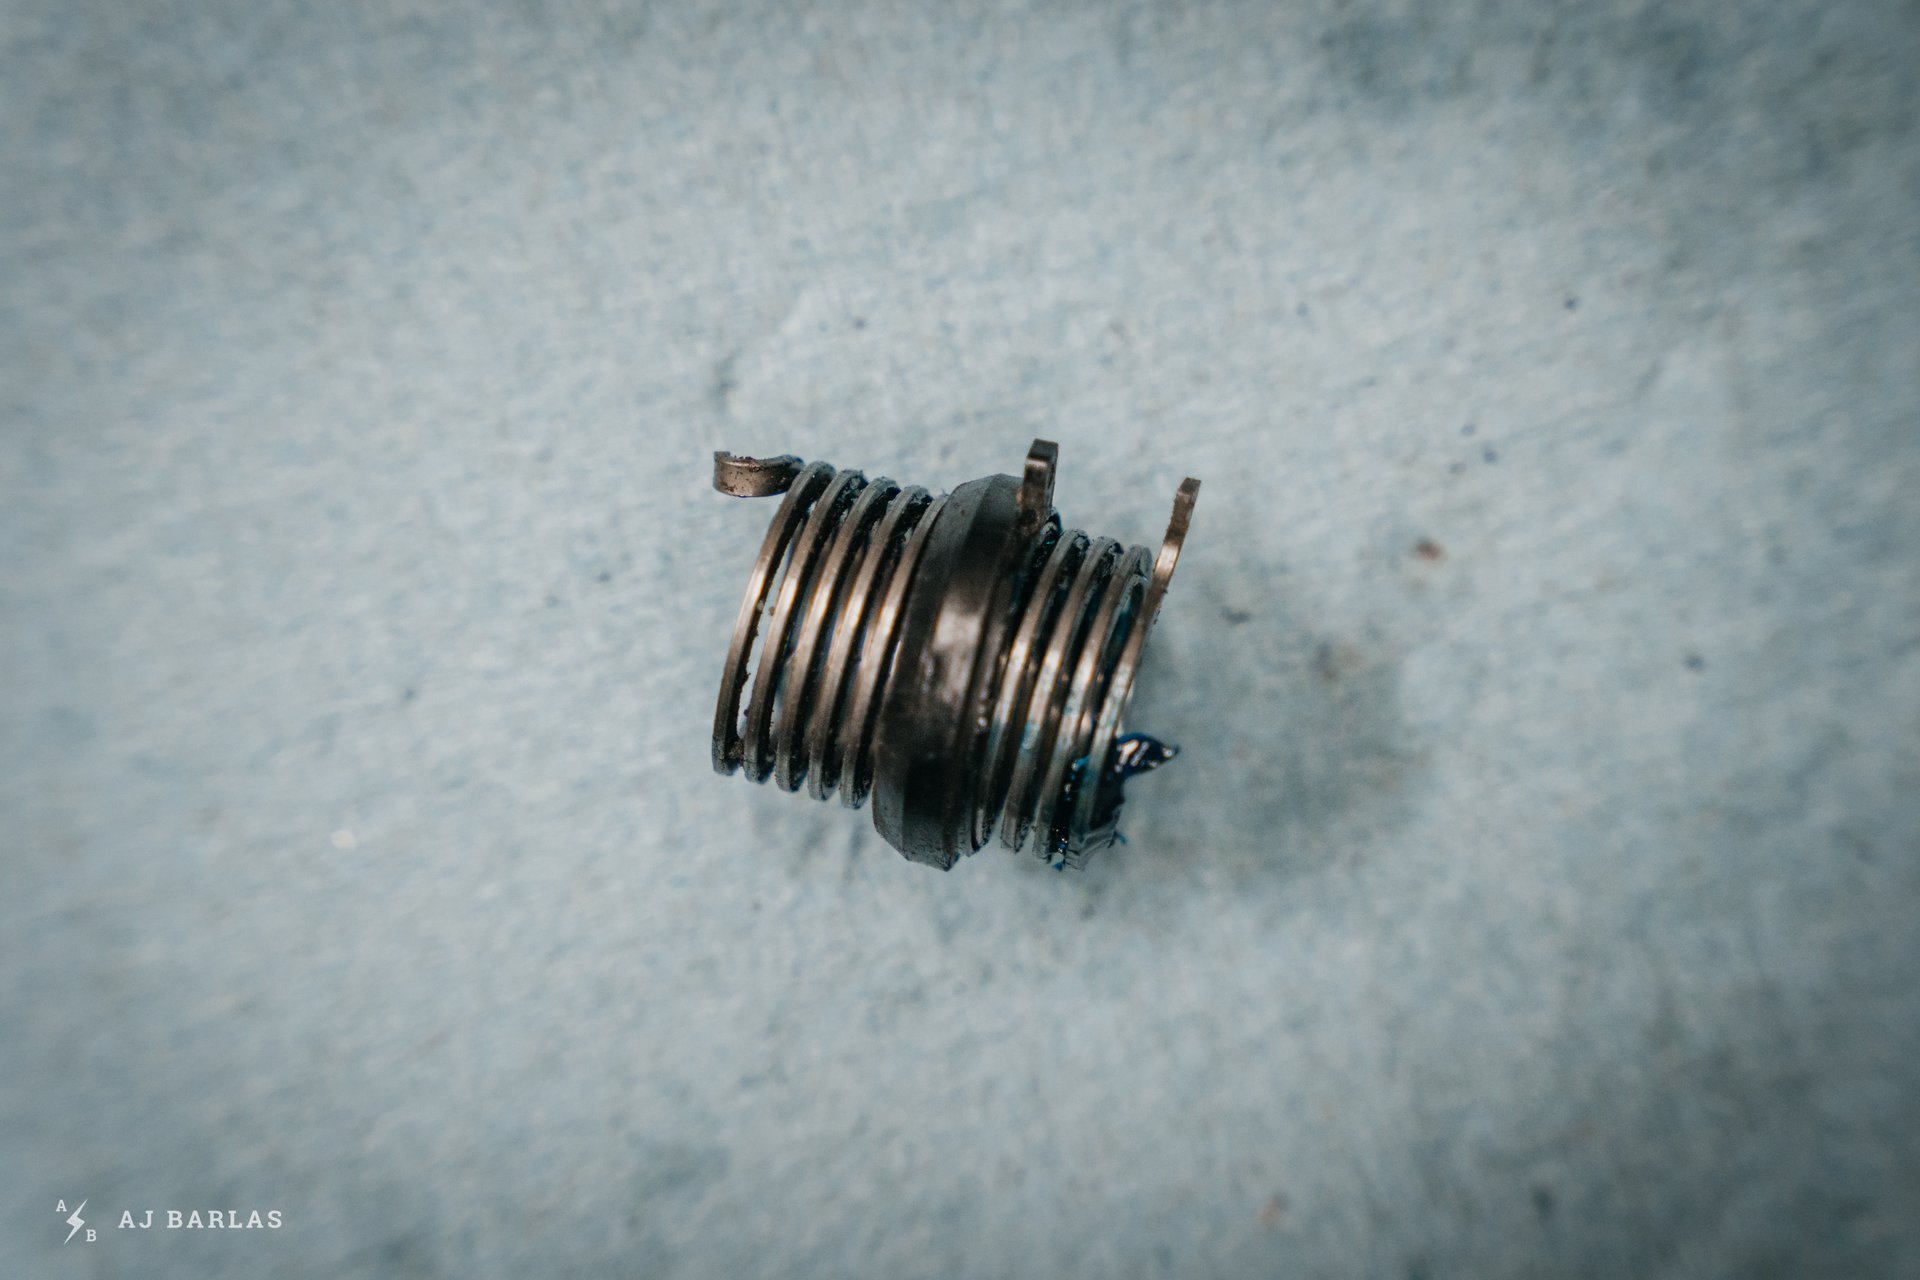
Slide the little plastic spacer over the spring. Be careful to align the tab of the spacer with the same shape tab of the spring (opposite the hooked end of the spring).
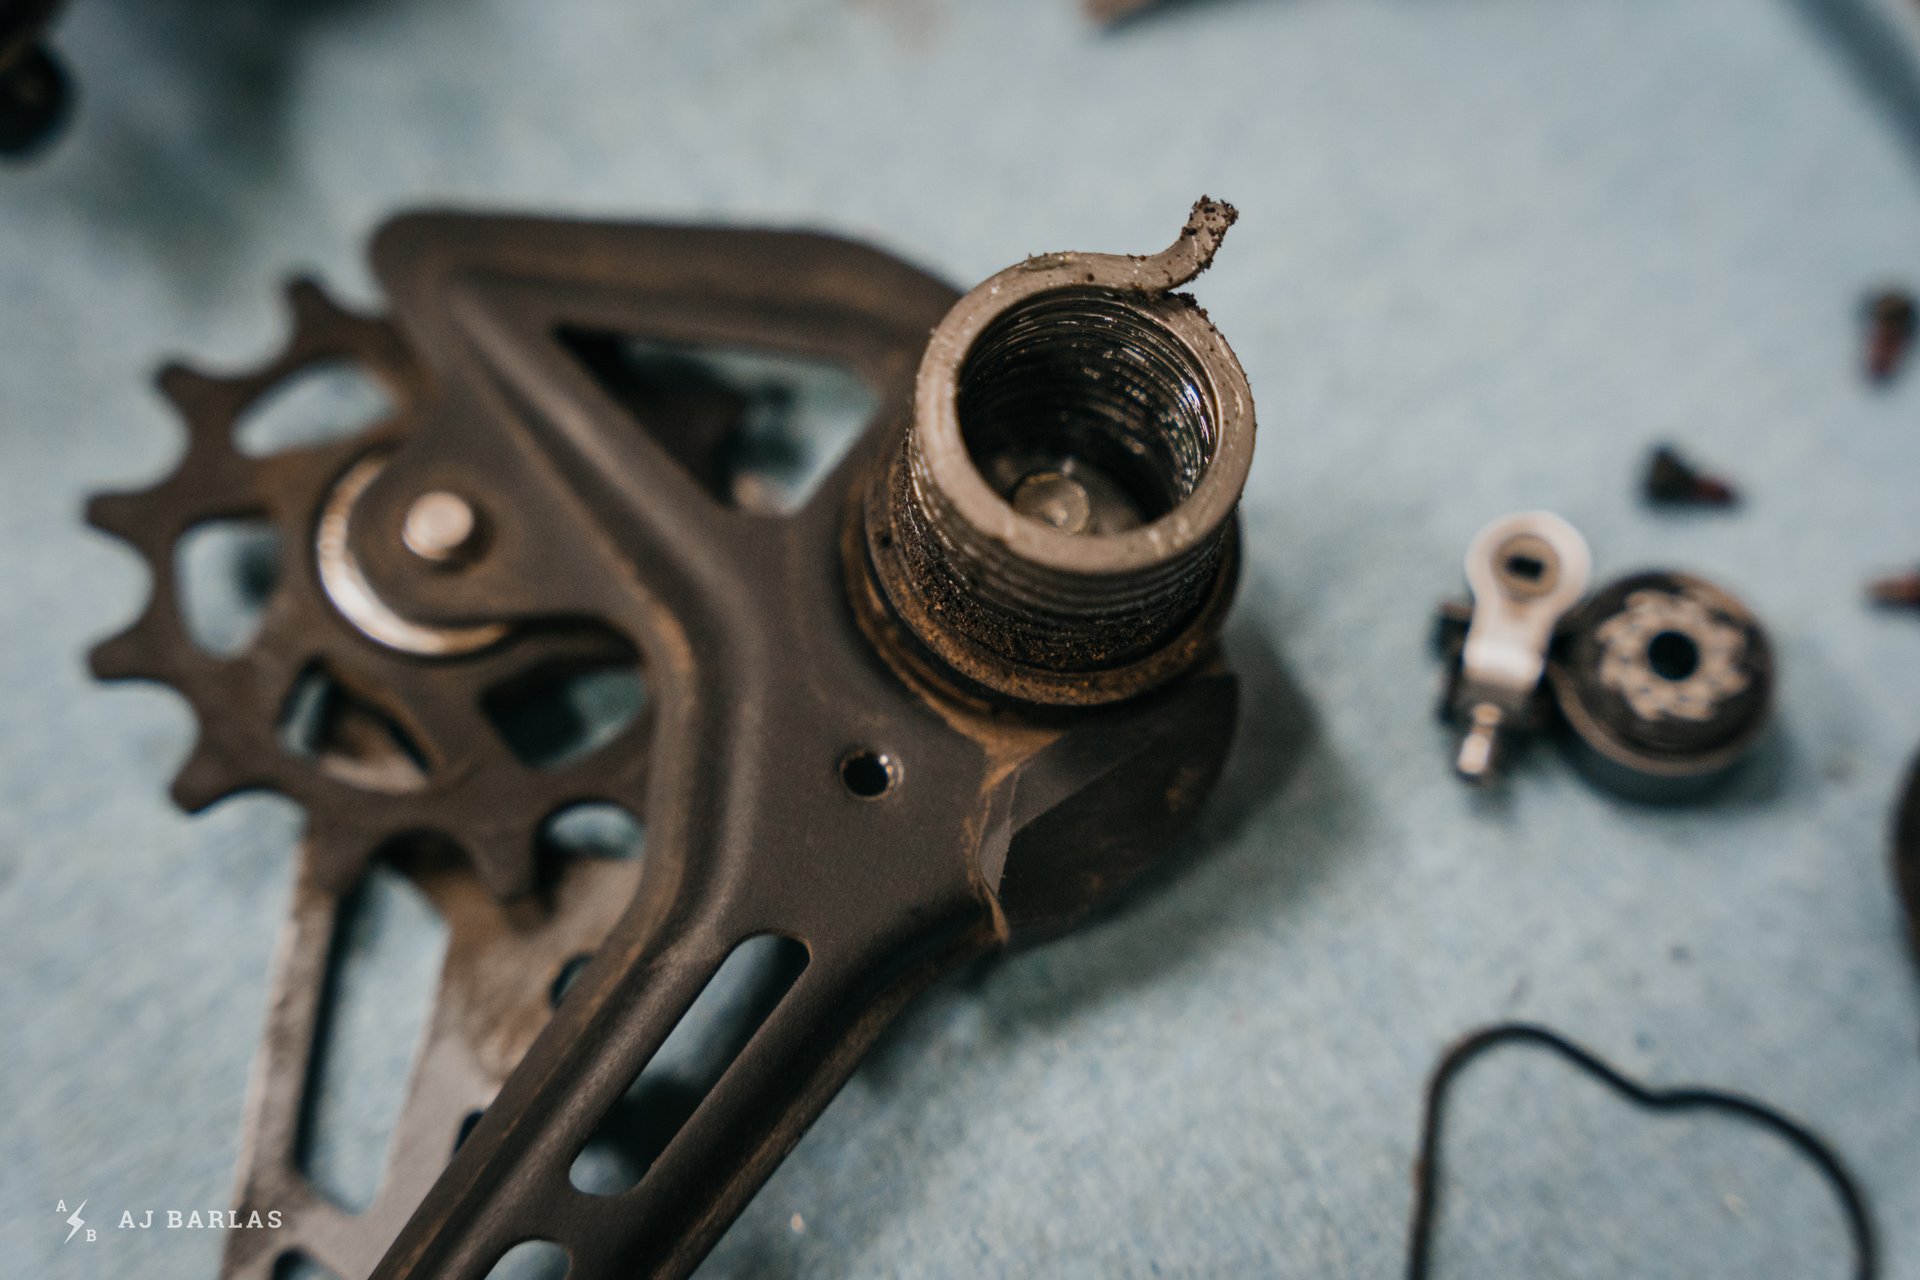
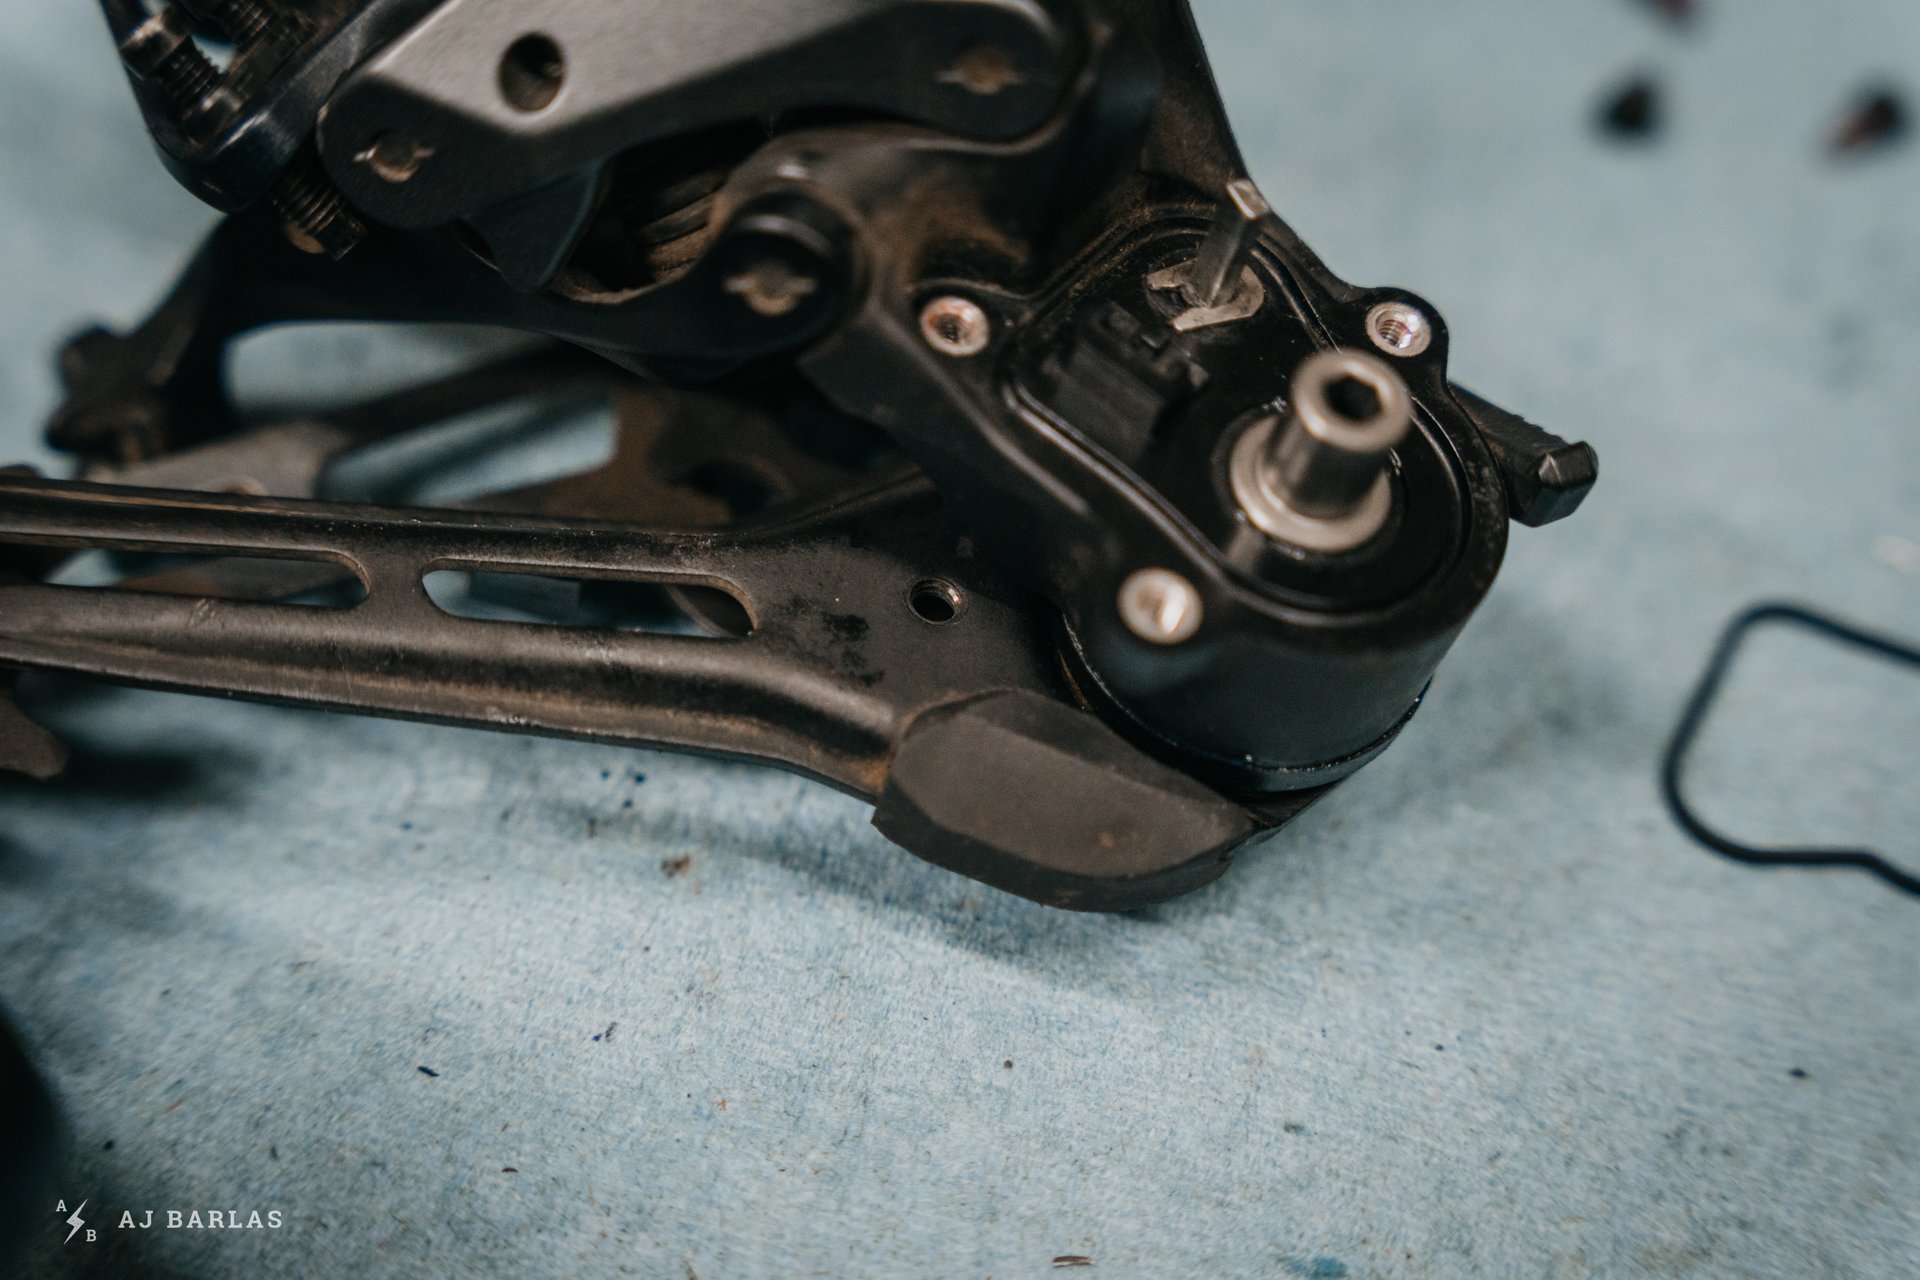
The hooked end of the spring needs to be worked back into the hole above the silver plate on the cage. This is also where moisture is able to get to the internals at the rear of the clutch.
Gently twisting and angling the spring will see it slot into place quite easily. Here we see the hole that can allow water into this part of the derailleur.
Looking straight on at the spring resting in the slot on the back plate.
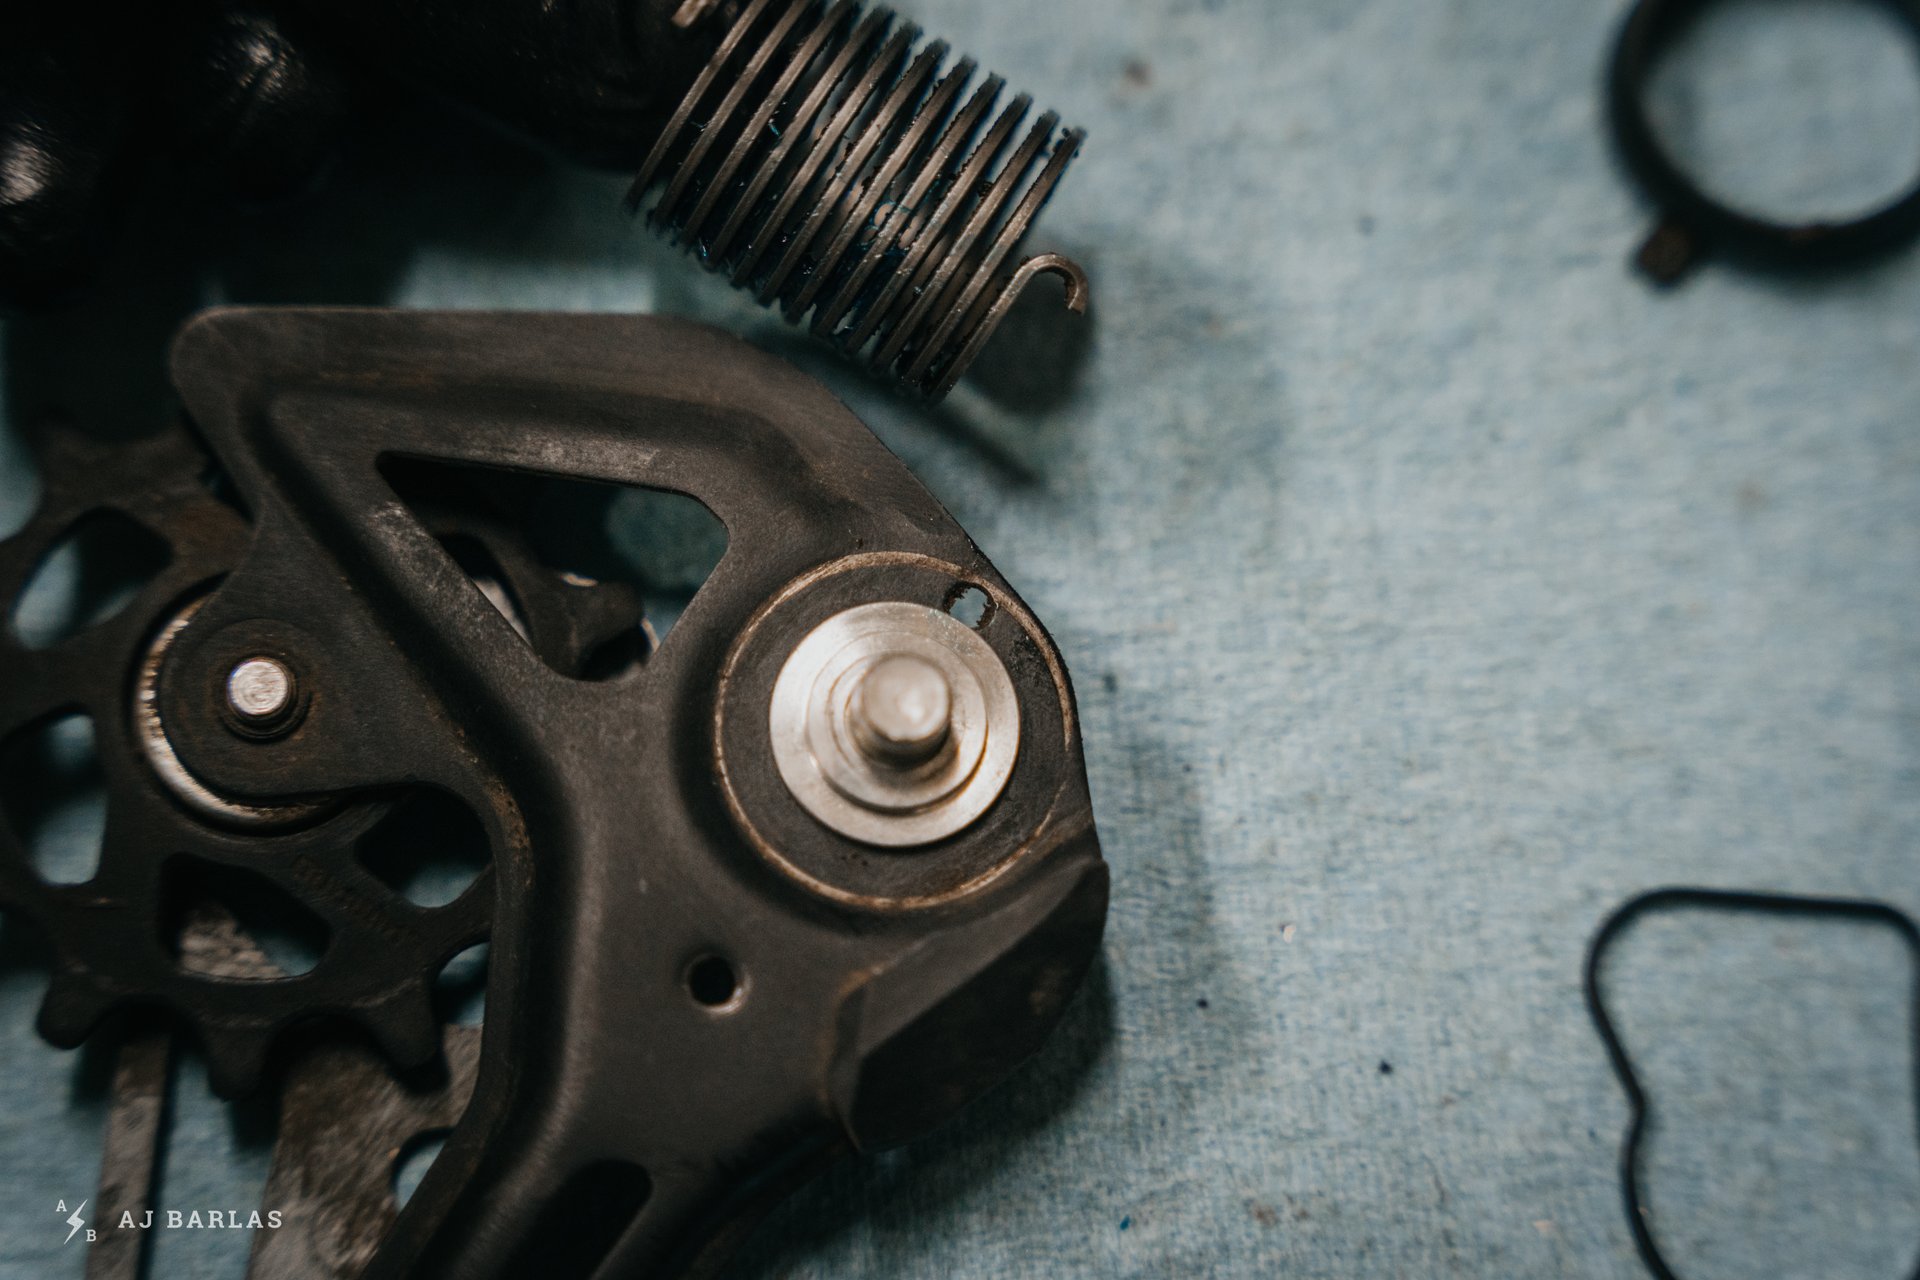
With a 4mm hex key in the end of the plate axle, position it into the upper half of the derailleur.
Carefully align and two halves, squeezing them together and begin threading the T27 and 4mm hex into each other (I need a third hand to capture that photo). Check alignment (image below) and with the two halves of the derailleur together, tighten the 4mm hex to 7.8–9.8 Nm.
While tightening, check that the tab of the plastic spacer is aligned to the slot in the main cage of the derailleur.
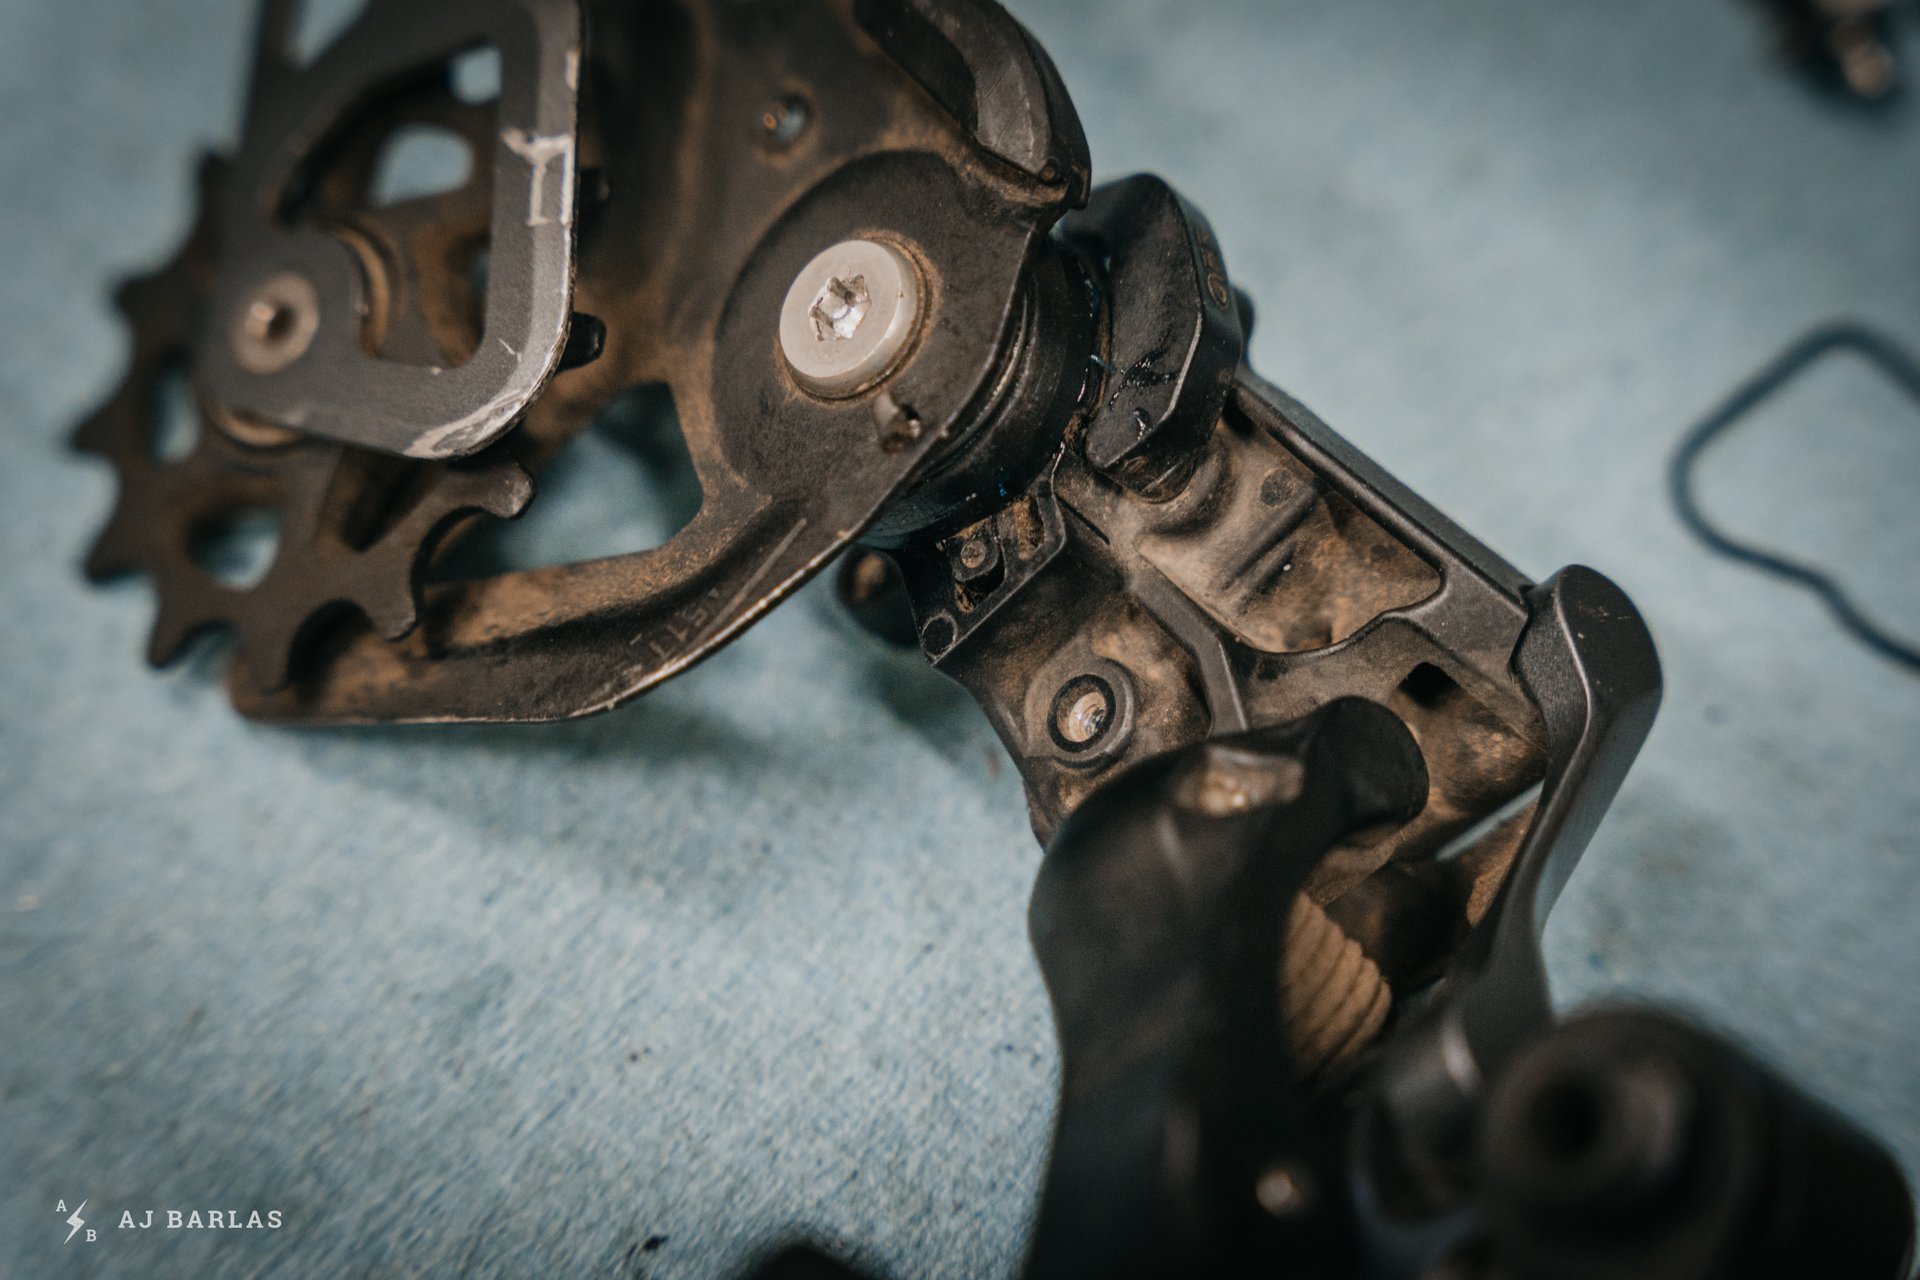
Now the upper and lower halves of the derailleur are back together, twisting the lower cage anti-clockwise will set it back into position, loading the spring and providing the proper tension.
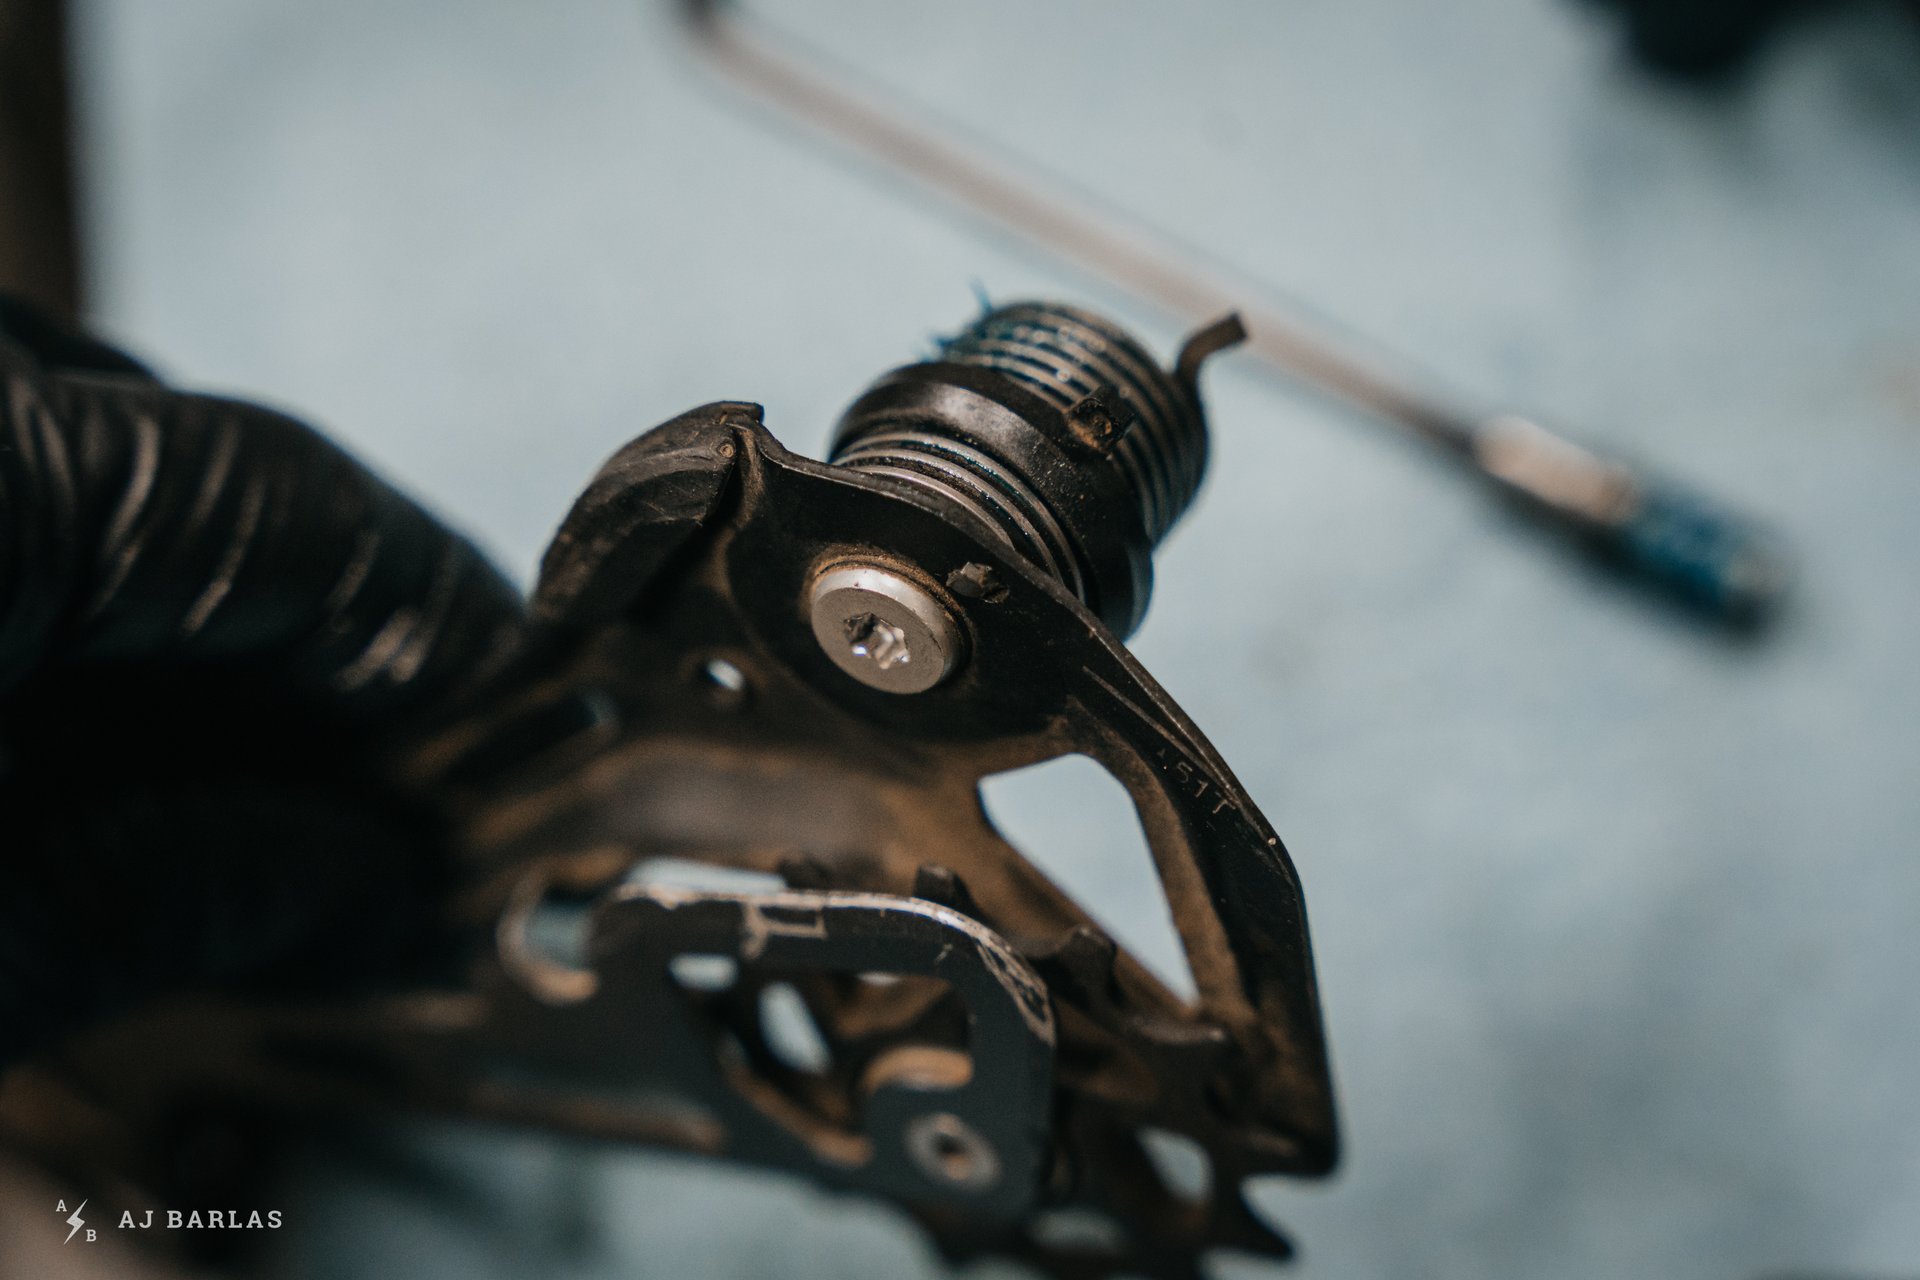
Once rotated back around (roughly 270 degrees), relax the upper cage. The two halves will connect, preventing the tension from automatically being unwound.
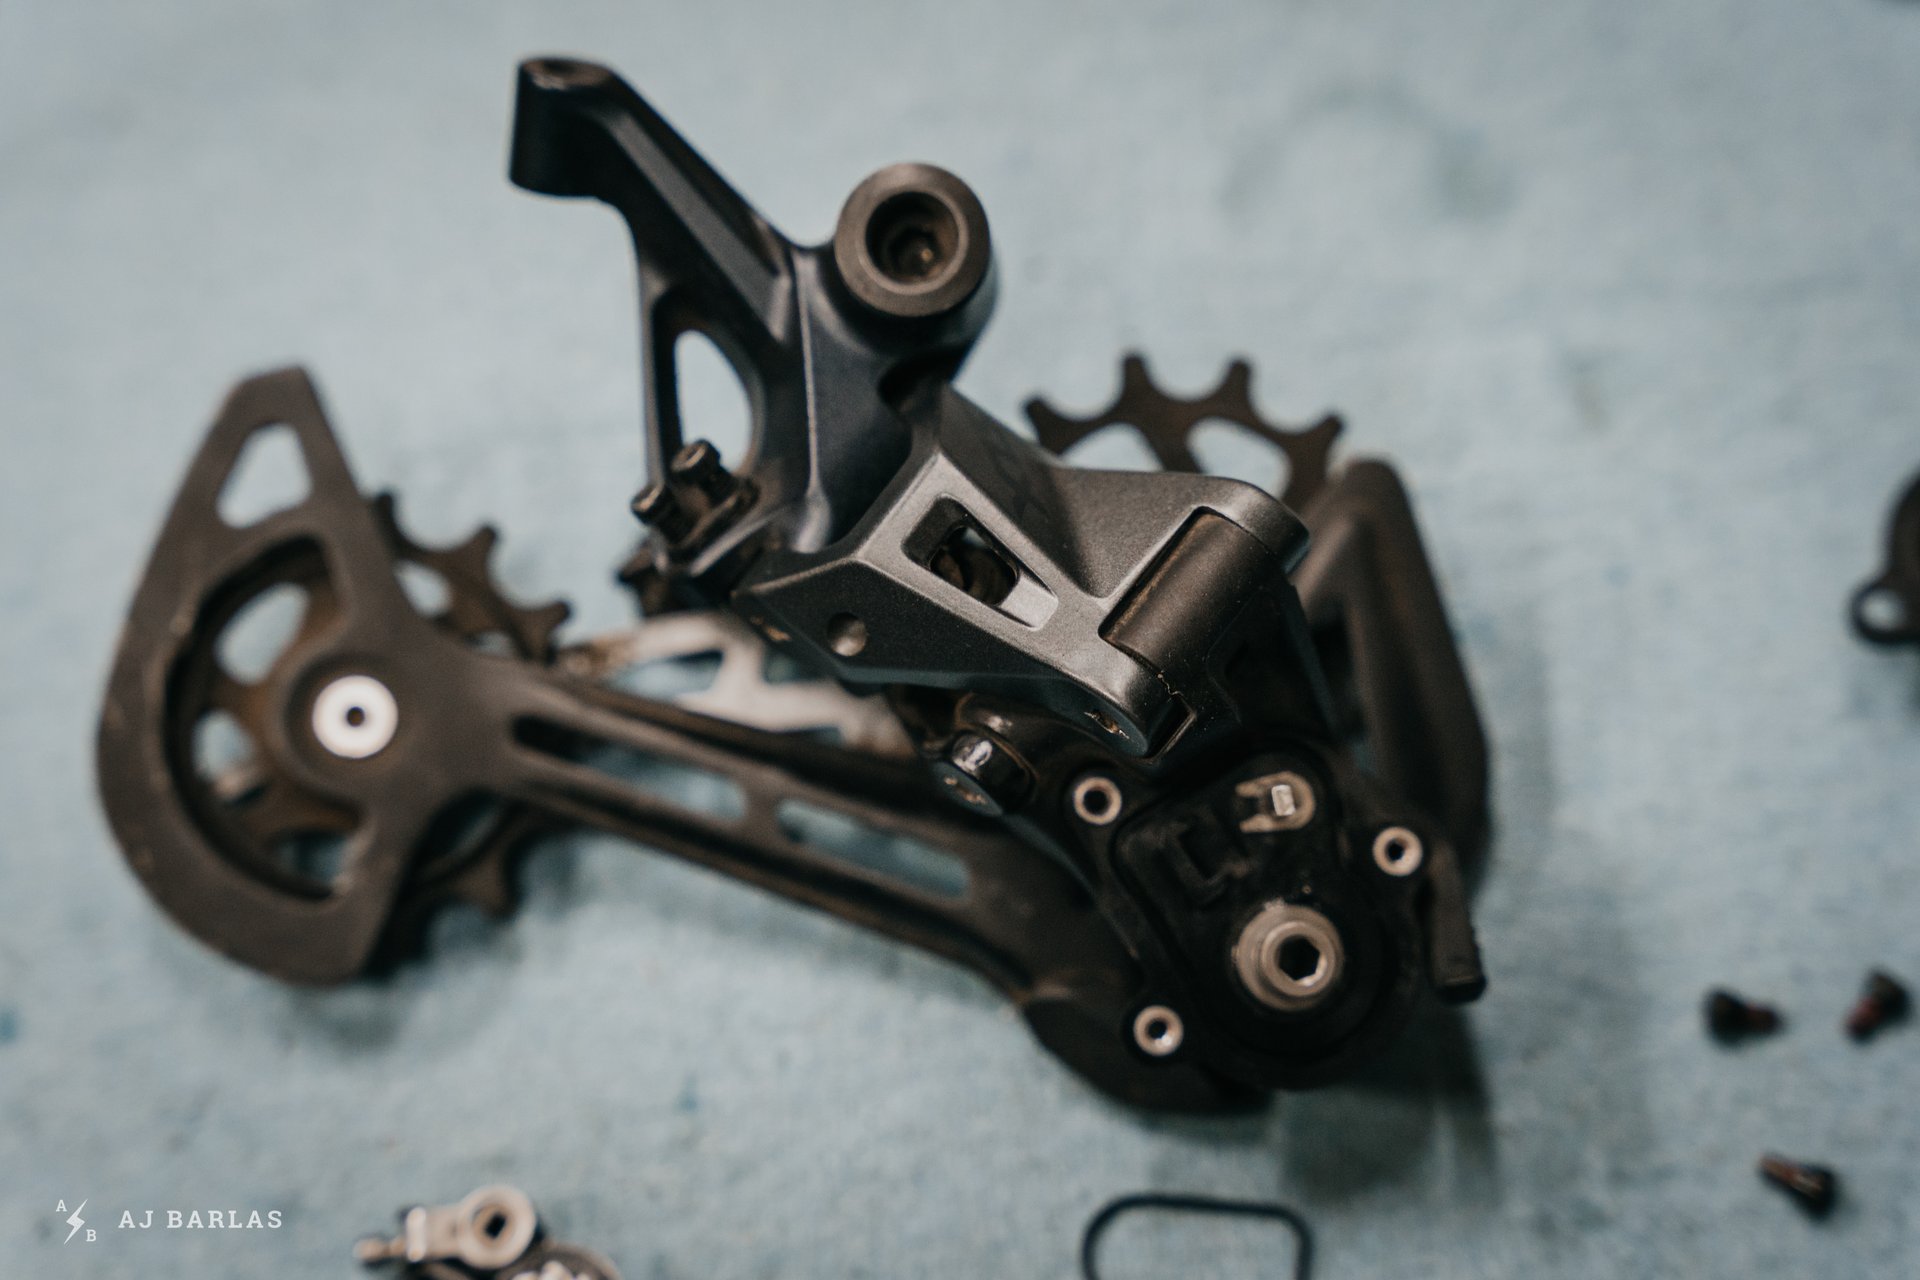
Now we're left with something that better resembles a rear derailleur. From here we need to set the 'plate stopper pin' back in position.
The 'plate stopper pin' is screwed back into the hole below the knuckle at the top of the outer 'plate.'
Apply a little loctite to the pin. I was fresh out and had to come back to it once I picked up some more.
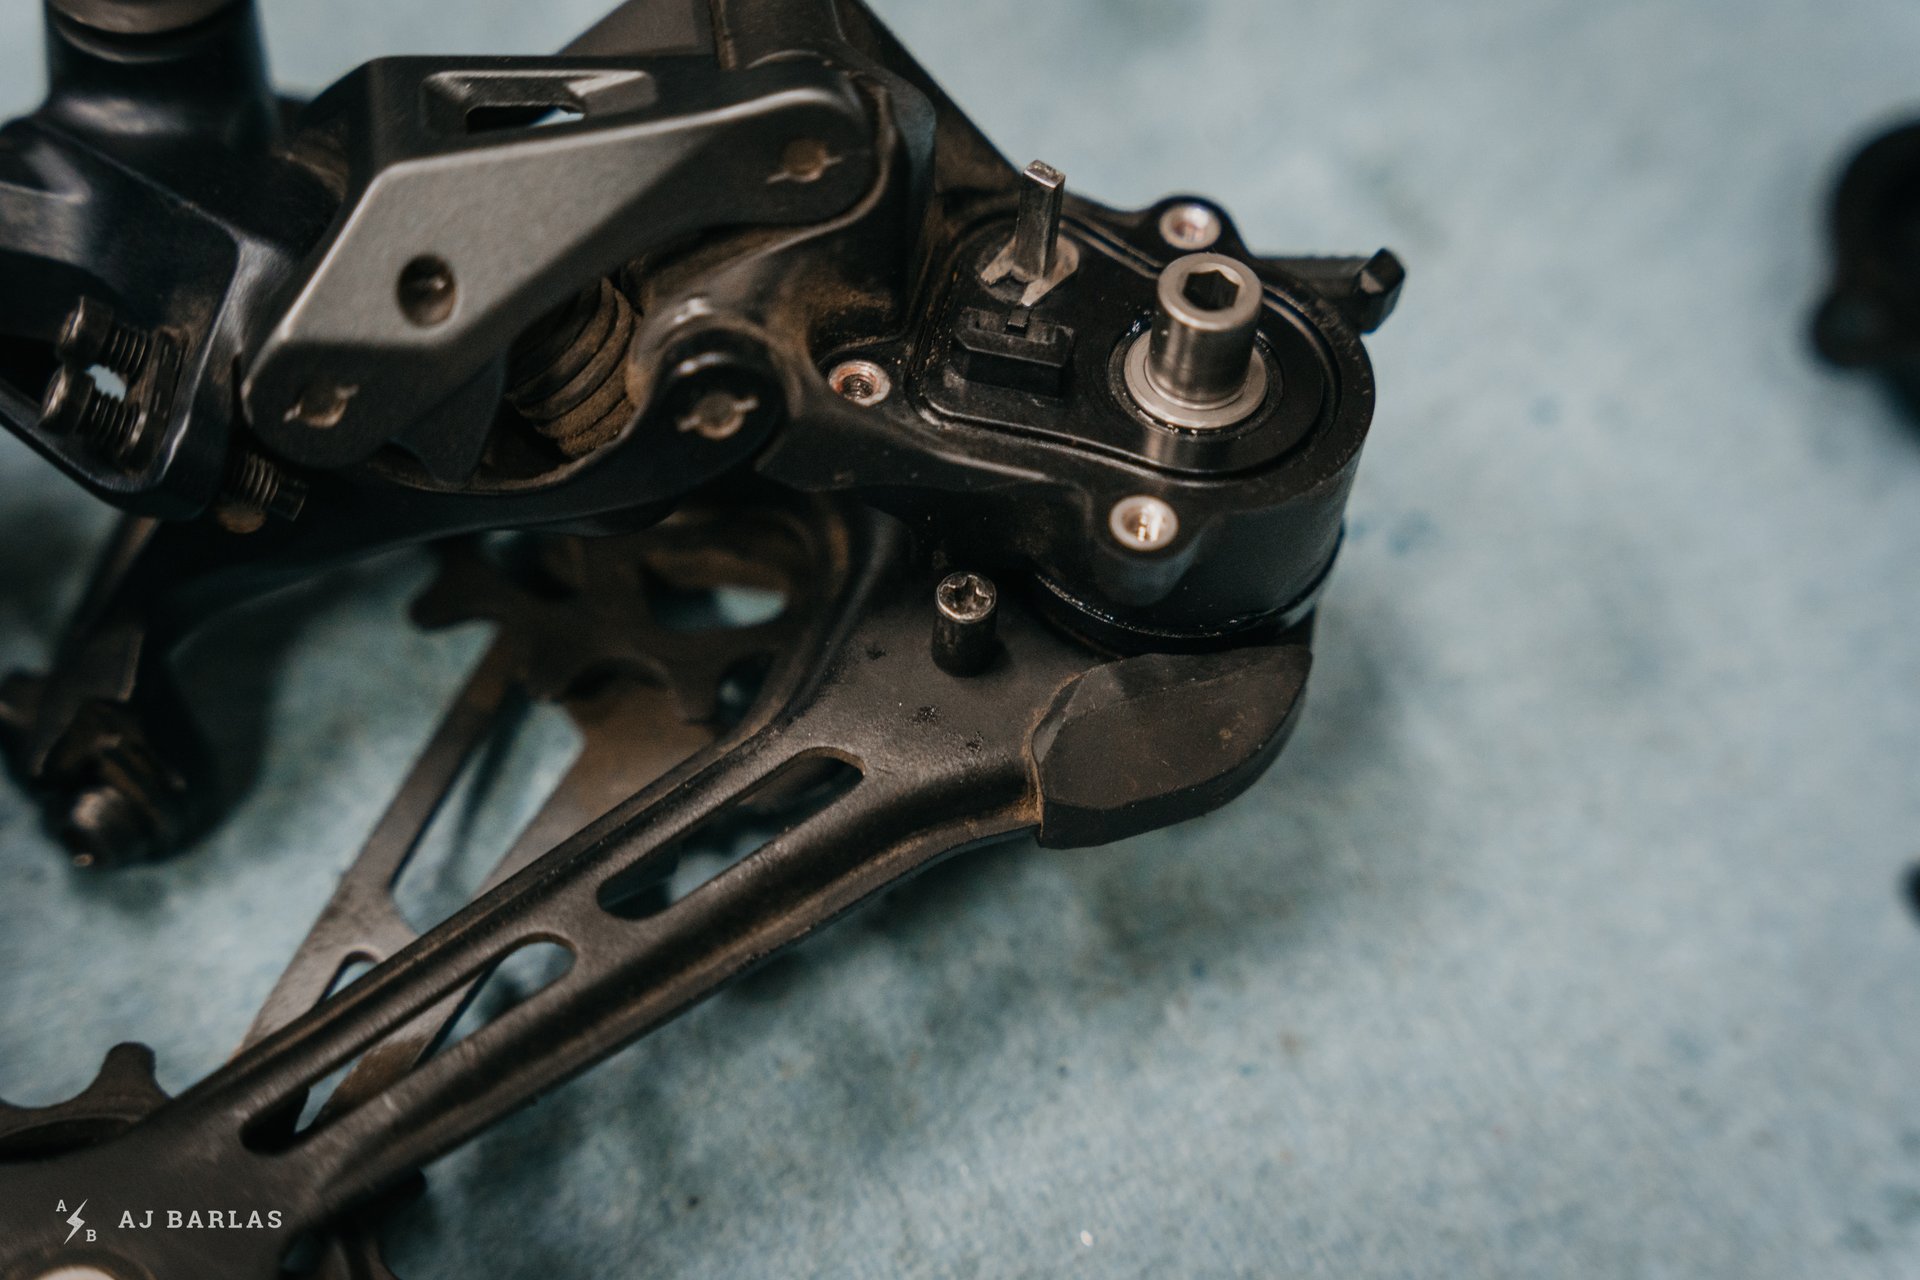
Then tighten to 1Nm using a regular #2 Phillips Head screwdriver. Check that the derailleur is tensioned correctly.
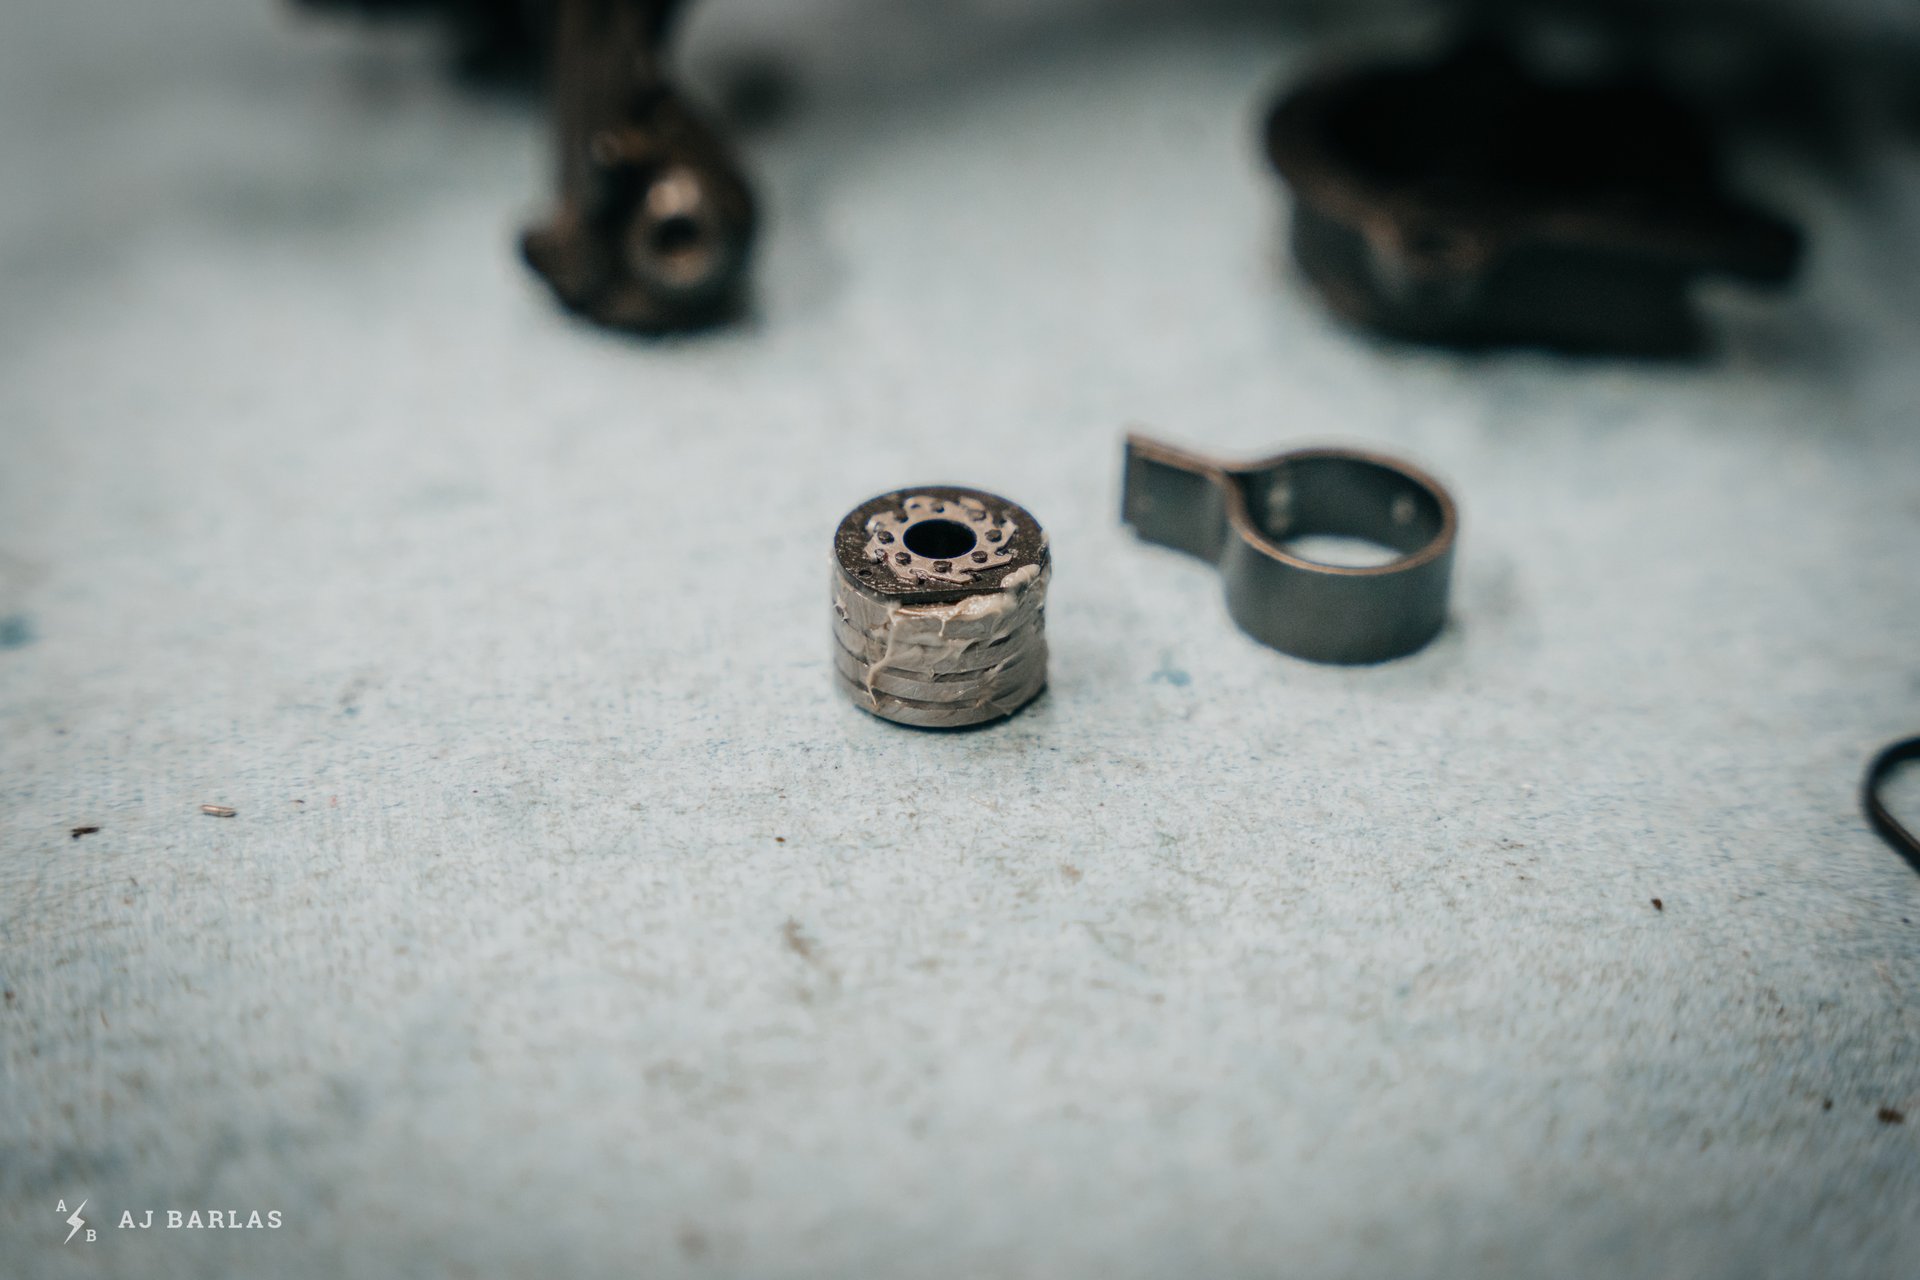
Apply a thin layer of lithium grease (Shimano recommends their internal hub grease) to the outside of the roller. Don't get any inside or the clutch won't work.
Using a flathead screwdriver to open the tension band, carefully slide it back over the roller. Wipe excess grease, making sure none gets inside the roller.
Now the cam unit and clutch can be set together. Make sure the long side of the tension band is at the top (as pictured).
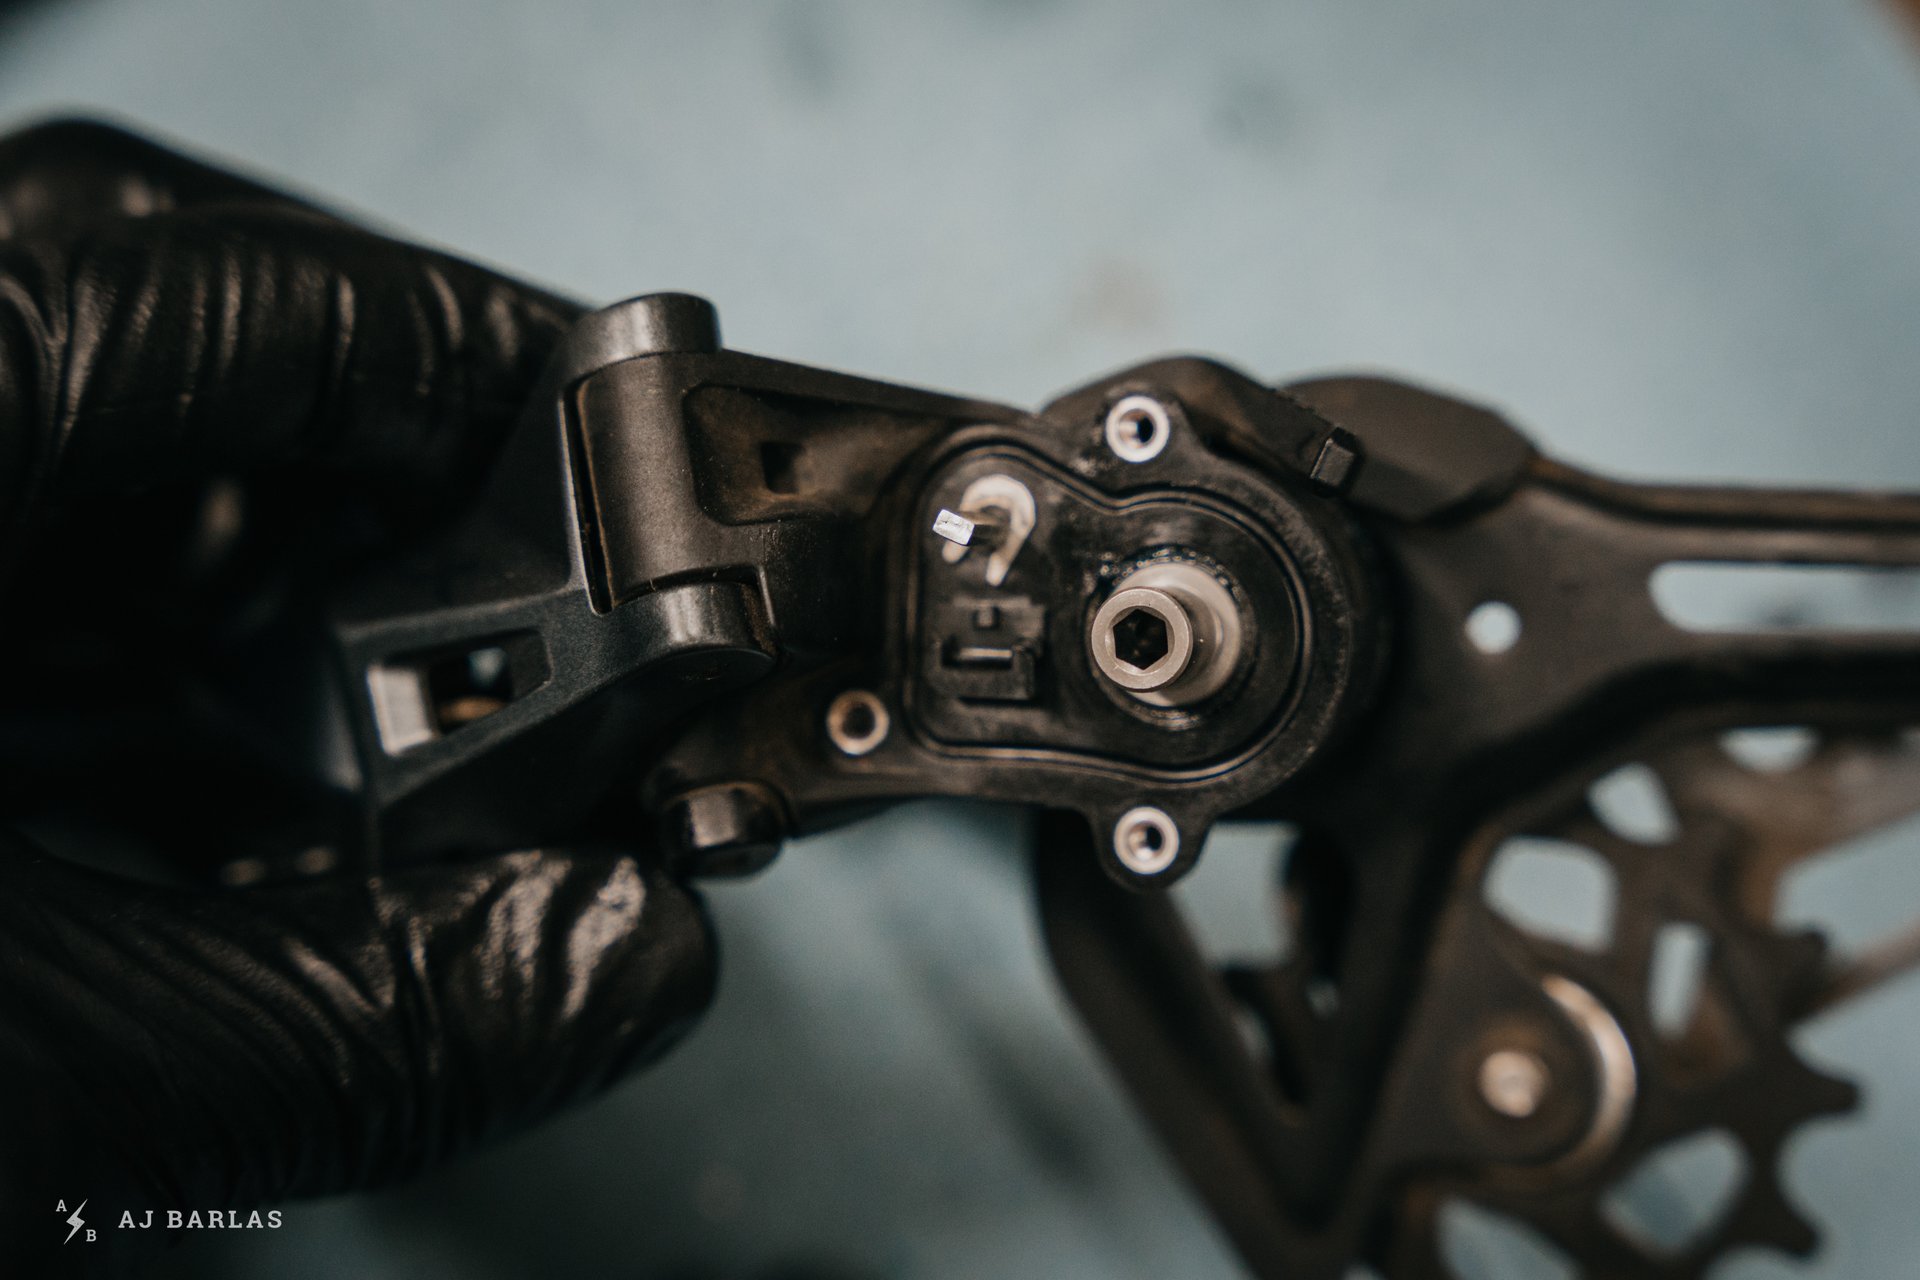
Slide the cam unit over the tension band with the band's long side at the top. It's important that the cam lobe is in the off position.
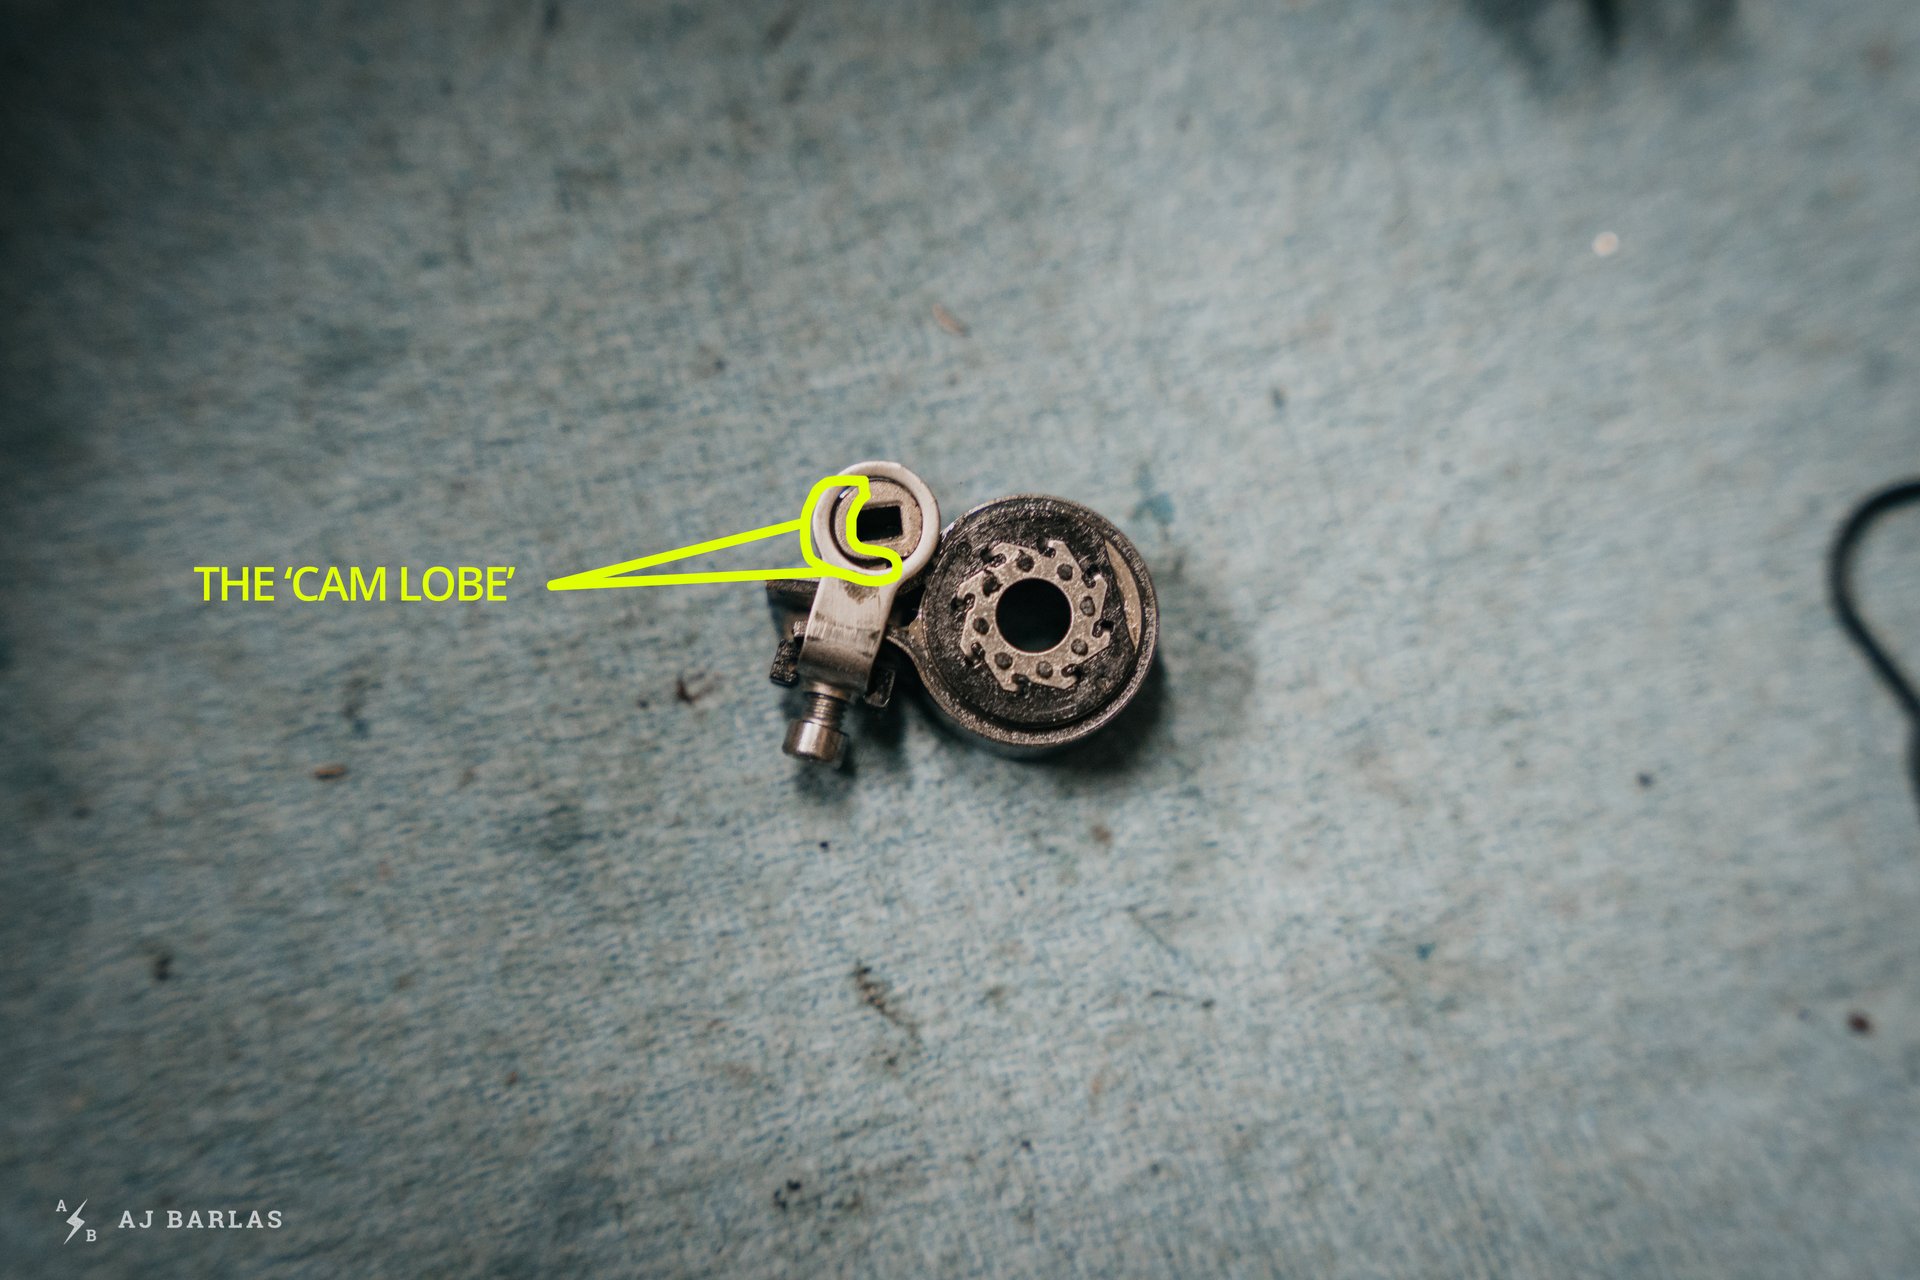
The cam lobe sits in the yellow shape drawn here. It puts pressure on the band to clamp down on the roller, turning on the clutch. If the cam lobe is located on the wrong side (opposite where it is pictured here) the lever to turn the clutch on when the derailleur is back together won't work.
Check that the clutch lever is still in the off position. Carefully align the clutch and cam with the protrusions of the plate axle and cam lever.
Double check that the cam lobe remained in the correct position, as shown.

Make sure the clutch is resting in place, butted to the bottom of the axle.
Grab the cover gasket…
And carefully slot back into the recess. There's only one way it can properly sit.
With a 2mm hex key, tighten up the cam slightly. I found this to help hold the parts tighter while finishing than leaving it loose. For derailleurs like the SLX here, there's no access once the cover is on, so set the desired tension now. Check that the on/off lever is working properly.
Grab the cap and carefully place it back in position. Check that the gasket remains in place as the cap is placed.
With a 2mm hex key, tighten the bolts for the cap to 1–1.5Nm (light), checking that the gasket remains seated while doing so.
Job done. Check the derailleur again to make sure everything moves as it should and then mount it back on the bike.
Once the derailleur has been removed from the bike, the whole process takes about 20 minutes. It's something I hope won't be needed too often, though and I may also look into a way to close the hole the spring sits in, which gives the elements a (small) way to enter the internals. Shimano also provides parts for the clutch, if something needs replacing, and provided there's stock with local distributors, your L.B.S. should be able to order them. With the shortage of many bike parts only looking to get worse, doing some maintenance like this could prevent a bout of rushed or unnecessary purchases and worse, time off the bike.


Comments
Velocipedestrian
3 years, 1 month ago
Now that's an NSMB article if ever I seen one. Good shit AJ.
It's almost like you lot don't belive in the 'bin it and replace' school of mountain bicycles so prevalent on these here intertubes.
Reply
babyzhendo
3 years, 1 month ago
YES! NSMB tech deep dives are truly awesome. Aside from deep-dive bike reviews, which are often few and far between (as they should be, if the person is actually riding the bike for a long time), these sorts of tech articles keep me a loyal daily reader.
Reply
AJ Barlas
3 years, 1 month ago
Thanks heaps, Velo. And yeah, 'bin and replace' has never sat well with me. Design with planned obsolescence is a regular point of frustration.
Reply
Ripmoslow
3 years, 1 month ago
Fantastic detail and great pictures. NSMB is the gold standard:)
Reply
YDiv
3 years, 1 month ago
Definitely agree. I hate it when I pull up a website looking for a review and it's only two paragraphs long. At that point you might as well call it an ad instead.
Reply
Sanesh Iyer
3 years, 1 month ago
I love pulling apart Shimano derailleurs. I've saved a lot of money doing cage swaps over the years.Thanks for the teardown article, loved the detail!
One tip, a zip tie or toe strap around where the cable stop and cable clamp is super helpful. You squeeze the derailleur like it's being shifted into an easy gear and you cinch the strap tight. This prevents you from needing to squeeze it by hand, and in my experience makes it a lot easier to reassemble when you need to wind the cage. If you're careful about how you do it you can even reuse the zapstrap and leave it uncut for next time.
Reply
AJ Barlas
3 years, 1 month ago
Great tip! Will try that next time I need to get in there.
Reply
gregster77
3 years, 1 month ago
My XT needed such service after just over 200km. Thankfully new bike tuneup service warranty covered it, but food for thought as no issues with my SRAM in over 2000km riding. No doubt Shimano shifting is amazingly smooth when functions, but not looking forward to having to do this too often. Very appreciative this guide exists now and will know where to look once i'm on my own to maintain :)
Reply
HollyBoni
3 years, 1 month ago
Don't worry, it's a pretty simple process. The clutch design has been pretty much exactly the same since 10spd, so there are lots of vids on youtube about maintenance.
I haven't had issues with SRAM's clutch, but I can definitely feel it getting a bit weaker in my RD, and it sucks a bit that I can't adjust the tension.
Reply
Ryan Walters
3 years, 1 month ago
Turns out there is a way to DIY make your SRAM clutch adjustable. I tried this method myself and it worked great - I have a 6 year old X0 rear derailleur that still shifts pretty good and is dead silent thanks to this mod. It definitely helps if you have a Dremel tool. This method was written specifically for the SRAM 2.1 clutch - I can't say how or if it will work for other versions.
Stolen from a PB forum post:
Check to see if your derailleur clutch is providing tension, assuming its not you have two options.
1) Replace
2) Open it up and adjust the clutch tension (with the potential of completely destroying your derailleur)
If you're willing to risk your derailleur:
Using a seal pick, pull out the plastic plug in the middle of the clutch cap, there's a T55 Torx drive under there.
DO NOT TURN IT YET.
Locate the little metal pin on the left side of the clutch housing
Using a file or dremel, carefully shave away some plastic around the pin
Once you have a bit of the pin exposed, cut a notch in the pin so that you can grab it with pliers or drive it out with a small chisel. You may need to turn the T55 cap slightly, less than a millimeter, to loosen up the pin hole.
Once you have the pin out, use the T55 to unscrew the cap all the way out.
File down the burrs on the thread around the pin hole on the T55 cap, this will make sure the clutch housing doesn't get messed up when you reinstall it.
Take a picture of the orientation of the sprag clutch before removing it, so that you know which way it needs to be re-installed.
Make sure your derailleur cage is properly screwed into the sprag clutch. With the cap out, you'll have access to both sides of the bolt. I used a drop of blue loctite on the screw (cage side) and some carbon paste under the screw head on cage side (assuming you have a carbon cage). Be careful with the blue loctite, only put it on metal parts, it can attack some plastics, and i'm not sure what plastic is used for the derailleur body.
Reinstall the T55 cap, you can now tighten it more, which will add more clutch tension. Toss the pin, you don't need it.
Your Sram Type 2.1 derailleur is now adjustable.
Reply
HollyBoni
3 years, 1 month ago
Yeah i've read this a while ago but i'm fairly sure people with 3.0 clutches (which is what I have as well) said it doesn't work anymore.
Reply
Mammal
3 years, 1 month ago
Correct. 3.0 clutches have been changed so there is no way to adjust the clutch. I imagine the work-around wasn't enough to stave off the patent police.
Reply
Andy Eunson
3 years, 1 month ago
I serviced my old 11 speed SRAM clutches. But I think I merely tore out the plastic cover to access what was under it. So long ago I don’t recall how I did it. The clutches had been sticking and creaking so cleaning and grease with a thin grease worked very well. I did it a few times IIRC before I went all eagle. Those have been fine so far.
Reply
AJ Barlas
3 years, 1 month ago
I did the same thing. Then the plastic cover became a more permanent covering that made it so we can't service. :(
Reply
Mammal
3 years, 1 month ago
My NX clutch (new bike spec) gave up after 2 months. Thankfully, Shimano 12spd mech does the job nicely with the rest of the Eagle bits. No issues with the Shimano clutch after 8 months of riding it, but this will help when there are.
Reply
SiT
3 years, 1 month ago
Excellent article! so much better to have all the steps as photos than just do a video, as far easier to follow. As for grease, sturmey archer IHG grease seems to work well, if you have some lying around!
Reply
AJ Barlas
3 years, 1 month ago
Glad you find the format helpful, SiT.
Reply
YDiv
3 years, 1 month ago
If anyone's still a bit hesitant, GMBN Tech recently put out a video on this that you might have an easier time following.
However, this article is a great complement because the quality of the photos absolutely blows everything else out of the water. Super impressed with both the photos and how concise the captions are.
This just serves as another reason that Shimano is so appealing. Once the SRAM clutch is knackered, ya done for. Can't adjust it anymore :(
Reply
Bikeryder85
3 years, 1 month ago
Truly fantastic article with great photos! Adding this to my favorites.
Reply
mrbrett
3 years, 1 month ago
Excellent work instruction, AJ. Thanks!
The back of the ‘plate axle’ that the clutch sits on is susceptible to moisture from a small hole in the back of the outboard lower cage.
Do you think a dab of RTV would seal this up? Would also be removable with a mechanic's pick for the next clutch service. Also would let the spring wiggle a little in normal use.
Reply
Sanesh Iyer
3 years, 1 month ago
I've done it before. You have to be super careful putting it on and it's never perfect. Imo you're better off servicing it when new and loading it up with grease.
Reply
AJ Barlas
3 years, 1 month ago
Good to know someone has given it a go already. Thanks for the suggestion mrbrett! I was gonna give it a try until Sanesh shared his experience with it but maybe I won't now?
Reply
mrbrett
3 years, 1 month ago
I'm convinced the "fill it up with grease" plan is the way to go, rather than RTV. That's all I needed to read.
Mentally bookmarked when I need to do some clutch service ...
Reply
Lien028
2 years, 10 months ago
Hello Brett, I am a bit confused with the outboard cage term. Is it referring to the derailleur cage itself? If so, where do I "fill it up with grease"? Thank you very much!
Reply
JT
3 years, 1 month ago
Great Crom! Where was this article two months ago?!? The things I had to learn by trial and error, esp. the cam lobe alignment. Great tear down, AJ!
Reply
AJ Barlas
3 years, 1 month ago
That cam lobe has caught me out in the past too. TBH I probably fluked it the times it went smoothly, until seeing the position referenced by Shimano.
Reply
Mammal
3 years, 1 month ago
This is THE BEST, thank you! Looking forward to some clutch lovin.
Reply
AJ Barlas
3 years, 1 month ago
It's a good rainy day project to mix in with other maintenance items. :)
Reply
Vincent Edwards
3 years, 1 month ago
Thanks for providing such excellent and relevant service articles!
Reply
cheapondirt
3 years, 1 month ago
Bookmarked for later, really appreciate this!
Reply
Sven Luebke
3 years, 1 month ago
Great article! I’m sad now, all our bikes are GX.
But my frame bearings, fork, shock, seatpost, headset and cables are all cleaned, replaced and lubed for spring!
Reply
AJ Barlas
3 years, 1 month ago
Ready to roll!
Reply
Kurt Adams
3 years, 1 month ago
Fantastic tear down peice!
After little riding my XT derailleur needed this... easy to do and so worth it. Strongly suggest everybody do this to start the season!
Reply
Tim (aka DigitBikes/DirtBaggies)
3 years, 1 month ago
These instructions are at odds with Shimano's, described on page 30, here: https://si.shimano.com/api/publish/storage/pdf/en/dm/MARD001/DM-MARD001-03-ENG.pdf
The 3.5–5.4Nm (which is mentioned, but I believe during the wrong step) is the target for clutch resistance when adjusting the cam-squeezing bolt. This is the only place I feel a torque wrench is NEEDED.
In the step where the 3.5–5.4Nm range is mentioned , the specified torque is 7.8-9.8Nm (page 36).
Reply
AJ Barlas
3 years, 1 month ago
Thanks for pointing that out, Tim. I've updated the piece to be clearer with the missing 7.8–9.8NM of the 4mm hex.
Reply
Tim (aka DigitBikes/DirtBaggies)
3 years, 1 month ago
That wasn't what I was trying to point out. The important deviation I see is in setting the clutch friction, where it says "...set the desired tension now. Check that the on/off lever is working properly." - this is where the torque wrench (set at 3.5–5.4Nm) is needed.
This is the only place where I'd bother to bust out the torque wrench, since this is the step where the clutch gets adjusted to work like new, which is the whole point in this endeavor.
Reply
IslandLife
3 years, 1 month ago
Maybe I missed it? But I don't think you ever told us if the service actually fixed your shifting issues? I'm assuming it did... but you know, horses mouths and all that.
Reply
AJ Barlas
3 years, 1 month ago
Great question. Yes, it did!
Reply
MuscogeeMasher
3 years, 1 month ago
Great how-to. Much prefer the pics over video.
I just don’t understand why it’s so hard to design a clutch for this application that isn’t so problematic and can also be easily adjusted as it ages.
Reply
Mammal
3 years, 1 month ago
My Shimano 10spd clutches have worked perfectly fine for many years with only small tension adjustments needed, and they share the same basic design. I think something may have changed in the sealing on the back plate, making newer ones a bit more susceptible. My 11spd clutch needs this service after 2 solid years of all-weather/conditions performance.
Reply
Sanesh Iyer
3 years, 1 month ago
I think the 12spd clutches need this new. They are way too tight and way to dry out of the box. I agree, the 10s and 11s were better out of the box. I think it's primarily a grease thing. Both my 12spd XT derailleurs came apart dry, everywhere. My saint 10spd and XT 11spd had some of that nice motul stuff in their out of the box. My theory is the grease robot was the slowest so it got fired. I think the clutch design is solid. I have a 1st production run Saint derailleur (2013) that has been continuously used on bikes (it's on my friends bike now) since then. It runs like new.
Reply
MuscogeeMasher
3 years, 1 month ago
Great point. Haven’t ridden a Shimano drivetrain in awhile. But, I’ve seen and heard of a lot of problems with the new stuff but not 10 and 11 speed. Remember that you could feel the clutch more with Shimano? Would be super curious to know if they changed the design or sealing slightly on 12 speed and if they were going for lighter shifting action.
Reply
MuscogeeMasher
3 years, 1 month ago
This comment has been removed.
Andeh
3 years, 1 month ago
I'll be the voice of dissent here: I don't get why people love Shimano derailleurs so much. I had the new XTR 12. That damn thing needed greasing after like 150 miles because it started getting notchy. Then again after another 150 miles. Even cranked to maximum, it still doesn't provide the same level of resistance as my last X01 Eagle clutch, which also never needed internal service for me in over 3,000 miles before I "upgraded" to the trendy new XTR.
And even if they theoretically have a much longer overall lifespan in terms of years, the XTR cassettes sure as hell don't. The aluminum cogs on there seem to be made of cheese.
Reply
AJ Barlas
3 years, 1 month ago
TBH, I'm surprised there haven't been more people with similar feelings to you, Andeh. As I said in the opening, each has positives and negatives and it's up to the user to narrow down what's important for them. You sound happy with SRAM drivetrains, which is awesome!
Reply
Mr.T
3 years, 1 month ago
No issues on the XTR derailleur(s) here... I've heard people have issues, but I'm guessing must be batch related. I'm on 3 bikes with 180 days in the saddle across stable in 2020 and no issues on derailleur (nor on 2 bikes over 2019 season), purchase of the 3 derailleurs occurred between XTR release and March of last year so fairly spaced out. Hopefully it is a batch issue.
Agree on cassette, I'm blown away as my 10 speed and 11 speed XTR were like timex watches. The new XTR cassettes are like ninja stars after a season. Its nuts, all 3 were new in March 2020 and I'm wondering if a better option is SRAM or eThirteen... but swap from Microspline to Xd is a PITA.
Reply
Lien028
2 years, 10 months ago
This comment has been removed.
Lien028
2 years, 9 months ago
PSA: The moisture and water are NOT coming from the hole in the rear, as suggested in the article. After some thorough investigation, the water is coming from the clutch lever. After a rainy ride and cleaning my bike, I noticed that water does not enter from the perfectly sealed rear. It enters through the hole where the clutch lever inserts into. I don't really use my clutch, so I've remedied the problem by closing it up with silicone.
Reply
Garrett Griffin
8 months ago
Big thanks for posting this! Pictures were extremely helpful.
Just did this service on my Deore 12 speed derailleur and it went smooth, process is almost identical to what’s shown. The only deviation is that the spring didn’t seem to unwind itself at that step, instead I had to loosen the T27 a bit and then get the two halves a little angled from each other to manually unwind the spring.
Still a pretty simple job, thanks again for taking the intimidation out of a service like this and saving me some time and money.
Reply
Please log in to leave a comment.