Mano a Mano Review
OneUp Al Pedals Vs Crankbrothers Stamp 7
Opinions about Flat pedals and shoes are so personal that one rider's perfection is another's purgatory. This makes writing a review a little challenging so you can expect a lot of provisos. It's a bit like reviewing a custom made suit. Only this garment has even odds of being made for you – or for someone else entirely; if it happens to fit it it's simply luck. Or it would be if I was simply reviewing pedals chosen for me at random. Having mashed gum rubber to pins since the turn of the century (which is a thing we can say now) I have a reasonable idea of my fussy pedal criteria; I like 'em sticky, I like 'em thin and if they rattle I'll throw them in the wood chipper.
Both pedals are nice and thin and support 10 shin slashers per side. Both come in 7 anodized colours, although Crankbrothers seems to be out of stock of several in size small.
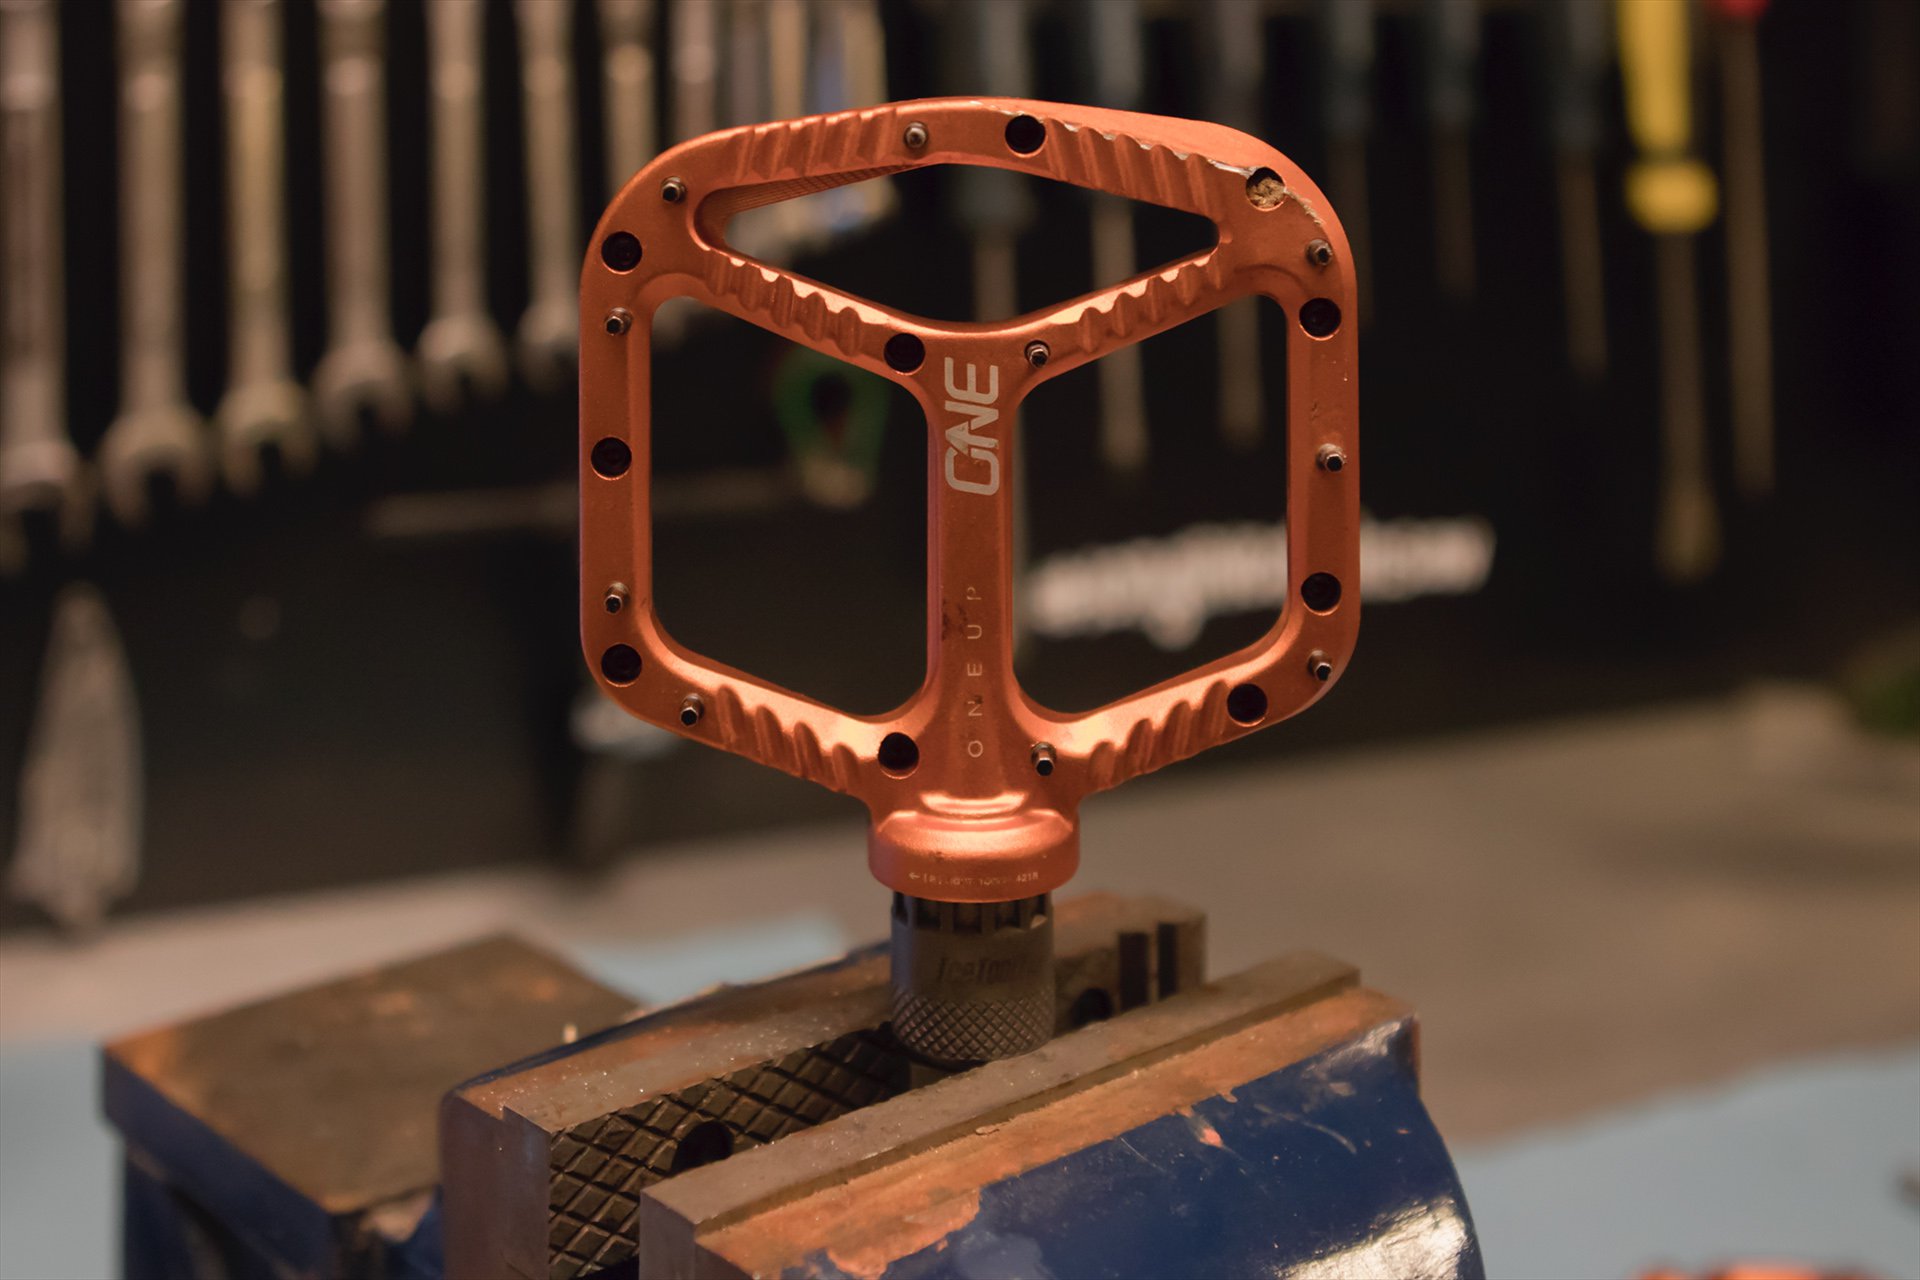
That narrowed my search down to OneUp's Aluminum pedals and Crankbrothers' Stamp 7. My experience with other OneUp products, and the lads behind the brand, gave me some faith and I had already ridden and enjoyed a set of Crankbrothers Stamp 3s in both sizes - so a thinner and lighter version sounded ideal.
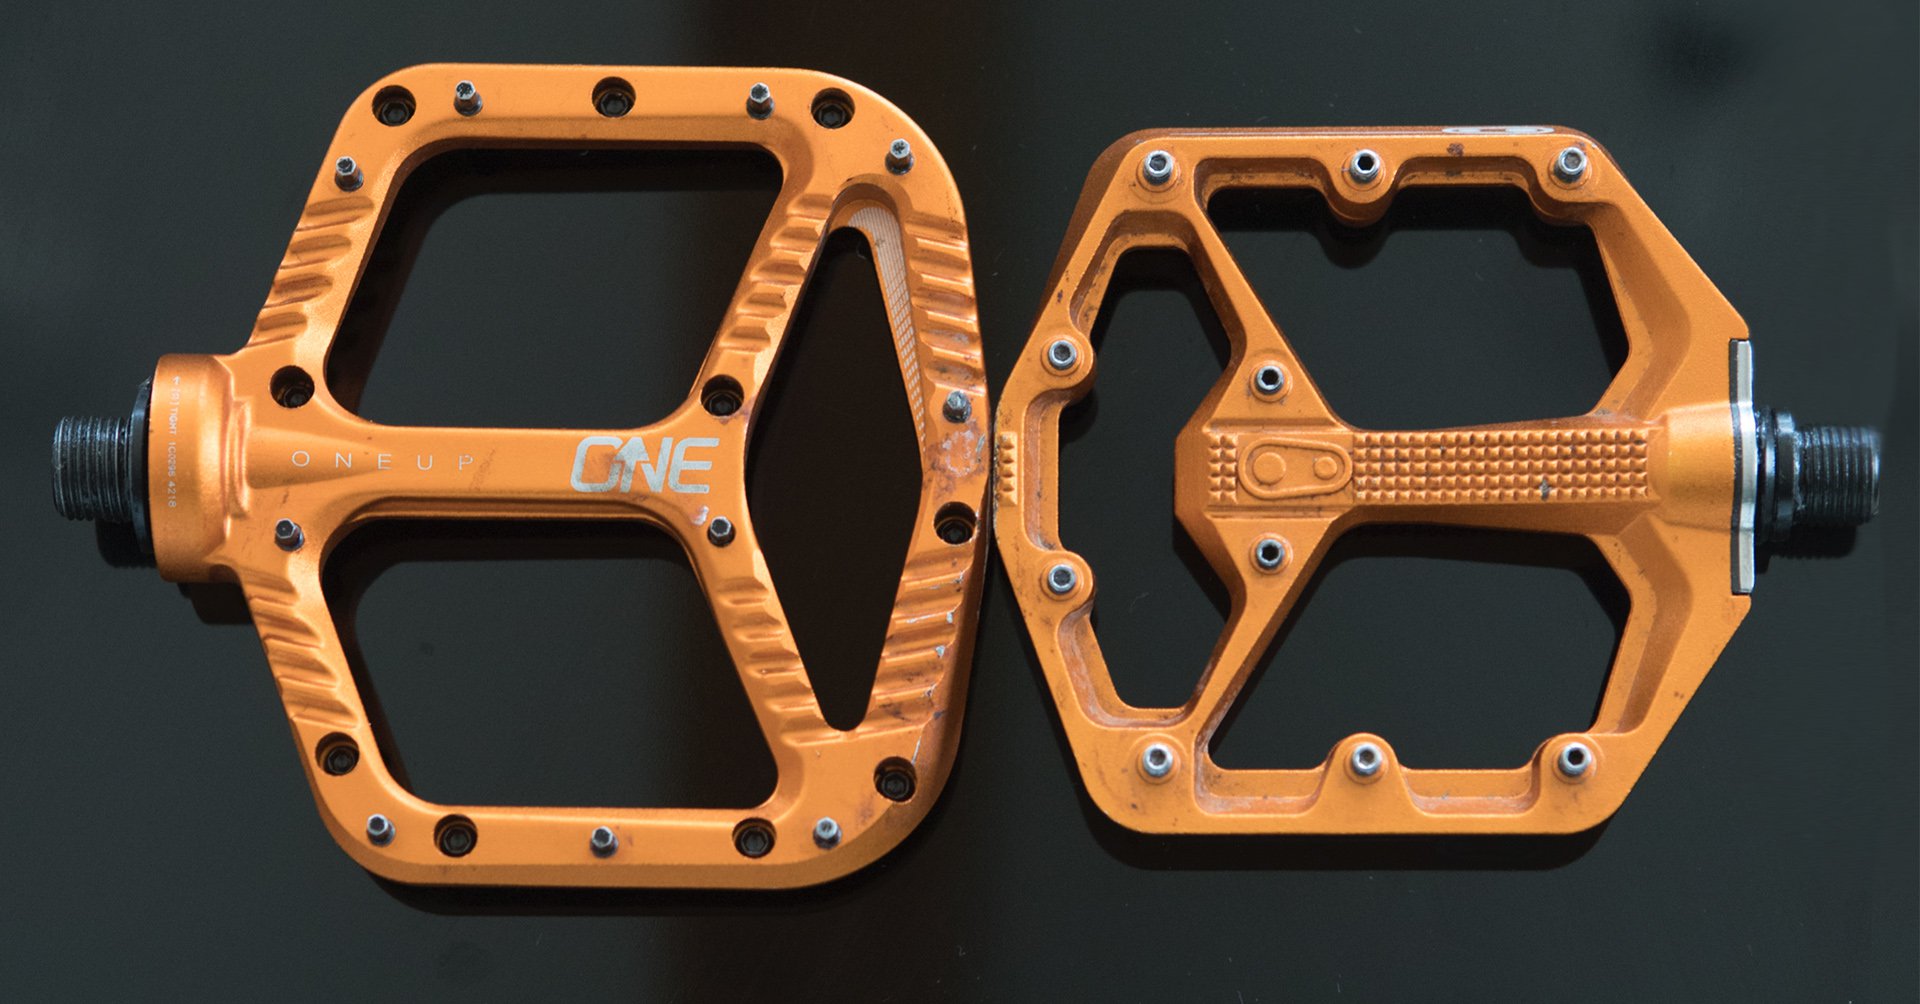
On the screen these match up well. Both are forged from 6061-T6 Aluminum, both have 10 removable steel pins per side, chromoly steel axles, a thin profile as a design priority that involved some design compromises, and each one is relatively easily user serviceable. They also both happen to be anodized orange and weigh within 18 grams of each other per pair, or the weight of a 60w incandescent lightbulb per pedal.
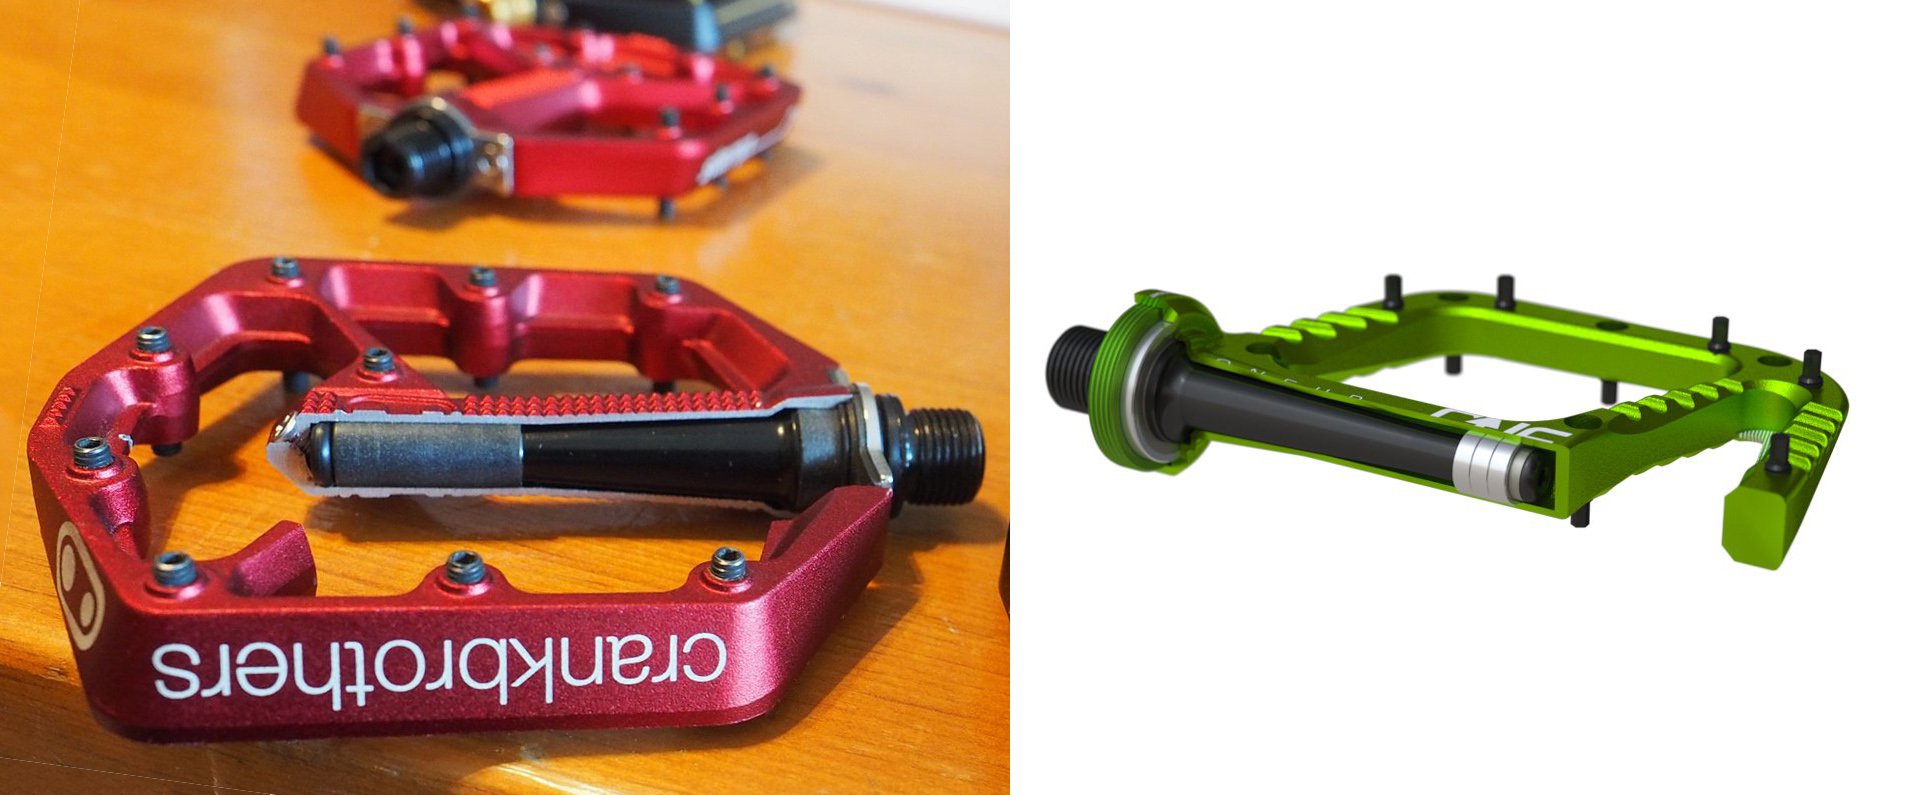
Both pedals make a lot of use of very little axle space. Crankbrothers uses two plastic self-lubricating Igus bushings to keep things turning smoothly while Crankbrothers opts for three small cartridge bearings underfoot and one large one close to the crank interface.
Teardowns
Before writing this I wanted to tear down each pedal to get a sense of the internals and the effort required to keep them running smoothly. My first stop was to dig out the service guides for each product. OneUp's was easily found and there was a video to go along with a step-by-step written guide with good photos.
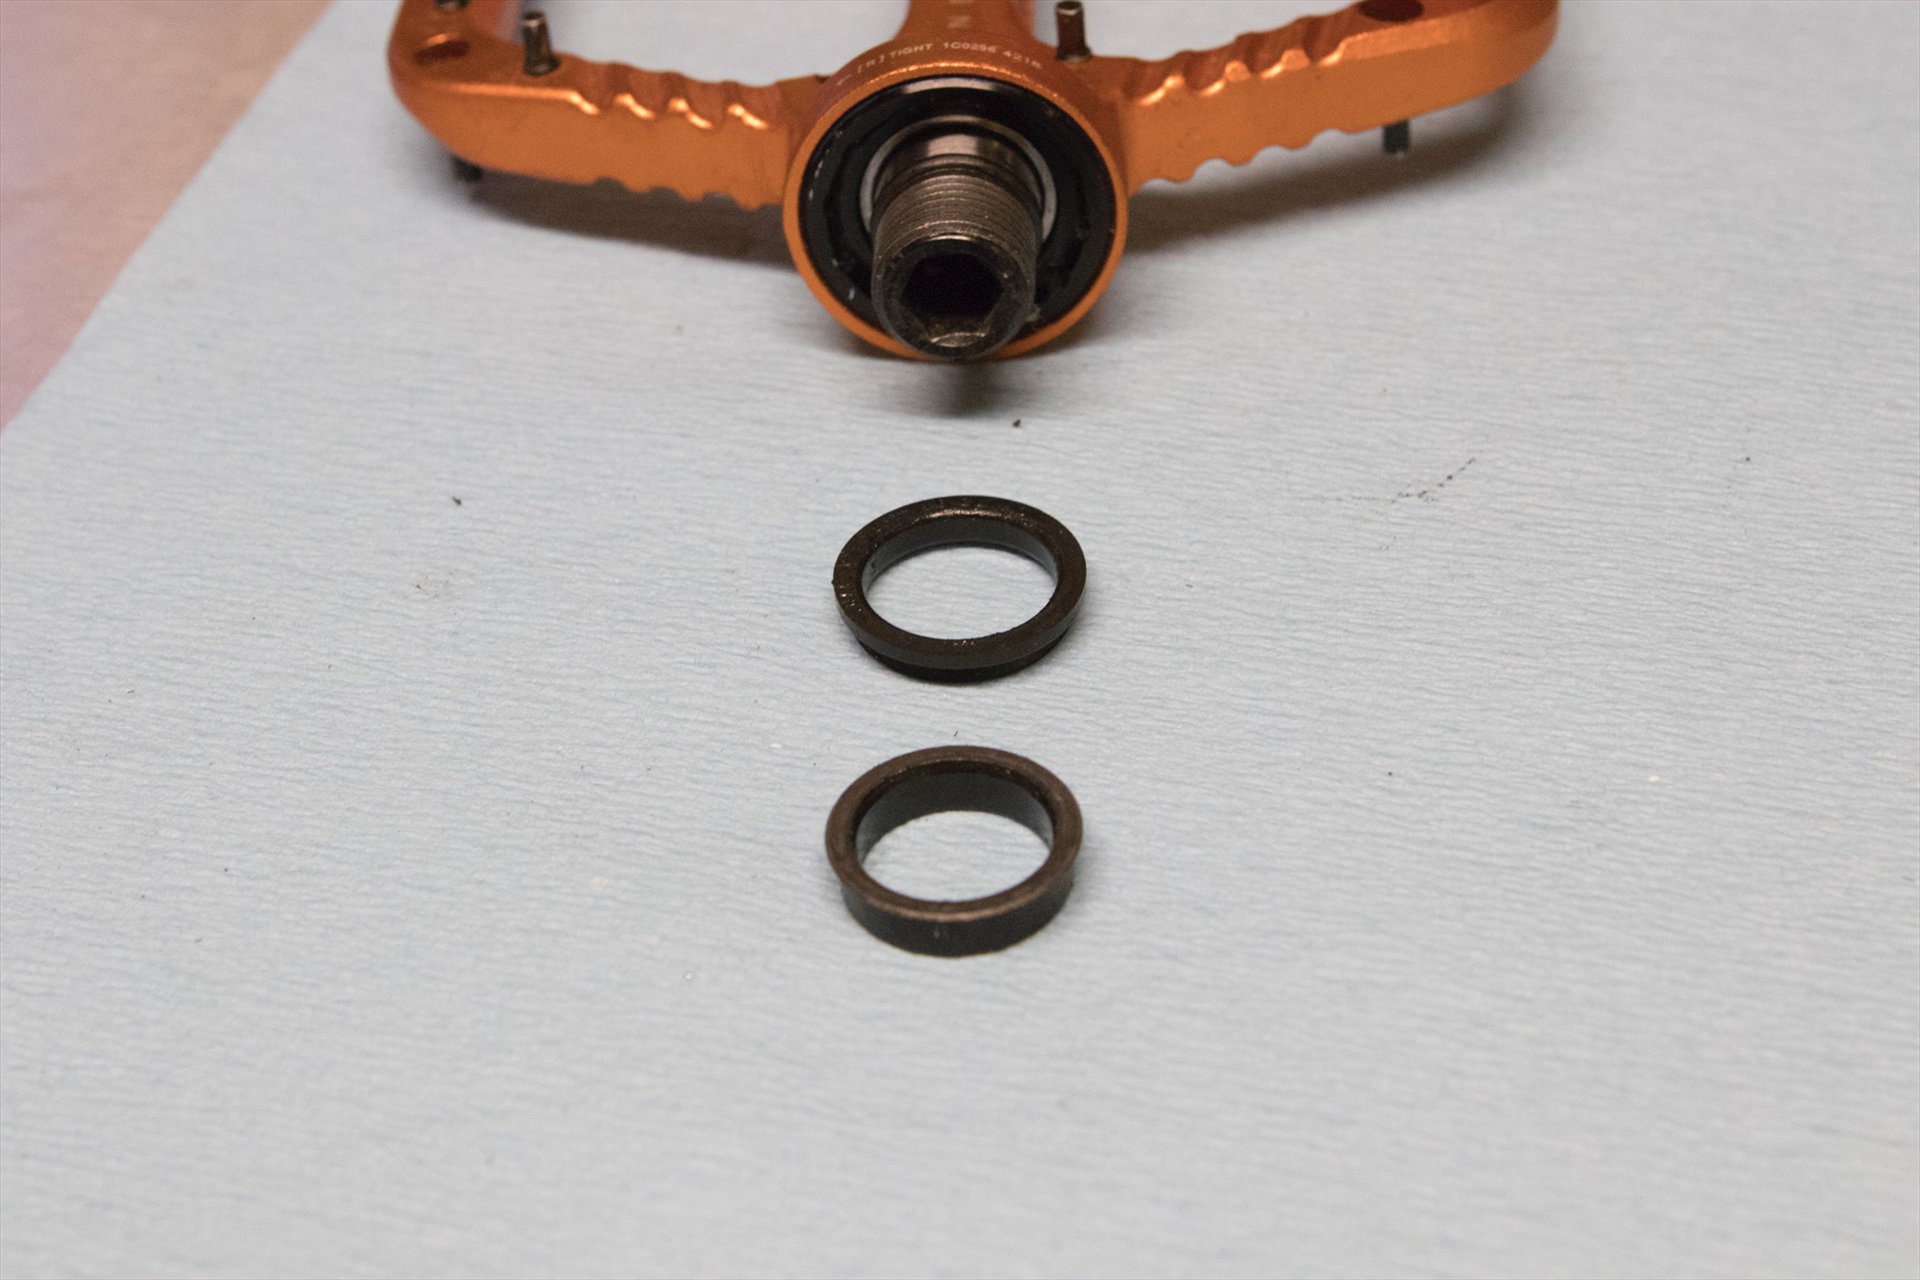
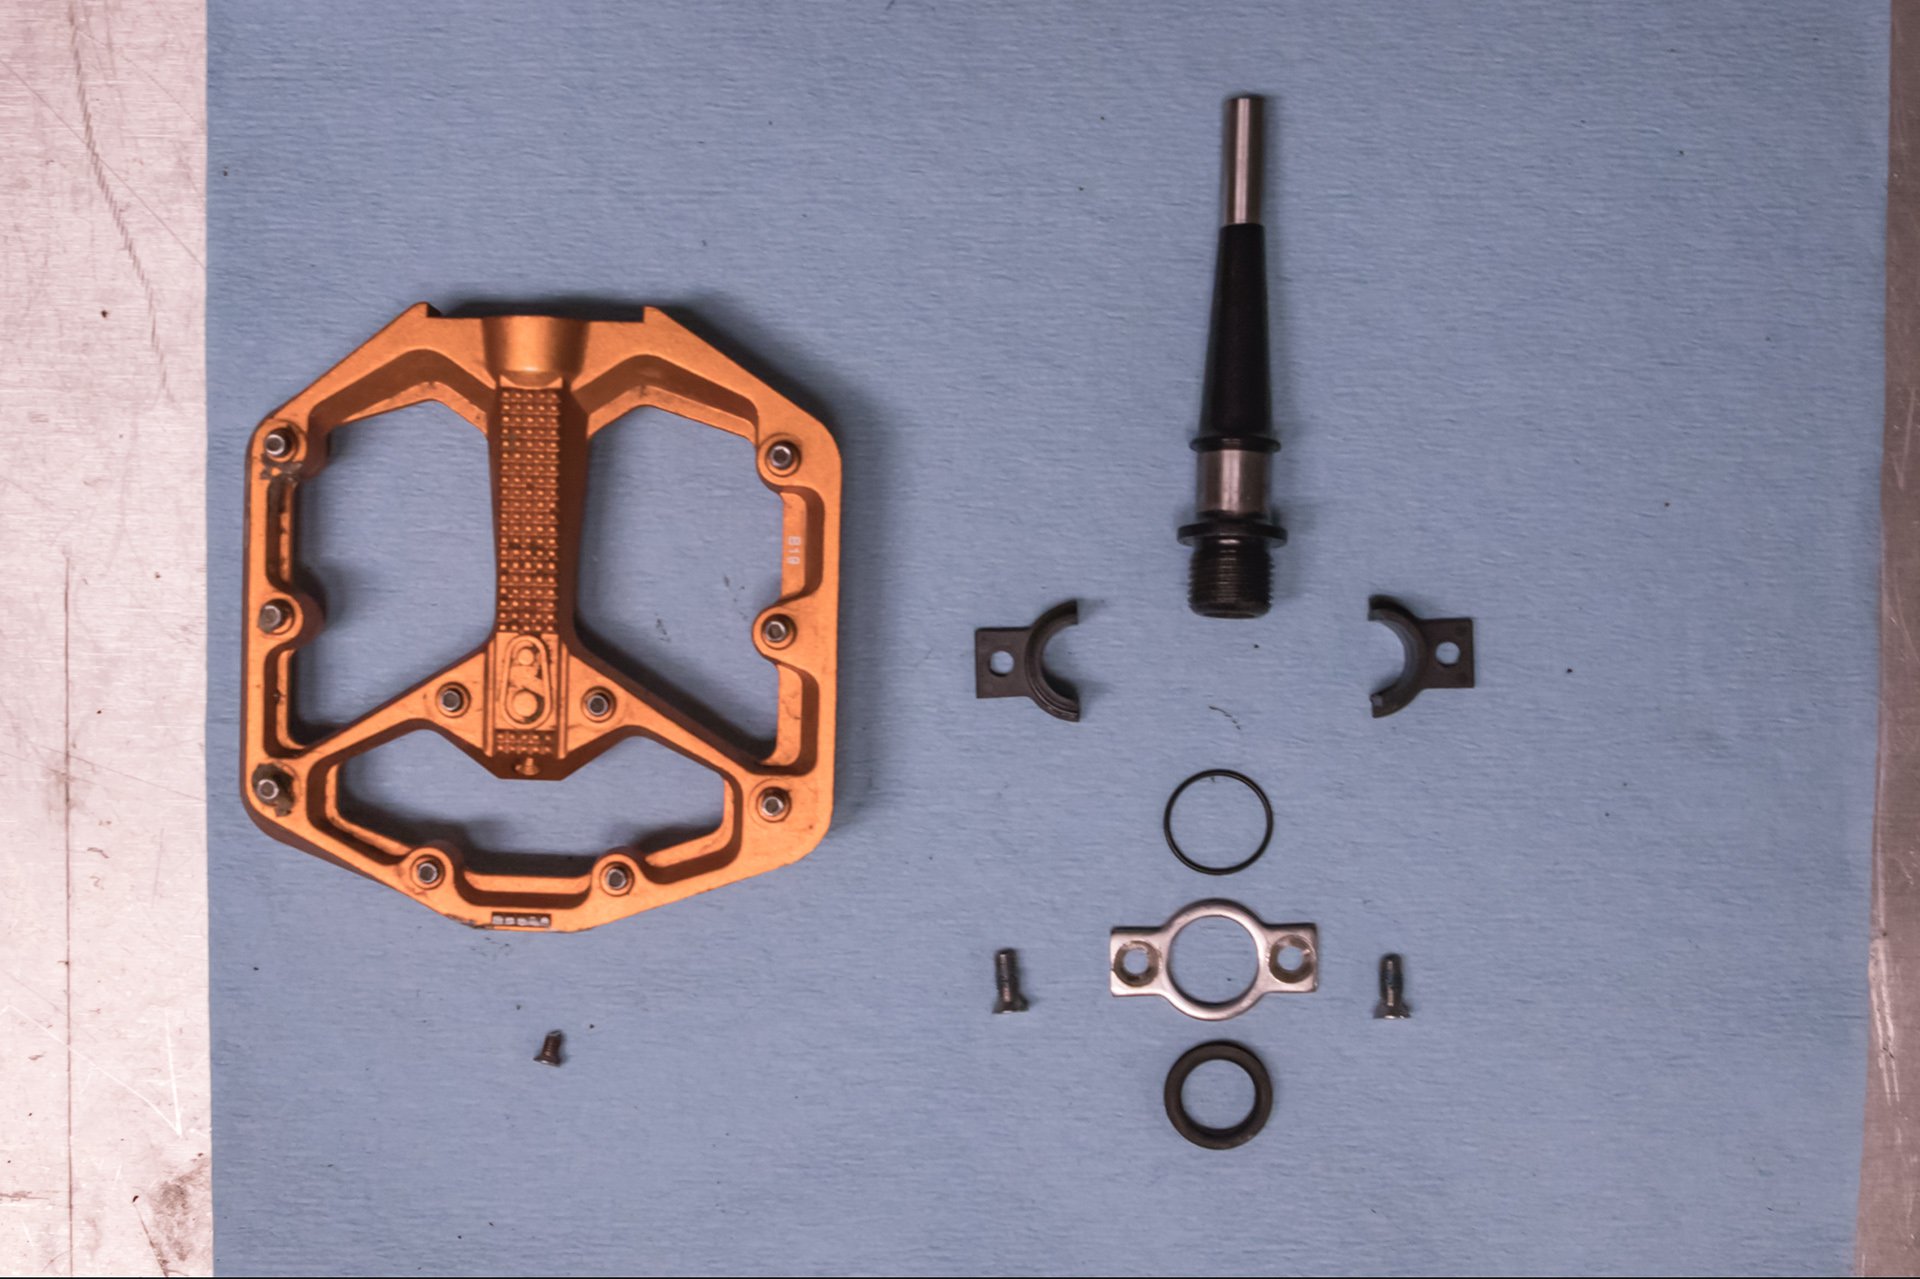
Step one for the OneUp pedal teardown is to remove the pedal washer and outer seal. Note - this isn't an optional pedal washer and a second conventional washer is needed for many cranks, and certainly all cranks with boots, to allow the pedal to spin freely, because of the large flange supporting the outer cartridge bearing.
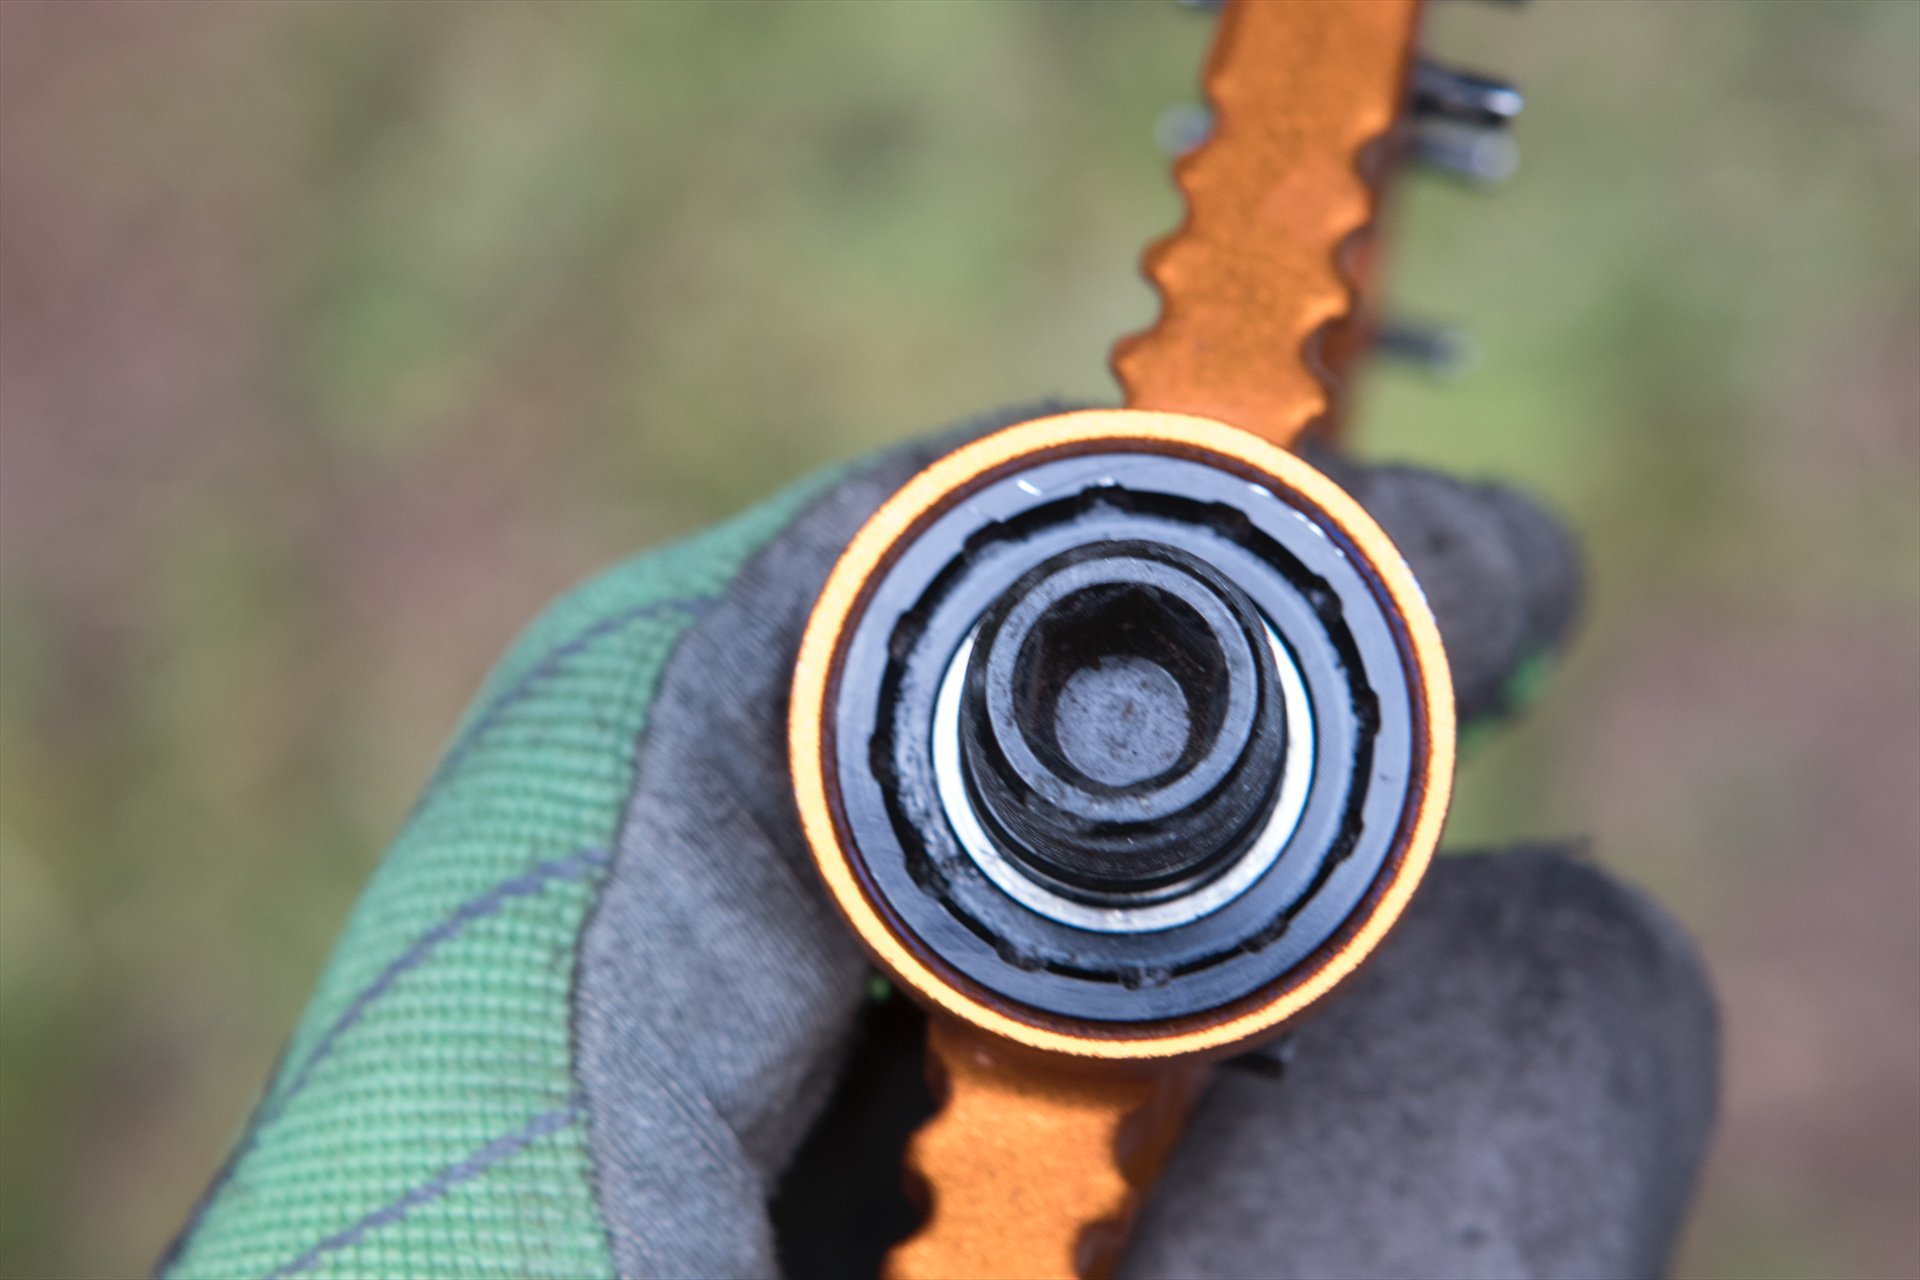
Once that is removed a Shimano cassette lockring tool is used to remove the ring that holds the axle in place.
Crankbrothers had 3 document links related to the Stamp 7 and the 11, which are only separated by the 11's titanium axle. The first link was a user guide, then there was an exploded view and finally a link that purported to guide you through an overhaul and installation of a refresh kit. Unfortunately this link was a repeat of the exploded view, and while it was useful, it left me in the dark about the sequence, how much lube to use (or any since Igus plastic bearings are made to be self lubricating), how to remove the inner Igus bearing and how to remove the clamshell Igus bearing without breaking something. It wasn't too hard with the diagram but I'm certain the actual overhaul guide has valuable information that would have smoothed the process. I thought I could use the documentation for the Stamp 3, since they share several components, but both the spindle replacement guide and the refresh kit install guide for the Stamp 2 and 3 links to documentation for pedals with different architectures - despite using the same rebuild kit. It's possible to muddle your way through but this is not a consumer-friendly approach. To be fair here, OneUp makes two pedals while Crankbrothers has six pedal lines with 5 different versions of the Stamp alone - in two sizes. It's a lot to keep track of and, considering the turnaround the company has seen, this is probably on someone's todo list.
A Shimano cassette lockring tool removes the outer ring that holds the OneUp axle in place. A vise is very useful for this procedure but with some ingenuity you could do without.
It's not very satisfying when there is literally nothing to do when you crack open a pedal, as was the case with the OneUp.
OneUp Teardown
There is one tricky element to the disassembly of the OneUp pedals. The process requires a Shimano cassette lockring tool, which happens to be identical to a Shimano freewheel removal tool from back in the day, and I used to have several. Somehow, despite finding both 4-tooth and 2-tooth Suntour freewheel tools from the 80s, I couldn't locate my Shimano version. I generally use an earlier version of Abbey Tools excellent Crombie tool made by Wrench Force to remove cassettes so I don't need it for that operatoin. Unfortunately that tool has a centre guide to keep it aligned which made it useless for disassembling OneUp pedals. Fortunately Andrew Major had one to lend me and I was back in business.
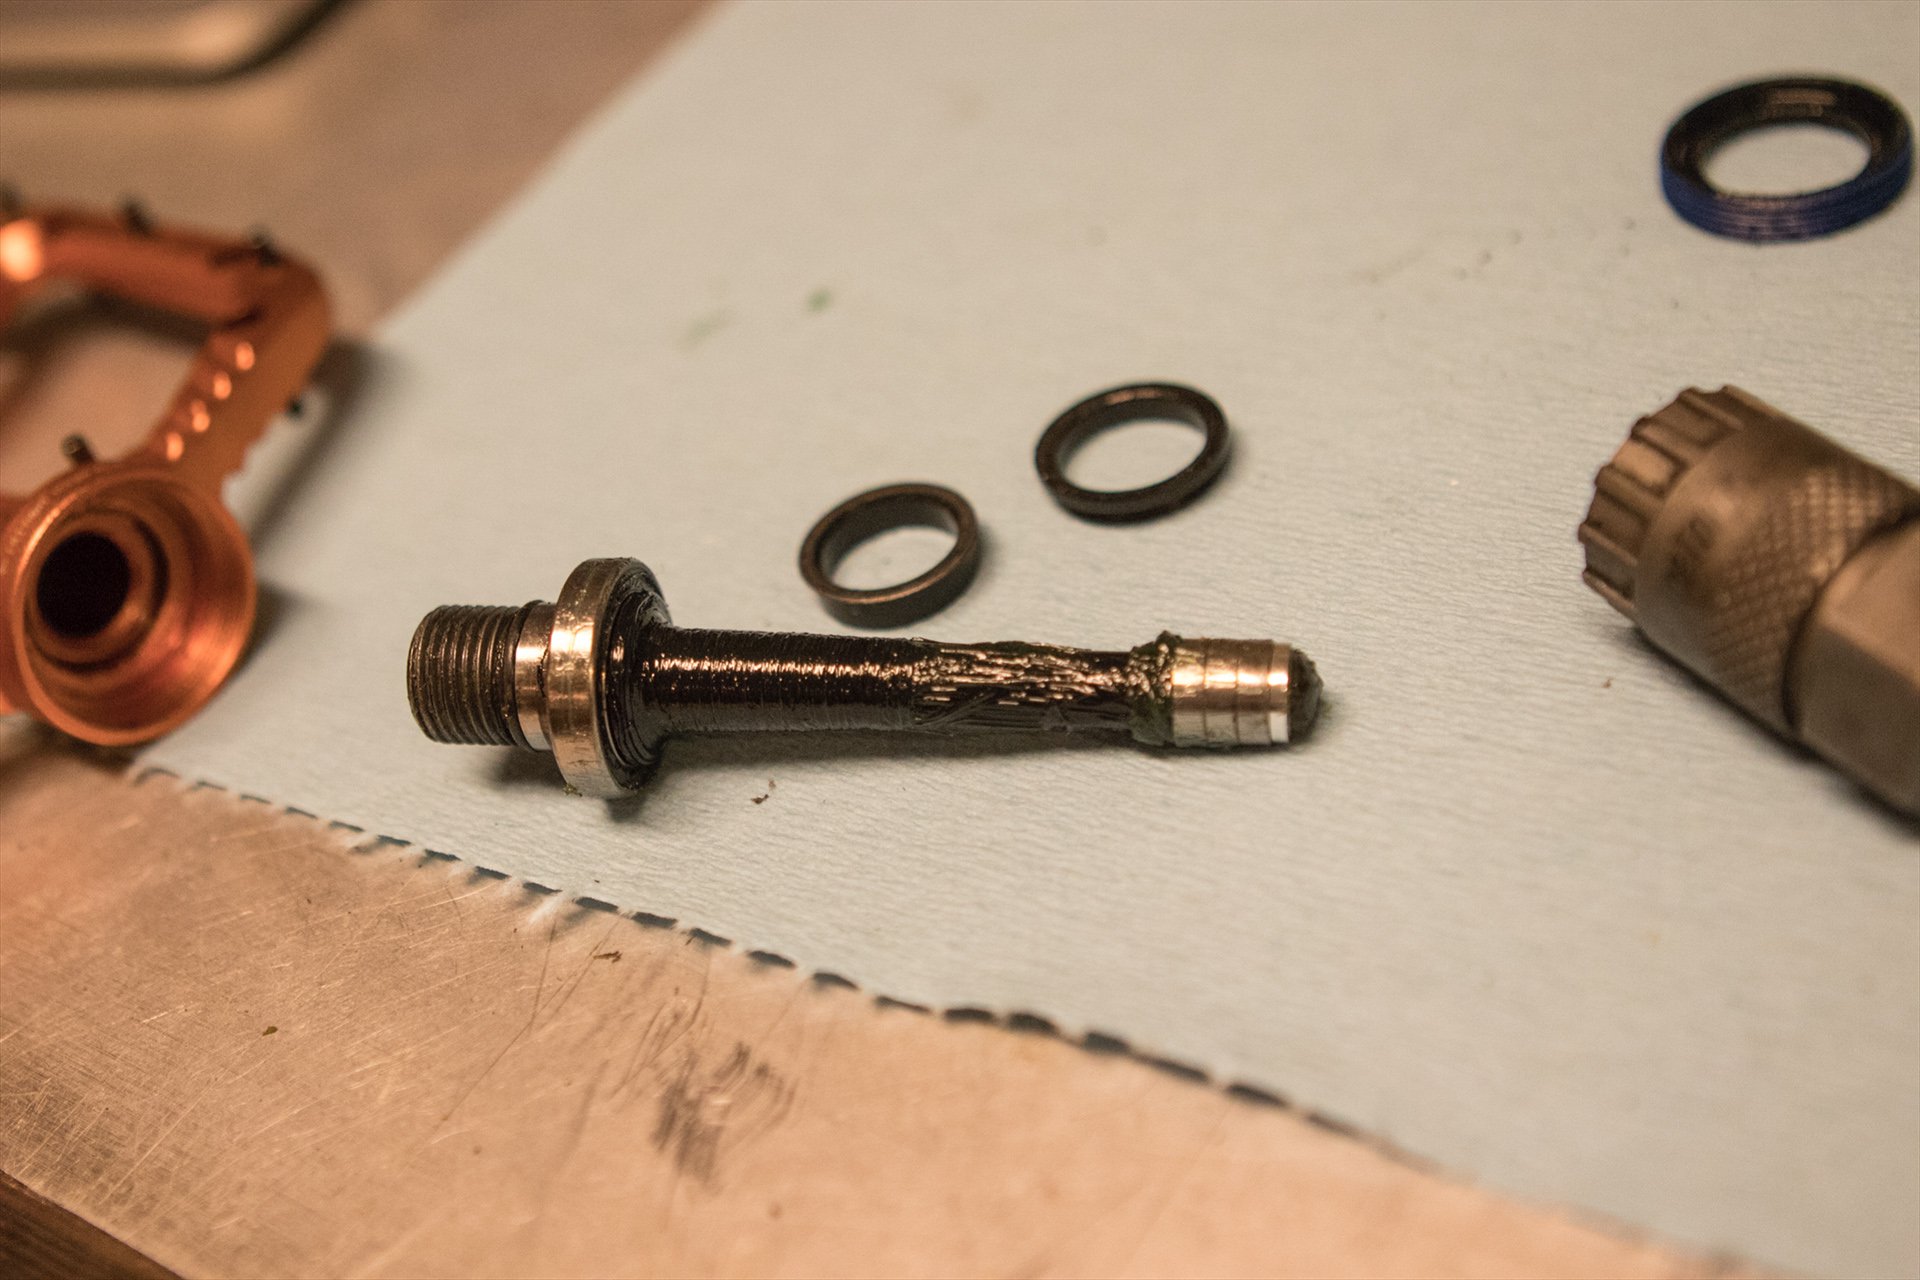
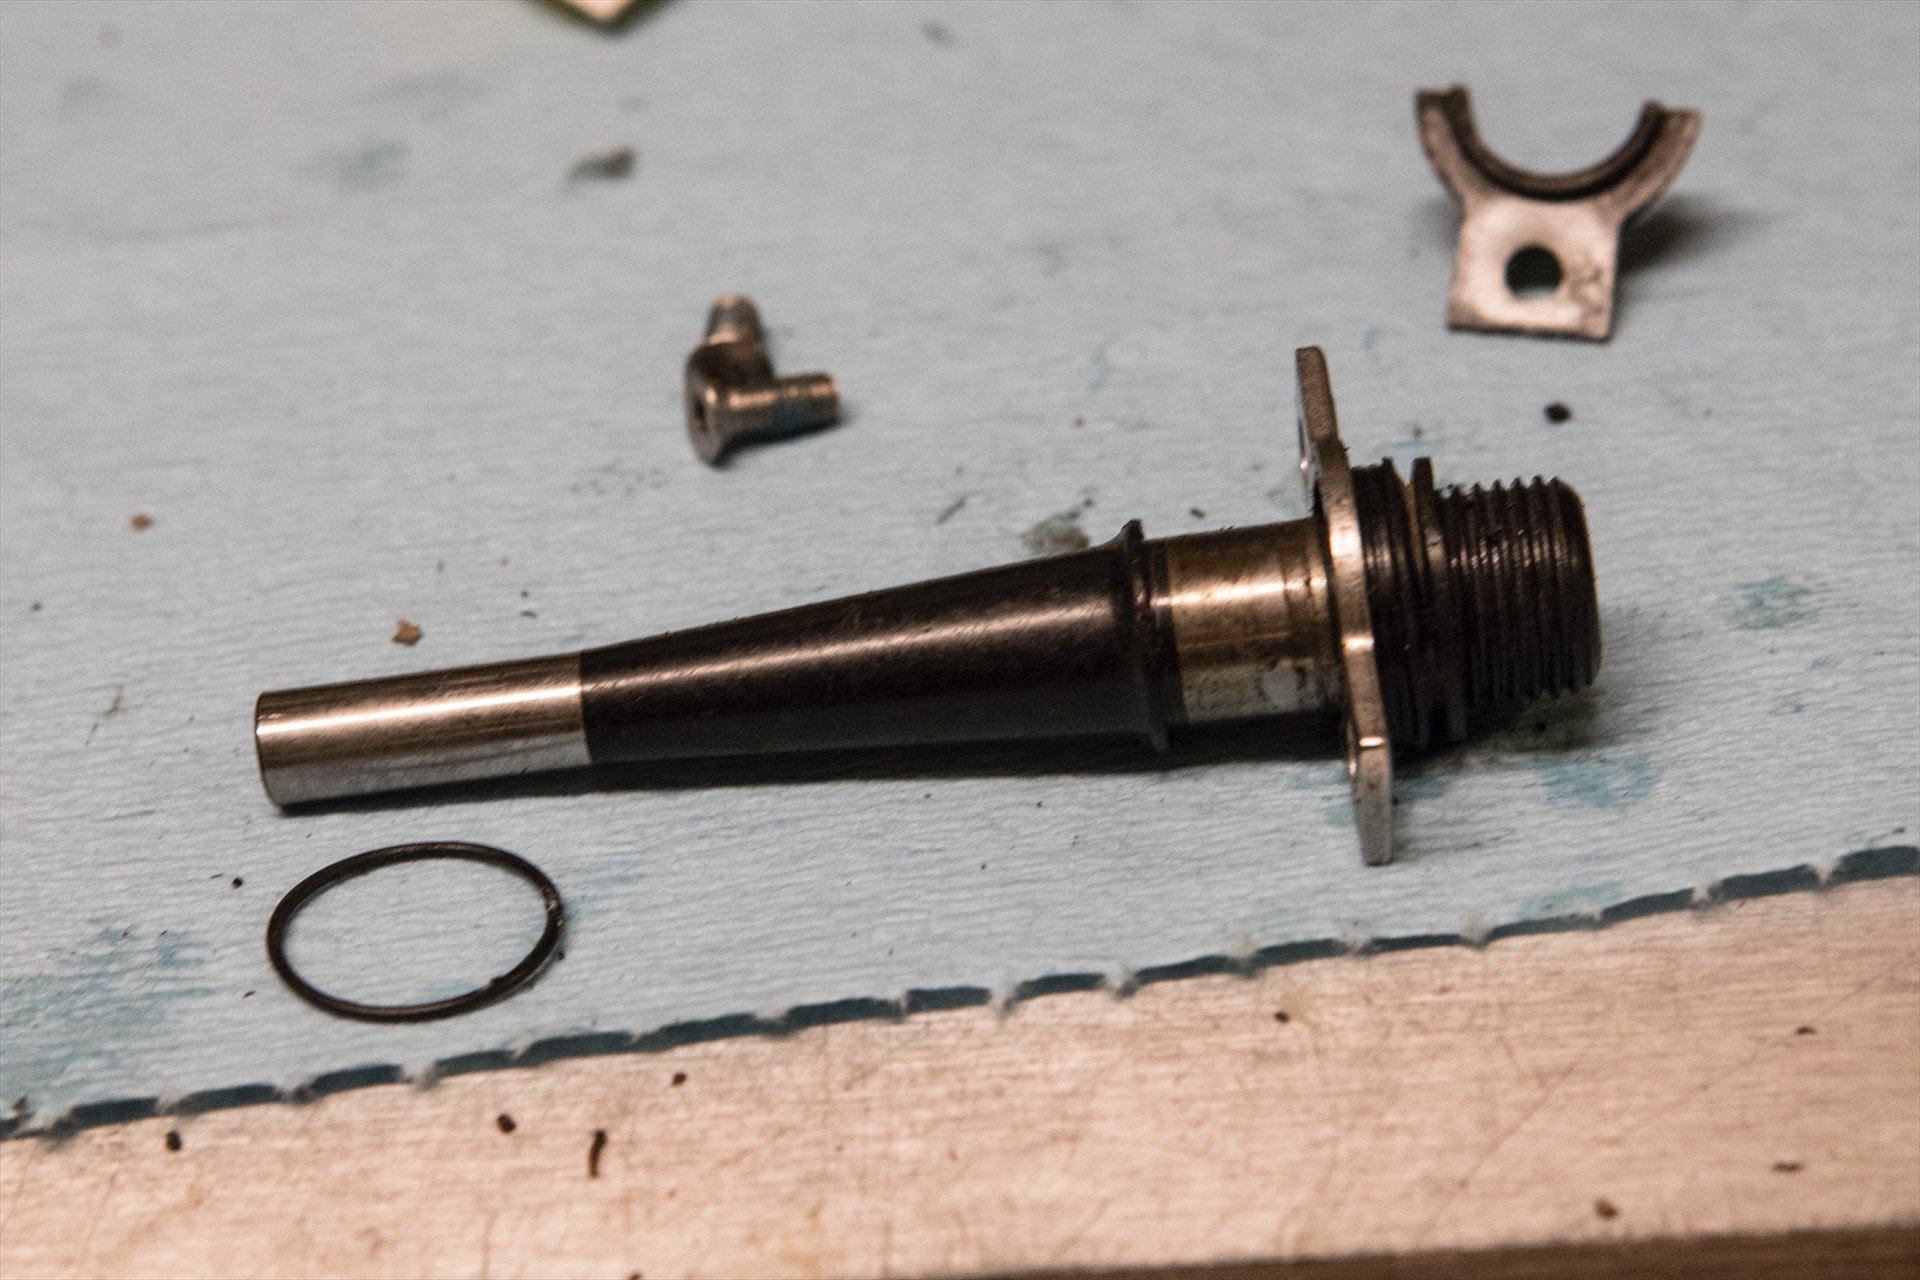
Taking apart OneUp pedals was truly a breeze. It was as easy as pulling off the pedal washer/main seal and then using the cassette tool to remove the lockring with the help of a vise. After that a quick tug had the axle and the four attached cartridge bearings (1 large and 3 small) staring up at me in anticipation. Only there was nothing to do. Everything was still perfectly lubed and sparking clean inside, so I just put everything back together in literally 45 seconds.
You'll notice some lateral play when the OneUp pedal is removed. This is by design and any movement disappears once the pedal is tightened on the crank. This is an elegant solution that means the internal pedal hardware doesn't need to apply outward force on the axle which would require more parts and complexity.
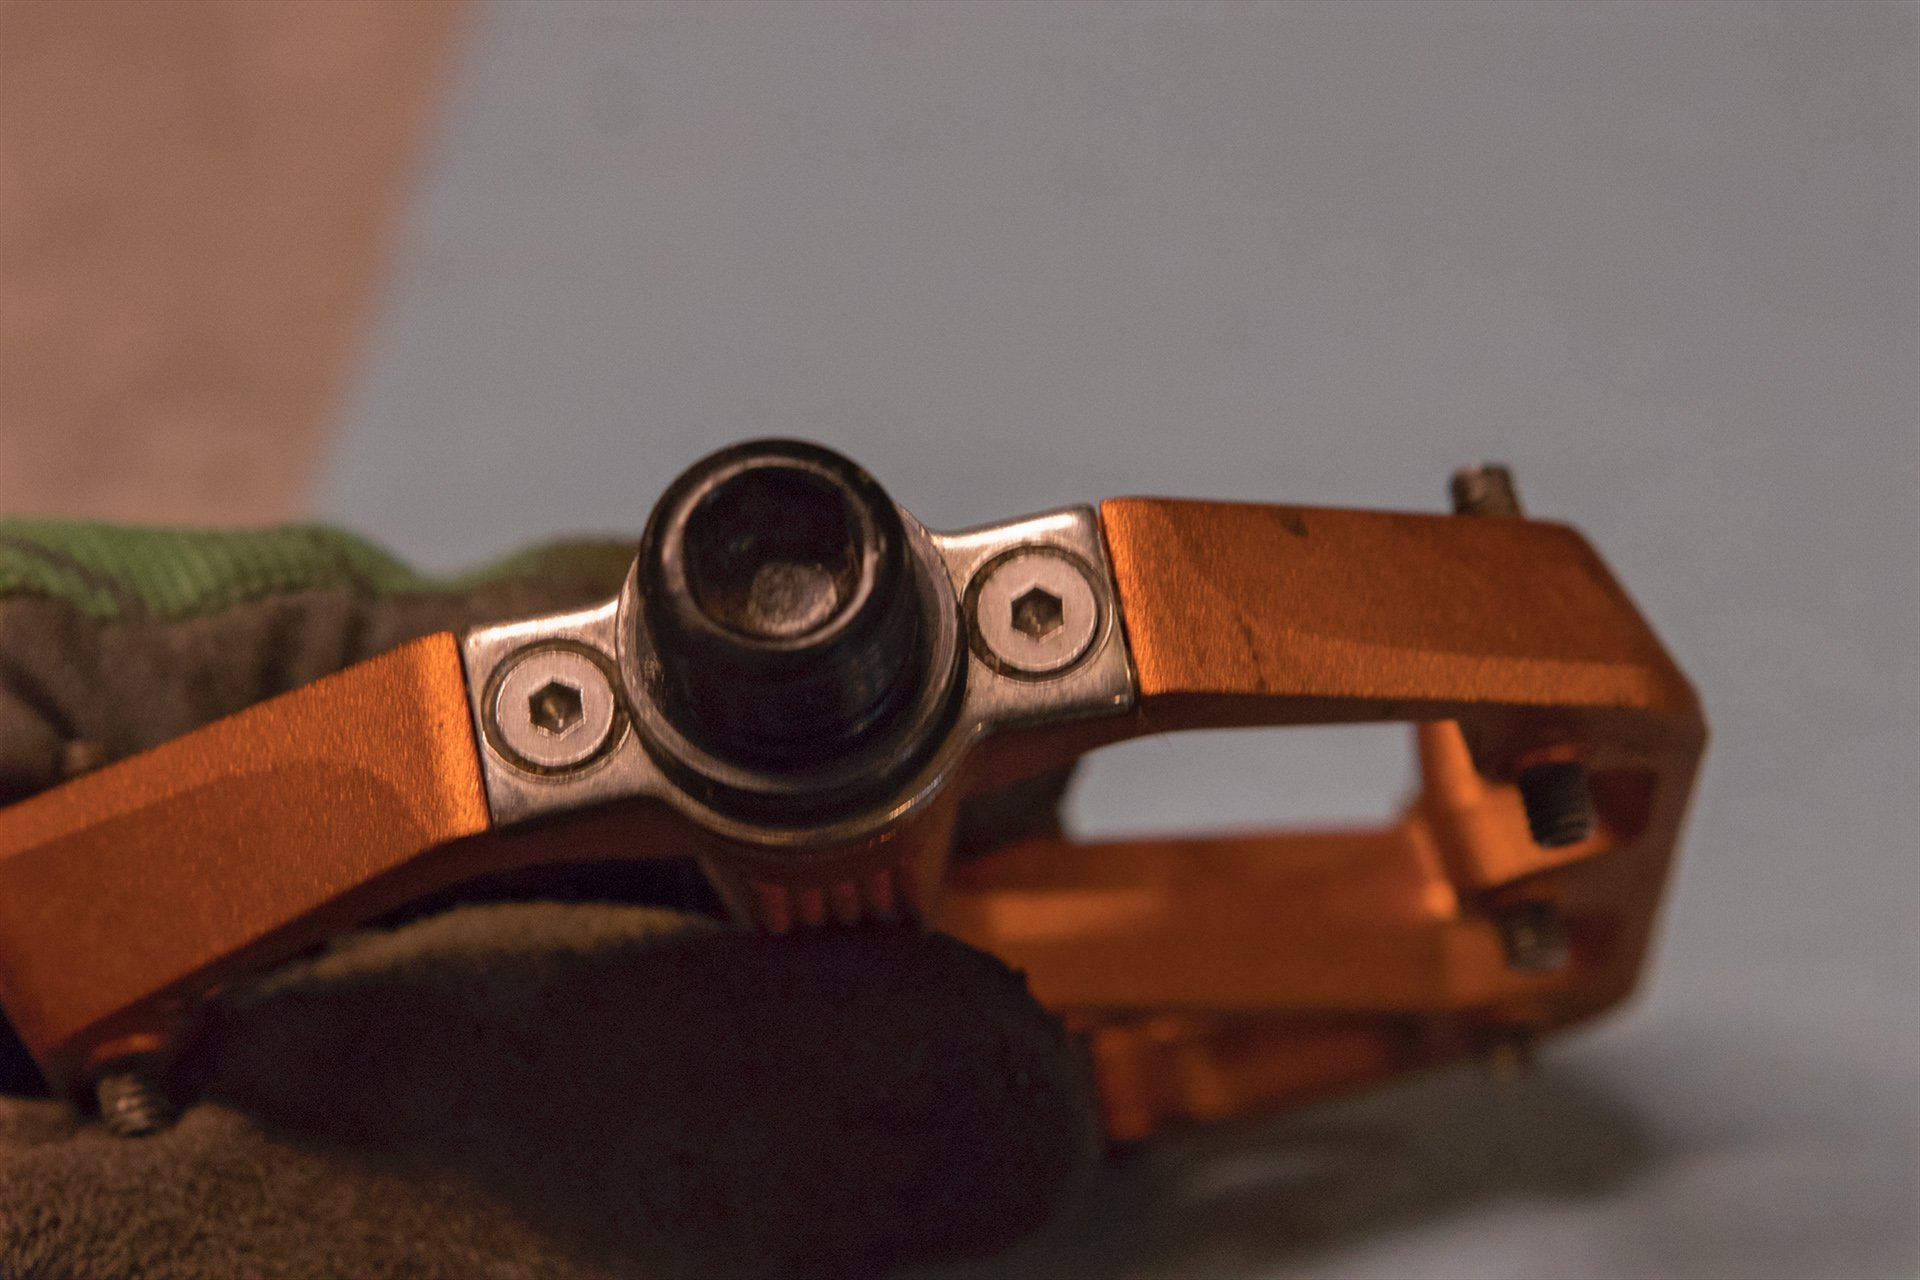
Step one for the Crankbrothers Stamp 7 is easy enough; simply remove two 2.5mm allen fittings. If I was a fussy mofo, and I am, I'd prefer to see a Torx fitting for such a small head.
Crankbrothers Teardown
This process was slightly trickier because there are more moving parts involved and because I lacked an overhaul guide. Still it only took me about 7 minutes to have everything in pieces, with time allowed for chin scratching. Everything was remarkably clean on the inside. In fact it was a little too clean. There was a distinct lack of lubrication to be found. Neither pedal (I pulled open the other after the first one was found dry) showed any sign of lubrication. I may have put five more rides on the Crankbrothers because I've had them longer and they have seen a little more weather, but the difference is negligible.
This part of the process was mildly tricky because the outer seal had to be slipped off before the clamshell Igus bushings could be removed. Most of the time a dry pedal axle is bad news but Igus bearings are self-lubricating and may actually run better without grease.
My next step was to slather some synthetic grease on the shaft and on the outboard clamshell Igus bearing. I probably overdid it because the pedals were slow to rotate afterwards (perfect for a dirt jumper) but faced with the lack of lube and guidance I felt it was the best way forward. The reassembly process was a slower than the OneUp procedure, again thanks to more moving parts and the complete absence of cartridge bearings, but it wasn't bad at all. Both pedals were a one beer job.
A note about Igus Bearings/Bushings
Igus makes self-lubricating plastic bushings,* generally for industrial applications. Here's what Igus says about lubricating their bushings/bearings; "Most lubricants (especially ones that contain propellants) might absorb dirt and become more viscous over time, which can cause more friction when used with a plastic bushing. Avoid applying lubricant and trust online lifetime calculators. However, if a lubricant must be applied, lightweight petroleum-based oils are best." The Stamp 7 has a grease port however and other pedals in the line that use Igus bushings indicate grease being added during the rebuild. It seems that running these pedals dry is an option but I'll need clarification from Crankbrothers.
The second pedal was similarly lubeless so it seems this is may be by design. They were certainly spinning smoothly and quietly.
Ron Burgundy would be proud. If you are interested in plastic bushings vs. cartridge bearings, or in hilarious industry videos, this is the most amazing video ever... I'd love to see the bike industry step it up like this.
NSFW - Winnebago Man would be proud.
Dimensions
The age of long low and slack is hard on flat pedals and making them thin has never been more important. The need for grip is even more important however and that goal runs at cross purposes. Longer skinnier pins have more grip but they are also more likely to get hang up on the ground. Or on your flesh (more on that later).

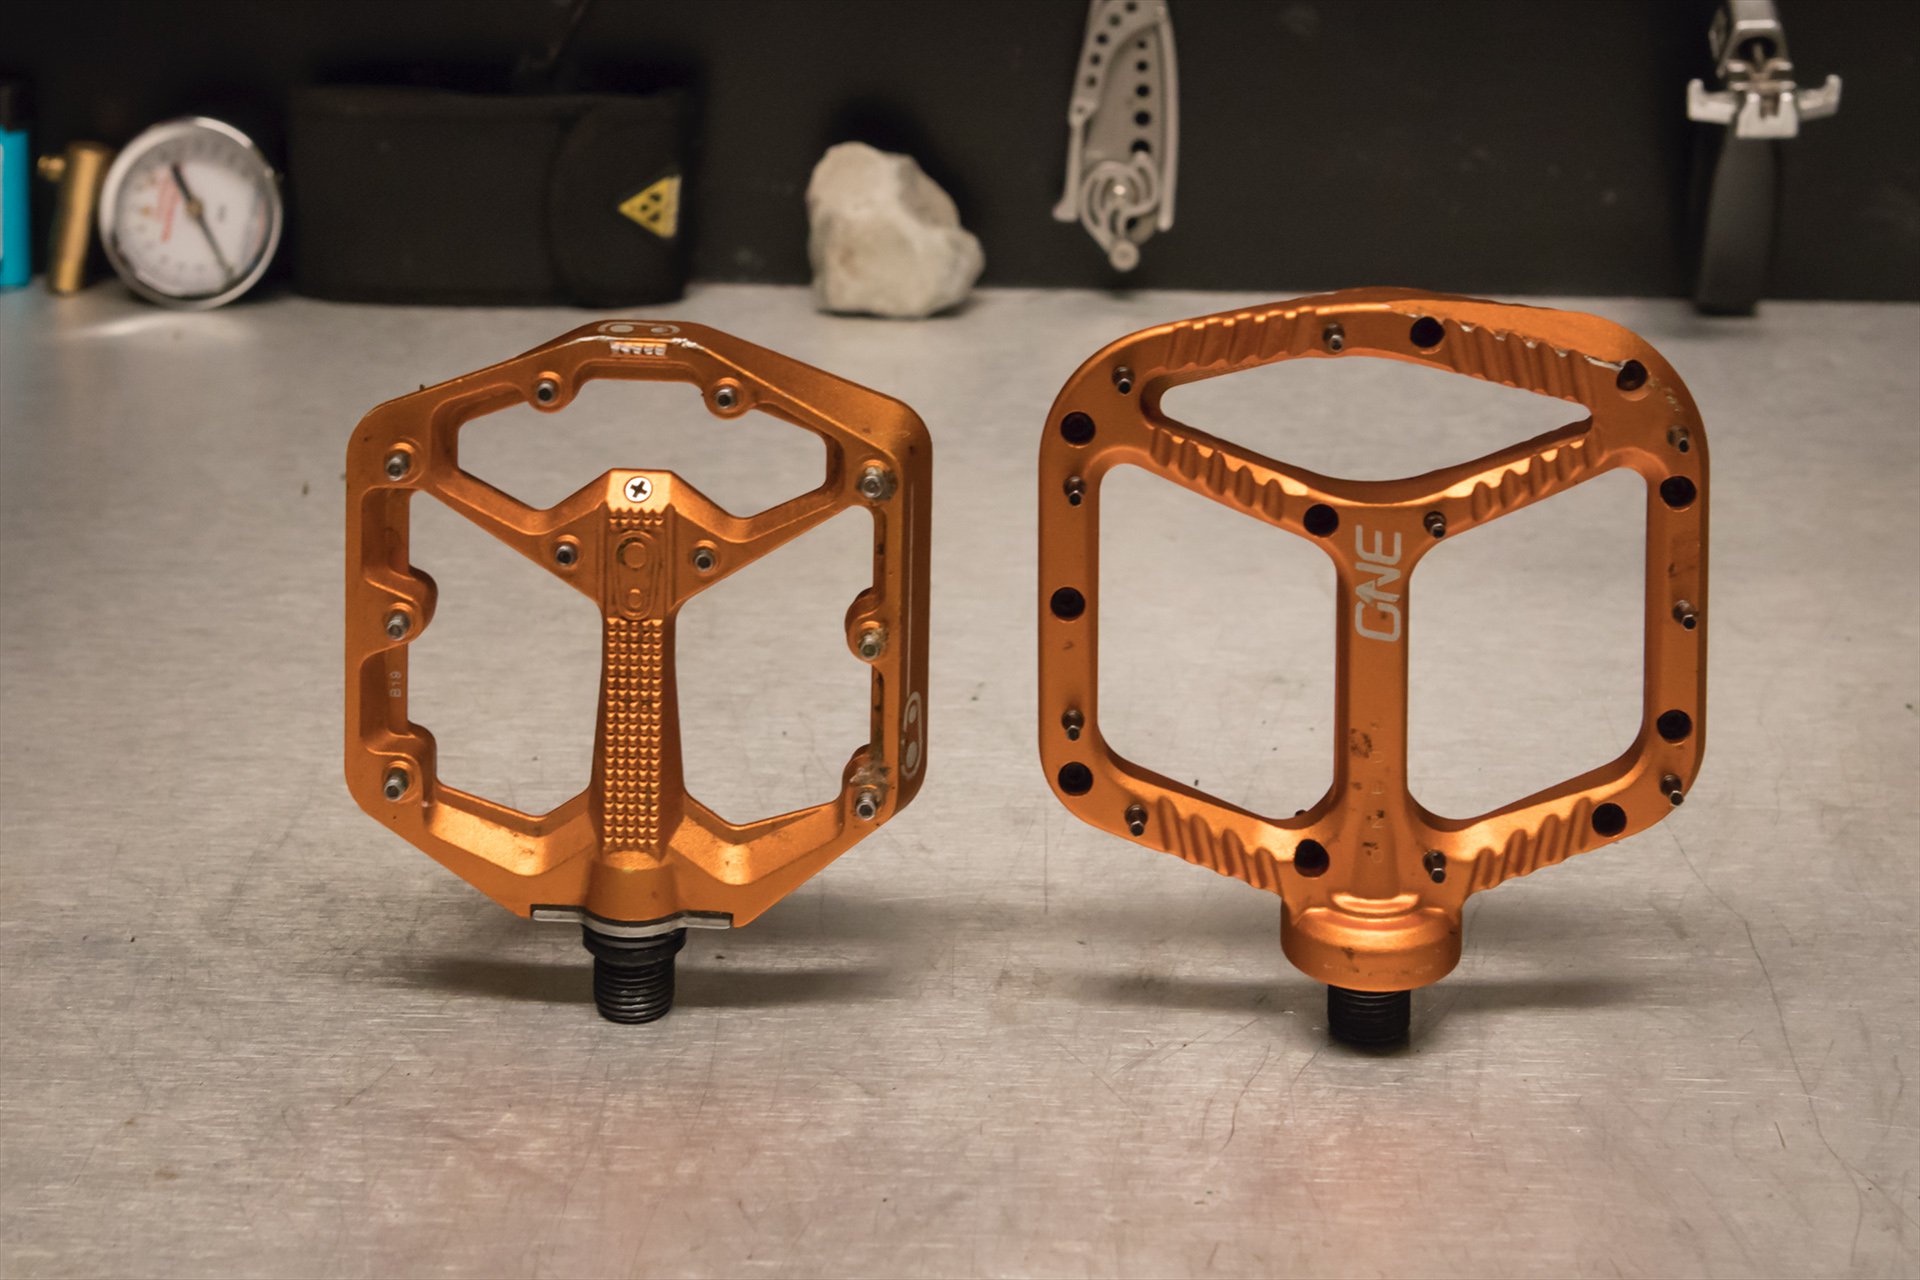
Crankbrothers (left) uses two plastic Igus bearings to keep the profile low, while OneUp uses one large cartridge bearing tucked close to the crank interface and three small cartridges further along the spindle.
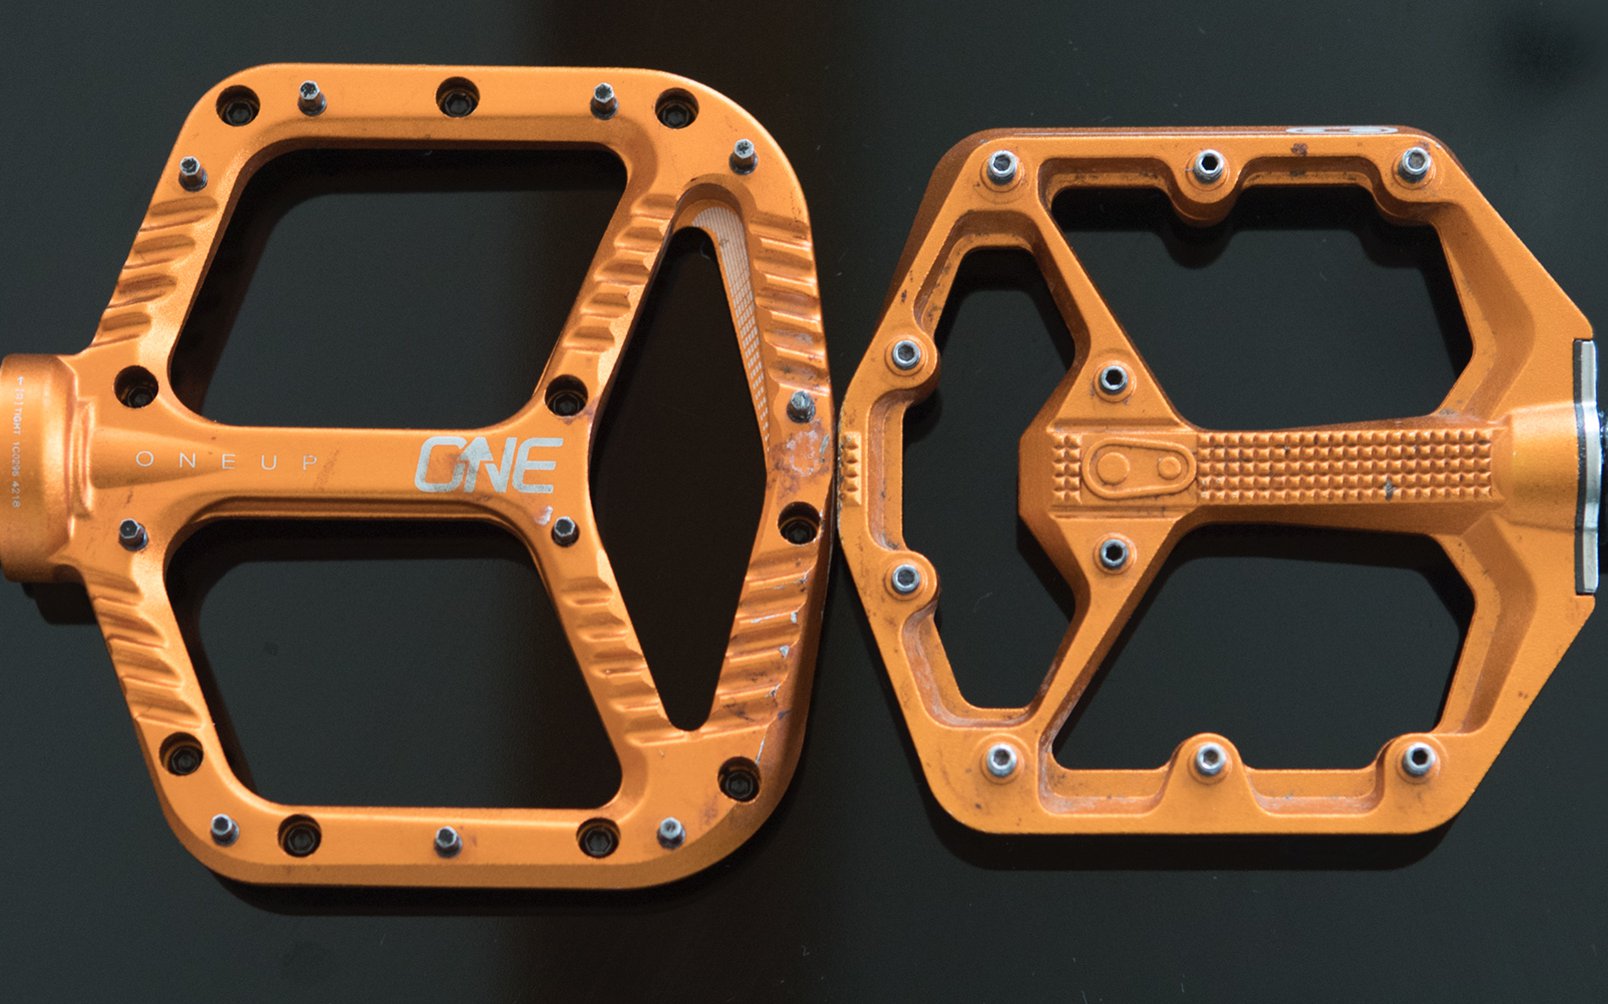
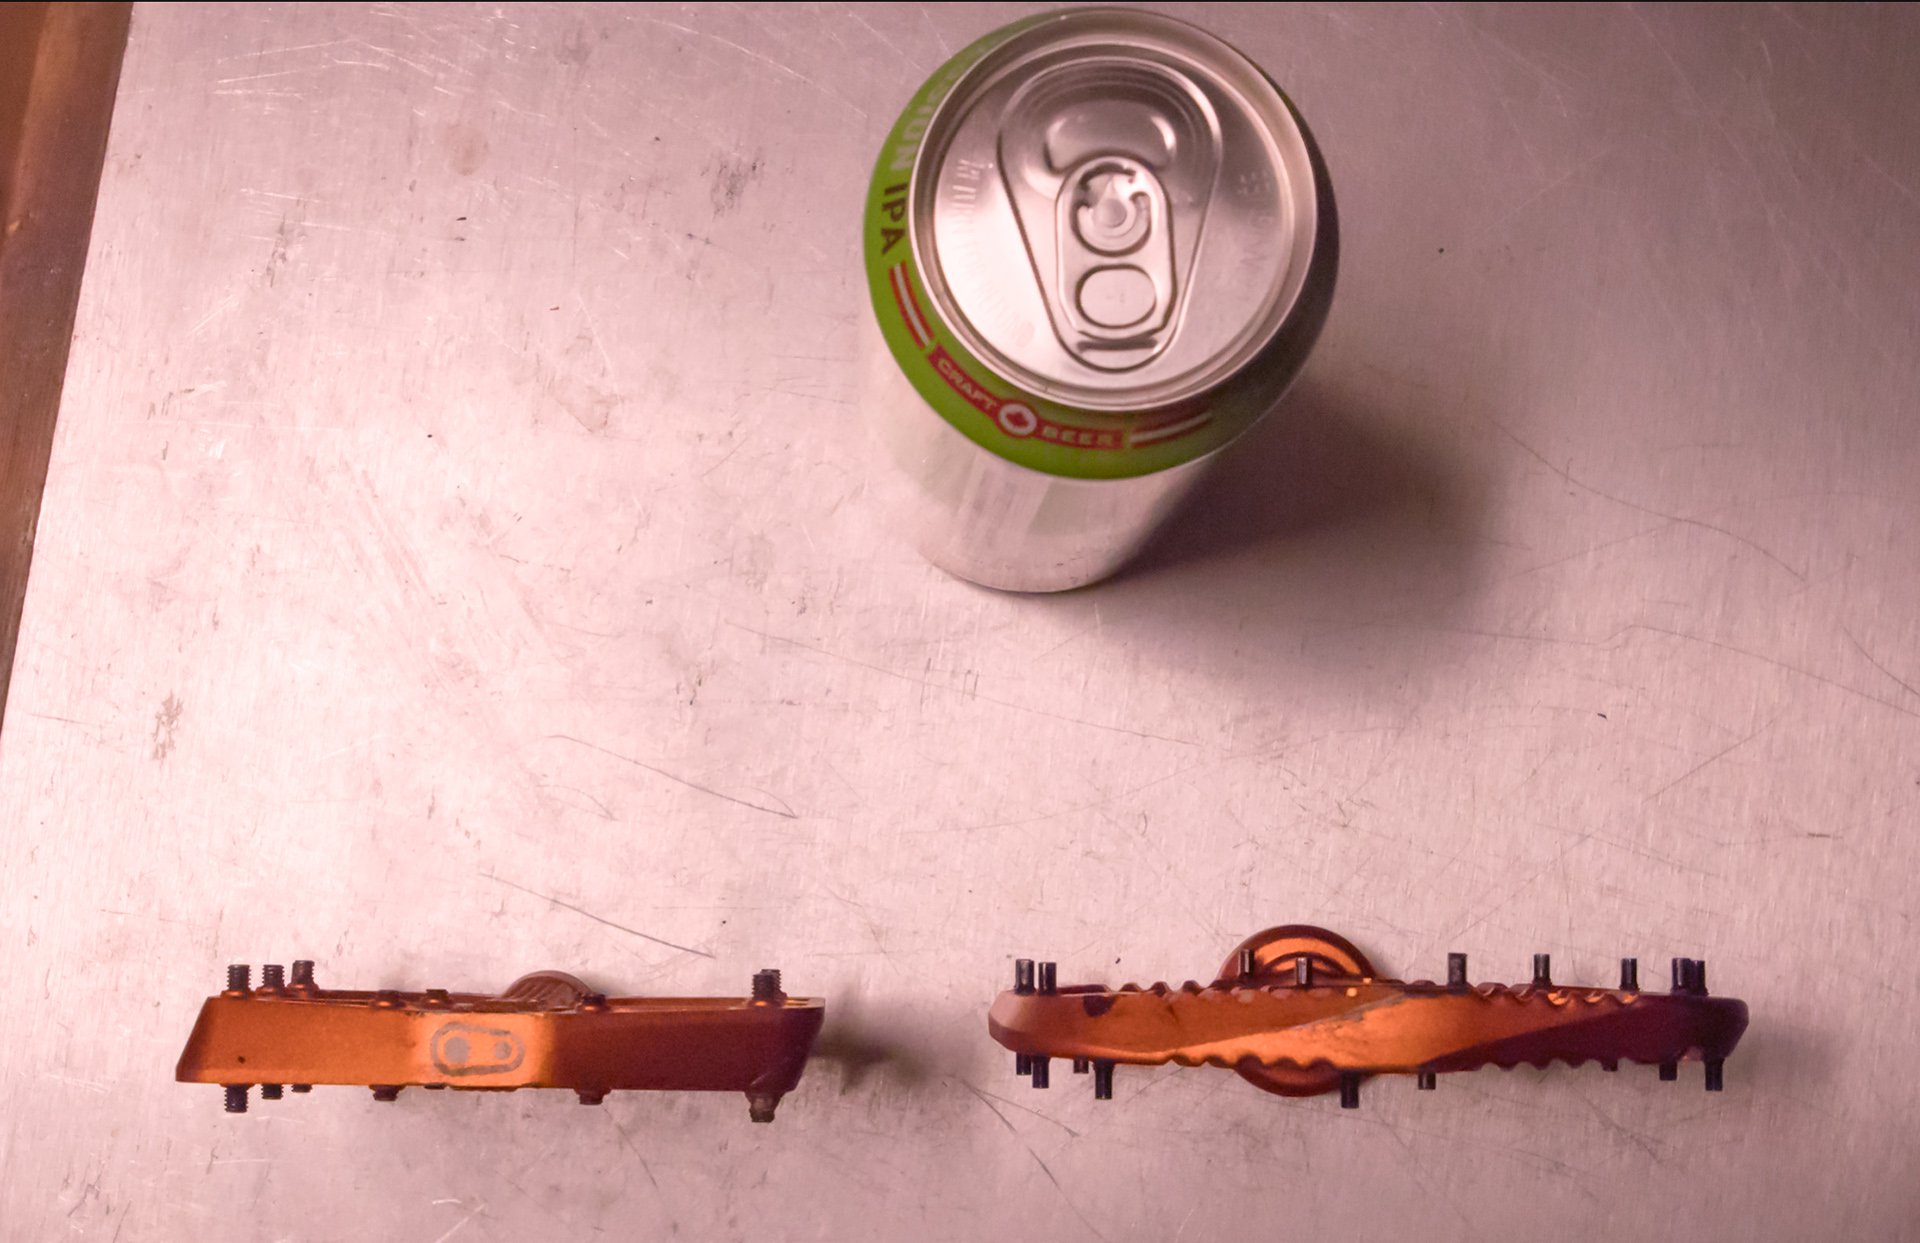
These two companies have taken opposing tacks in the skinny regatta with the Stamp 7 displaying a conventional convex shape while the OneUp, although very thin, is actually convex, with the fattest profile at the axle - but without any obvious hump - and the thinnest on the outside where contact is most likely to cause damage.
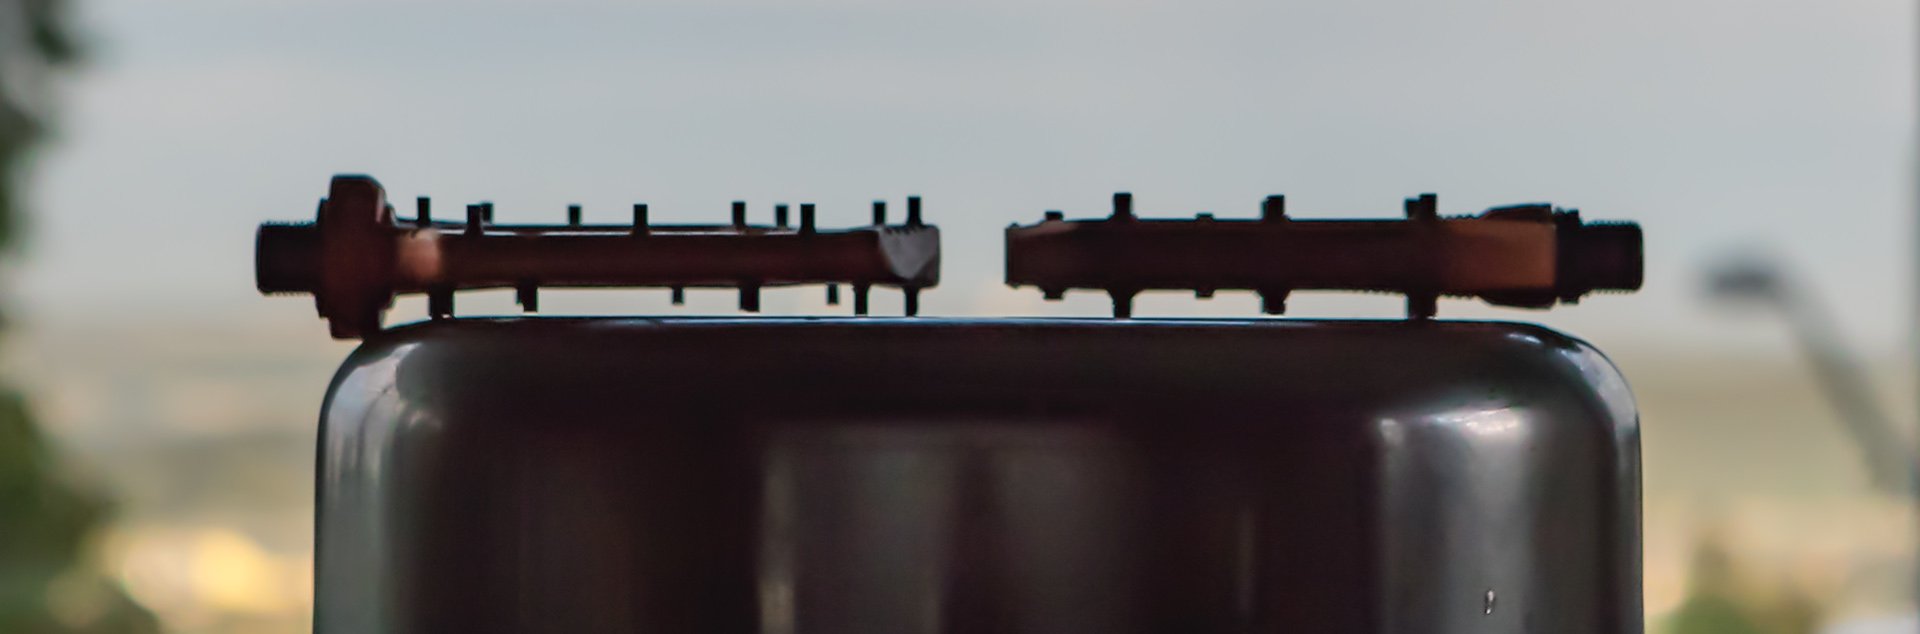
Both of these pedals are nice and thin and the measurements are similar but the thinnest and thickest points are placed differently.
Gription
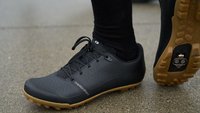
I first came to flat pedals after 7 or 8 years on SPDs and I always sought maximum grip. Now my preference is a max grip pedal with a shoe that has a slightly harder outsole so I can reposition my foot without sitting down. Both of these pedals meet my grip needs wearing Ride Dynamics excellent Livewire shoes.

OneUp decided upon rear loading pins which use a 2.5mm Allen head for removal. These should be removable easily in most circumstances.
Relatively speaking, the slightly thinner pins on the OneUp pedals seem to dig in slightly more aggressively. I discovered just how angry they get when I was pushing up a steep section of trail and, with my sock pulled down I think, I drove my shin into one of these little daggers. I believe I said something like AHHH FUCK! and then descended the final two trails back to the care. It was a little deep but not too long but as it turns out I should have gone for stitches. I thought Steri Strips would do. Here's the damage in animated form - DON'T CLICK THIS LINK IF YOU ARE SQUEAMISH.

Crankbrothers pins load from the business side with a 2.5mm Allen head. I think Torx would be better here as well but likely too expensive. These can become damaged but generally you can remove them by filing flats into the damaged head and using a small adjustable wrench. Sometimes a drill is required. Sometimes you lose a pin hole.
Size and shape play a role in grip as well, particularly for those with large feet. Crankbrothers tackled this by making two sizes. I am in the range for the large pedal with my size 11/45s but I prefer the small pedal, partially because of decreased width for sneaking through small spaces and partially because I like to drape my foot over the platform.
OneUp's pedal doesn't feel too big for me because it's quite narrow (105mm vs. the small Stamp at 100mm) and because the unique convex shape allows to get that draped feeling despite the 115mm length (small Stamp is 100mm). In this case the shape is a bit of a wash because the small size of the Stamp and the shape of the OneUp cancel each other out.
Support
Both of these companies will sell you pins and rebuild kits for these pedals and both provide documentation to help you maintain them yourself. Because of incomplete documentation on the Crankbrothers side, OneUp gets the nod here but both companies are making an effort to provide solid after sales support.
The Final Analysis
This is a really tough one because there are elements about each of these pedals that I really like and while neither wins every category both do almost everything extremely well. I think I appreciate the feel of the Crankbrothers slightly more because of the smaller size but there are times when the extra pin grip of the OneUp gets the nod, particularly climbing. Talking guts, I'm a fan of cartridge bearings in the OneUp but I'm optimistic about the longevity of the Igus bushing in the Stamp 7s. The rebuild kits cost about the same as well (25 USD for Stamp vs 30 CAD for OneUp). I prefer the rear loading pins OneUp uses for ease of replacement and durability. The OneUp rebuild process is much easier, assuming you have a Shimano cassette lockring tool without a centre guide.
While I think I prefer the feel of the Stamp 7s underfoot, it's so close that the edge goes to OneUp because of the lower cost (125 USD vs 150 USD for Stamp 7s), cartridge bearings, ease of maintenance and rear loading pins. If your grip preferences line up with mine however, you'll be stoked on either of these platforms. Links below for more info.


Comments
Kelownakona
4 years, 9 months ago
So true with the steri strips.
My shin is just about healed up after slipping and gashing it open about twice the length of Cam's from these pedals.
I was on a week's worth of amoxicillin, good job I don't race Enduro ;)
Reply
Nouseforaname
4 years, 9 months ago
A Shimano cassette locking tool is not the same as a Shimano freewheel removing tool. Sorry.
Park FR5 is the cassette locking tool, but the FR1 is the freewheel tool. Easy to mash your stuff up trying to cross use these tools.
Reply
Cam McRae
4 years, 9 months ago
Thanks for that clarification! Good thing I didn't find that old freewheel tool.
Reply
George-Crankbrothers
4 years, 9 months ago
Hi guys - below is a link to the overhaul guide for our Stamp 7 pedals:
https://www.dropbox.com/s/jrghkbdham2907w/Stamp%207%20%26%2011%20Overhaul.pdf?dl=0
Reply
sansarret
4 years, 9 months ago
Those pins on the Oneups are crazy sharp. I got 5 stitches from them slashing my shin after slipping on a rock. It must happen to a lot of people. PSA: If you use these pedals, make sure you carry Steri strips with you
I still think they are very good pedals, I ground down the outer pins a bit and they are still plenty grippy
Reply
Cam McRae
4 years, 9 months ago
Don't click below if you are squeamish but...
Did you miss this in my article?
Reply
Tadpoledancer
4 years, 9 months ago
What is better with the aluminum version of these pedals compared to the plastic ones? I need a new flat but it’s a bit difficult to see past the lower price of the plastic versions.
Reply
Cam McRae
4 years, 9 months ago
Some people prefer composite because they dampen contact noise but otherwise they aren't as thin and a good pedal smack can easily strip the pin threads.
Reply
Cooper Quinn
4 years, 9 months ago
I won a set of the OneUp composites at Beyond the Valleycliffe of the Dolls last year, and they've been awesome.
Holy hell are the pins hard.
Reply
Rob Gretchen
4 years, 9 months ago
Love the OneUps... Running 2 sets and yes, I have been bitten... ouch. But that was user error. They have great support as well.... so winners in my books.
Reply
chachmonkey
4 years, 9 months ago
I have the OneUp composites and love them. I removed the three pins along the axle, keeping only the seven front/back pins to get a more concave/flat shape. I still get more grip than I need, but I also have big feet which may play a part in that.
Reply
pdxkid
4 years, 9 months ago
I need new pedals and have been on the fence about these exact two pairs. Well timed article! OneUp ftw! Thanks!
Reply
Pnwpedal
4 years, 9 months ago
Even if the Crank Bros pedals won today, they would lose after ~6 months of constant use. The only thing that Crank Bros can seem to get right are their multitools... Everything else they make seems to die a very premature death, with the rider ultimately swearing off the brand for pedals (or dropper posts) that actually last.
Reply
Cam McRae
4 years, 9 months ago
I think you may be relying on old news about Crankbrothers. The pedals use quality bearings and bushings and the new dropper posts have been among the most reliable we’ve used. The company was sold and the new leadership has made quality and customer satisfaction top priorities.
Reply
Please log in to leave a comment.