
Two Packs Reviewed
2 Pack Options: One Back and One Hip
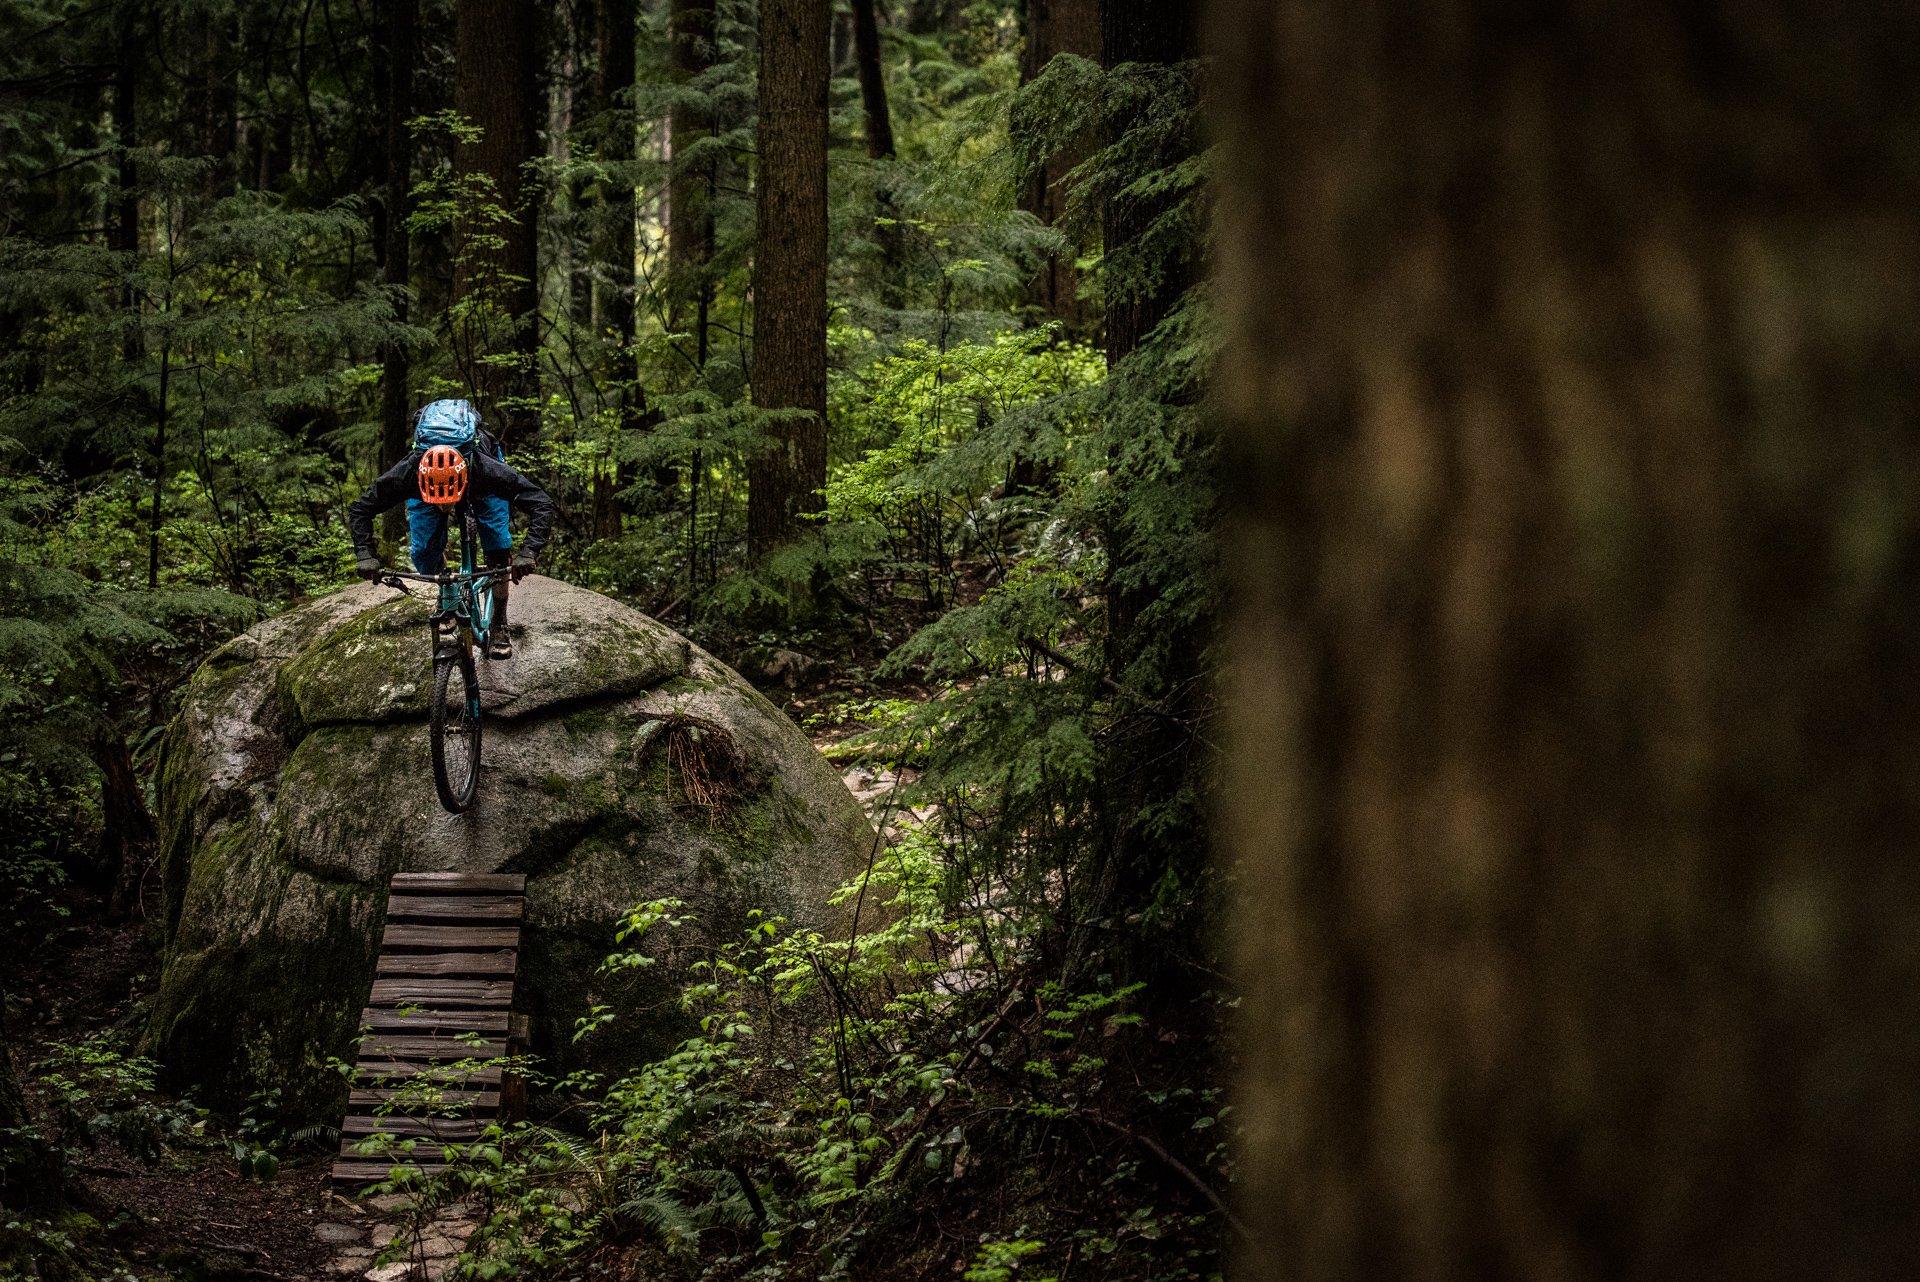
Carrying something is a necessity for most of us. For some that only means a water bottle while others need to be able to MacGyver their way out of any sort of mishap. I generally sit somewhere in the middle of those extremes; I like to be prepared but I don't want the weight of my pack to slow my mo. I probably carry about as much as your average enduro racer on most rides, plus a flask and the odd can of beer to cap off the climb, but lately I've been trying to figure out a way to do it differently.
My desire to travel light is exceeded by my hatred of a ride ending mechanical - so I have worn a decent sized hydration backpack since the first Camelbaks arrived. Before that, I used a bottle cage and what we used to call a "fanny pack" ( I can hear our old country readers snickering from here).
We had one of the crappiest winters ever for mountain biking. It was cold and wet and snowy, so extra gear became even more of a necessity. For most of the winter, I wore a Mission Workshop Hauser. While it worked well and held lots of gear securely it lacked many of the features you get from Camelbak or Dakine, but it's waterproof and that was amazing. So when the Dakine's first waterproof pack arrived, the Seeker 15 litre, I was keen to try it.
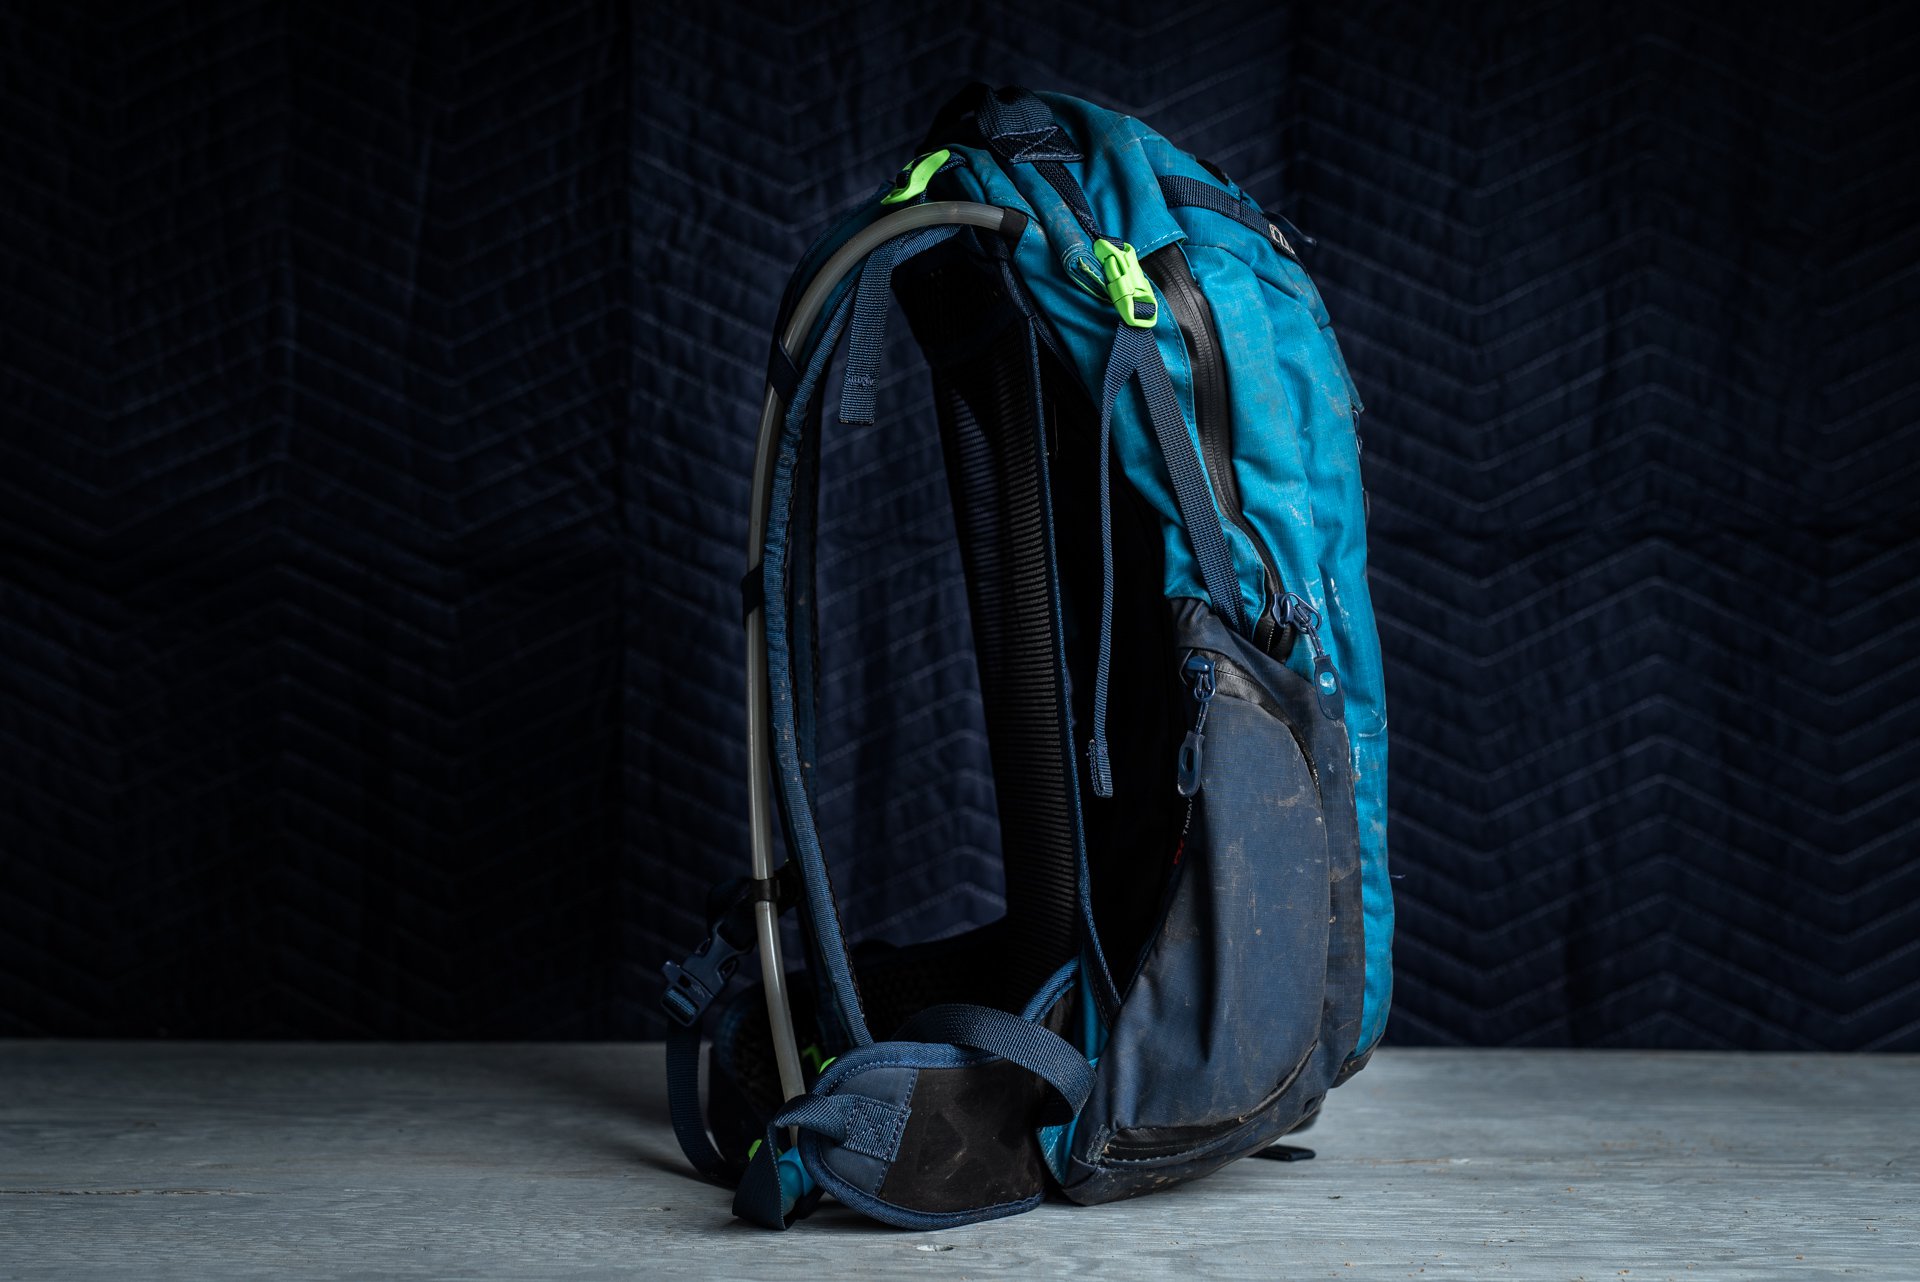
Dakine Seeker 15L
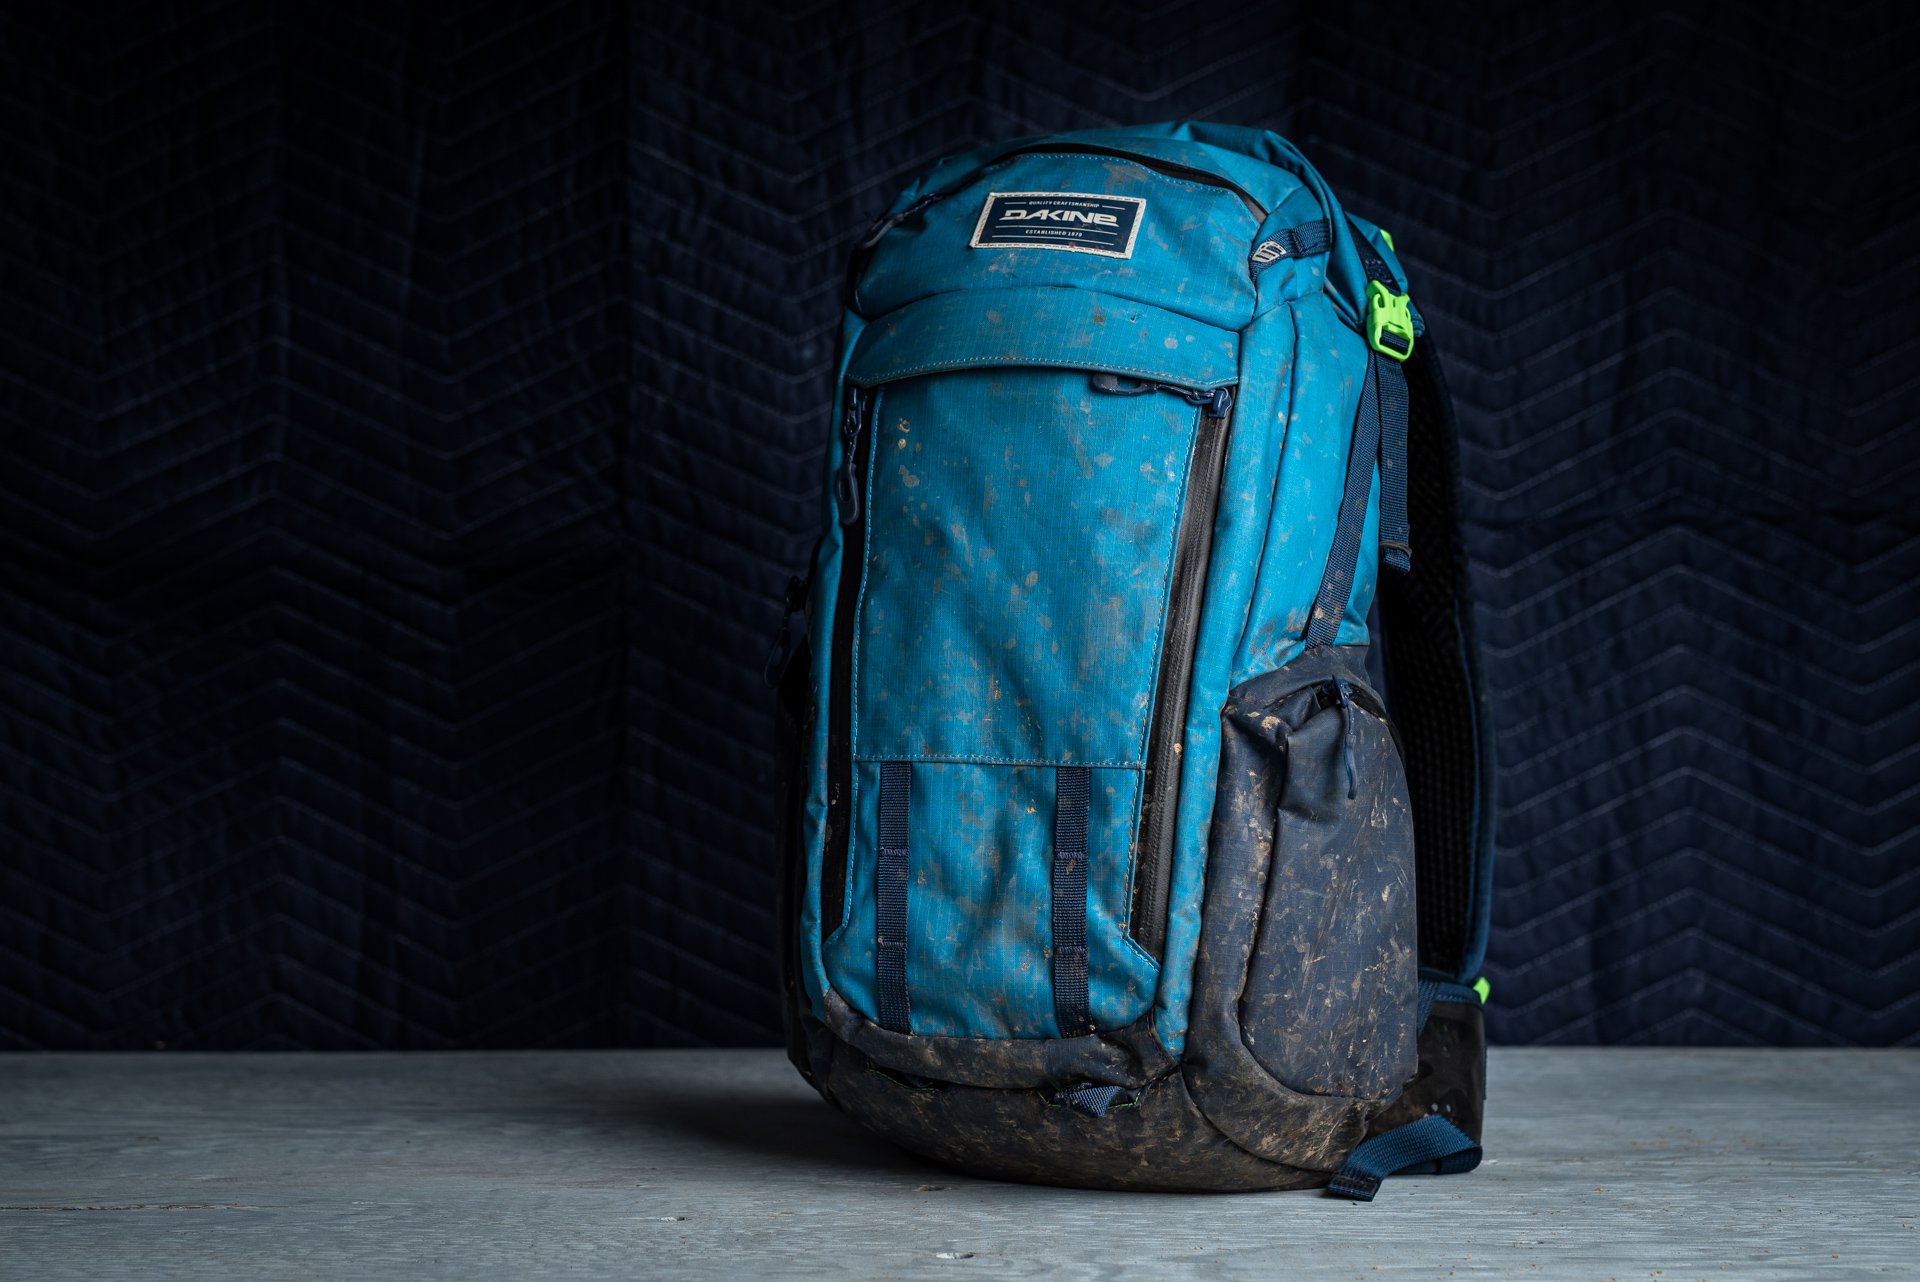
The Seeker is a good size and it's waterproof. The bladder holds up to 3L/100 oz of water (but in my experience, you'd have a hard time fitting the bladder in full). There is also a deployable helmet carry that will hold a conventional or full face lid and a fleece lined eyewear pocket.
The Seeker uses technology pioneered by Deuter to keep the pack off your back. It has a suspended mesh panel that contacts your back creating a channel and pushing the bulk of the bag away from you. This allows airflow and prevents sweat absorption. When you take it off at the top of the long climb and put it back on it's completely dry which is amazing. In this case, it also provides space for a spine protector, although one wasn't included with our tester.
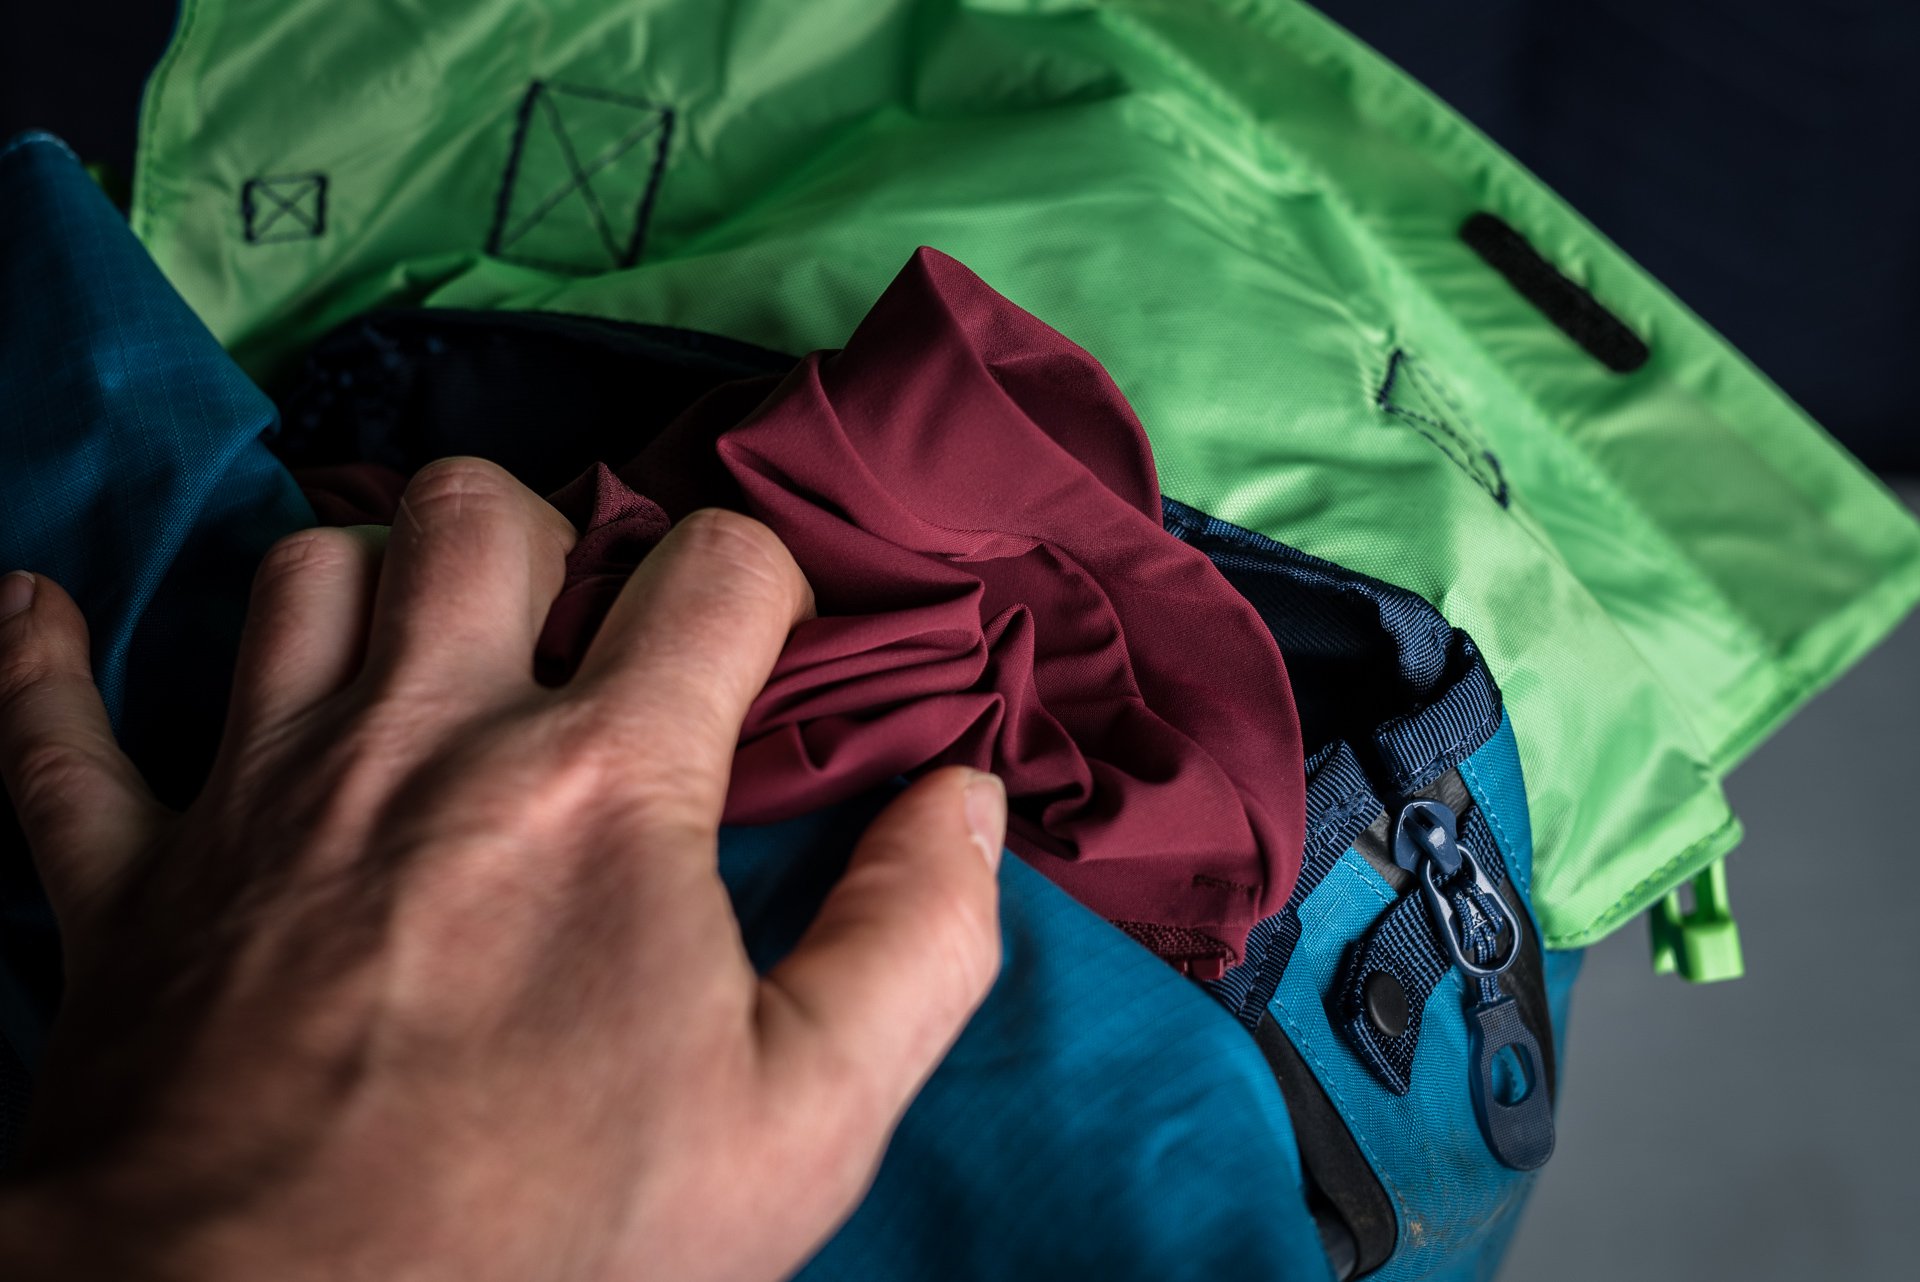
The top of the pack can be accessed by the rolltop closure or a waterproof side zipper. Bright green lining makes it easy to see what you've got inside.
The Seeker stores water low and has a multitude of pockets and zippers elsewhere. The top pocket accesses an open storage space and it has a rolltop and waterproof side zipper for access. The lower pocket is where there are mesh sleeves to store your tools, pump, and flask.
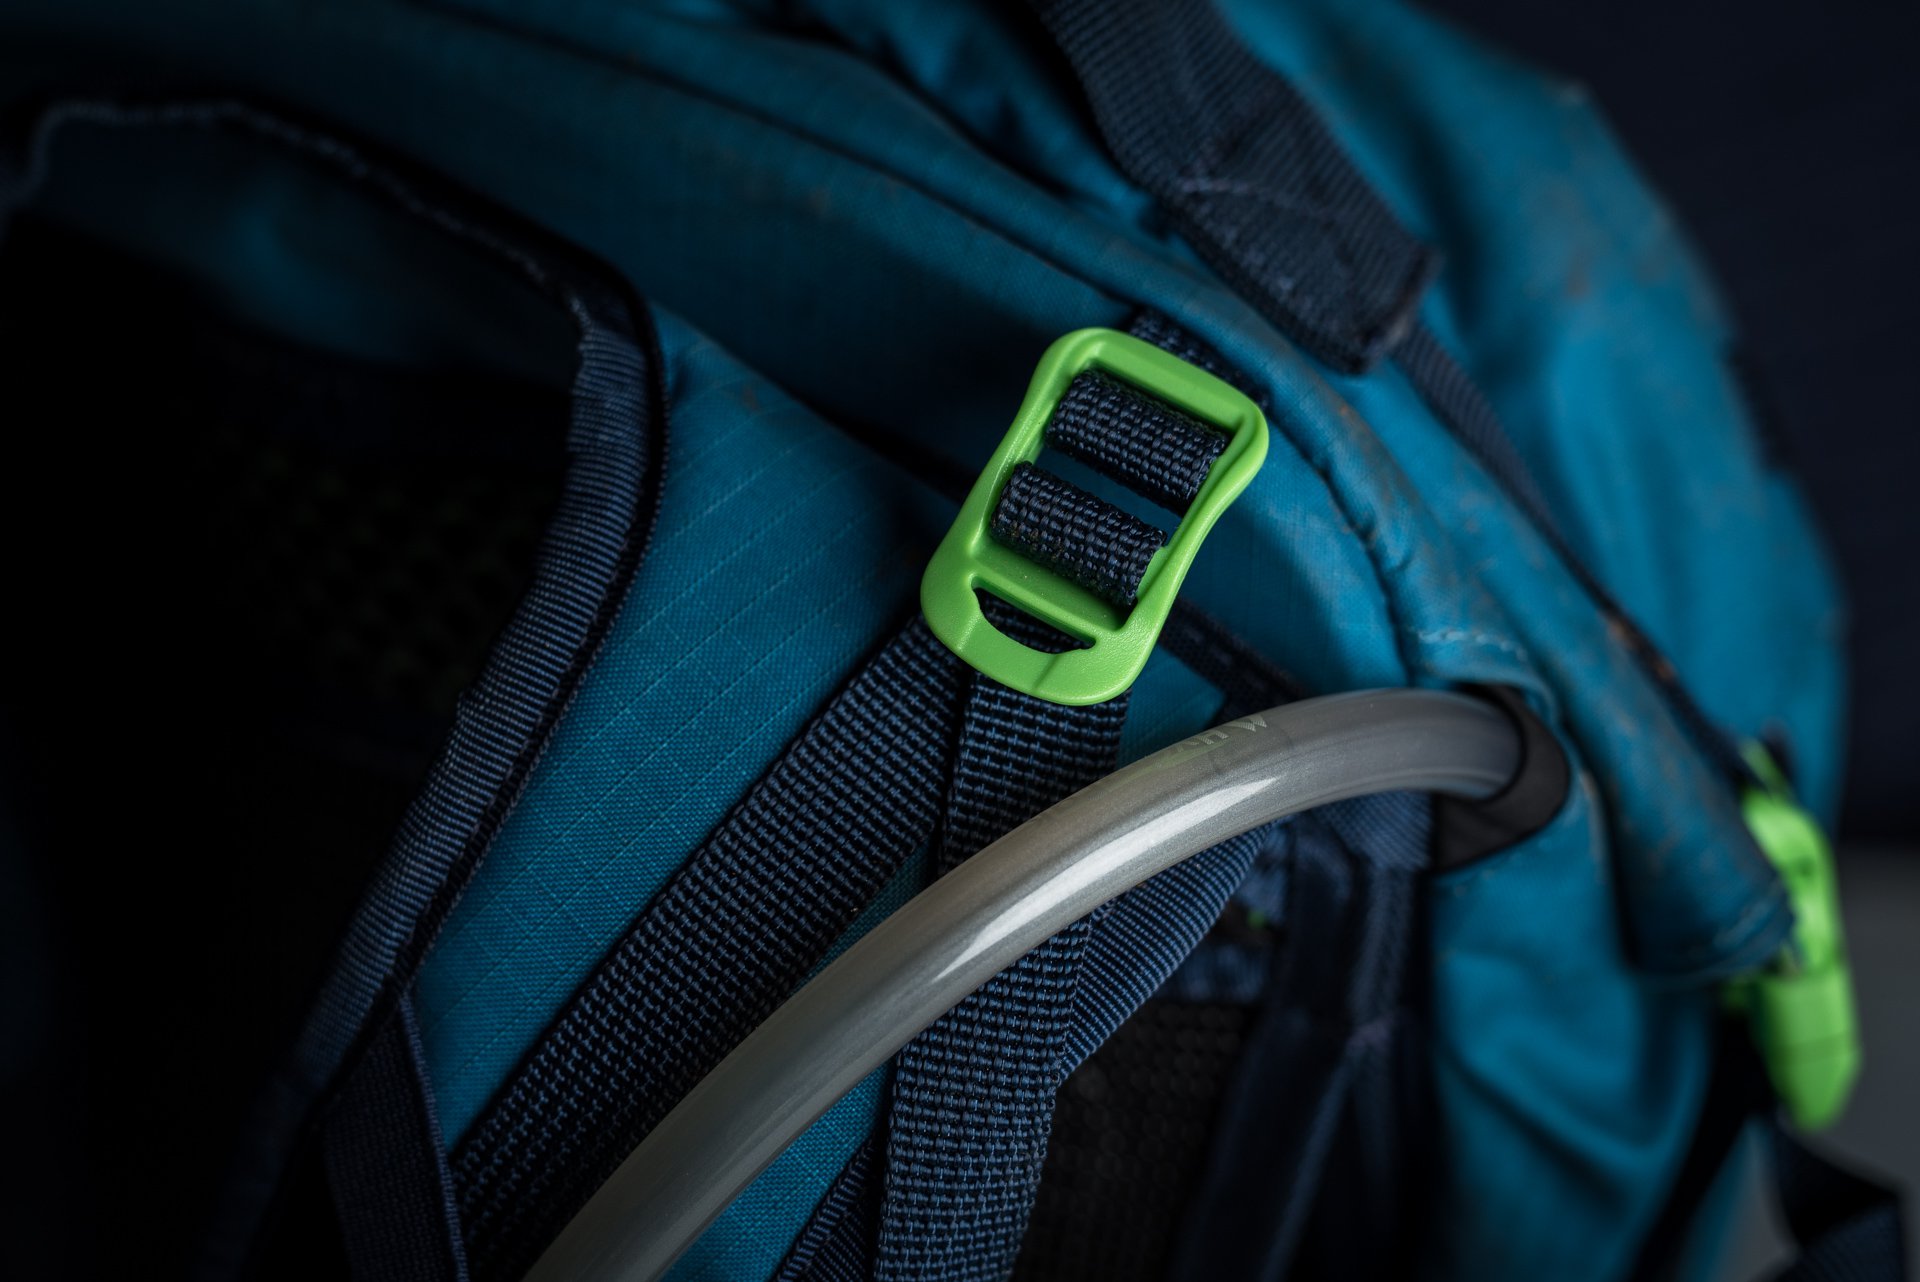
The magnetic hose retention system works like magic. Just spit out the nipple and it'll find home every time.

Being able to drink and then stop without a hand leaving the bars is a big advantage in challenging terrain. The chest buckle doubles as an emergency whistle. Attention to detail is excellent.
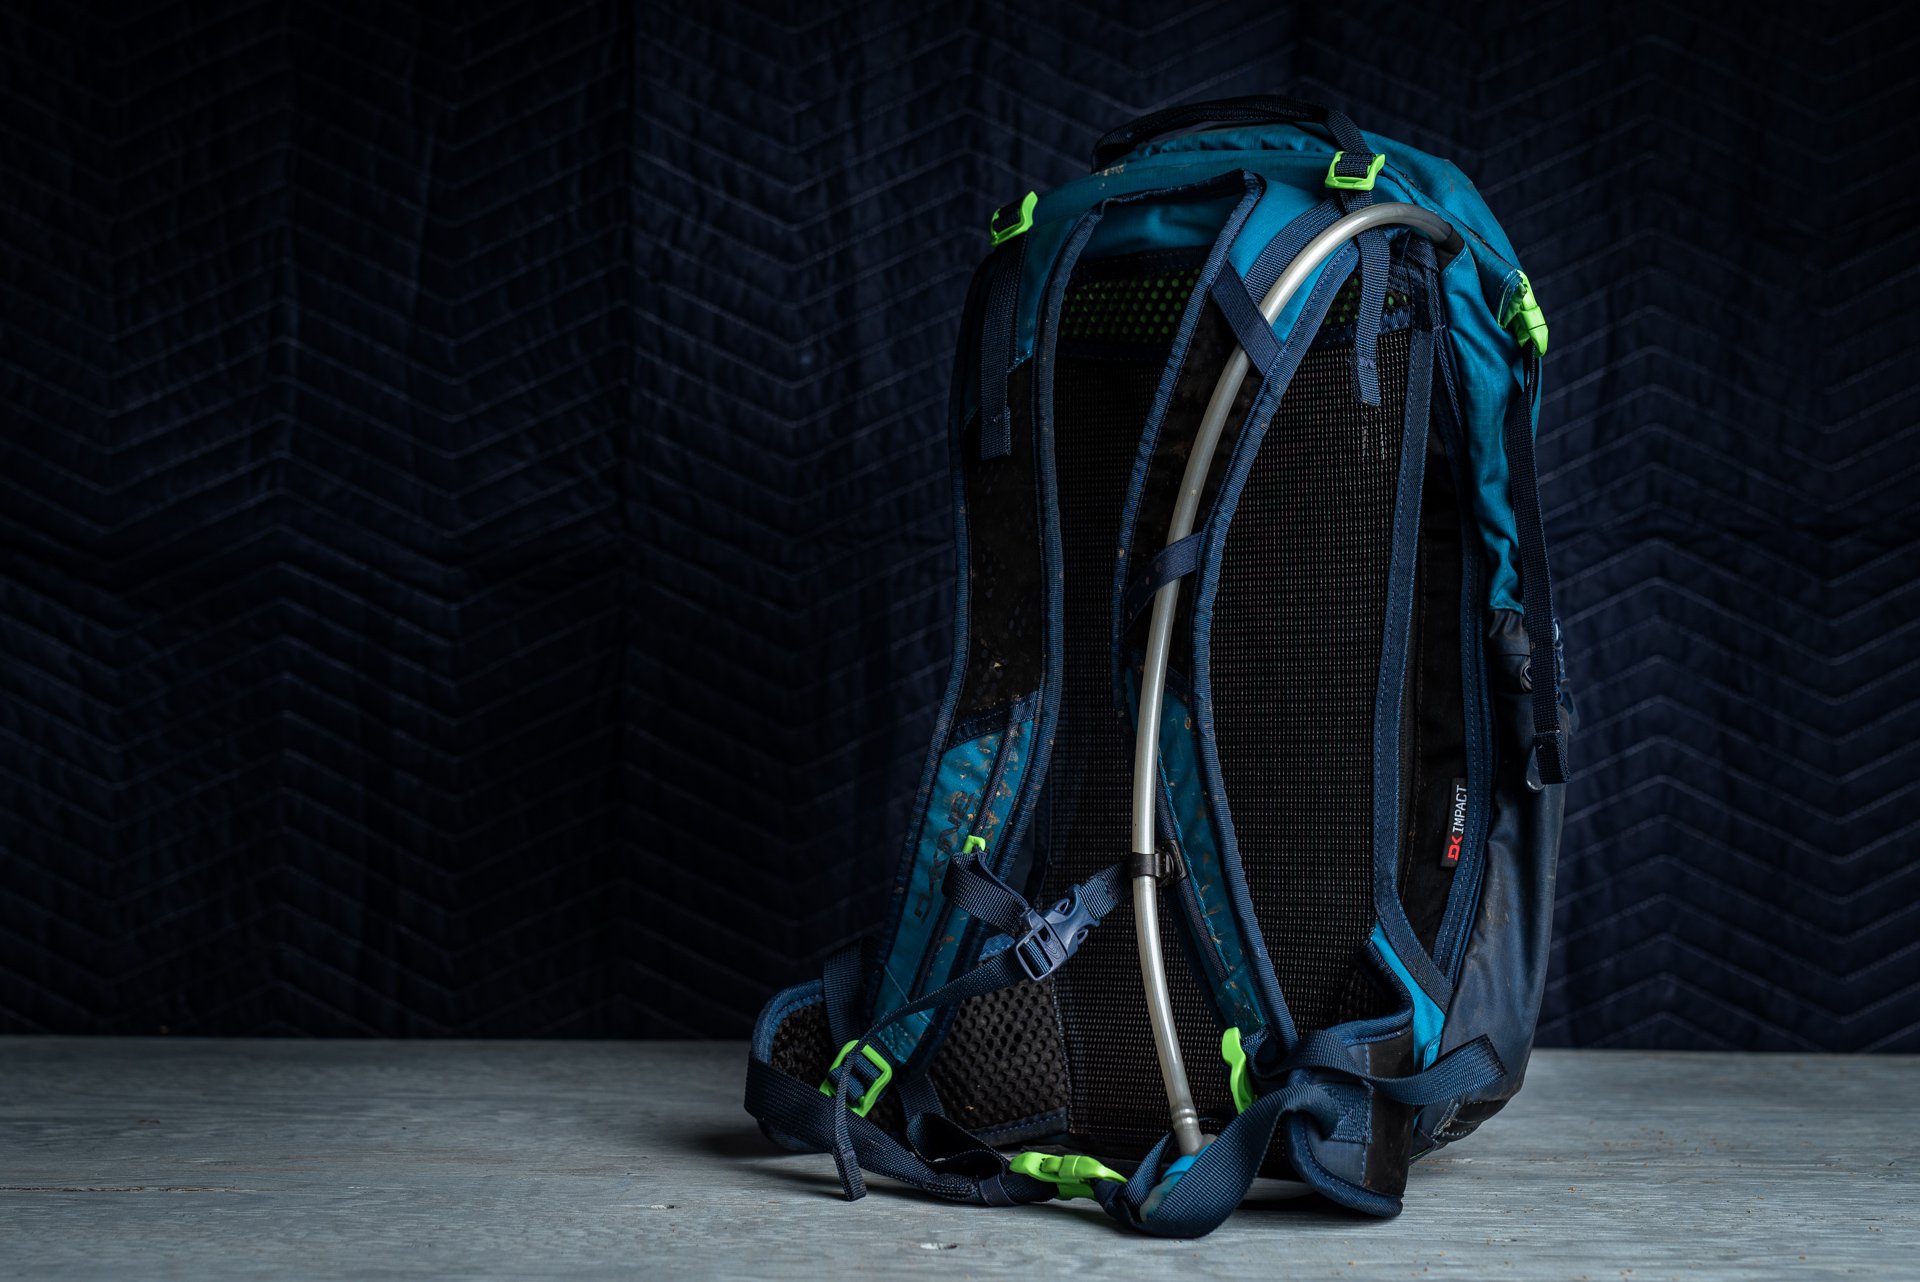
Right away I was unconvinced by the Seeker and I attempted to modify it. The back mesh panel is held under tension with a plastic insert inside the pack. The plastic panel is too long in my view and it pushes the pack well away from your back, increasing the swing weight of any water and gear you are carrying. I assumed I could slide it out and cut it a little shorter to decrease the bow, but alas it's sewn right in. The dramatic bow also compromises room for water and gear, making it difficult to insert even a partially full bladder in the lowest pocket and generally squishing the entire interior volume.
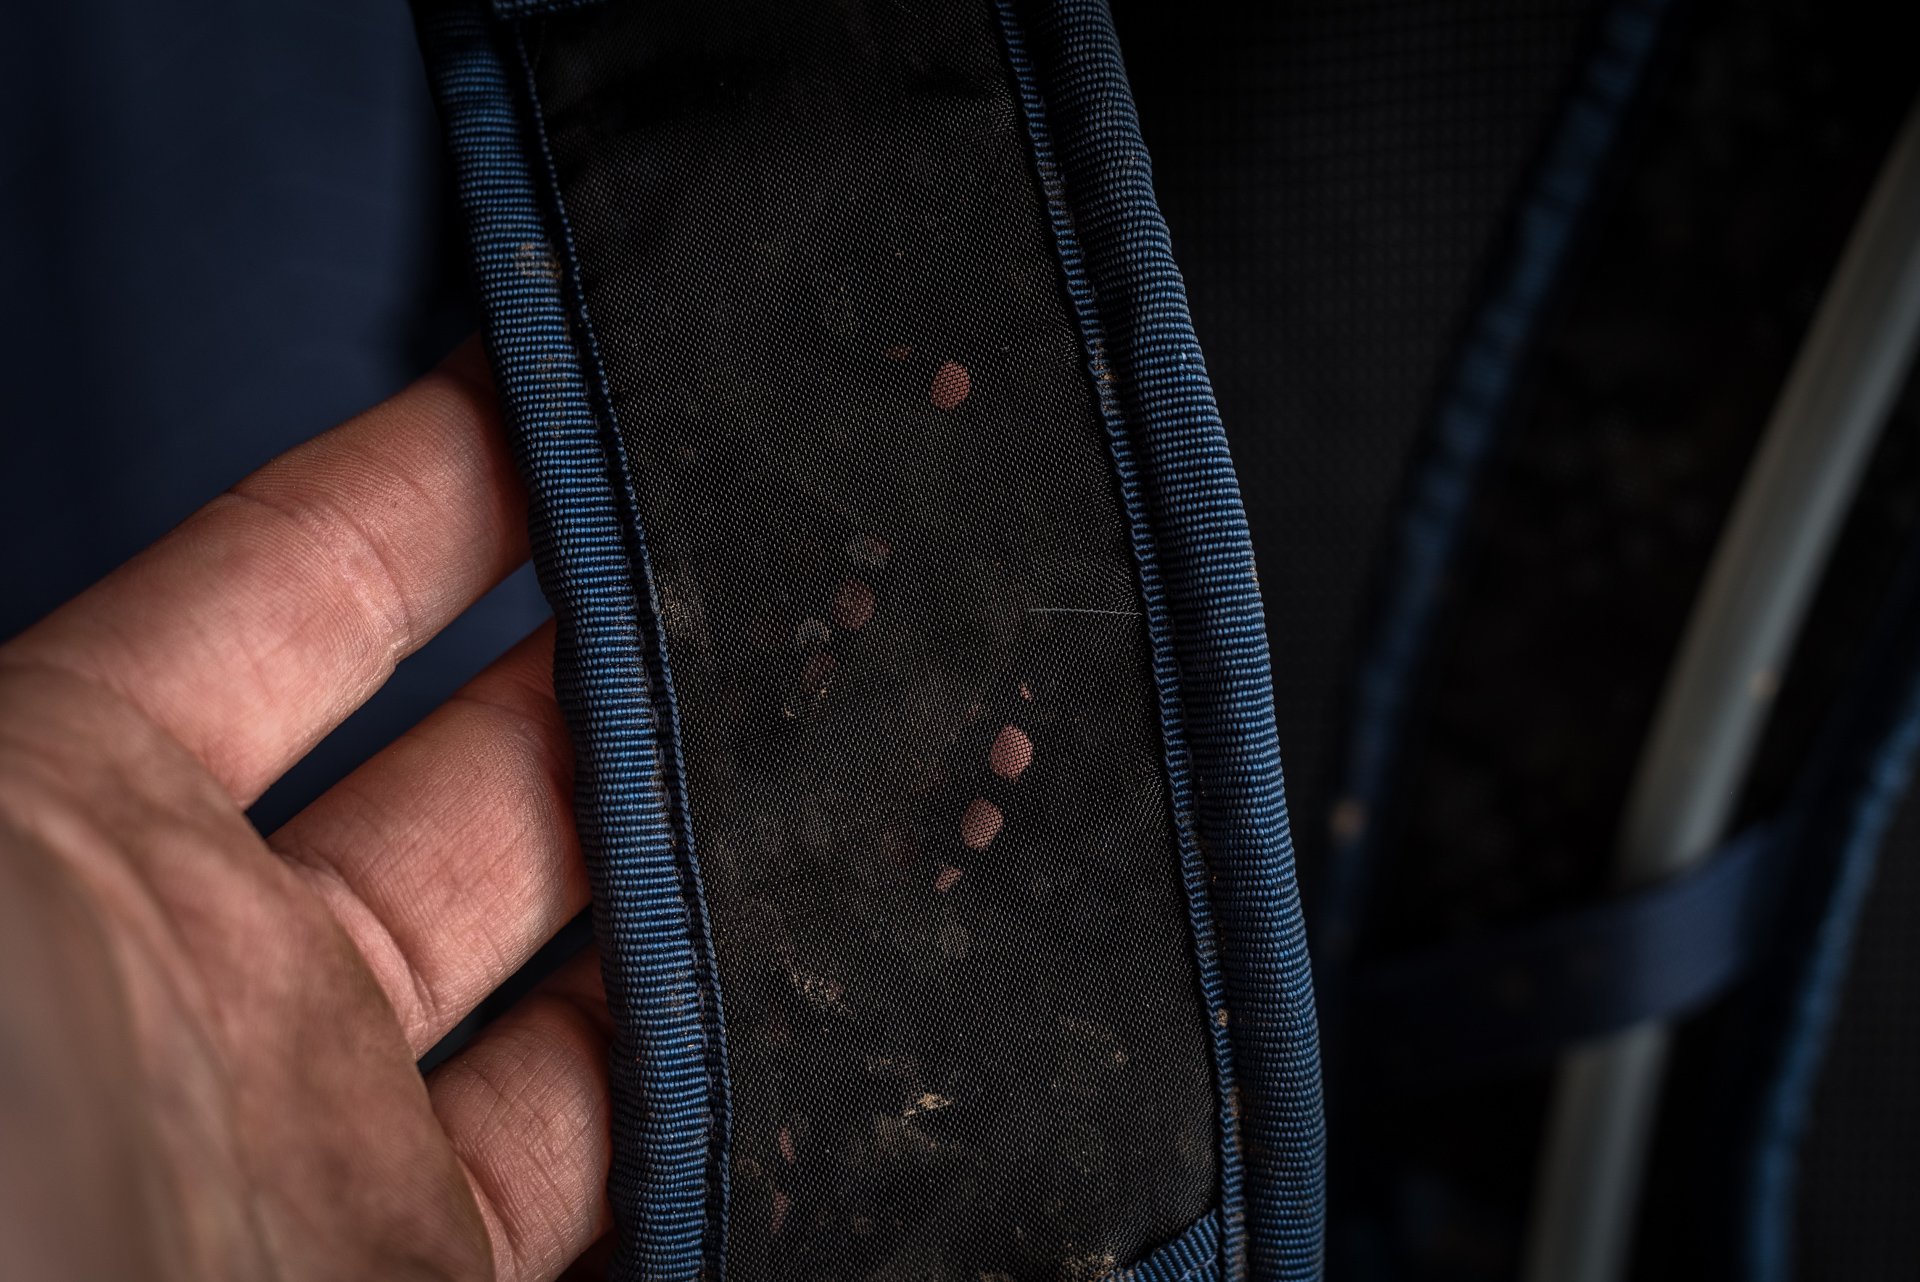
Straps are well vented as is the suspended mesh back panel.
Even with lots of adjustments I couldn't secure the pack as well as I would have liked.
On the trail, I was never able to adjust the straps to hold the pack securely. It often would bump into the back of my helmet on steep sections or swing left and right when things got rowdy. This experience got me thinking about trying to ditch a pack altogether. I have heard that others have had better success so perhaps the Seeker and my lanky 6' frame is a bad combo.
I like the idea of the suspended mesh back panel that contacts your back, but in this case the panel was suspended so much it compromised the space in the pack and pushed the weight of your cargo further outboard contributing to more movement than I appreciated.
Despite these issues build quality was excellent and everything I stowed stayed dry in the nastiest showers. My favourite feature, however, was the magnetic keeper for the hydration tube. It held the tube securely but I could grab it whenever I wanted with ease. When I was done I just spat out the nipple and it always found its magnetic resting place. Every single time.
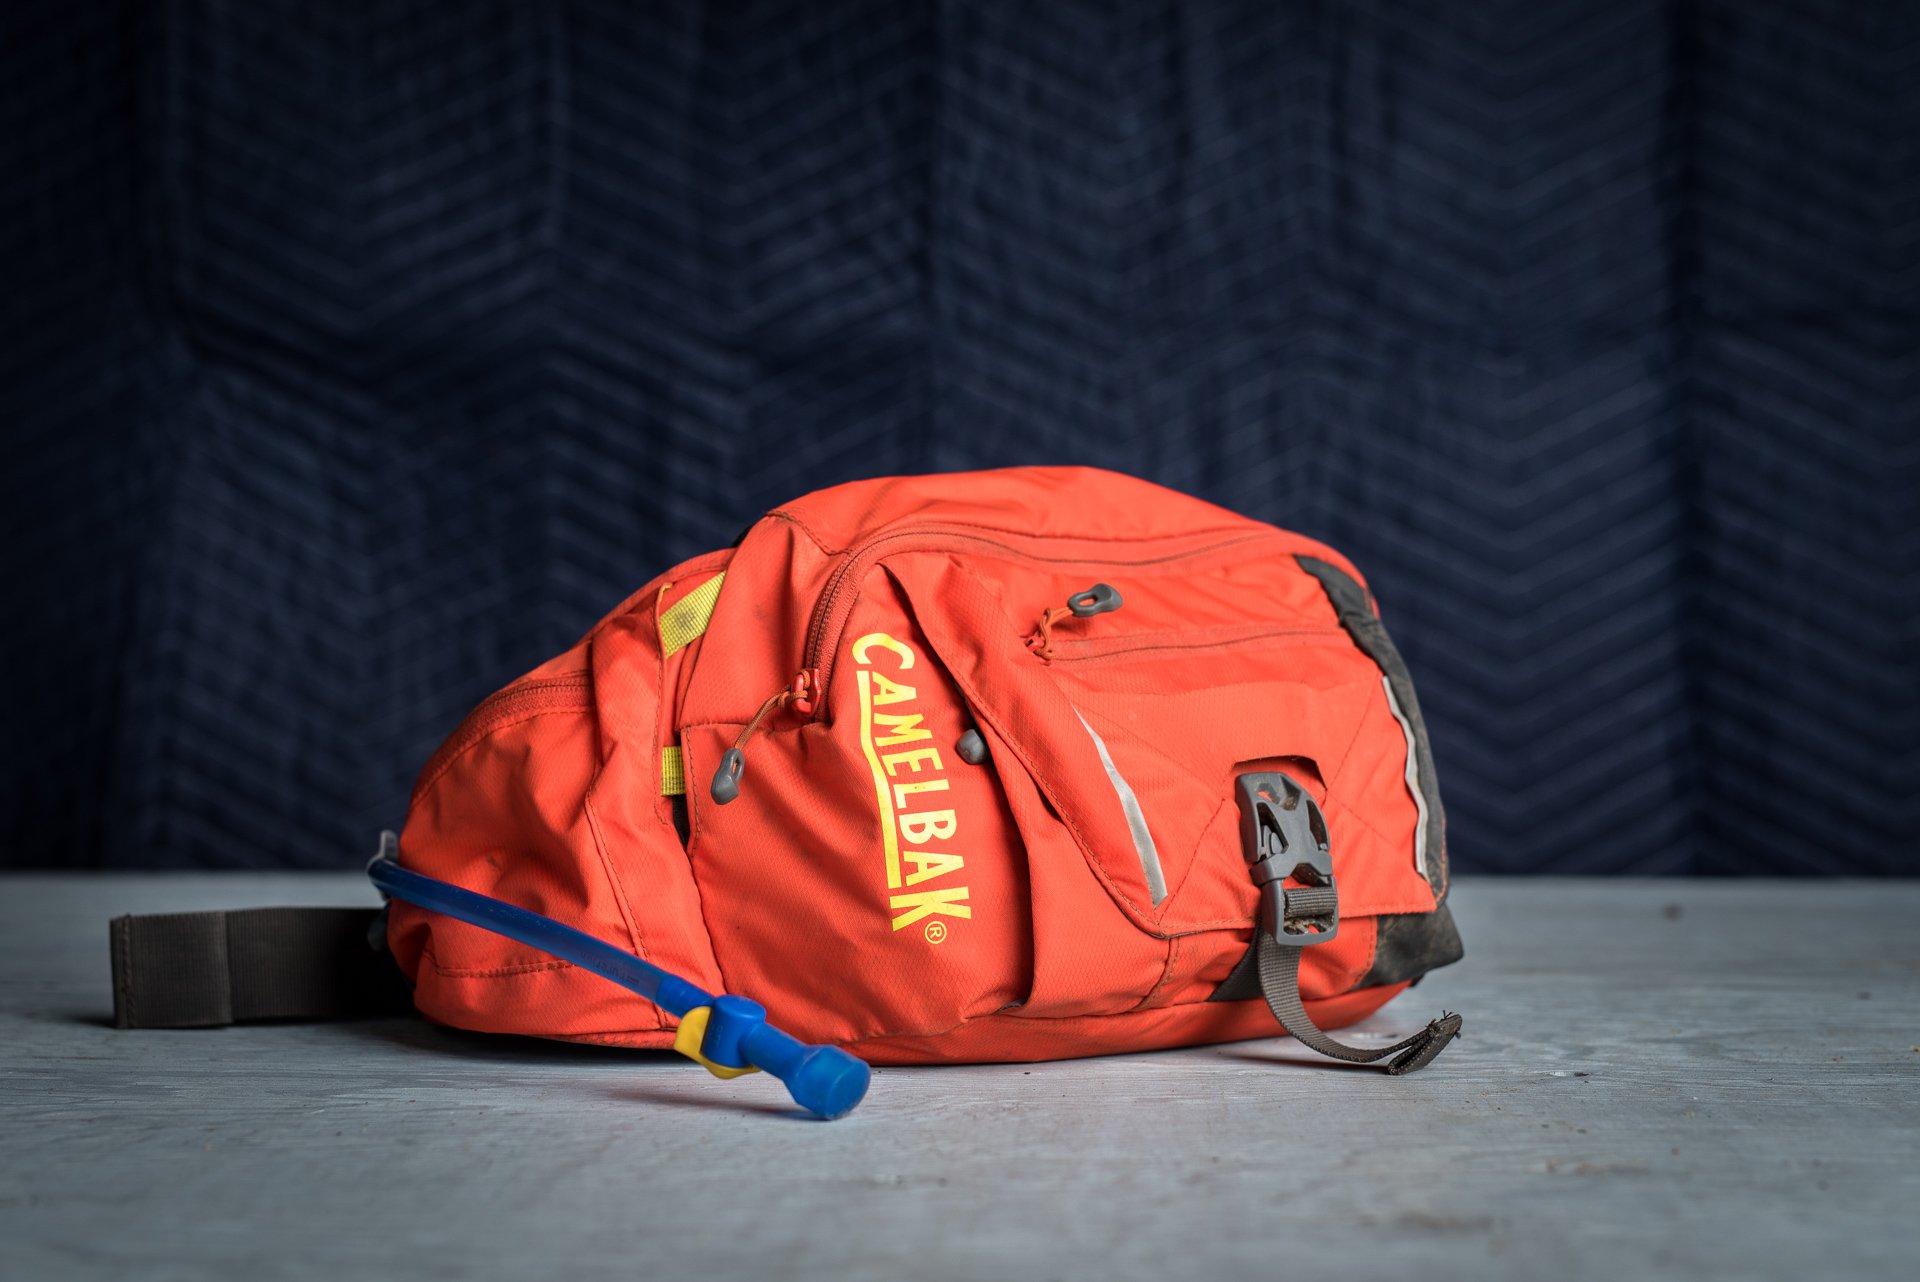
Camelbak Palos LR 4
Lately I have been trying to switch over from wearing a backpack on every single ride to only wearing one occasionally in the warmer months, although I will likely keep packing up most days in winter. Since I've been riding Cushcore I've gotten cocky and stopped carrying a tube, pump or CO2 for most rides, but I've been riding a bike with only an under top tube cage so water has been a problem. First I bolted a pump on the bottle mounts and at the end of the ride, it was nowhere to be seen. The bracket held onto the pump fine but the bracket broke free along with the pump. On another ride, my bottle was gone by the end. Without riding a Specialized with a SWAT Door and/or getting OneUp's new tool, the EDC or Every Day Carry, I'm stuck lugging something on my back. But as it turns out that hasn't been so bad.
The back panel of the Palos LR4 unclips to allow access to divided pockets top and bottom and the two panels become overflow storage where you can pack a small jacket.
Camelbak sent us a hydration fanny... er hip pack to try; the Palos LR 4. I was skeptical about how well this would work, especially after someone I know in the bike industry announced on social media something like, "Worst.Idea.Ever." For my first ride, I found a spot for my multi-tool in an easy to access hip sleeve and a spot for my spare glasses and then I put in about 750 ml of water (a large water bottle's worth). This left room for a light jacket, a pump, and a tube. It was a tight squeeze to get my wallet and keys in but I managed it. Now that I've jettisoned pump and tube everything fits well.
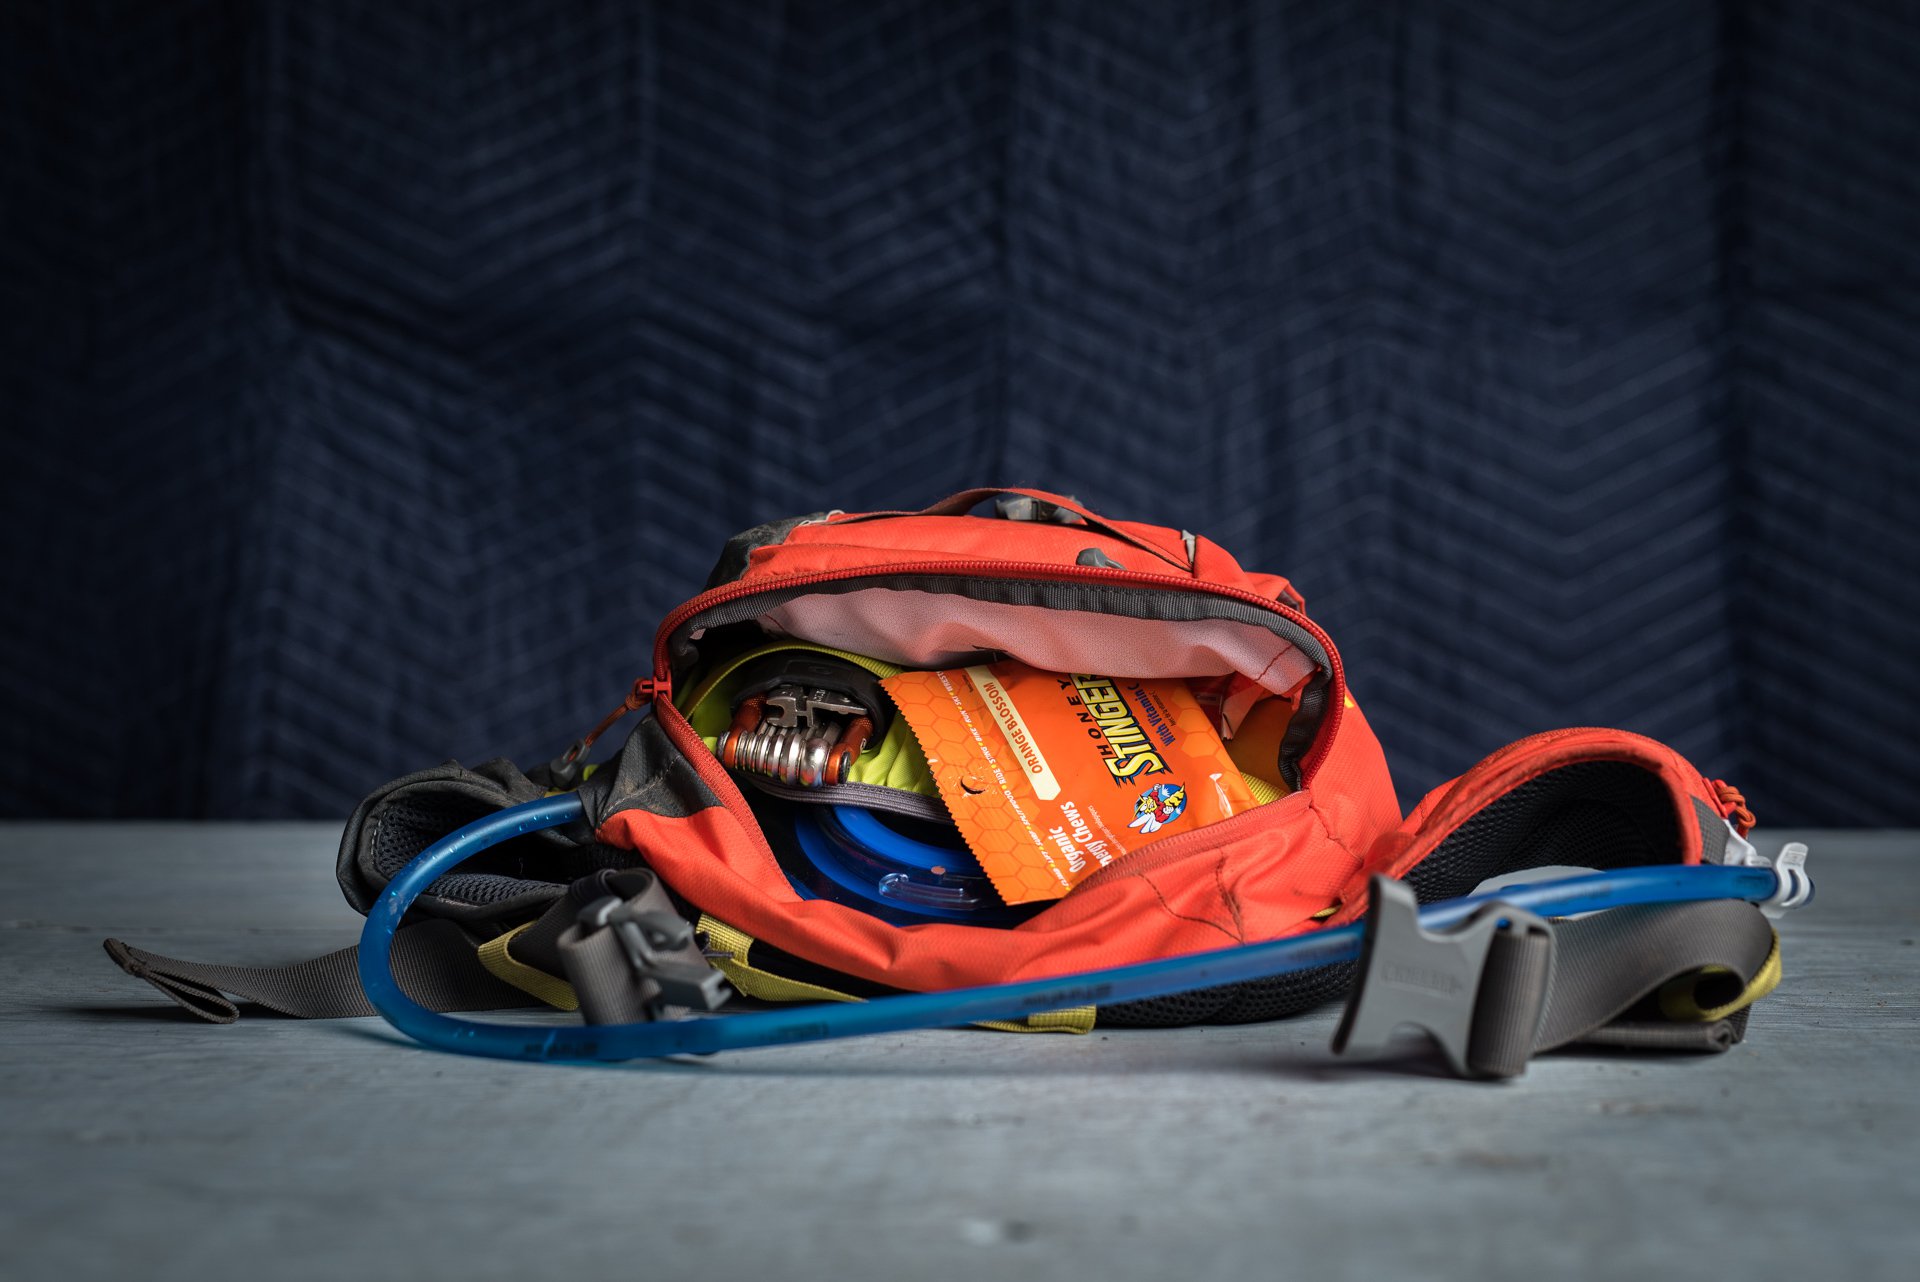
4 litres isn't a lot of space (water and storage combined) but it's enough as it turns out... just barely. The waist belt pockets are extremely useful because they are accessible without removing the bag. One closes with overlapping elastic panels and I keep my multi-tool in there for easy access. The other closes with a zipper so my keys live there.
To start with I had no idea what to do with the nozzle. It's long enough to reach my mouth obviously so this leaves a lot of hose hanging around where you don't want a lot of hose hanging around. Eventually, I settled on wrapping the hose around my back from right to left and then using the magnetic holder on my left hip. At this point, I have only been drinking when stopping to rest or consolidate the group so I also tuck the hose into one of the elastics that holds the excess belt strap for security. It's not really any more user-friendly than carrying a bottle but when climbing I could easily do without the elastic strap and access water from the saddle. Ease of use could be better but the weight of the water is spread evenly and I find it much more secure than wearing even a light pack.
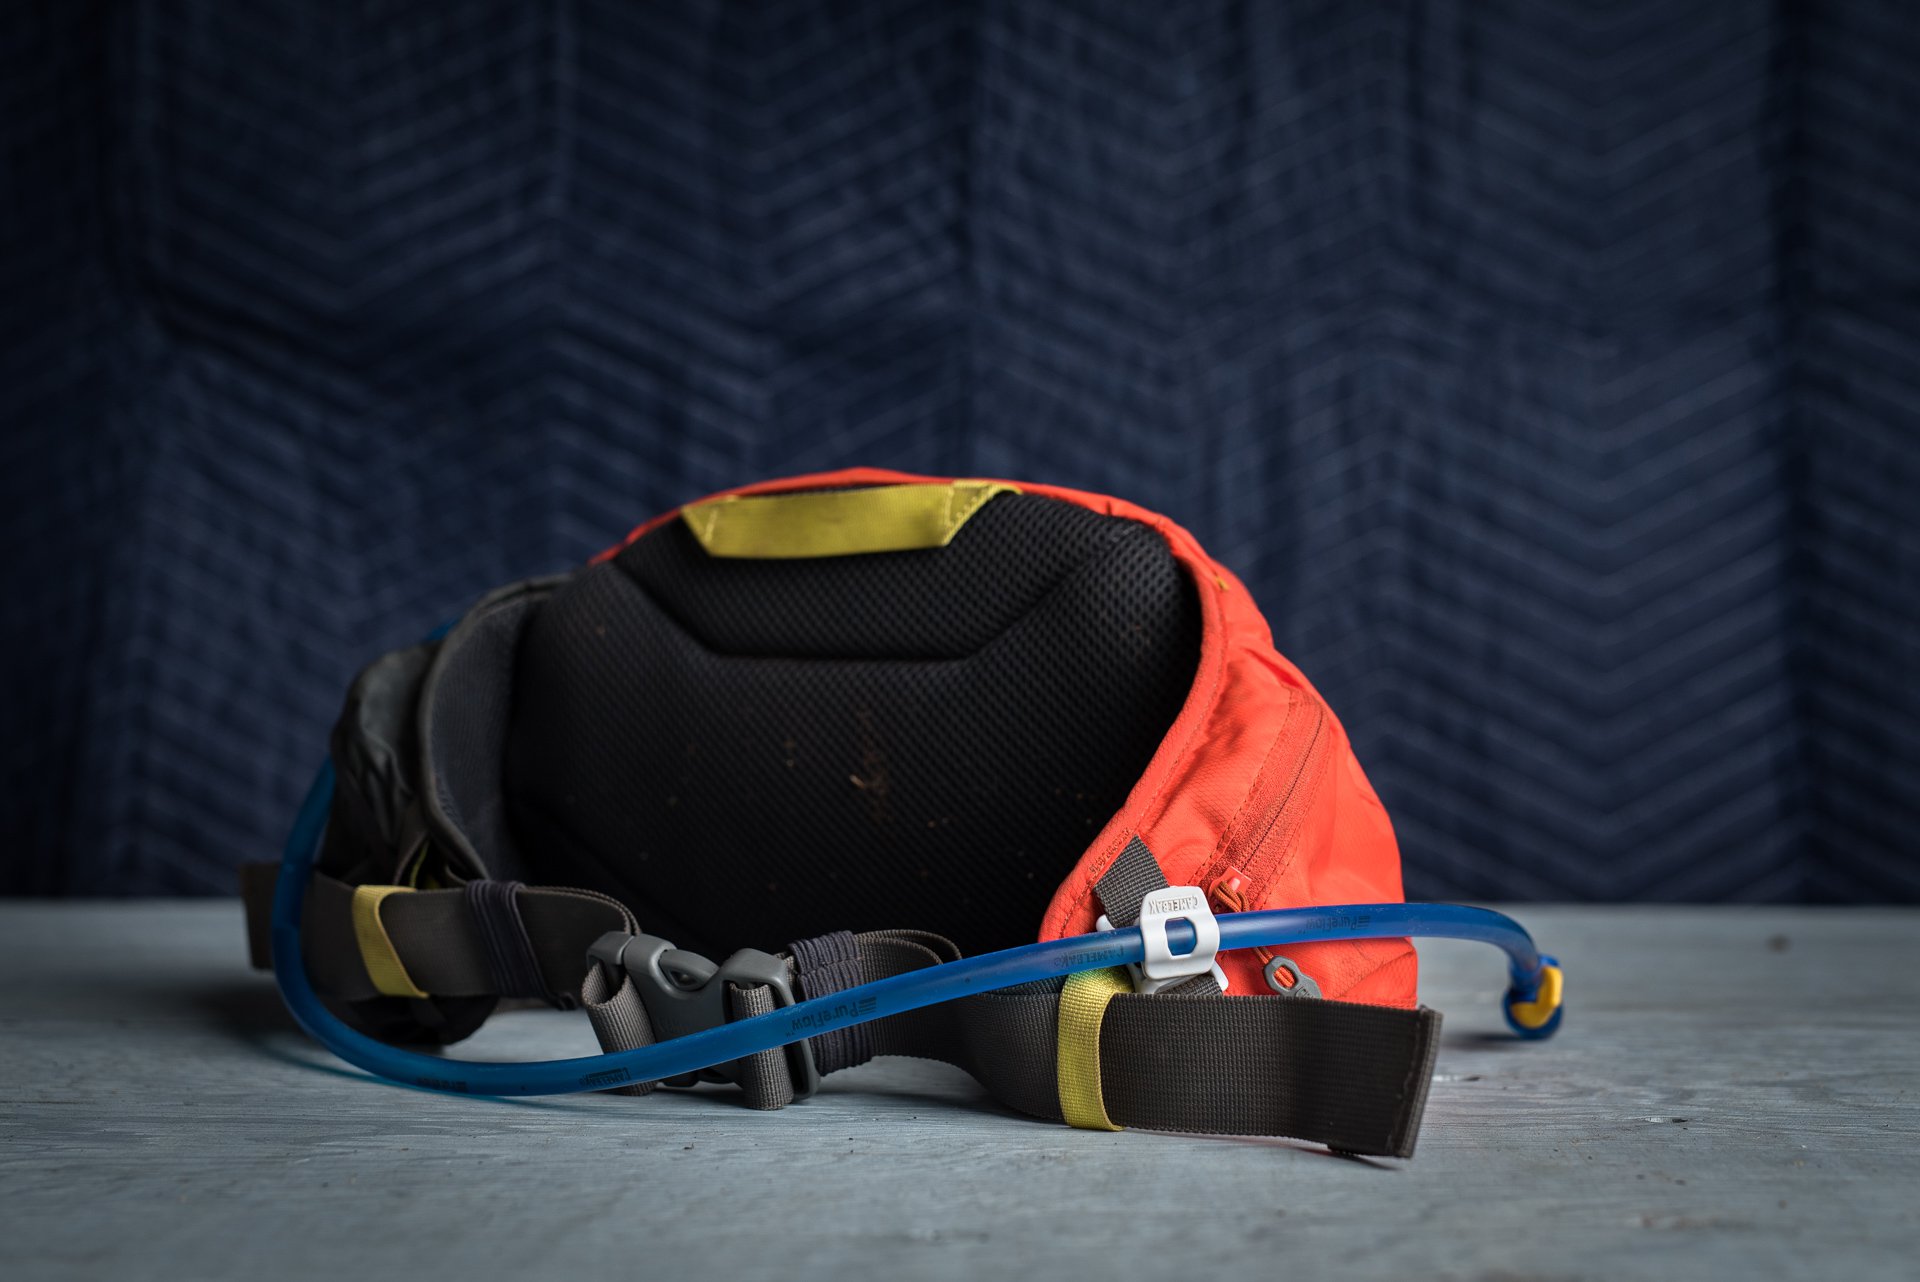
Camelbak's intention seems to be to have the hose loop around your waist from the front, but the prospect of hooking it on my saddle when I'm hanging on for dear life is not appealing so I swing it around the back and it's never been an issue. There is also a clip so you could attach the hose to the collar of your jersey or jacket in less demanding situations.
The advantages of carrying weight around your waist are many. Your shoulders are free increasing mobility, ventilation is improved, and the weight swings around much less than even the best fitting backpack I have worn. If you have shoulder or back problems you may get some relief from wearing a... hip pack, but on the first few rides I felt it in my lower lumbar. Since that time I've had no discomfort. I may be a convert for the warm seasons.
The Dakine Seeker 15L is priced at US$200 click here for more info.
The Camelbak Palos LR 4L costs US$75. More here.


Comments
Andy Eunson
6 years, 10 months ago
A common problem with many hip packs is that the waist strap constantly comes loose like on the Palos for example. I bought a couple sliders which helps a lot but even then the waist belt loosens during a ride. And you still don't want too much weight in one either as they can bounce. Really a good road jersey with three back pockets works better especially if you have one bottle on the frame, tube, tool and CO2 under the saddle. Extra bottle in the middle pocket and you're gold.
Reply
Cam McRae
6 years, 10 months ago
I haven't had issues with the Palos coming loose. I think there was an auto-correct to "Pablo's" above so I'm not clear if you own one or not. I cinch it when I stop sometimes but just to get it a little tighter. There are also supplementary cinches (you can see the yellow loops above that Dave has fed the main strap through to make the photo tidy) that take up any slack. Don't you find that a water bottle bounces in a jersey pocket?
Reply
Andy Eunson
6 years, 10 months ago
Damn auto correct.
Reply
Andy Eunson
6 years, 10 months ago
Bottle in the pocket doesn't bounce if the jersey is tight enough. Loose or wool jerseys don't have enough support and will bounce. I found a full bottle on a dead end trail yesterday and figured I'd find the person so I didn't dump the contents. Wearing a Castelli soft shell gabba jersey. No bounce at all. I figure I'll try using the yellow loops and see if it's better. I actually want to be able to loosen and spin the pack to the front to access tools or phone.
Reply
mtnfriend
6 years, 10 months ago
Westjet treated me to a Palos in Sedona this spring after my bike and I arrived on a flight, while the rest of my kit wandered in an airport vortex for a few days. Now, it's my go-to for rides up to four-ish hours. I'm a skinny kid, 5' 10", 150 lbs. I (gasp!) followed the instructions with this bag, first loosen the supplementary straps. Then snug the main grey straps, then snug the supplementary straps. If I do that, the thing is glued to me! (As I drink down the 1.5L reservoir, I continue to snug the supplementary straps down.) Cam, there's also a little key retention clip in behind the zippered pocket on the outside flap of the bag. That may free up some room for snacks in one of the side pockets. ;)
Reply
awesterner
6 years, 10 months ago
If you use a bottle in your frame, I highly recommend From High Above hips packs. I have his original and the latest version (which has a bottle holder). They fit incredibly, very low profile, and the strapping is superb. I've have a Camelback Hydration hip pack in the past, and while I don't really have any issues with the strapping coming loose, the weight of 1.5L of water is too much in such a small package. For me it overhangs a bit too much and will bounce a bit which causes it to ride up off my boney hips....then it really bounces haha
Reply
Raymond Epstein
6 years, 10 months ago
I am right there with you Cam. I want enough stuff to get out of a mechanical, but not have to carry my whole life with me. My go to of late is the Race Face Rip Strip with a Back Bottle (no water bottle mount on my bike...boo!) for local rides of less than two hours. I carry my phone, and some snacks in my shorts pockets and I have a multi tool, my keys, a tire lever, CO2 inflater, tube, rotor truing tool, chain tool, spare links and the bottle in the Rip Strip. The Belt was given to me by a more svelte individual whom could not get it to fit right. This is not a problem for me having plenty of posterior. I may, like you ditch the tube/lever/inflater soon, but being on a new wheelset I have not wanted to chance it just yet. On two hour plus rides I grab my EVOC Enduro/FR pack. You can fit your life in this thing if you want and it has a spine protector. The main difference I've found with the EVOC pack (and I've tried nearly every pack under the sun) is that it does not move. No up and down movement nor swinging when loaded down. The waist belt is wide and made of neoprene. It cinches down without any hard spots that would either suffocate you or perform a primitive appendectomy. It packs some solid German engineering for the long days.
Reply
cyclotoine
6 years, 10 months ago
Thanks for the review. I've been thinking about trying the camelbak hip pack. It makes a lot of sense for 2ish hour rips where the full pack is unnecessary.
Reply
stinky_dan
6 years, 10 months ago
I have had a lot of success with the Molle waist pack. Lots of stash pockets but no water bladder so I usually have a water bottle on the frame. I usually strap my pads to the frame for the grind up as well, but the Molle has enough straps and attach points to place packs, but there's a point where overloading a hip pack becomes silly so adding the weight of a bladder at the hip makes for an uncomfortable ride for me.
I'm picking up a backcountry research race strap in a few months to test.
Reply
Cr4w
6 years, 10 months ago
If you're over 6' tall you definitely need to pay attention to the dimensions of hydration packs. Many of them are quite short - many with the "waist" strap going around my ribs. I have an Osprey Raptor 10 that is awesome. The construction is killer, it's surprisingly light and has tons of clever features.
I've been using the Palos since last year. I find I have to run it around my navel to be comfortable when riding. Overall I really like it. Just enough room for a couple of basic things (tool, pump, levers, quicklink, phone/keys/wallet, triangle bandage). Overall it's a great solution for most of my Shore rides. I could see 1.5L not being enough on hotter days.
Reply
Andy Eunson
6 years, 10 months ago
Yep. And at the opposite end of the height spectrum, me, many packs are too long. Often enough packs are available in a couple sizes though. Something to look for. The Hauser has multiple attachment points for the shoulder and waist straps to make fit more people. I really like mine for when I need the storage.
Reply
Endur-Bro
6 years, 10 months ago
USWE packs make fanny packs and attaching a shit ton of expensive parts to ones frame a moot point. If I rode bikes in the winter I'd consider a Mission Workshop pack, or see if USWE does a waterproof version. I have no use for little side pockets or waist pockets so packs with that are considered drawbacks ime.
Reply
jeffgicklhorn
6 years, 10 months ago
Like some of the other posters, I don't have water bottle mounts on my frame (BOO!), so have had to get creative. For local rides I use a Backcountry Research Mutherload Frame Strap (http://backcountryresearch.com/mutherload-frame-mount-strap.html), which holds tube, multitool, tire lever, CO2 cartridge and inflator, and an Osprey Rev Solo waist pack (https://www.rei.com/product/866605/osprey-rev-solo-hydration-waistpack), which holds 20oz of water, phone, keys, and a bar/gel. This has worked for local rides of 2-2.5 hours. For longer rides I carry a 100oz hydration pack and switch out the CO2 for a small hand pump.
Reply
Velocipedestrian
6 years, 10 months ago
I've been using the Palos for the last year or so, and haven't reached for a pack more than three times in that period.
Small child keeps rides under 3hrs, and my weedy cyclist shoulders appreciate the freedom. I'm the guy who always carried too much crap just-in-case, so having a smaller bag forces me to only carry the basics.
Tools (a little roll of proper allen keys, both pumps, chain breaker, t25, spare hanger...) tube, snacks, keys, and the full bladder packs it out, but as above following the instructions re: straps keeps it steady. A rolled windshell fits in the overflow storage, and just like that - I'm at capacity without the extraneous stuff.
A decent climb + hot weather sees me empty the water inside 3hrs, but the only bottle mount on my frame is in the front wheel spray position, so I don't use it.
It'll be interesting to see how far I can push it once the kids are bigger and time for longer rides reappears, but so far I'm totally sold vs a pack.
Reply
Please log in to leave a comment.