A packable derailleur hanger de-wambler
Wolf Tooth Pack Hanger Alignment Tool
The second I started to type the intro to what should be a pretty easy to parse product review, my brain went into vapor-lock. There are some caveats here. They must be addressed before we can move on. So, here we go:
- This is a review of a derailleur hanger alignment tool. Most people do not need one of these. Why not? Well, for the price of this tool (119.95 US), you could purchase three or four replacement hangers, since most bikes these days have replaceable hangers.
- This is a review of a packable, portable, derailleur hanger alignment tool. See above. This tool may be packable and portable, but it is still several orders of magnitude larger than a replaceable hanger.
- Most bike and/or replaceable hanger manufacturers will likely warn against trying to bend a derailleur hanger back into shape, because hangers (especially the replaceable ones) are generally made out of aluminum and aluminum does not take kindly to repeated bending.
- About that bending, it's very easy to use too much force. People who have not spent some time in shops learning the ugly way how much is too much, well, every once in a while they might find themselves snapping a hanger clean off. Hopefully it's a replaceable hanger. Go back up to point number 2. Replace hanger.
- Bike shops NEED hanger alignment tools. They are an integral part of fixing bikes. The vast majority of "my bike won't shift right" customer complaints can be chalked up to buggered/dirty cables or derailleur hangers that got knocked out of plane by something ("I swear, I was just riding along when that tree came and punched me right below the rear axle..."), and not all hangers are replaceable. Individual customers, well, refer to points 1 through 4.
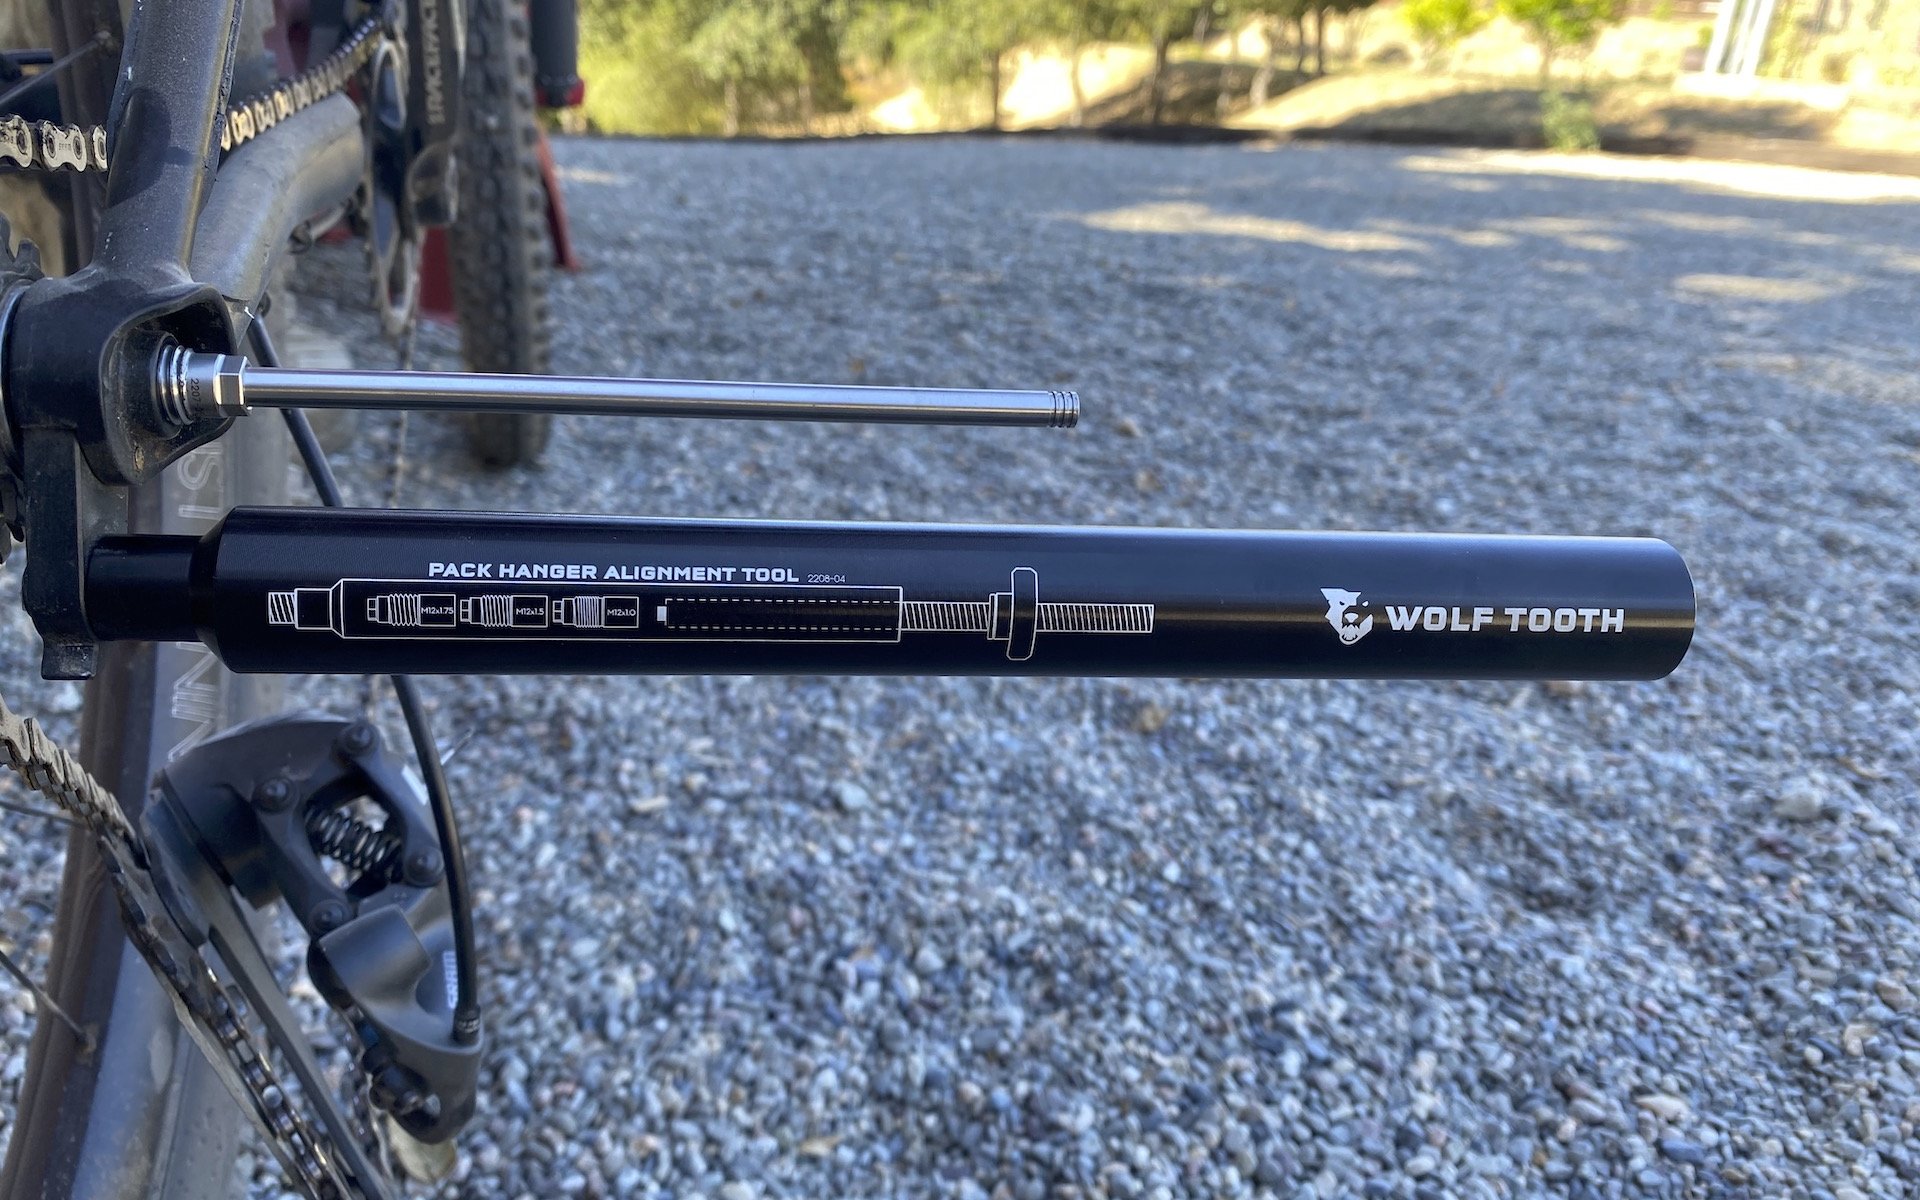
Okay, now we have that out of the way, let's see what we've got here. This is the Wolf Tooth Pack Hanger Alignment Tool for bikes with thru-axles. It is unlike all the other hanger alignment tools out there. Everyone else, from the ubiquitous bike shop Park DAG-2 to the beautiful but somewhat ostentatious Abbey Hanger Alignment Gauge (to say nothing of the scads of Chinese knock-off tools available on Amazon), works basically the same way: big long arm pivoting around a bolt that threads into the derailleur hanger, with some sort of index arm that you reference against the rim of the bike's rear wheel. Rotate tool, bending as you follow the rim, adjusting until the index arm is consistent with the rim.
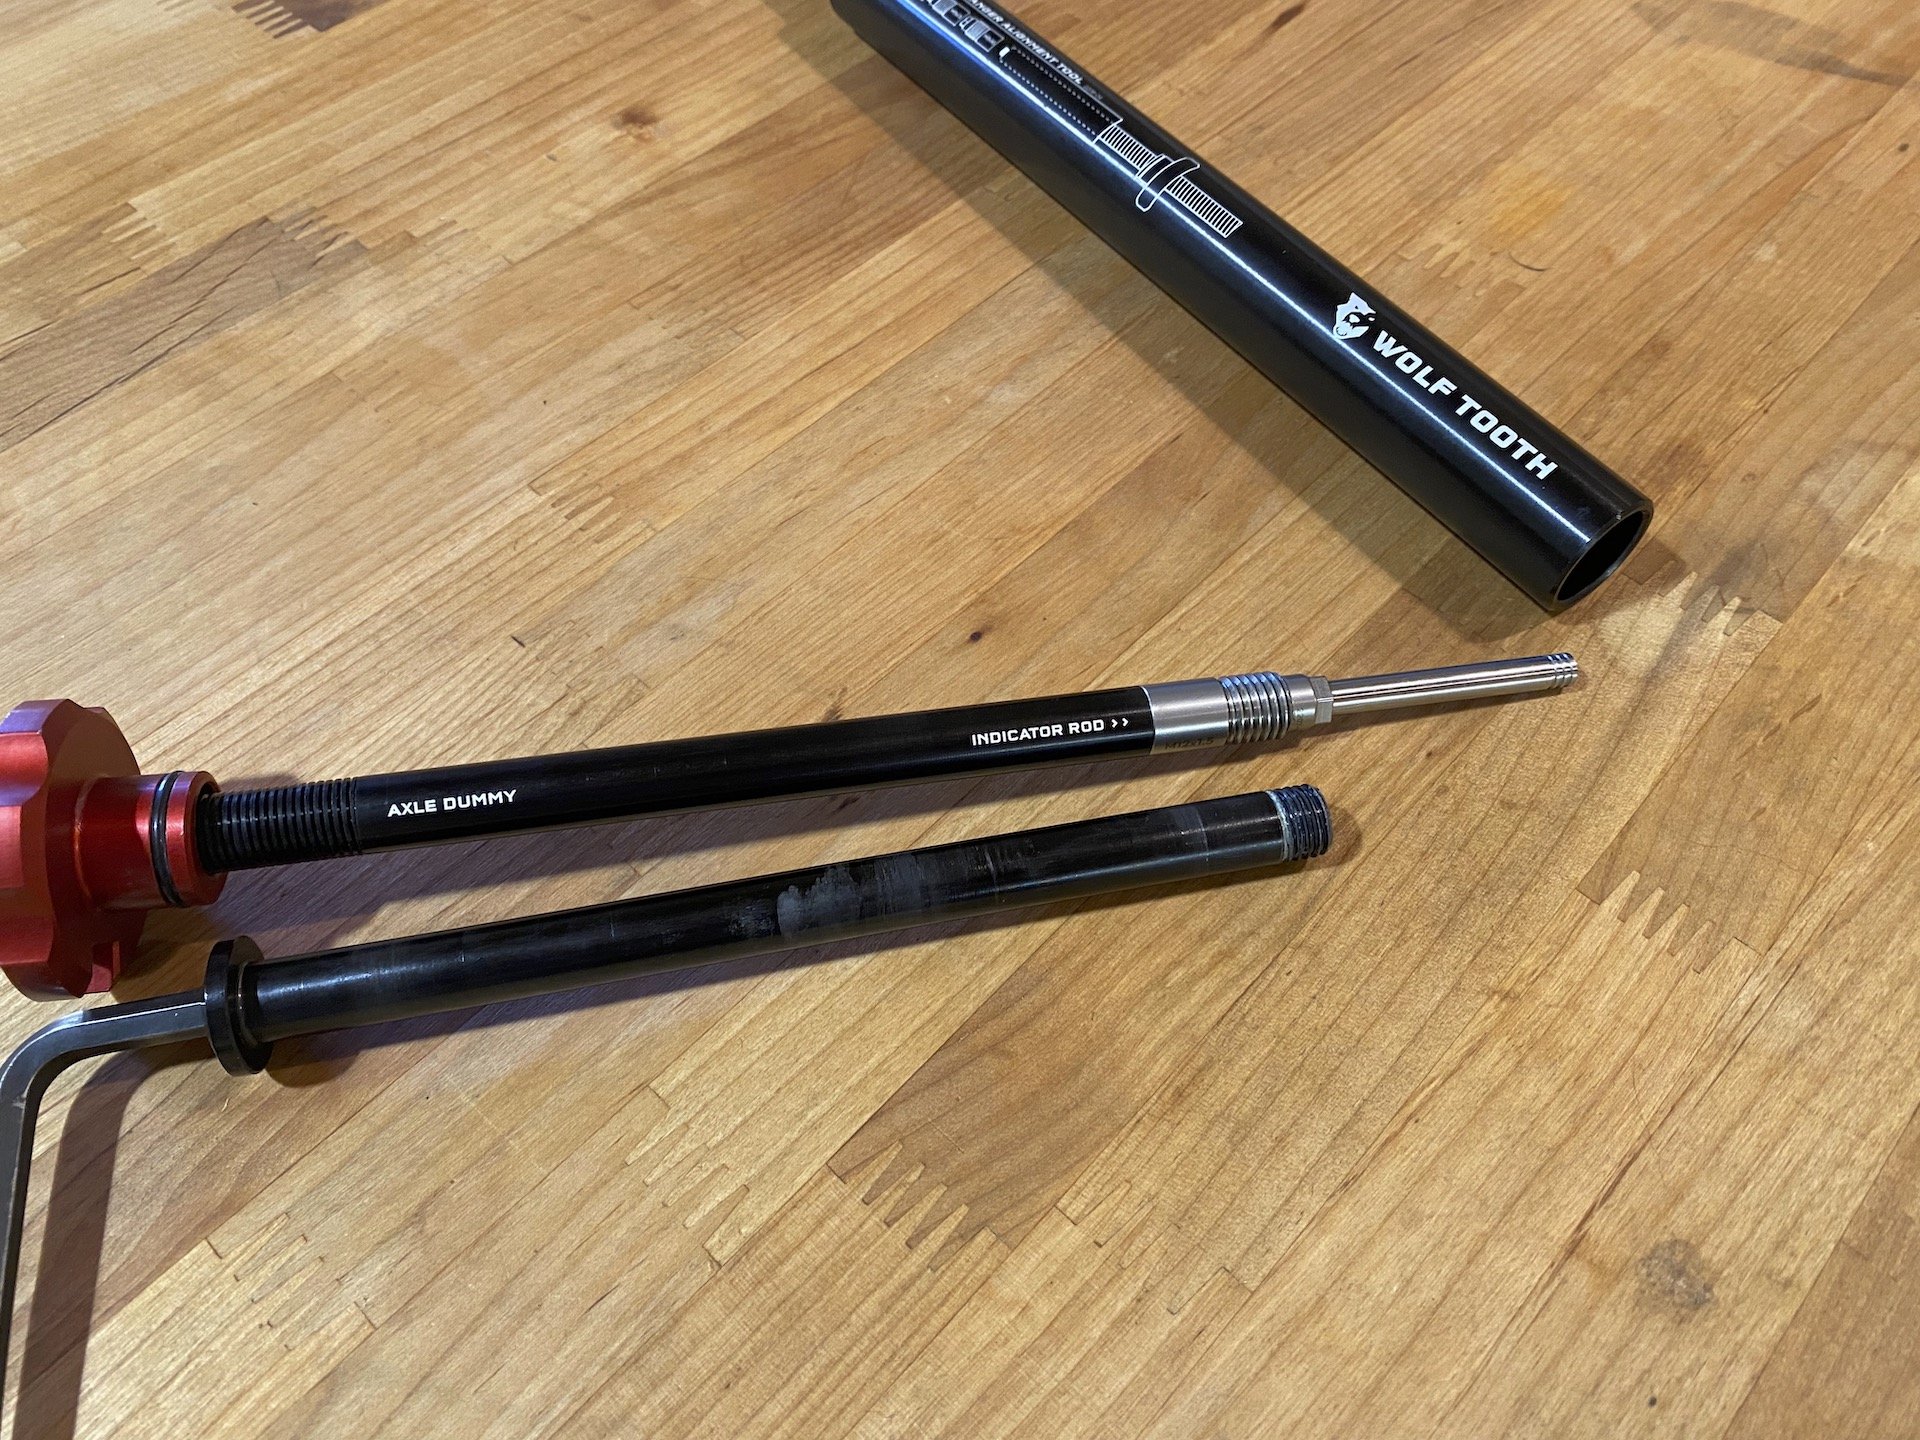
The Wolf Tooth P.H.A.T goes about things differently. Instead of an index arm referencing off the rim and a big long bender bar, the P.H.A.T utilizes a dummy axle with an indicator rod that extends out of it, and a separate handle that threads into the derailleur hanger. Alignment is achieved by eyeballing the differential between the hanger handle and the indicator rod, and bending into the hanger handle until it is visually aligned with the indicator rod from both above and behind. The end result is the same, but the manner of getting there is different. More on the pro/con of the different methods later.
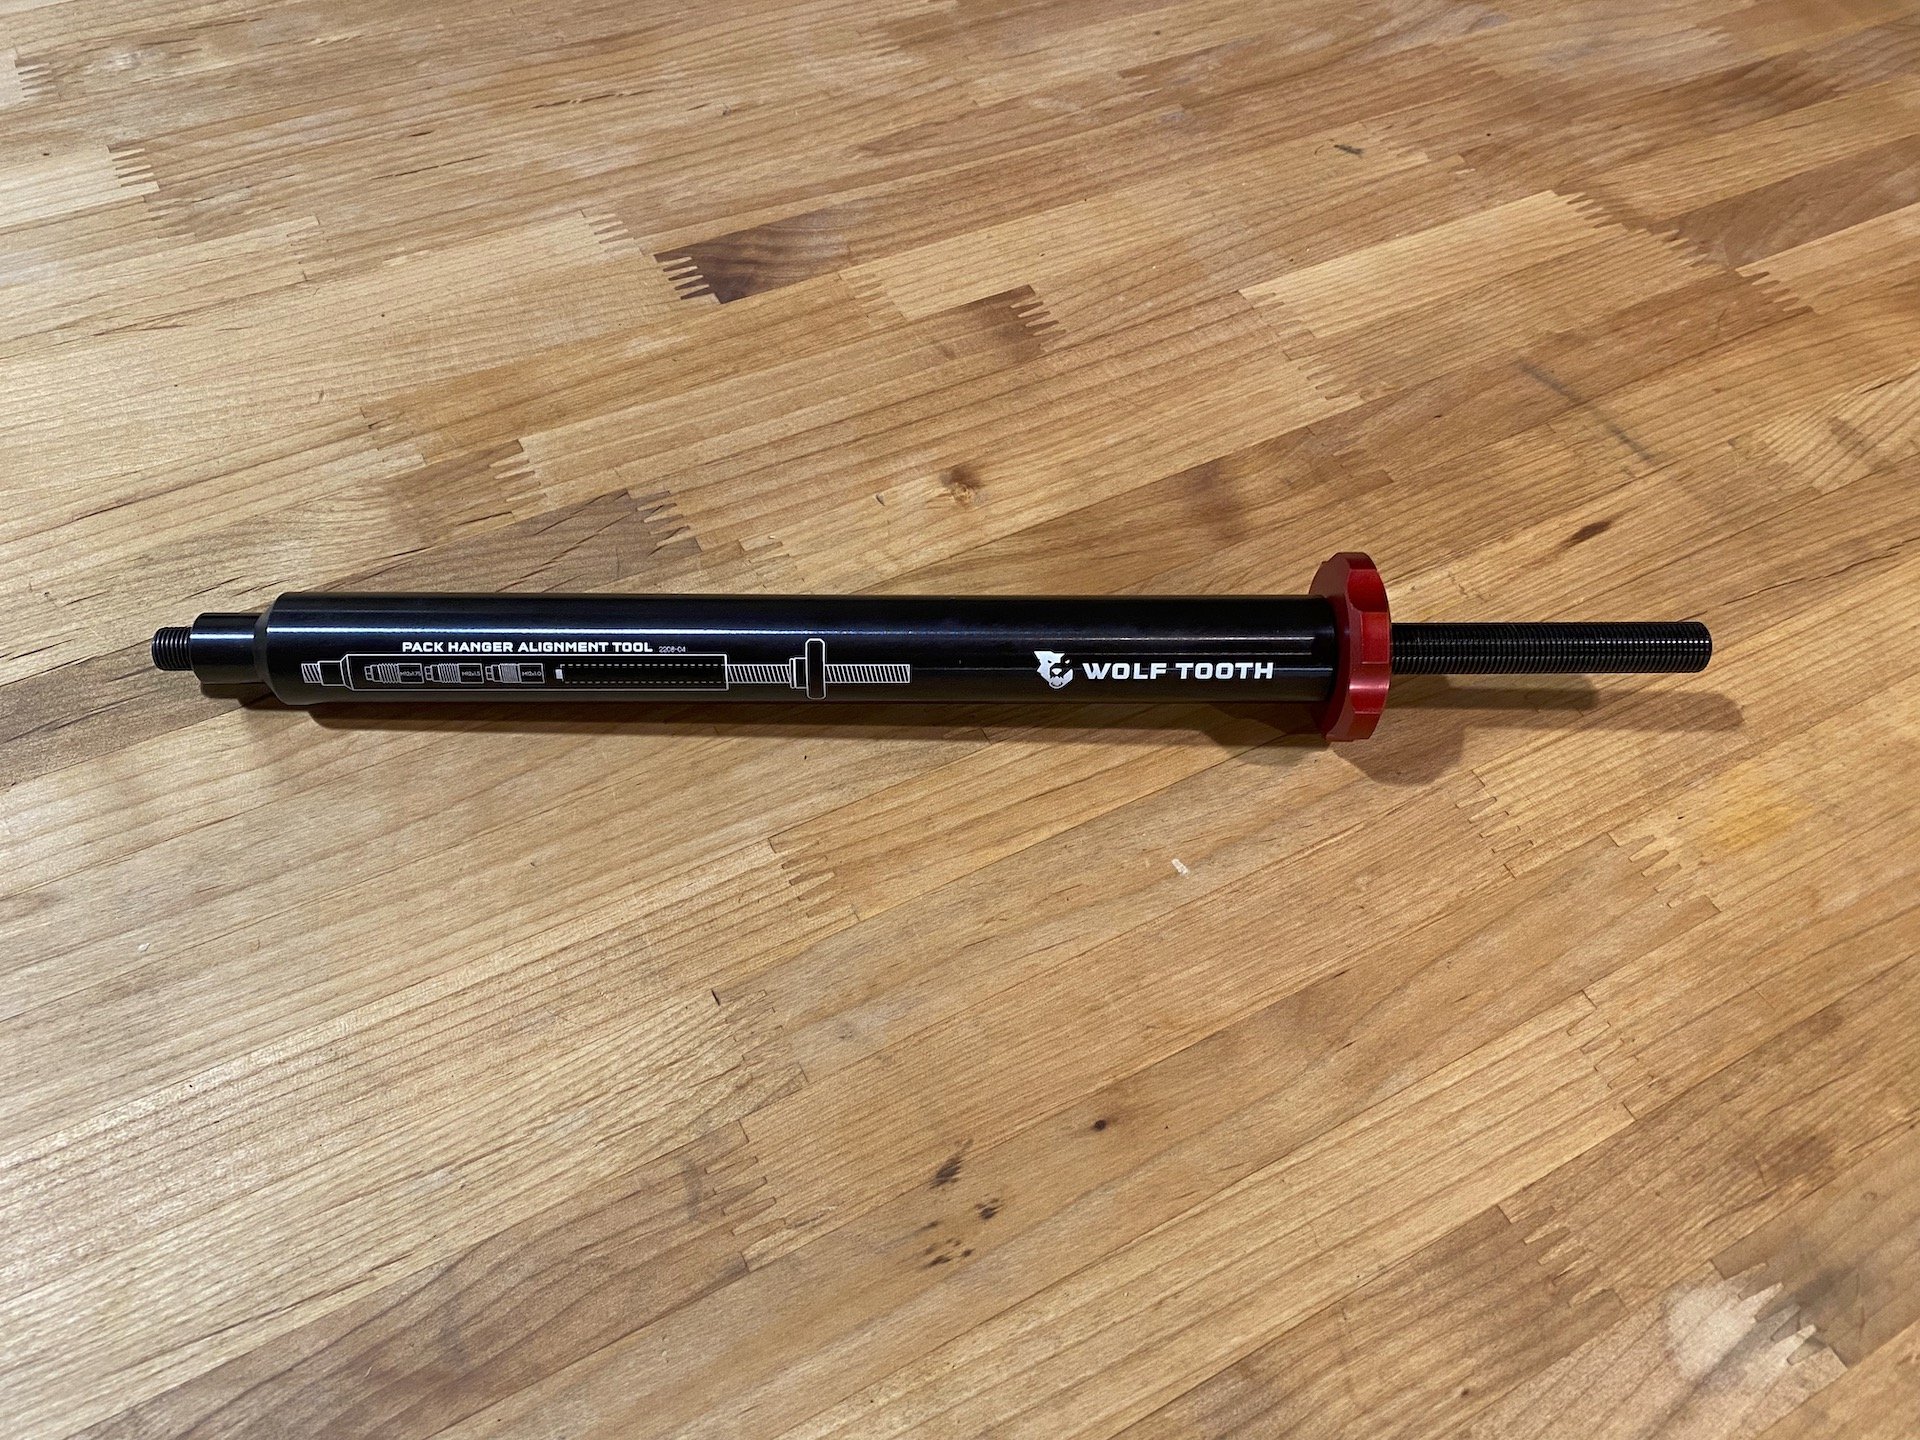
All packed up, it looks like this.
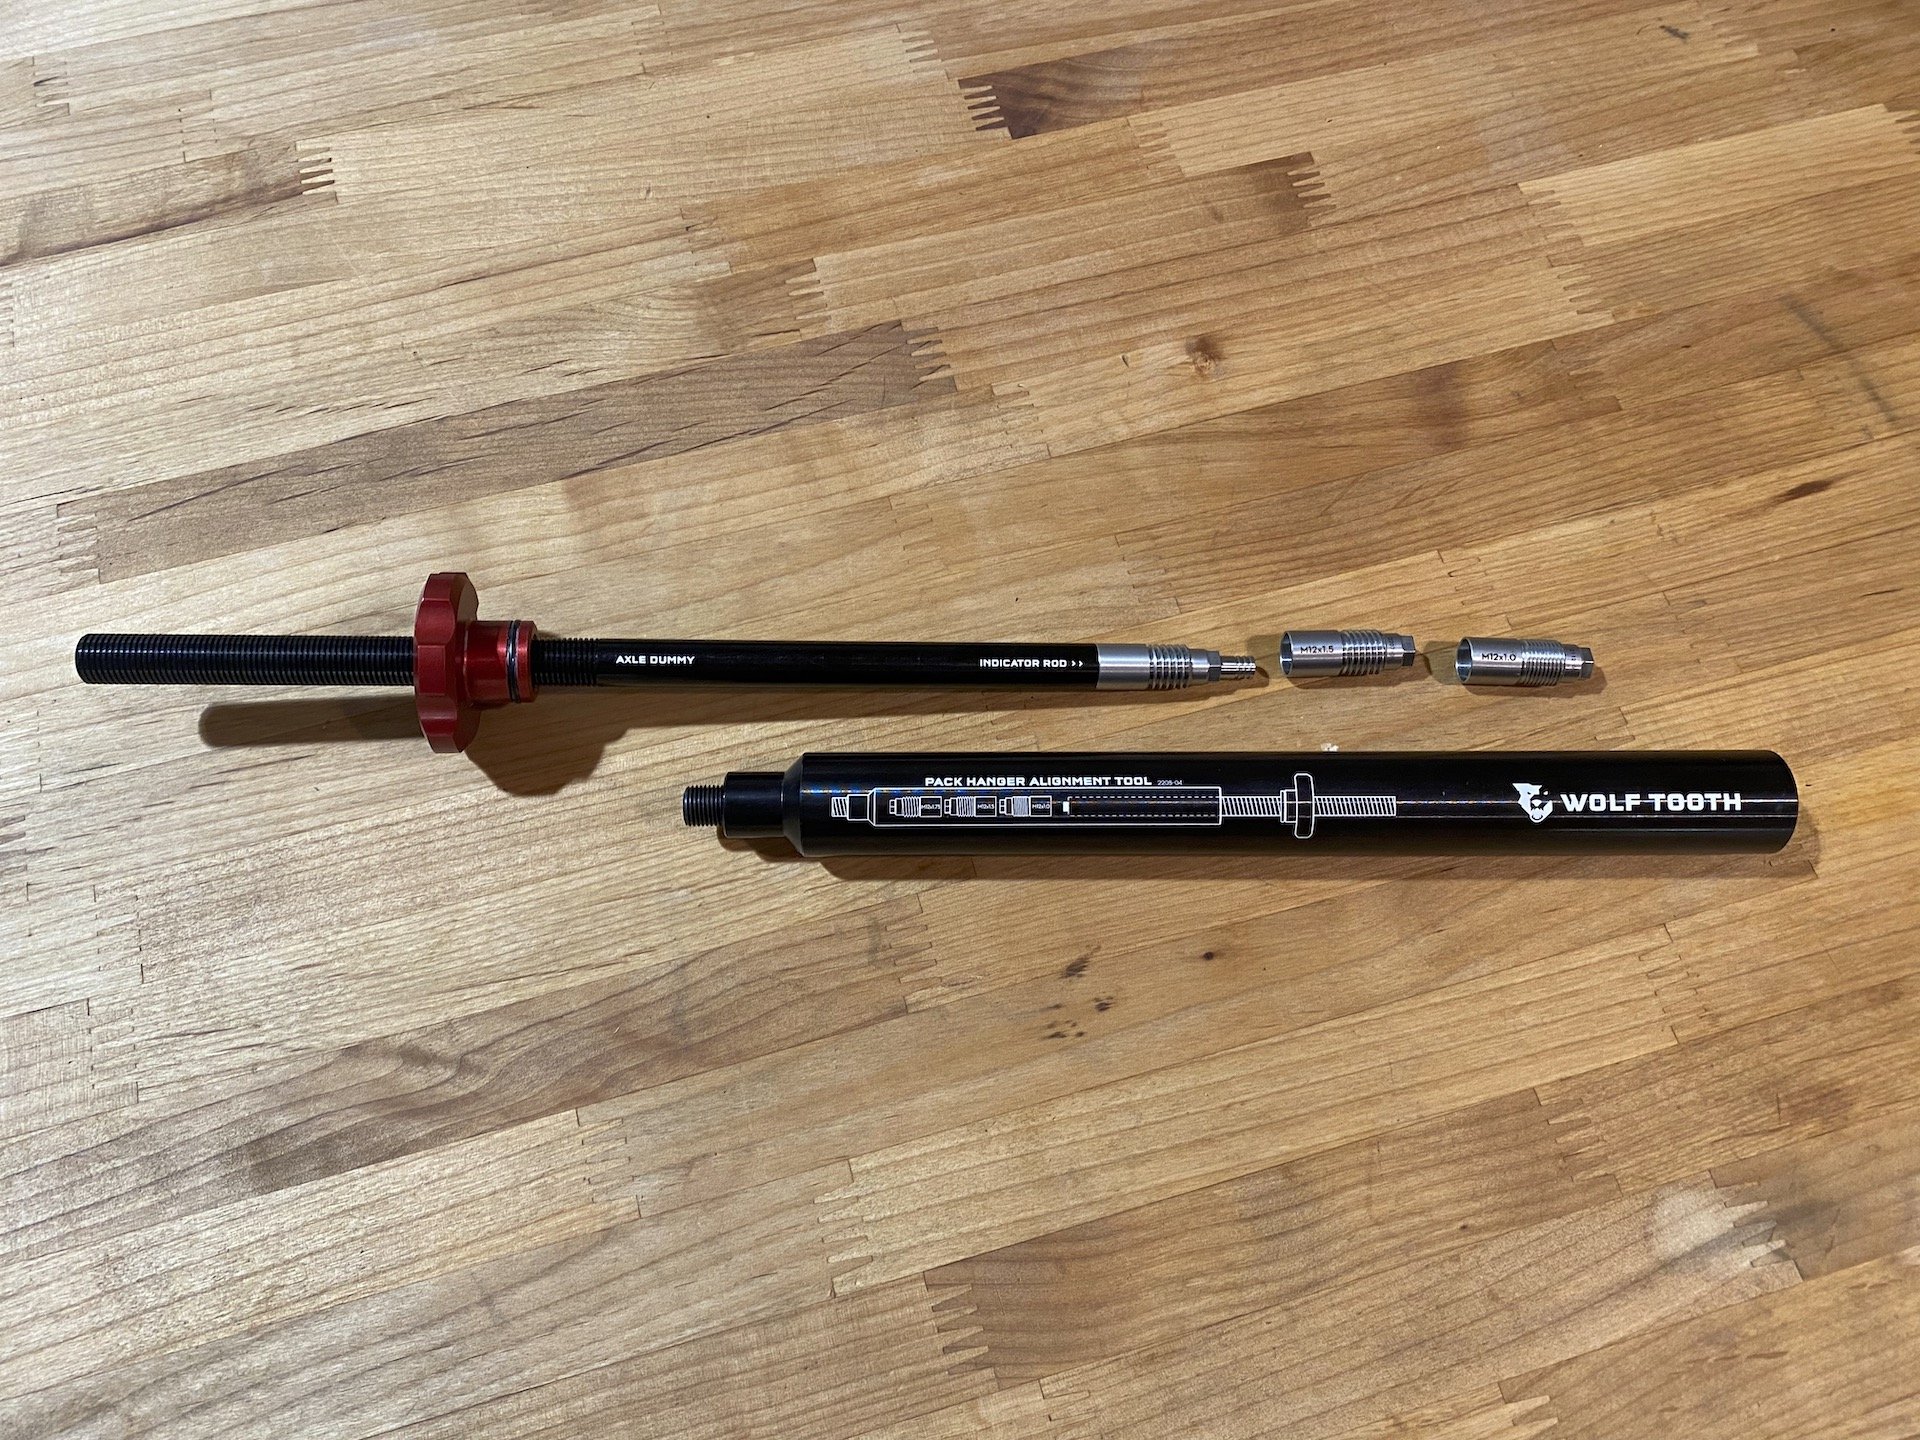
Mostly unpacked, it looks like this.
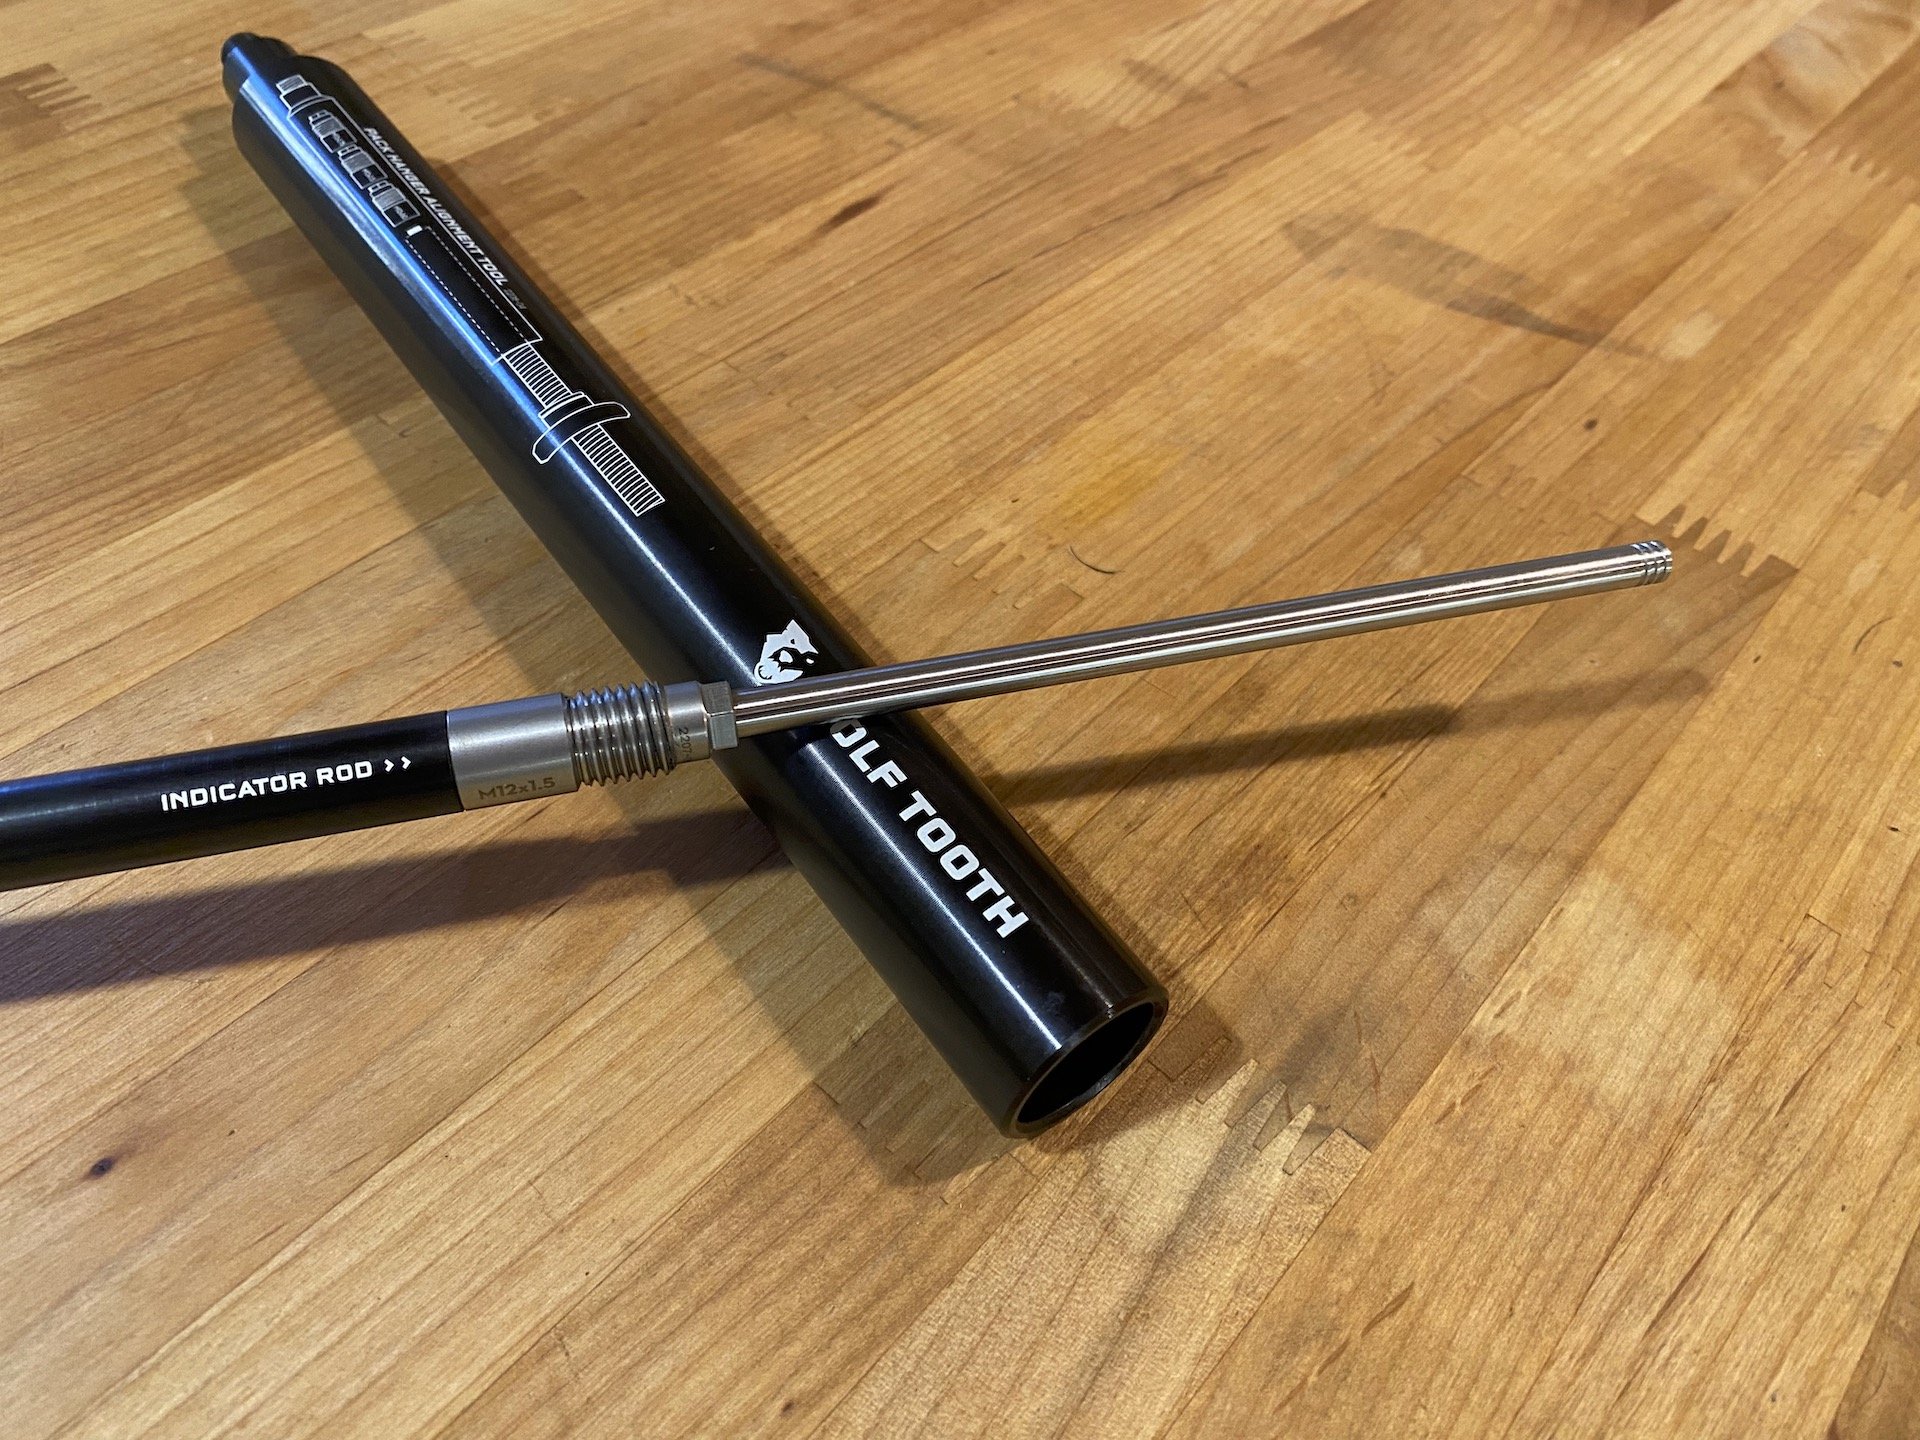
Or in its excited state, it looks like this...
In execution, like all Wolf Tooth gear, this is a beautifully made piece of kit. It's manufactured in the USA, with its various component pieces machined from 7075 and 6061 aluminum, and 303 stainless steel. The stainless steel indicator rod slides smoothly but precisely inside the aluminum 12mm axle dummy, held in tension with a pair of tiny o-rings in the shaft. There are three stainless axle tips for different thread pitches; 12x1.0, 12x1.5 and 12x1.75. A tightening knob (that also serves as the "cap" for the packed tool) is partially threaded in what is referred to as a "rock to lock" design; it can be slid along the threaded end of the dummy axle until it is needed to thread down and snug the assembly tight into the frame of the bike being worked on. The knob also has a notch machined into it that fits the hex on the end of the axle tips so you don't need to chase down a wrench to swap them out. The thru-axle kit seen here packs down into a single tube, about 360mm stem to stern and weighing a modest 297 grams.
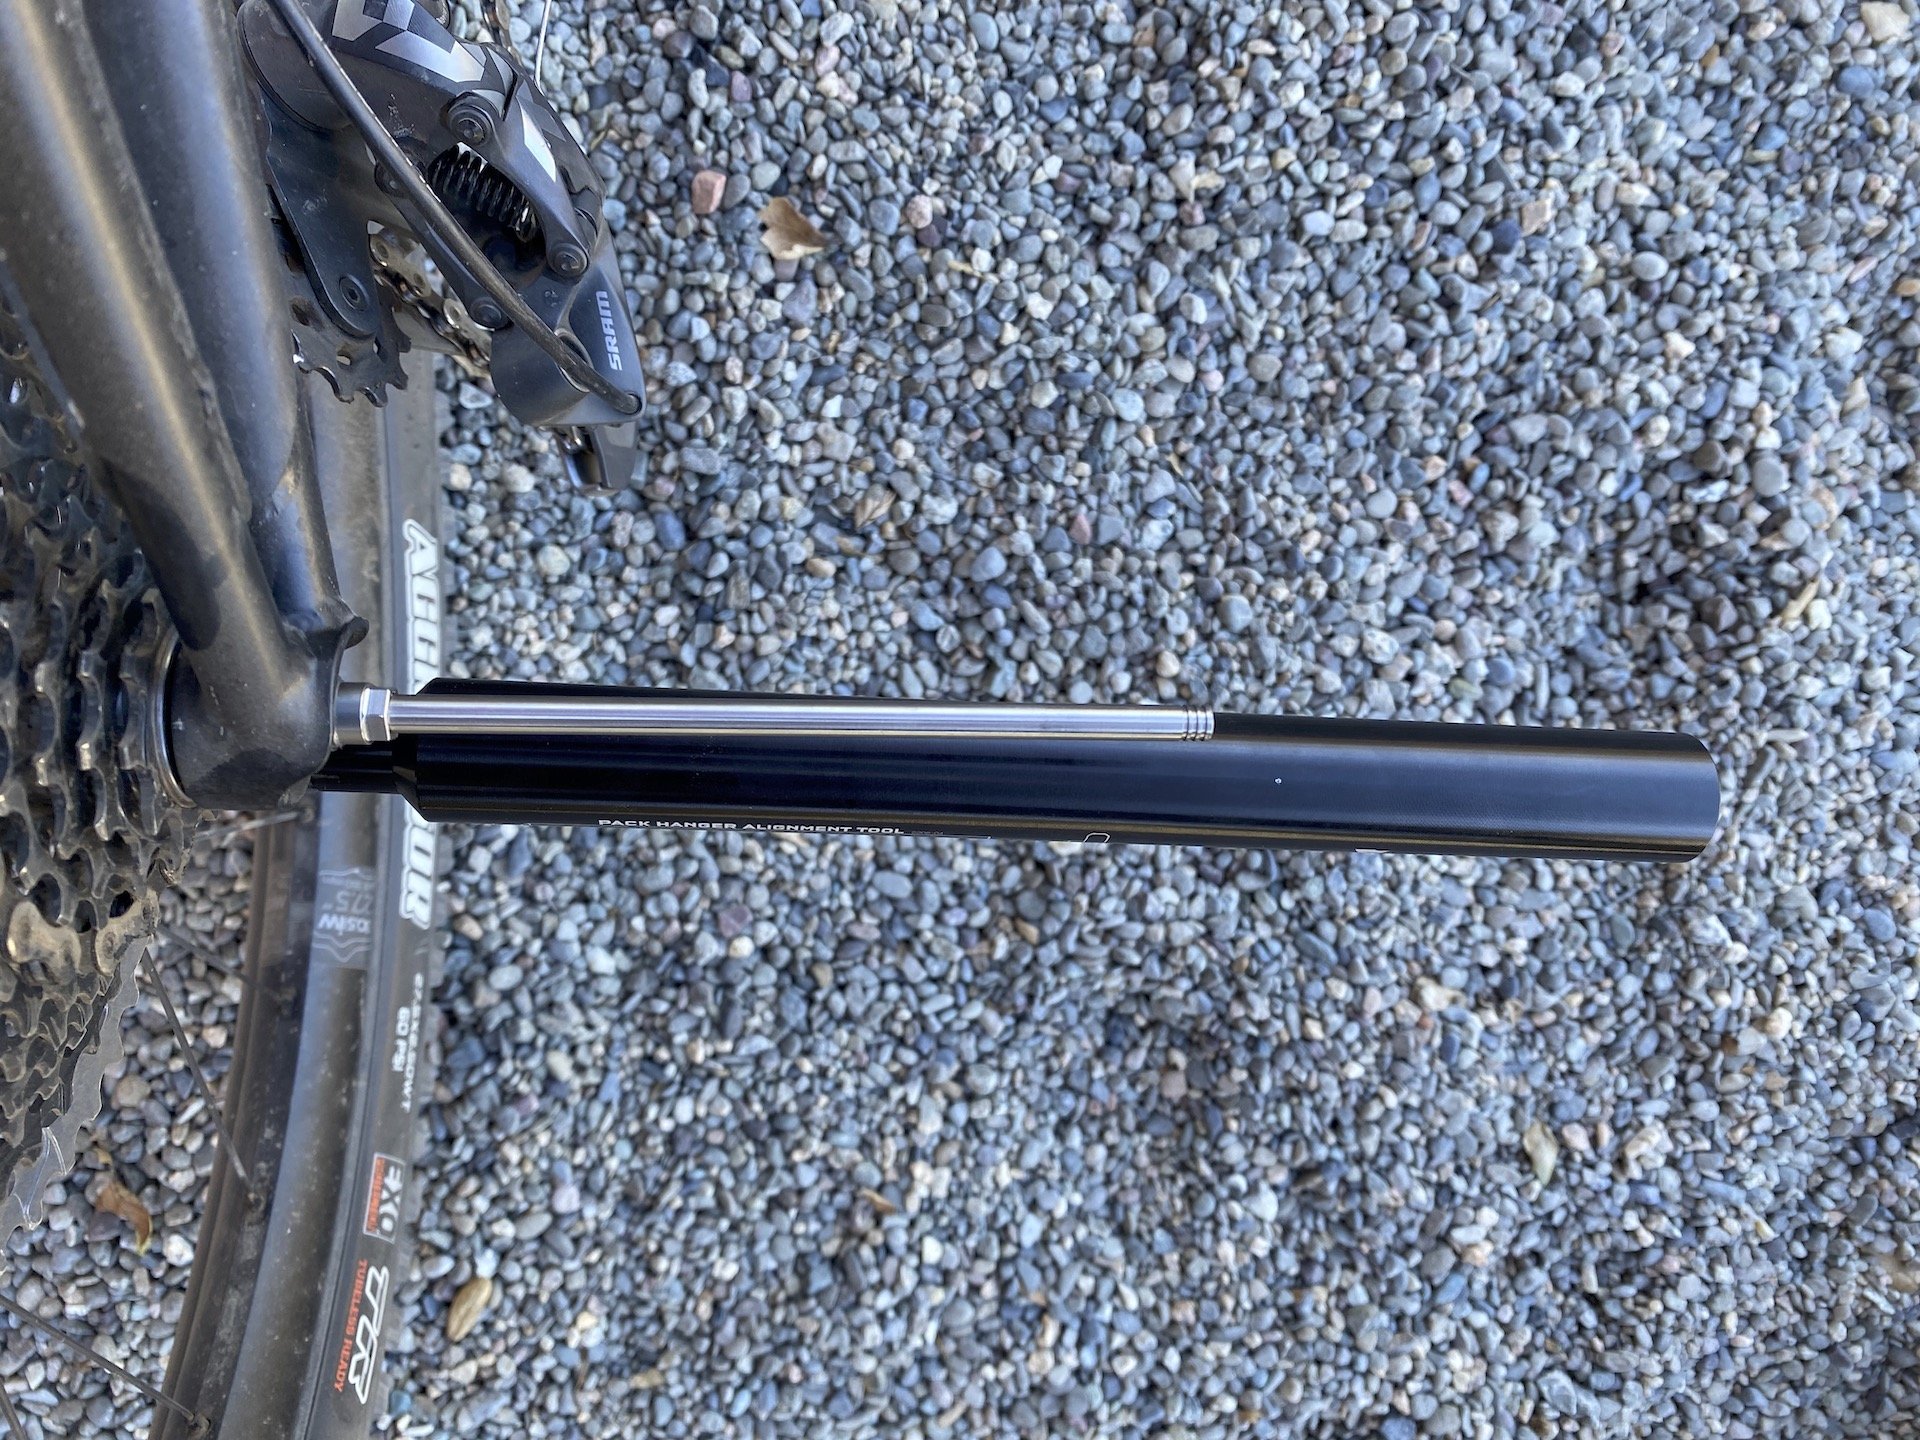
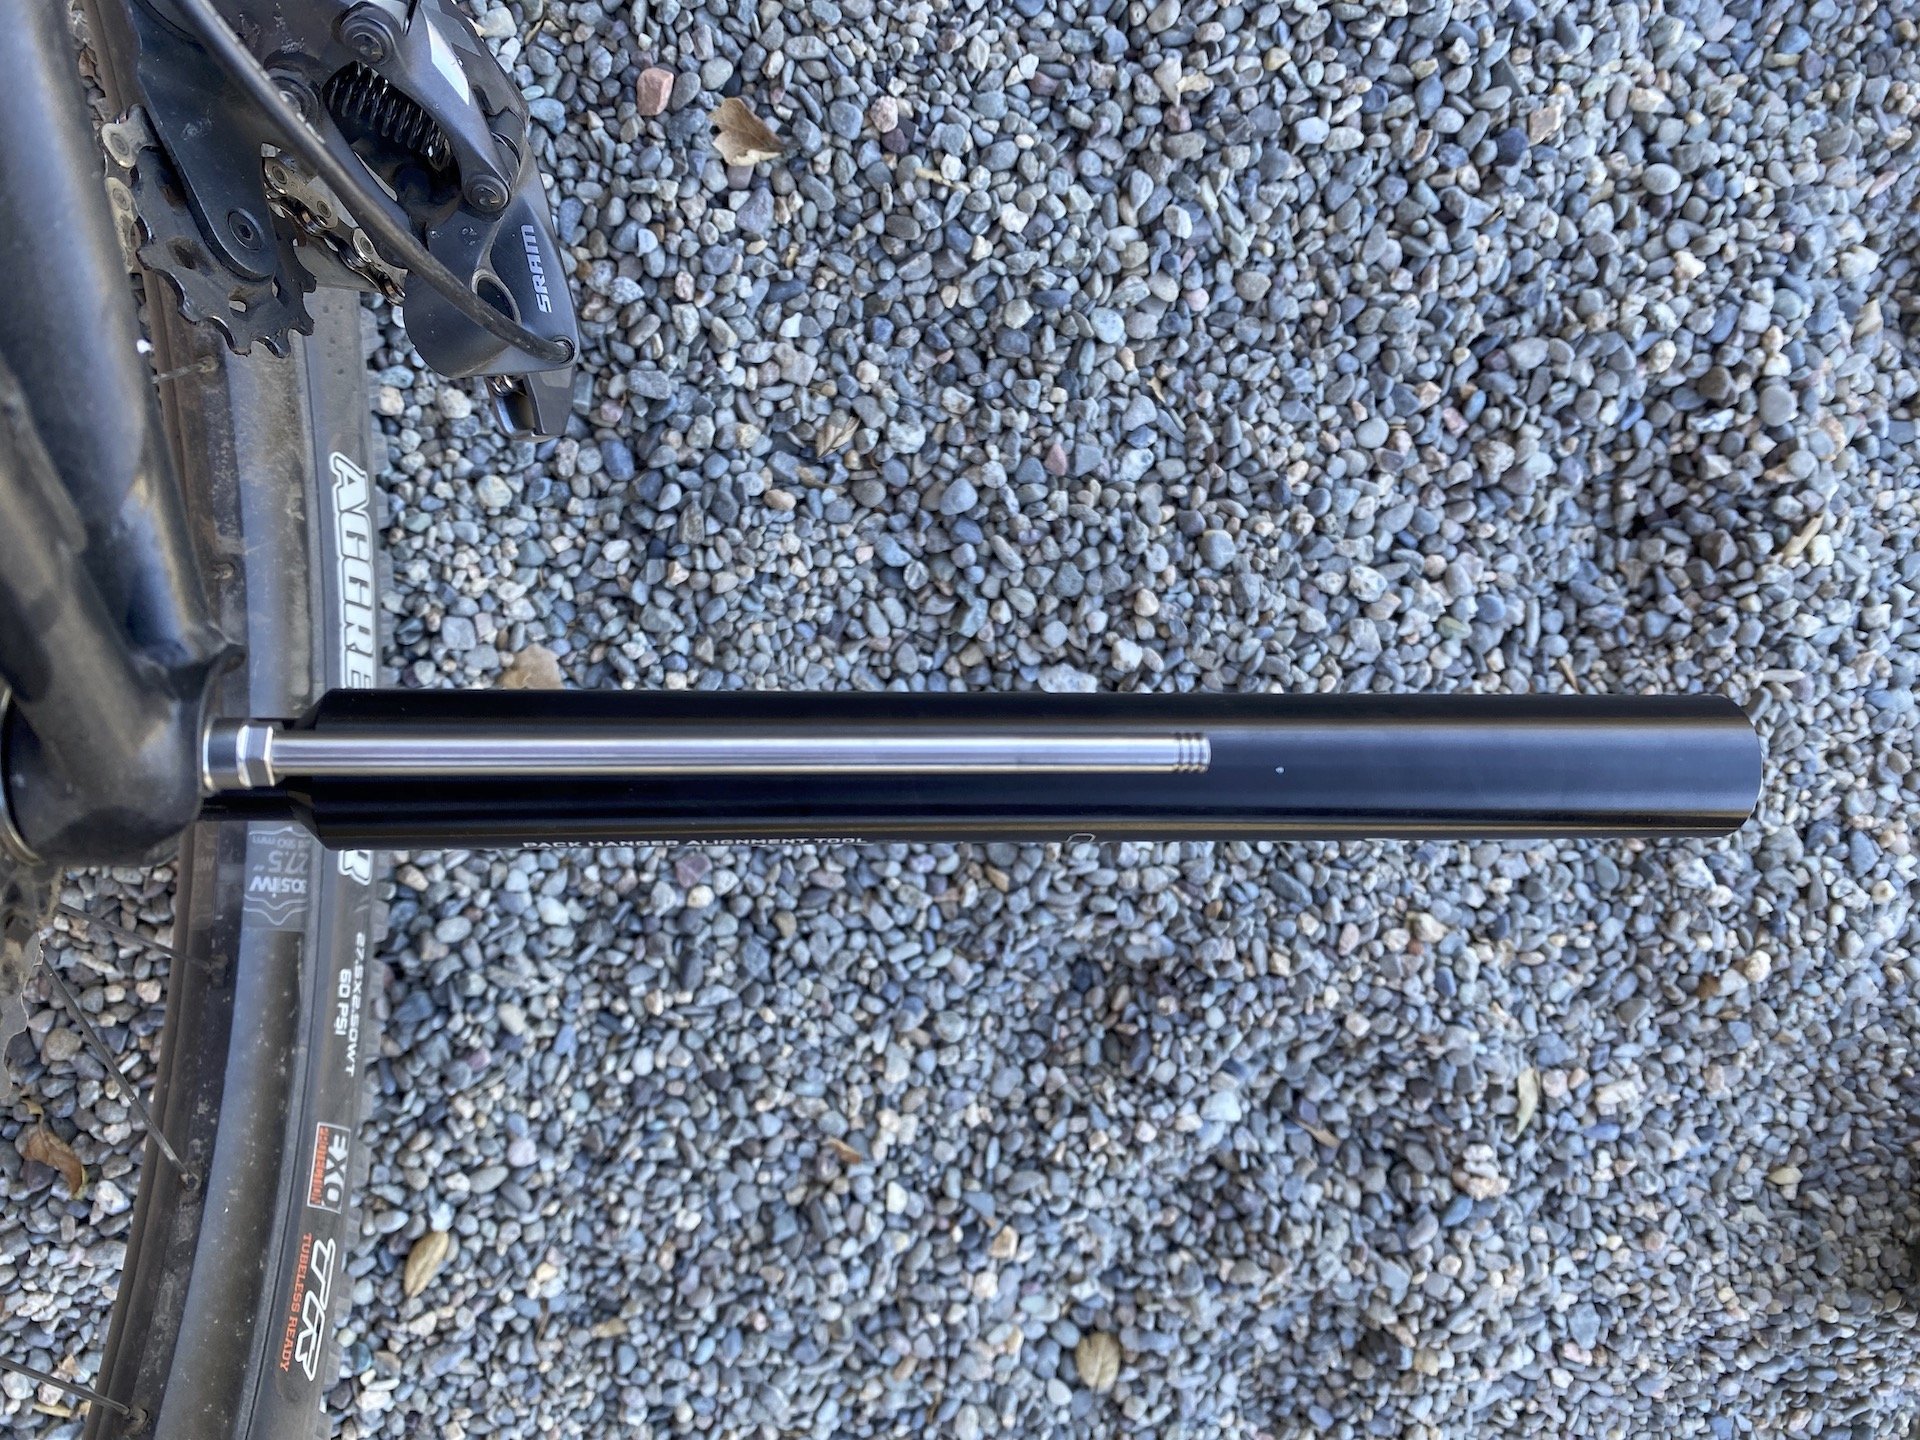
To use the P.H.A.T, you need to remove the derailleur, as well as the rear axle. Then you match the P.H.A.T axle tips with the axle from your bike, making sure to DO THIS PART RIGHT. Thread the Dummy axle in where your old axle was, slide the tightening knob into place then rock/snug the assembly finger tight. Thread the hanger handle onto the derailleur hanger, gently extend the indicator rod, commence eyeballin' and start straightenin'.
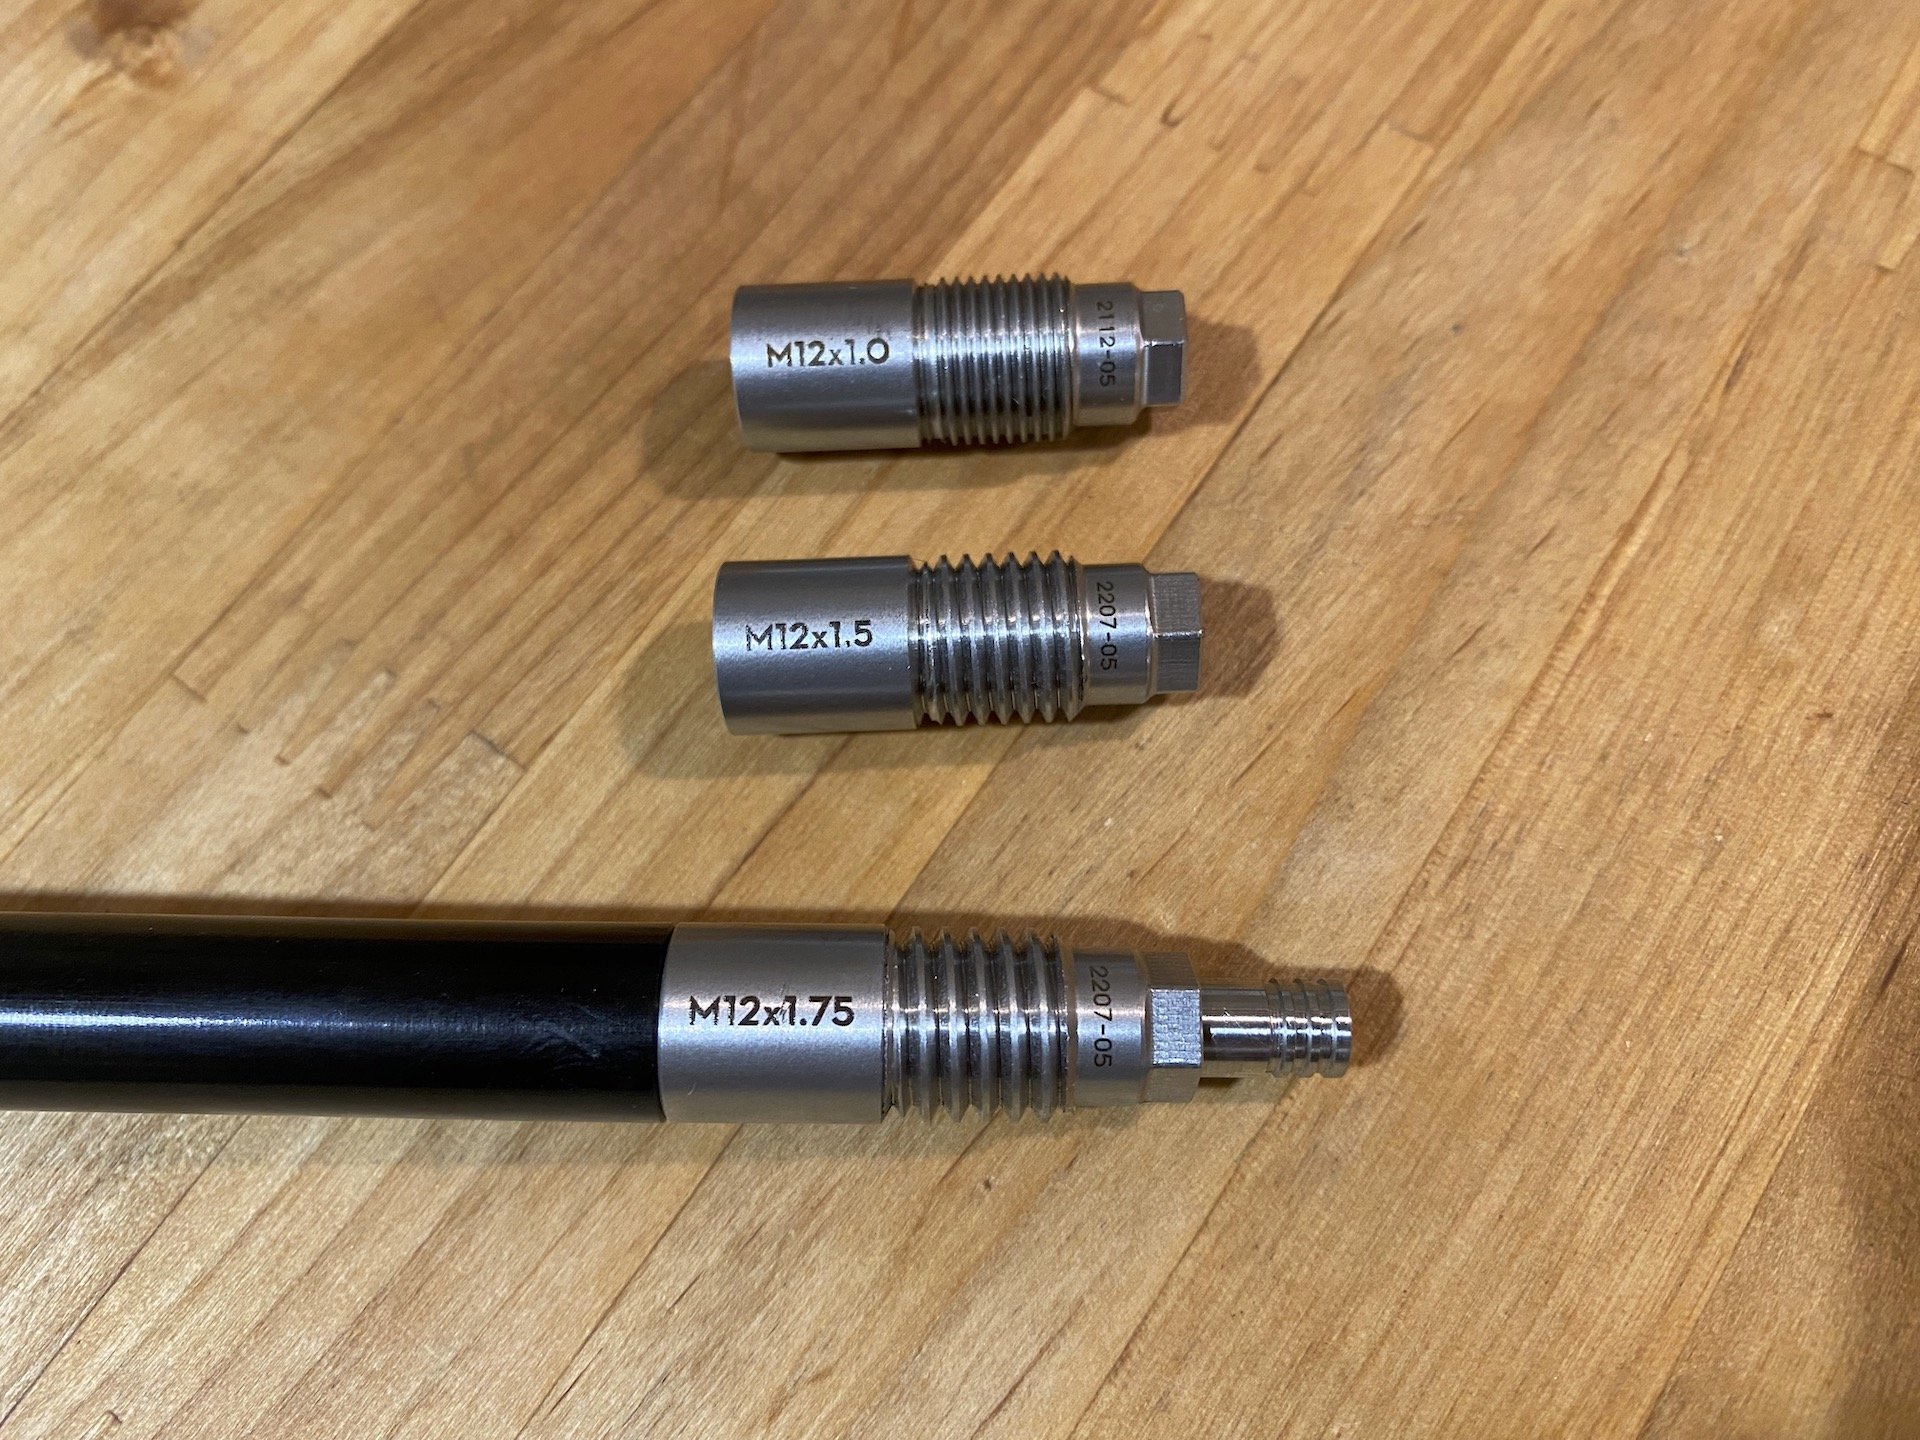
The Wolf Tooth P.H.A.T comes with three axle tips.
Match the axle with the correct tip, and get to straightening. Do this part right. Do it wrong, and well, at least it was a replaceable hanger you were trying to straighten, right?
I'm old as dirt, and have been using either Park DAGs or really long 6mm Allen wrenches for the past 35 years, so it took me about five minutes to get used to the difference here, but it did the job on a freshly wambled rear hanger and had a cantankerous XO Eagle 12-speed derailleur shifting fine again in short order. It works! But it is a bit different, and there are definite pluses and minuses to consider.
First, the hanger handle is shorter and offers less leverage than the long bar on the bigger "old style" tools. That means it requires more effort to get things in line. On one hand, this is good - it will also require more effort to snap a hanger clean off. On the other, as one applies more effort, it can sometimes be difficult to precisely meter that effort, so maybe, just maybe, one could argue that it's more difficult to apply just the right amount of oomph to the afflicted hanger. Personally, I think this is a matter of calibration. It just feels a little different and takes some getting used to for people used to the old long bar type tools.
Second, you need to visually align two parallel tubes of differing diameters, and there isn't a clearly etched set of reference marks on the body of the tool or any handy cheat sheet. It's not really necessary, since it is pretty easy to reference the edge of the black hanger handle against the shiny silver of the alignment rod, but it could conceivably mess with people who have moderate to severe astigmatism, or who have short vision issues. However...
Third, some people might claim that the old way - having a feeler gauge tapping on a rim - is a more accurate way to measure alignment. I doubt that assertion. Rims are not always perfectly true, and most of the more modestly priced long arm tools have some degree of either slop or futzy operation to their feeler gauges (which need to be slid up and down along the gauge arm since they are not rotating concentrically with the rim) that it takes practice to get good and consistent with that method.
Fourth, you need to remove both the rear axle and derailleur. With the long bar tools, you only need to remove the derailleur. Buuuut, I think using the bore of the rear axle for alignment is on the whole a more accurate point of reference than using a rim, see above. So, once you get the hang of it, the process takes about two minutes more, from soup to nuts, maybe, but is also likely to yield more predictably accurate results, maybe.
I bought this thing out of curiosity, because I had a couple hangers that had been mangled, and because I like nice tools but can't justify paying twice this much for the super swank Abbey piece of kit. Also, while I don't really buy into the packability aspect (see reasons 1-4 at the top of this scroll), I do value a tool that can fit into a toolkit unobtrusively and be relied upon to consistently do its job. Meaning, I may not pack it on rides, but I sure as hell will take it on the road in the travel toolkit. To that end, the P.H.A.T is beautifully compact compared to every other alternative.
Before: 12 gears with 11 clicks, depending on cable tension it sorta worked okay in the bottom three, or the top three, or three somewhere in the middle, but basically, ugh...
After: 12 for 12, every gear where it needs to be. We now resume our regularly scheduled broadcast...
Final thoughts: I like it, but I am a tool nerd and I am fully aware of the "oops" limits of most aluminum hangers. If you are not a tool nerd, and if you subscribe to the "tighten until it strips then back it off a quarter turn" school of wrenching, you could better spend your coin on other things. Lastly, this is a thru-axle only tool. It can also be purchased as a kit with a q.r axle adaptor, or as a q.r only tool, or the q.r adaptor can be purchased separately.
Ahhh, q.r rear axles. Remember those? Sigh... I wonder if anyone is trying to adapt a 135 q.r rear end to SRAM UDH yet. Hey, here's a video of how this here tool works!


Comments
MTB_THETOWN
9 months, 3 weeks ago
The problem with just getting multiple spare hangers is that many frames aren't straight. I have seen many brand new bikes where after checking the hanger with my Abbey HAG, it needed a little adjustment. Fresh hanger won't fix that. HAG is expensive, but I had the cyclus cheap one before and the HAG turns this task from a chore to a joy.
The way I get around the rim possibly not being straight (I read this somewhere, probably from Dave Rome, or could have been Calvinfrom Park tool) is by turning the wheel as i go and measuring at the same spot on the rim ti account for any differences (usually the valve stem). That way I'm getting the same measurements everywhere.
Reply
Mike Ferrentino
9 months, 3 weeks ago
True regarding frame straightness - however, if you head out on a ride and your bike is shifting fine, and at some point during the ride you kiss a rock or throw your bike off a cliff and then your bike is no longer shifting fine, I'm willing to bet the hanger bent, and not the frame. So, for carrying a "thing" around in your ride gear to account for mid-ride shenanigans, I would still opt to carry a hanger over a tool. That's the point I was trying to make about the portability.
Reply
XXX_er
9 months, 2 weeks ago
I have always found replacement hangers to be close enough, but if you break the hanger the bike isnt going to shift at all which is why I would carry a spare,
Reply
Justin White
9 months, 3 weeks ago
Spinning the wheel to follow the tool and measuring always from the same place on the wheel is the only way to do it correctly. Anyone teaching anything else is doing it wrong.
But you still need to deal with sliding the gauge pin along the tool over and over again, and that's a pain, and is why this tool is so nice. Even without the portability (I've never brought mine on a ride, though it does go in the road-trip tool-bag), that alone makes it so worth it to me.
If your frame is that bad, it might be worth installing and aligning you spare hanger ahead of time. On the other hand, many recent hangers (including UDH) are positioned by the hub and axle as well as the frame, so the frame would have to be really really bad to truly fubar hanger alignment, maybe bad enough that it might be worth looking into a warranty replacement.
Reply
kcy4130
9 months, 3 weeks ago
It's a pretty small use case, but I could see it being useful to have one on a long multi day large group ride. But I suspect the main use will be wc mechanics and others that have to pack tools for air travel, where a conventional tool is probably too heavy and bulky. I also really like that wolf tooth comes up with some very original ideas.
Reply
Justin White
9 months, 3 weeks ago
I love this tool (despite not needing it at all lately thanks to North Shore Billet)!
One tip, though: depending on your hanger design, you'll want to make sure the dummy axle is pretty snug before trying the alignment.
With Specialized "sandwich hangers", the dummy axle doesn't actually contact the inner plate. Which means you can make adjustments that won't really "take" without good pressure from the hub end-cap holding the inner plate in place. I learned this by trying to make adjustments without the wheel in place, and saw the inner plate moving around the axle. I have a friend with a mini-mill and we have drawn up plans to machine a small "dummy end-cap" to screw onto the dummy axle to apply force to the inner plate without the wheel needing to be in place. Until then, I just make sure to carefully snug up the dummy axle to a decent fraction of the normal axle torque, to hold that inner plate nice and snug (though I still find it easier to move around the bike and operate the tool with the wheel out of the way).
On the other hand, NSB's burly Sandwich Hanger is way stronger than Spesh's, and I haven't had to make adjustments since installing it about 1.5 years ago.
And actually, the OEM ones aren't even bad, it was actually the crappy GX b-pivot getting wobbly that had me hunting down a stiffer hanger, thinking that the OEM hangers couldn't handle even a single impact and subsequent adjustment. Turns out they can, but even the most perfect hanger adjustment can make up for a sloppy b-pivot. Yet, I don't regret the NSB purchase at all, it's a great piece and, based on the marks on the XT mech that went on soon after, has handled a decent amount of smacks without even needing alignment.
Reply
rolly
9 months, 2 weeks ago
I went through three OEM hangars on my Norco Sight before I finally went with NSB's version. I should've done that from the start. With Shimano's 12 spd system the hangars need to be pretty much perfect, and the OEM hangars are not that.
Reply
danithemechanic
9 months, 3 weeks ago
The '20s will forever be remembered as "the redundancy years".
Every second new product these days seems to solve in a aestethically pleasant manner an already solved problem, at the cost of a hefty price tag.
You lost me at "eyeballing" Mike: my C02 cartridge that's been rattling in my pack for years now is the perfect eyeballing hanger straightening tool and for just a 100th of the price of this tool.
It costs less, weights less, takes up less space, and can still perform this task if it has been used to inflate a tire.
Reply
Mike Ferrentino
9 months, 3 weeks ago
You have your CO2 cartridge, I have my long 6mm Allen wrench. There are a plenty of ways to sorta skin that cat when it comes to roughly getting it done. Same as you can use a block of wood and a hammer instead of a press tool, or a Leatherman file instead of a facing tool. I'm not claiming this thing is a necessity, but I still like it anyway.
Reply
Perry Schebel
9 months, 3 weeks ago
"you can use a block of wood and a hammer instead of a press tool"
i feel seen
Reply
Justin White
9 months, 3 weeks ago
What do you reference the cartridge against?
Reply
Martin
9 months, 3 weeks ago
I myself bring a hardcover book that I’m reading at the moment and rest it against the chainstay to align with the CO2 cartridge. Since getting my auto-shifting, auto-driving ebike, fixing stuff and reading while being transported in the woods became my two biggest passions.
Reply
bradfa
9 months, 2 weeks ago
I just bought a Park DAG-2.2. I already owned a DAG-1. DAG-1 fits great on almost all QR hangers but really doesn't fit on any thru-axle hangers. Both my Park DAGs have about 2mm of play in them at the rim when measuring and Park advises that "good enough" is when you have alignment within 4mm measured in 360 degrees. I thought about buying this fancy Wolf Tooth tool but the DAG-2.2 was half the price (and the cheap Chinese knock offs are half again the price of the Park).
Reply
Mike Ferrentino
9 months, 2 weeks ago
Most places I see sell the DAG 2.2 for about $84US, so, about $36 less than the Wolf Tooth. I was sorely tempted by the $128 DAG 3 because it looks more preciserer and also more quasi-futuristic, but I wanted the compactness of the Wolf Tooth unit. My toolbox already runneth over with single purpose tools that take up way too much room...
I have not used any of the knock-offs, but have heard from a few sources that some have enough slop to render them very frustrating to use.
Reply
BarryW
9 months, 3 weeks ago
What steel hardtail is that you're aligning?
Great review, and owning the Park tool I'm not likely to this because I just put the full toolbox in the rug for weekend/week bike terms and the DAG-2 lives in there, but still if I ever need space in the toolbox I think this is the best option.
And I'm glad you've mentioned the inconsistency of aligning to a possibly crooked rim. This solved all that.
Reply
Mike Ferrentino
9 months, 3 weeks ago
That's a steel full suspension bike. More on that later!
Reply
Justin White
9 months, 3 weeks ago
Crooked rim situation has been solved forever: you always measure against the same point on the wheel, spinning the wheel to get the reference point where you need it. This tool does disambiguate that by not relying on the wheel at all, but crooked rim is not the real problem it was trying to solve.
Reply
XXX_er
9 months, 3 weeks ago
will this work on my E-bike ?
edit: using the park tool at a shop is really nice, often you dont even need to adj the cable
at home I would just eyeball and bend with a cresent wrench
Reply
ClydeRide
9 months, 3 weeks ago
I want to downvote this and say ISWYDH.
Reply
XXX_er
9 months, 2 weeks ago
I have packed a spare Der hanger back when we had to ride skinnies but seriously who is going to pack a der alignment tool ?
Reply
Please log in to leave a comment.