Review
MTB Hopper Portable, Stowable Ramps
Learning to Fly
Does everyone get the, "I finally figured out how to fly!" dream? In my dream, that feels almost lucid at the best times, not only do I get to experience the sensation of Supermanning over the land, I am also certain, even as I'm waking up, that I have cracked the code for myself permanently. The disappointment that inevitably follows is muted by the glow from the aerial nocturnal experience.
Maybe it's those dreams that have made me frustrated about the way my jumping skills had been declining for years, without enough exposure to the Whistler Bike Park or neighbourhood dirt jumps. I've been clawing back a little more recently and feeling more confident, but the progress has been far too slow for my liking.
These factors made me very excited indeed to have a chance to steer my jumping progression a little without being at the mercy of opportunity or location.
After a few months playing around with MTB Hoppers I can sometimes jump and feel a little less like a squid. What I want (what I really really want) however is to click into a nice flat table top. And a whip. I don't have any thoughts about taking my hands off the bars any time I'm in the air but I bet that would feel pretty cool when executed properly.
What is it Exactly?
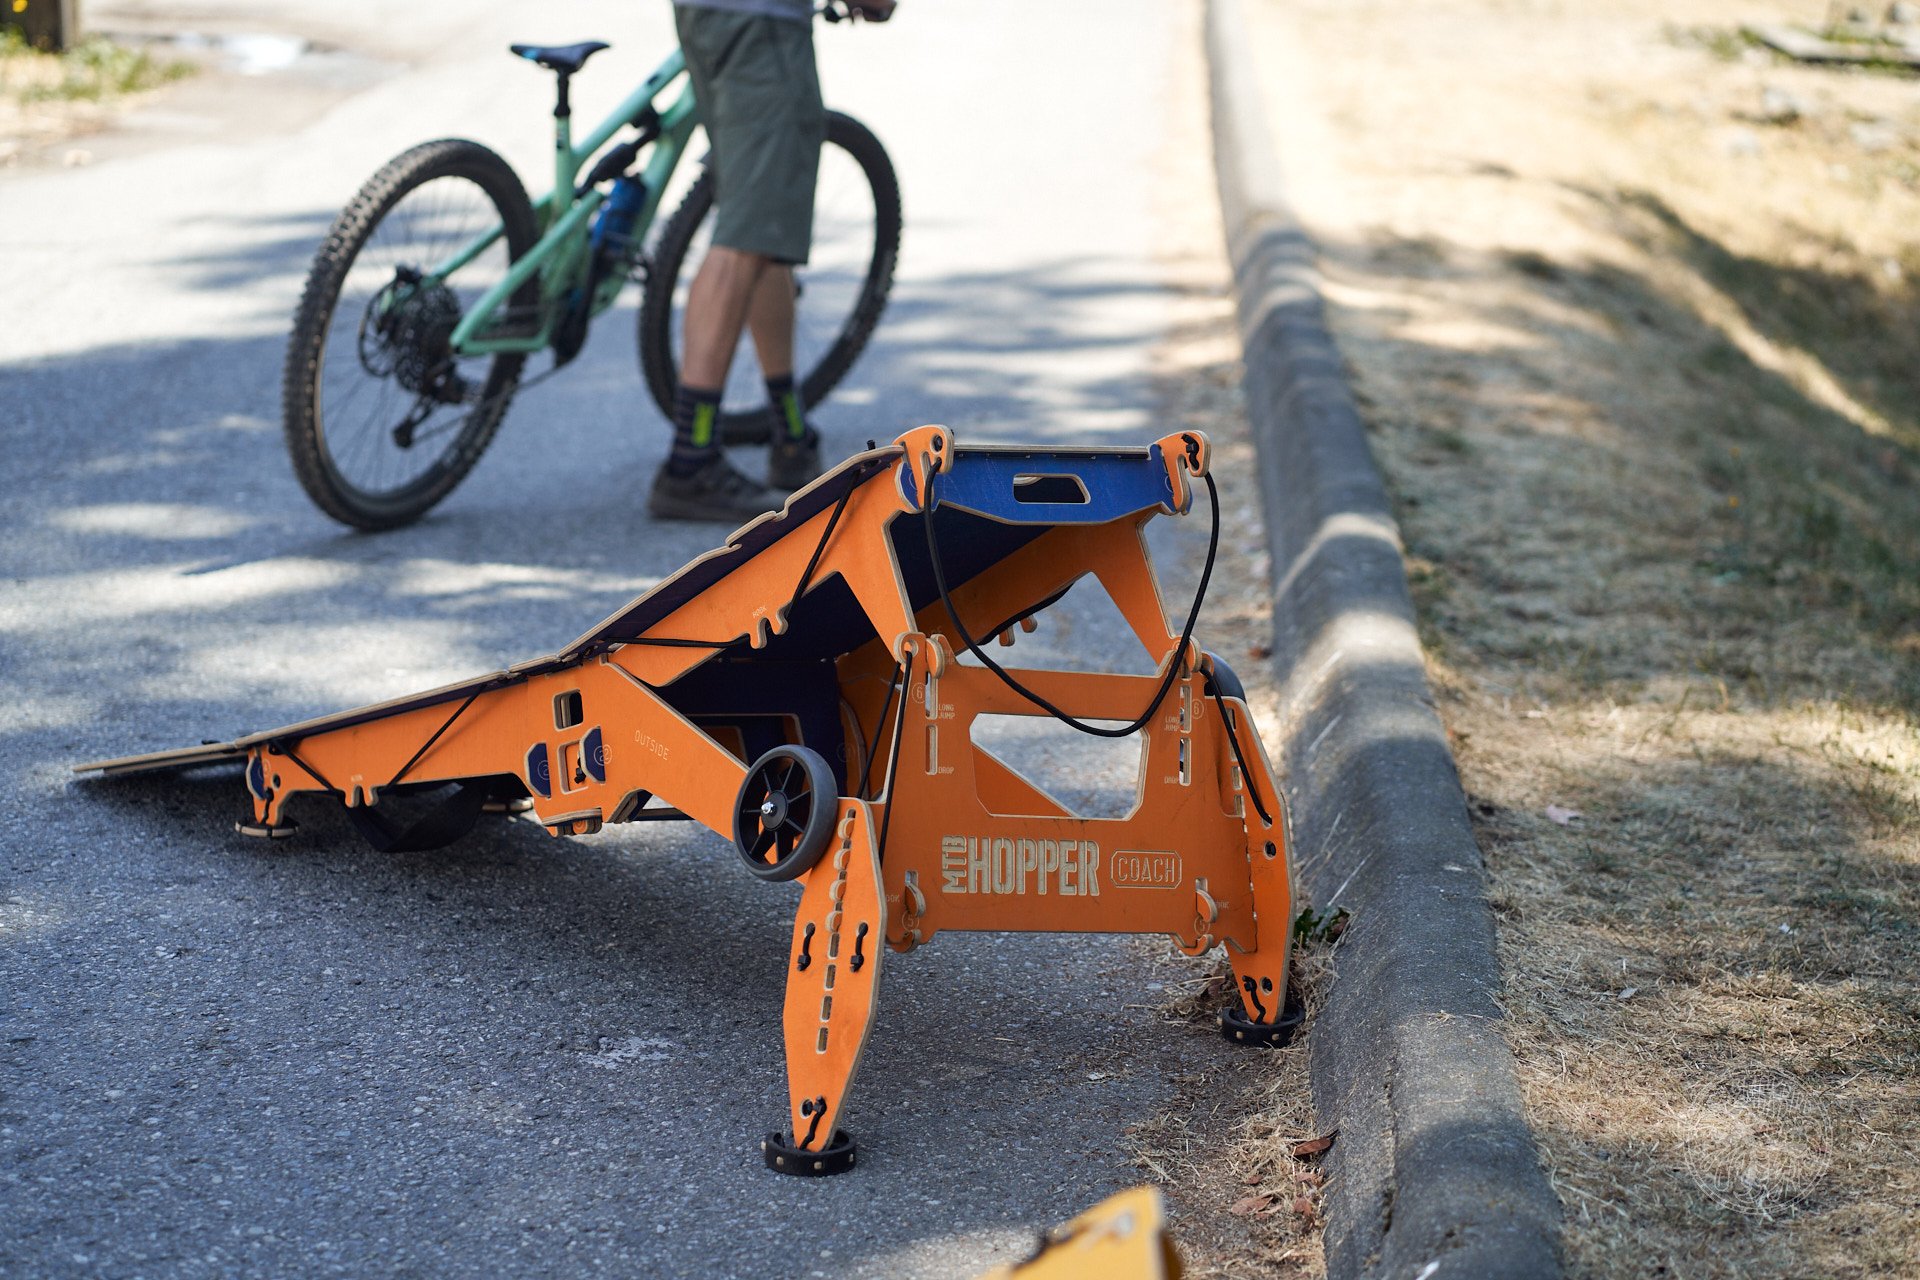
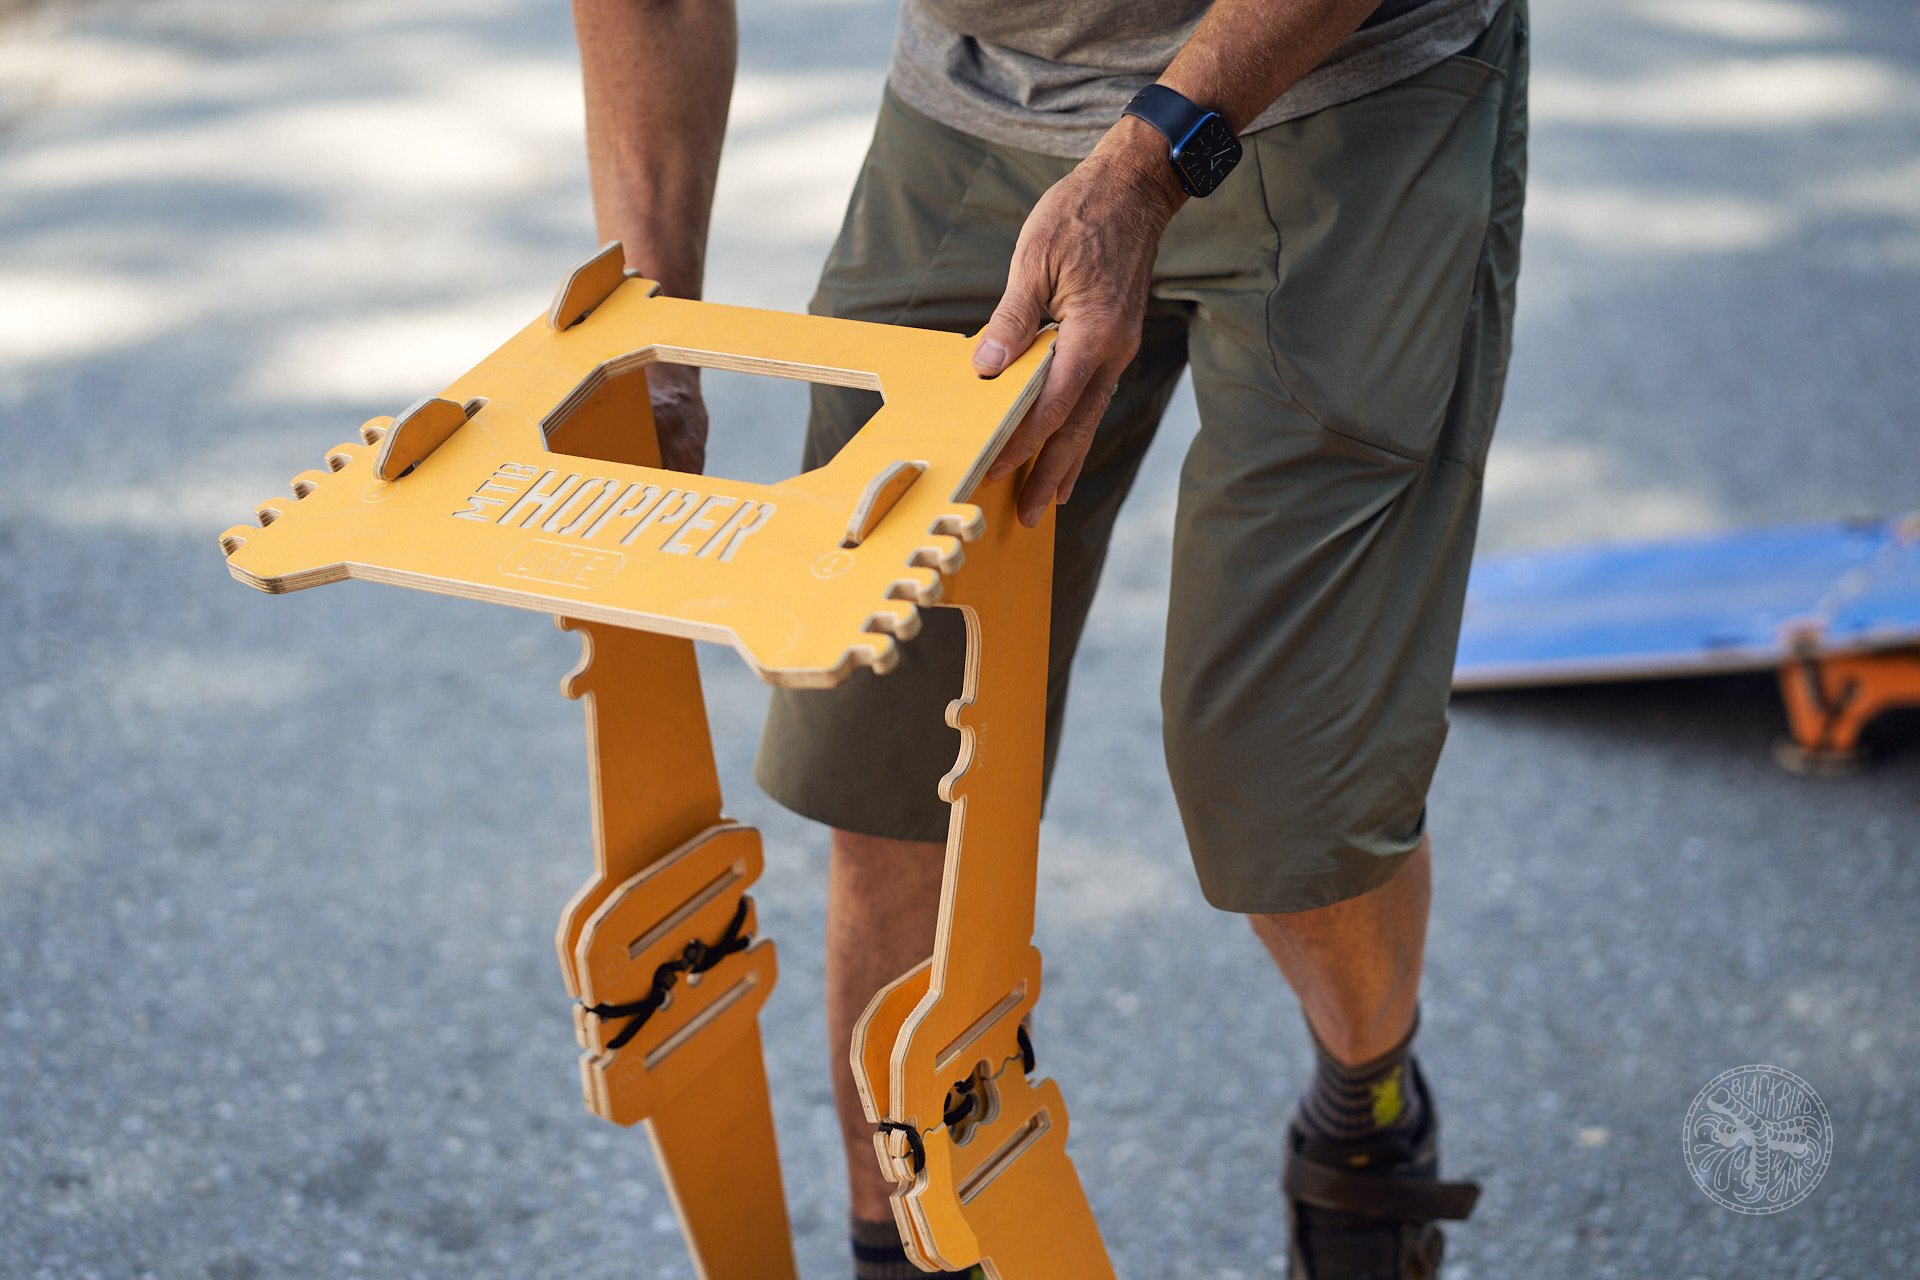
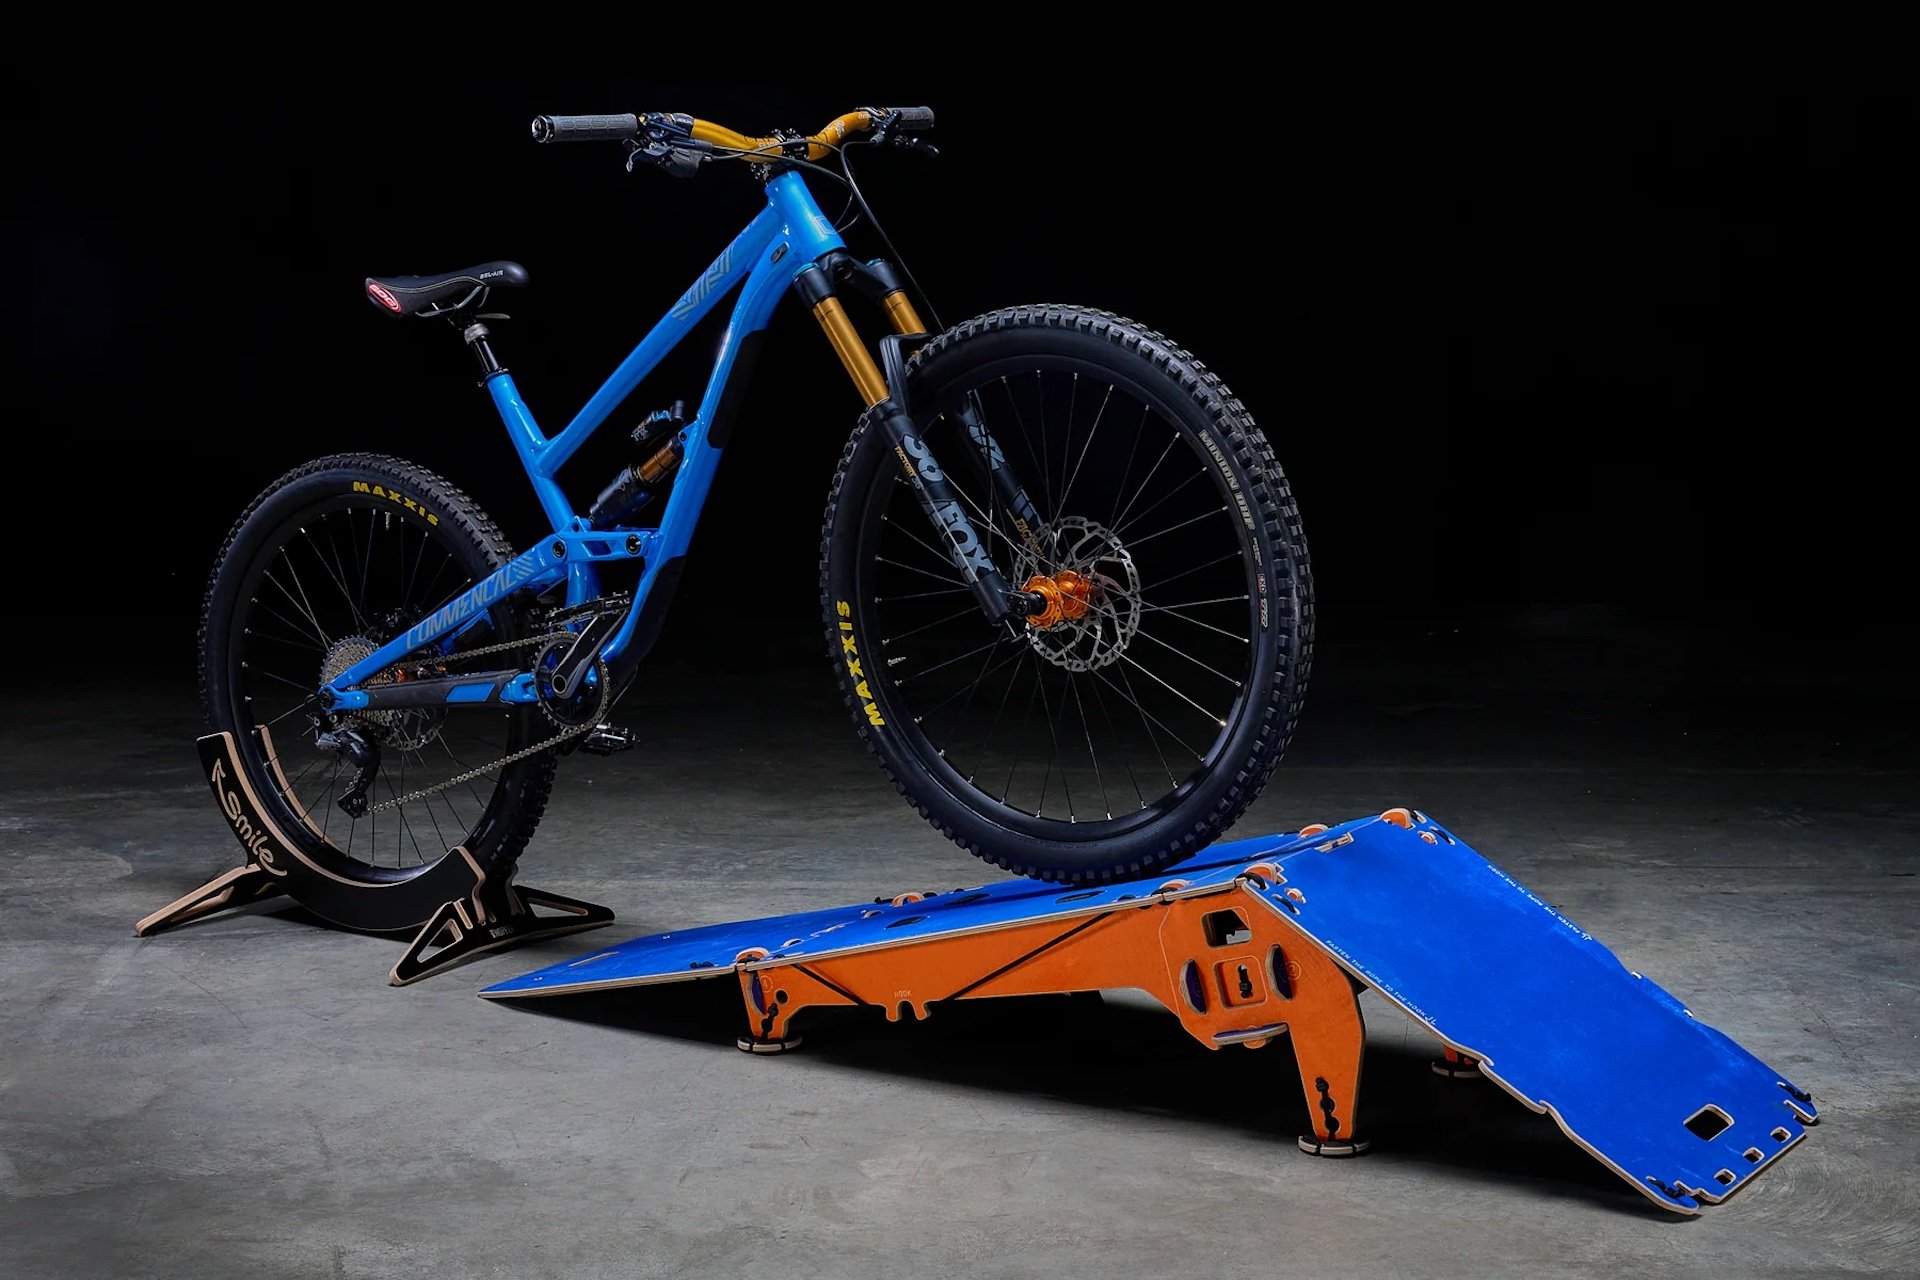
This is such a unique product that we don't even have a category for it in our system. I guess the elevator pitch would be something like this: "It's a modular bike ramp system made of laser cut plywood and held together with elastic cords, that packs flat when disassembled and can even be worn as a backpack." It's a remarkable combination of old and new technology augmented by some radical engineering.
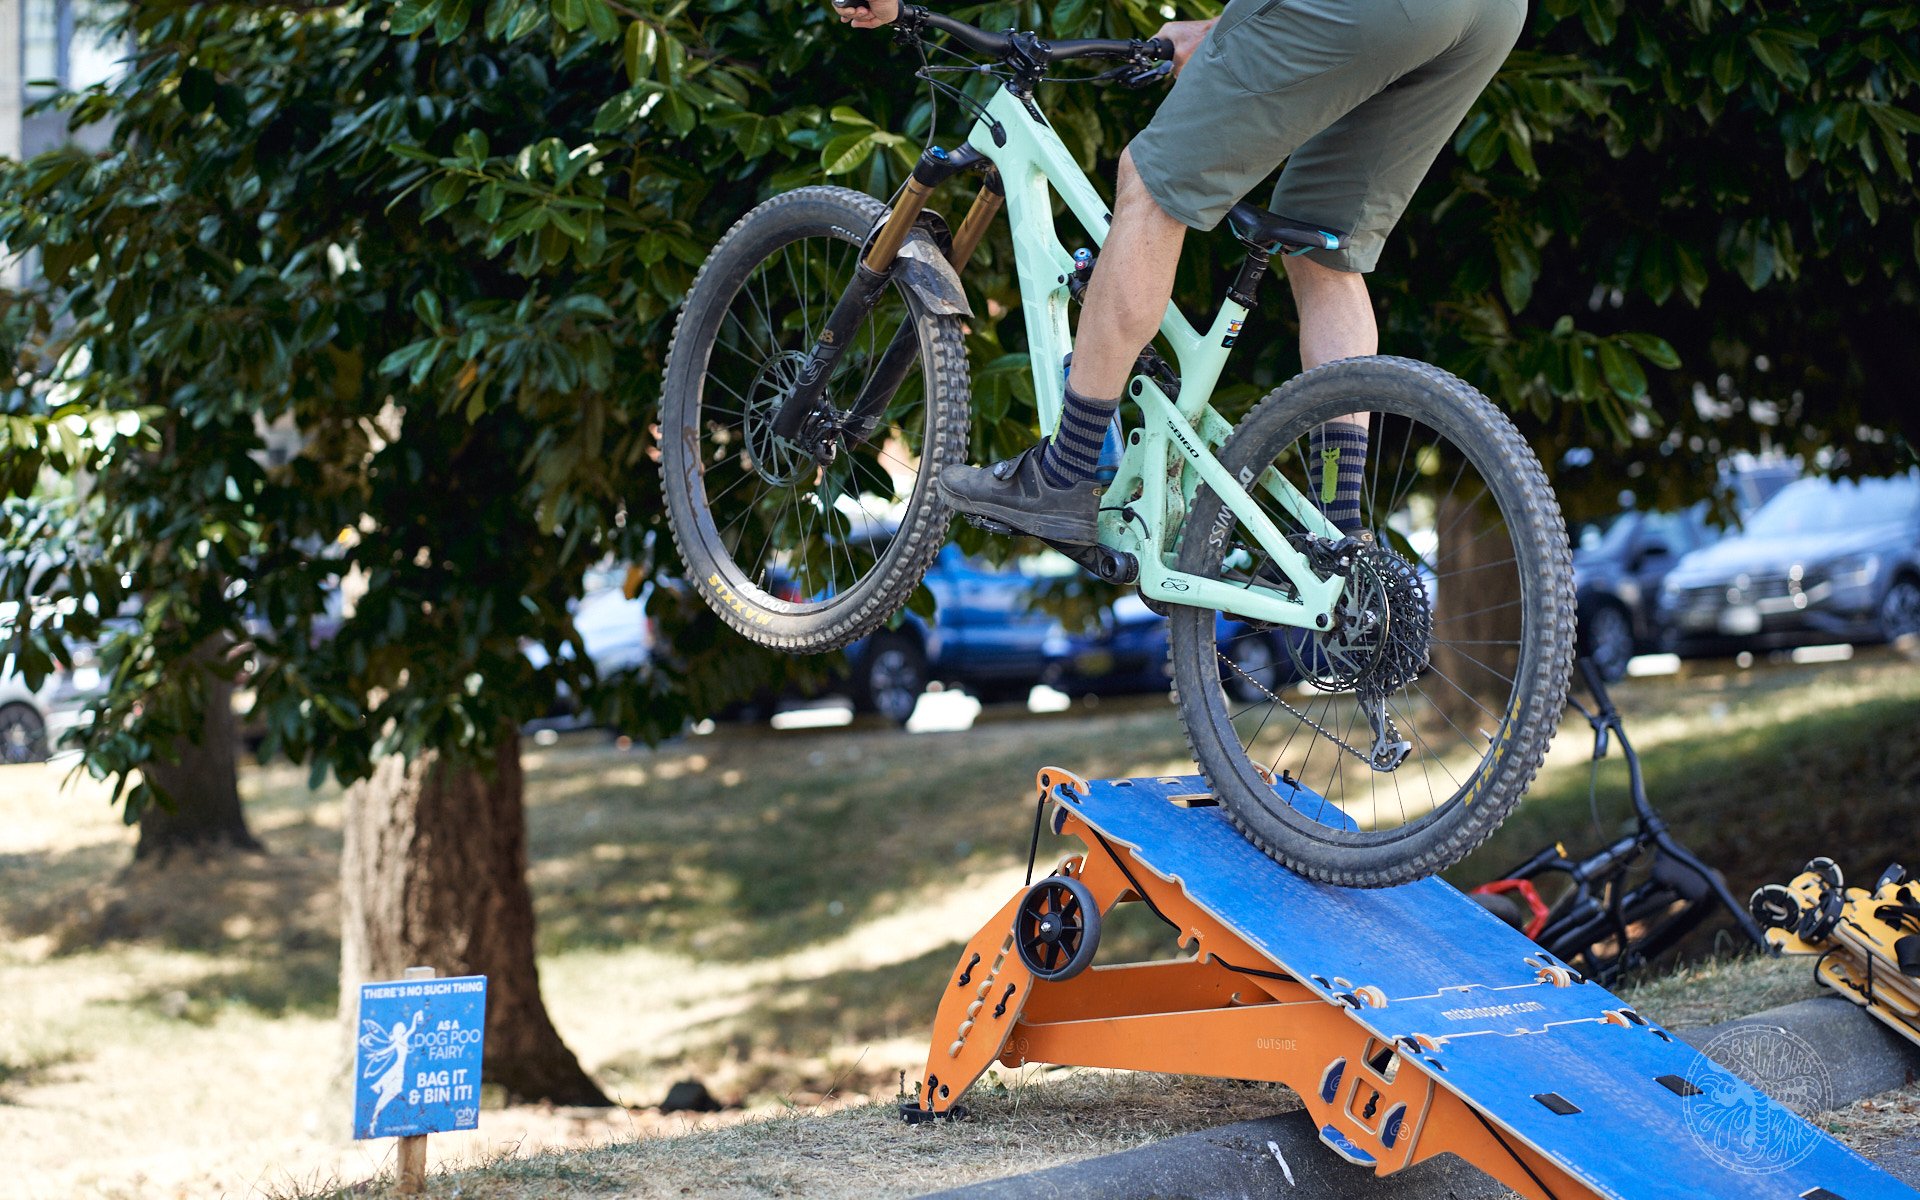
You can put an MTB Hopper virtually anywhere but the best case scenario is finding some spot where you can land on a transition, either as a step down or, if you are very lucky, with a landing that tops out even with the top of the ramp like a table top or traditional dirt jumps. In a pinch you can land it to flat or if you have two, you can use one as the take off and one as the landing.
It doesn't take much to constitute a transition however. I have used the base of trees and set up the ramps as hips by raising one of the adjustable legs more than the other and put ramps on slopes so you have as much transition as your roll in gives you.
The adaptability of MTB Hoppers is a big asset. Here the slope was perfect to set the Coach up as a drop in the middle height setting but you could use it on slopes that were more or less steep just by adjusting the legs, which takes but a moment.
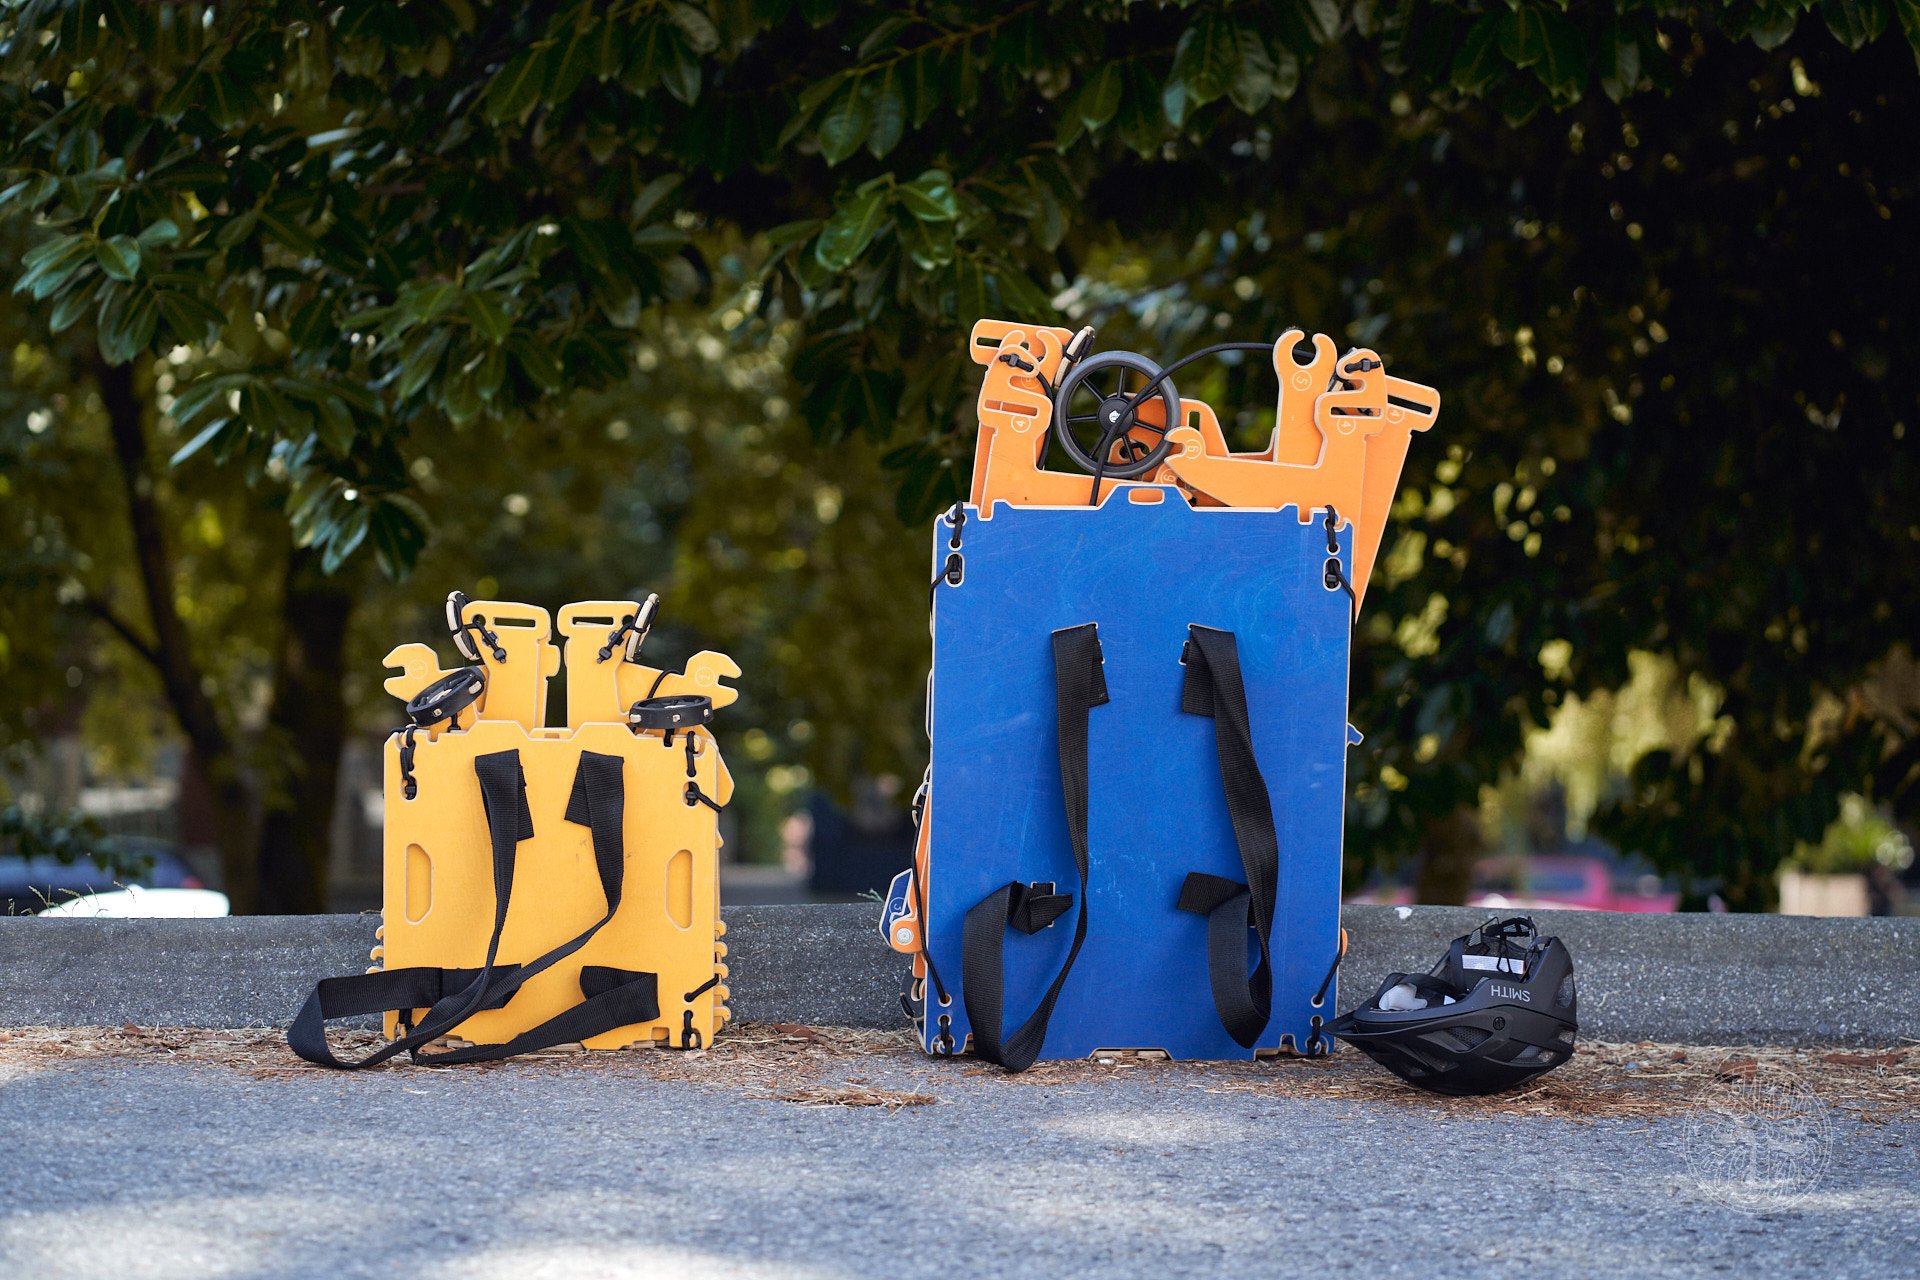
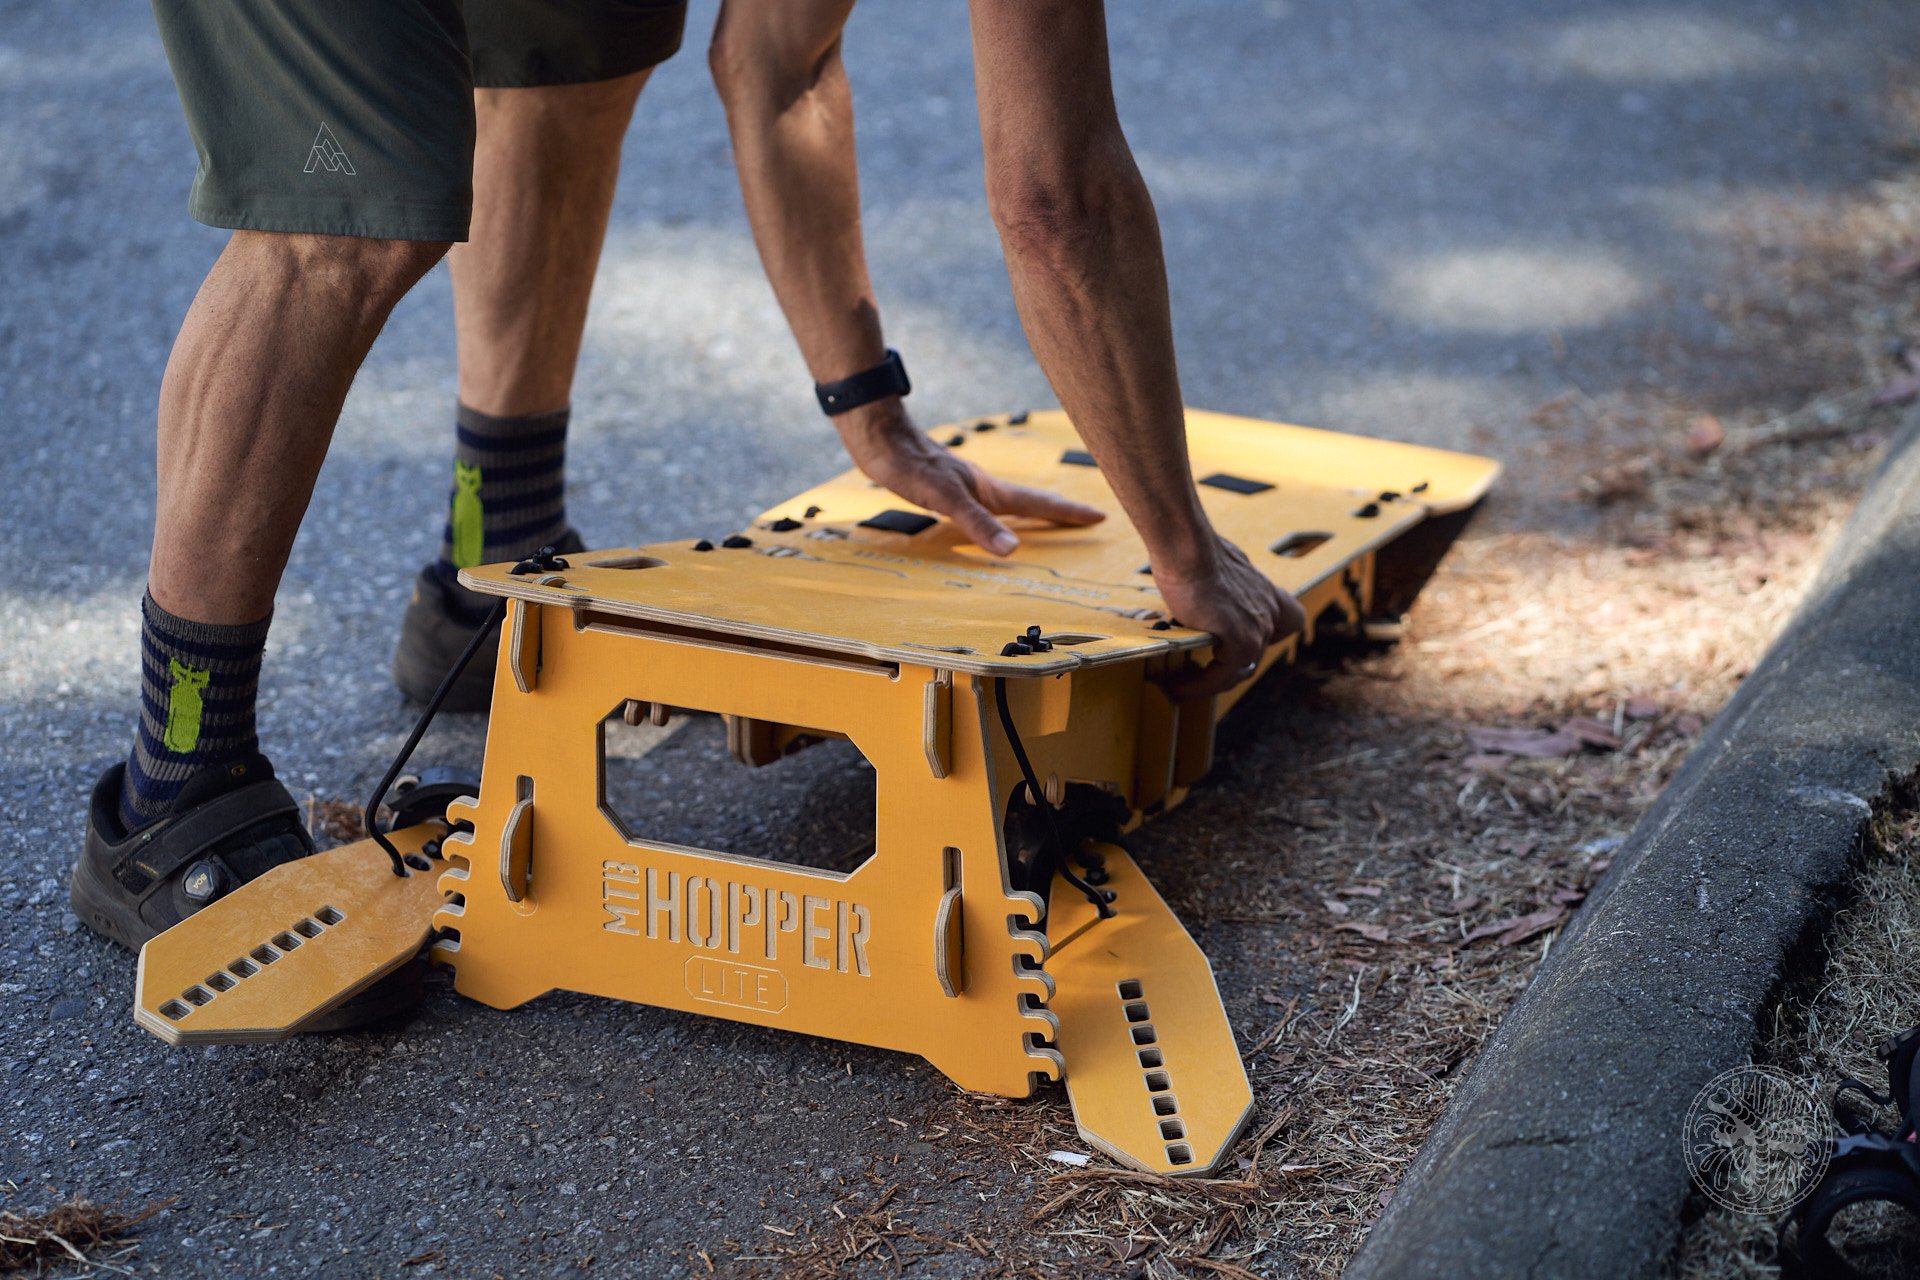
The MTB Hopper Lite (left) is substantially smaller and at 6.1 kg (13.4 lbs) it weighs less than half as much as the Coach at 15.2 kg (33.3 lbs)
Assembly and Disassembly
The tricky thing about the MTB Hopper is building it the first few times. The ramps come with thorough instructions on 11 x 17 sheets of paper, which is great, if you want to be travelling with paper or you are assembling the ramps at home. Otherwise, taking a photo of the sheets with your phone is a workable solution. Despite being pretty good with Lego as a kid, it would have taken me a very long time to figure out the build of the Coach, the larger of the two ramps, without the step-by-step guide.
Looking at a complex diagram on your phone isn't ideal but it works, and to be fair, after assembling the Lite ramp once, you'll be able to slap it together without any instructions at all. Having the diagram on a laptop would be pretty convenient as well.
Either ramp can become a hip just by extending the legs to different settings.
The Coach is a little trickier and the number of pieces can be a little daunting at first, particularly when many of them look similar and are often almost, but not quite, symmetrical. If you have that large sheet of paper in front of you, this isn't bad at all but on the phone, zooming into a large diagram, it's a little awkward, particularly if the image resets to the size of your screen. It would be great if MTB Hopper posted assembly videos of each ramp, but those would only be of limited use when you are actually in the throes of assembly. Diagrams and text, when well-executed, are much more useful in when working through a step-by-step process.
Everything fits together extremely well and I found myself amazed by the ingenuity of the system. The pieces click together precisely but not too tight. Once you have assembled everything, shock cords keep things from coming apart and add some cohesion to the system without compromising flex.
This isn't my favourite moment with the Coach ramp. The assembly instructions include a suggested arrangement of the pieces on the ground beforehand to ease the process. This is a little tedious but it's very helpful the first few times.
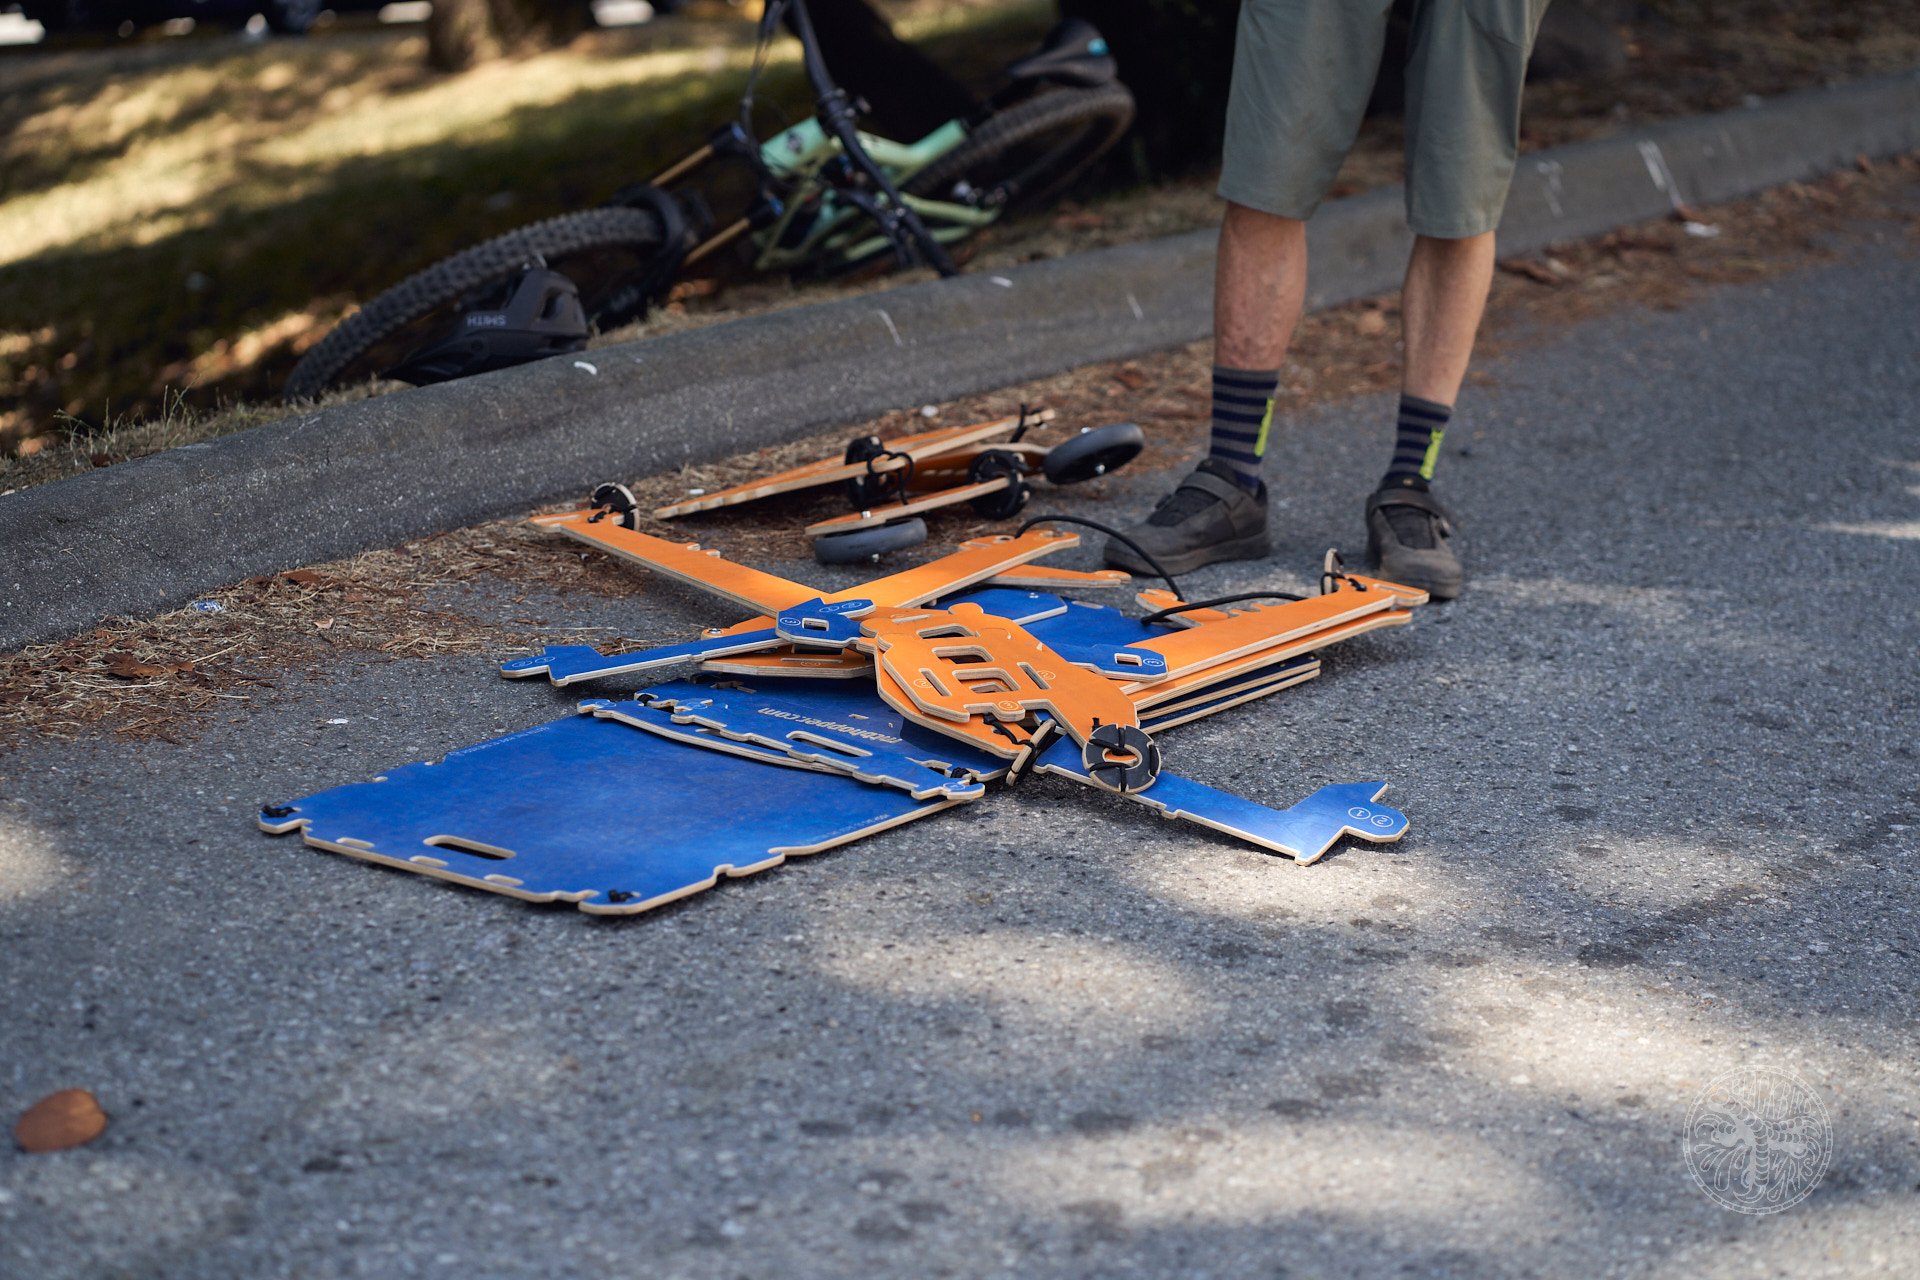
Once it's time to tear it all down, you'll need to refer to the diagrams again because turning it into a backpack is somewhat less than intuitive, and with the Coach, I have always gotten it together, but never as tidily as in photos or diagrams of how it should look.
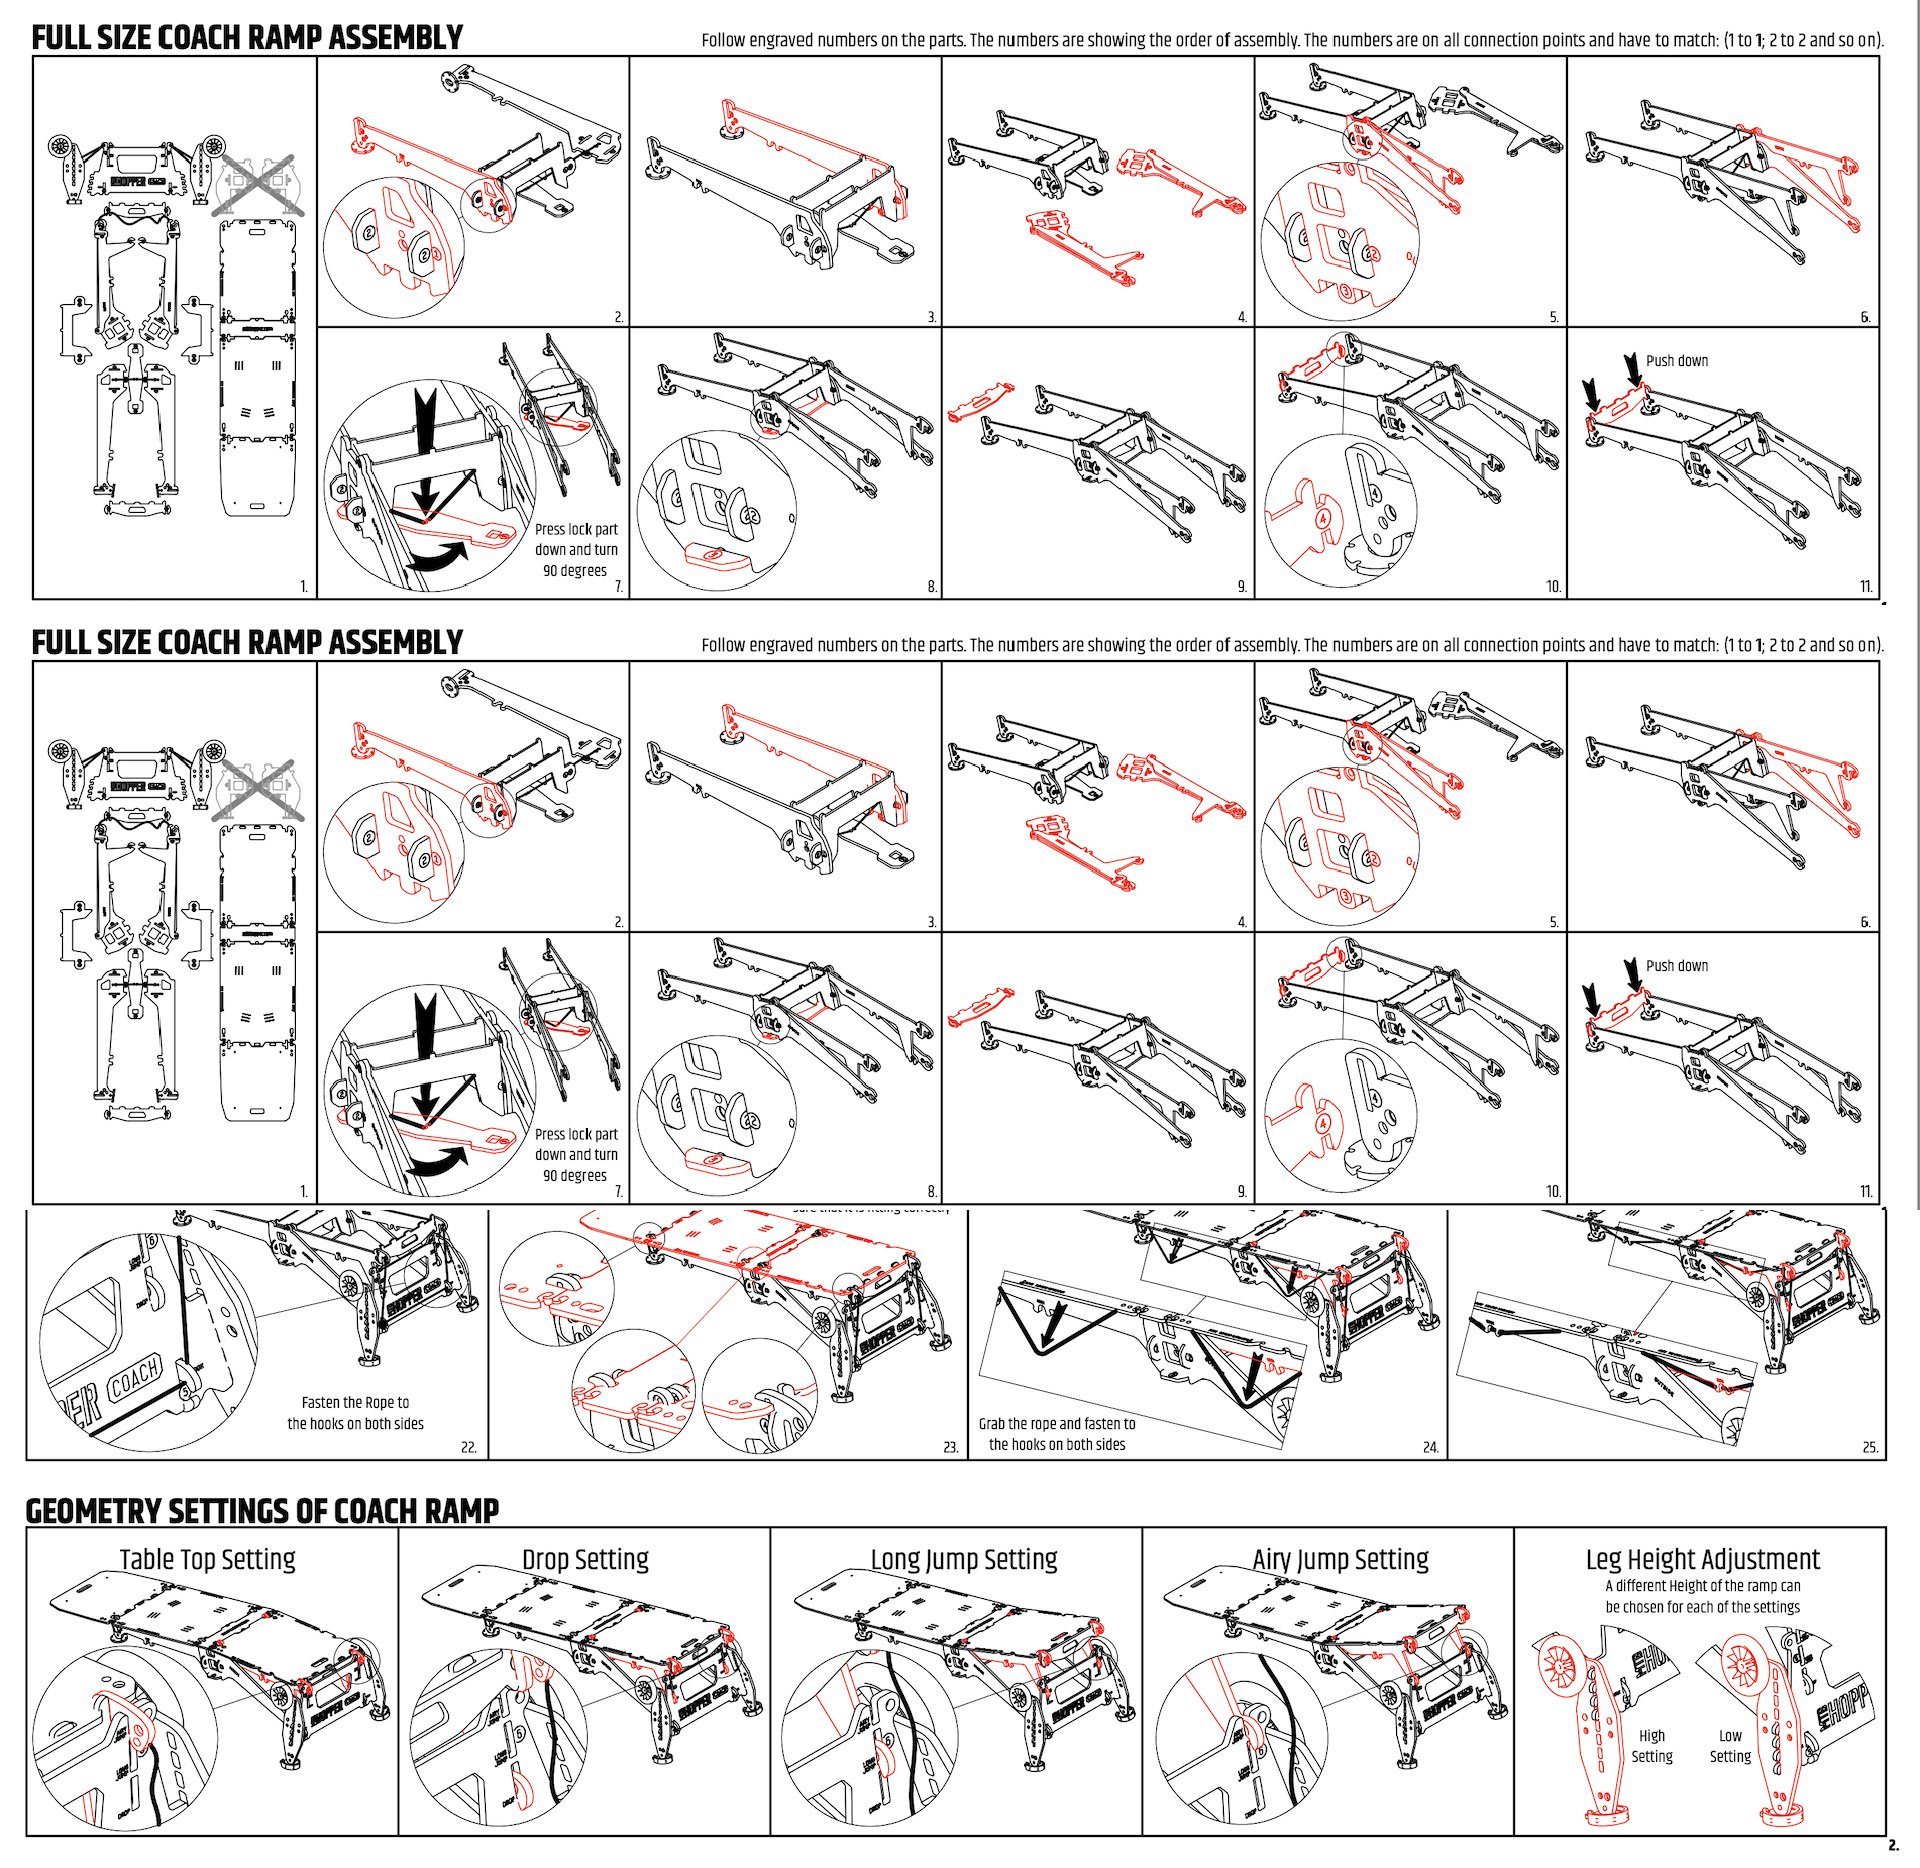
The full instructions for the Full Size Coach Ramp are on opposite sides of an 11x17 sheet of paper so what you see here is the first section with two rows of diagrams, taken from one side, along with the remaining three rows from the opposite side. The final row describes how to adjust the ramp in most of its iterations from drop, to long jump, to 'airy jump' and then to adjust the legs from the lowest setting to 130mm or 5.6" higher. With the 'Airy' jump setting and the highest leg adjustment, it's a jump you can do a lot with, but even in the lowest settings you can have a lot of fun.
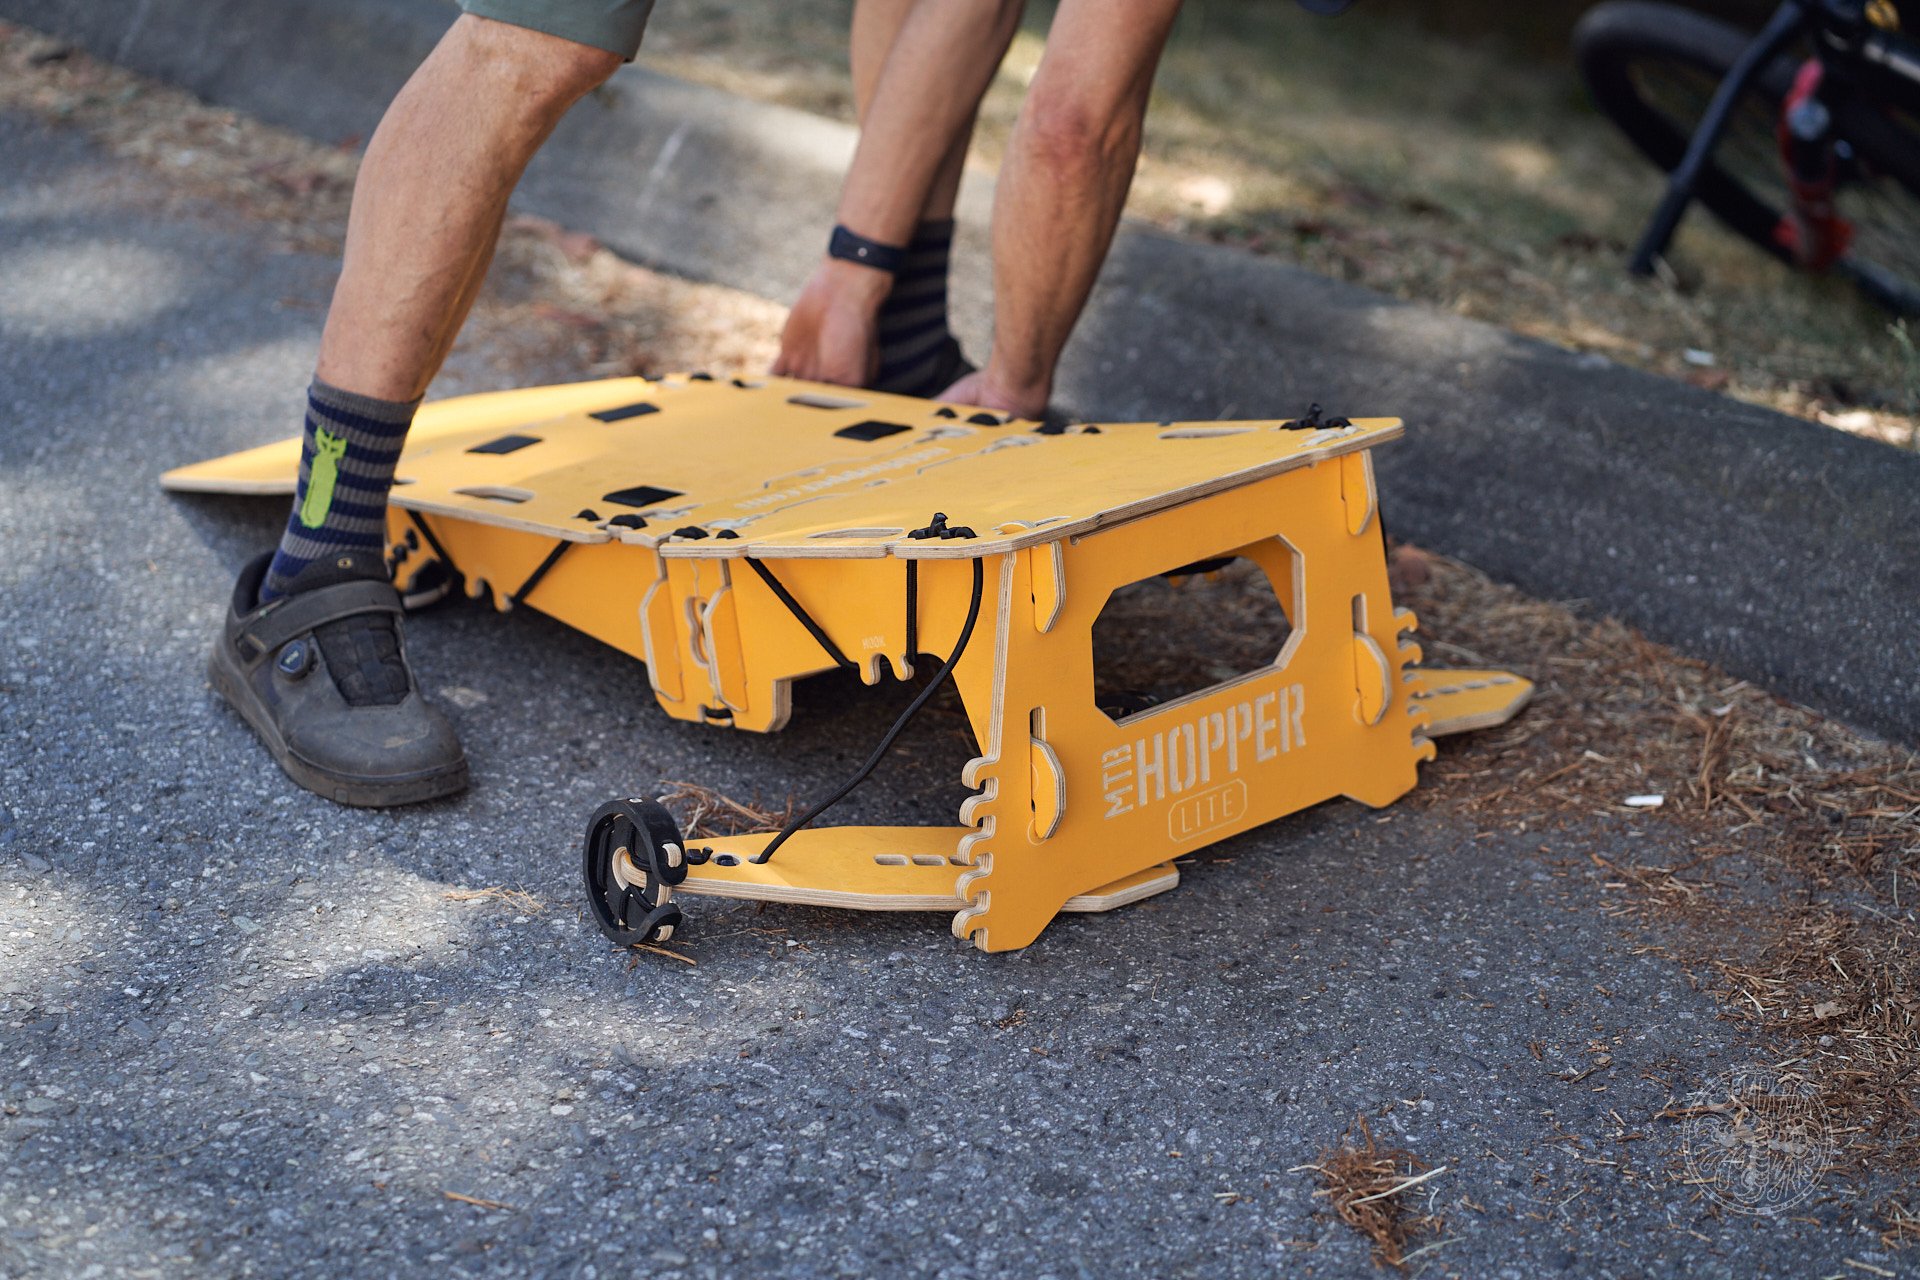
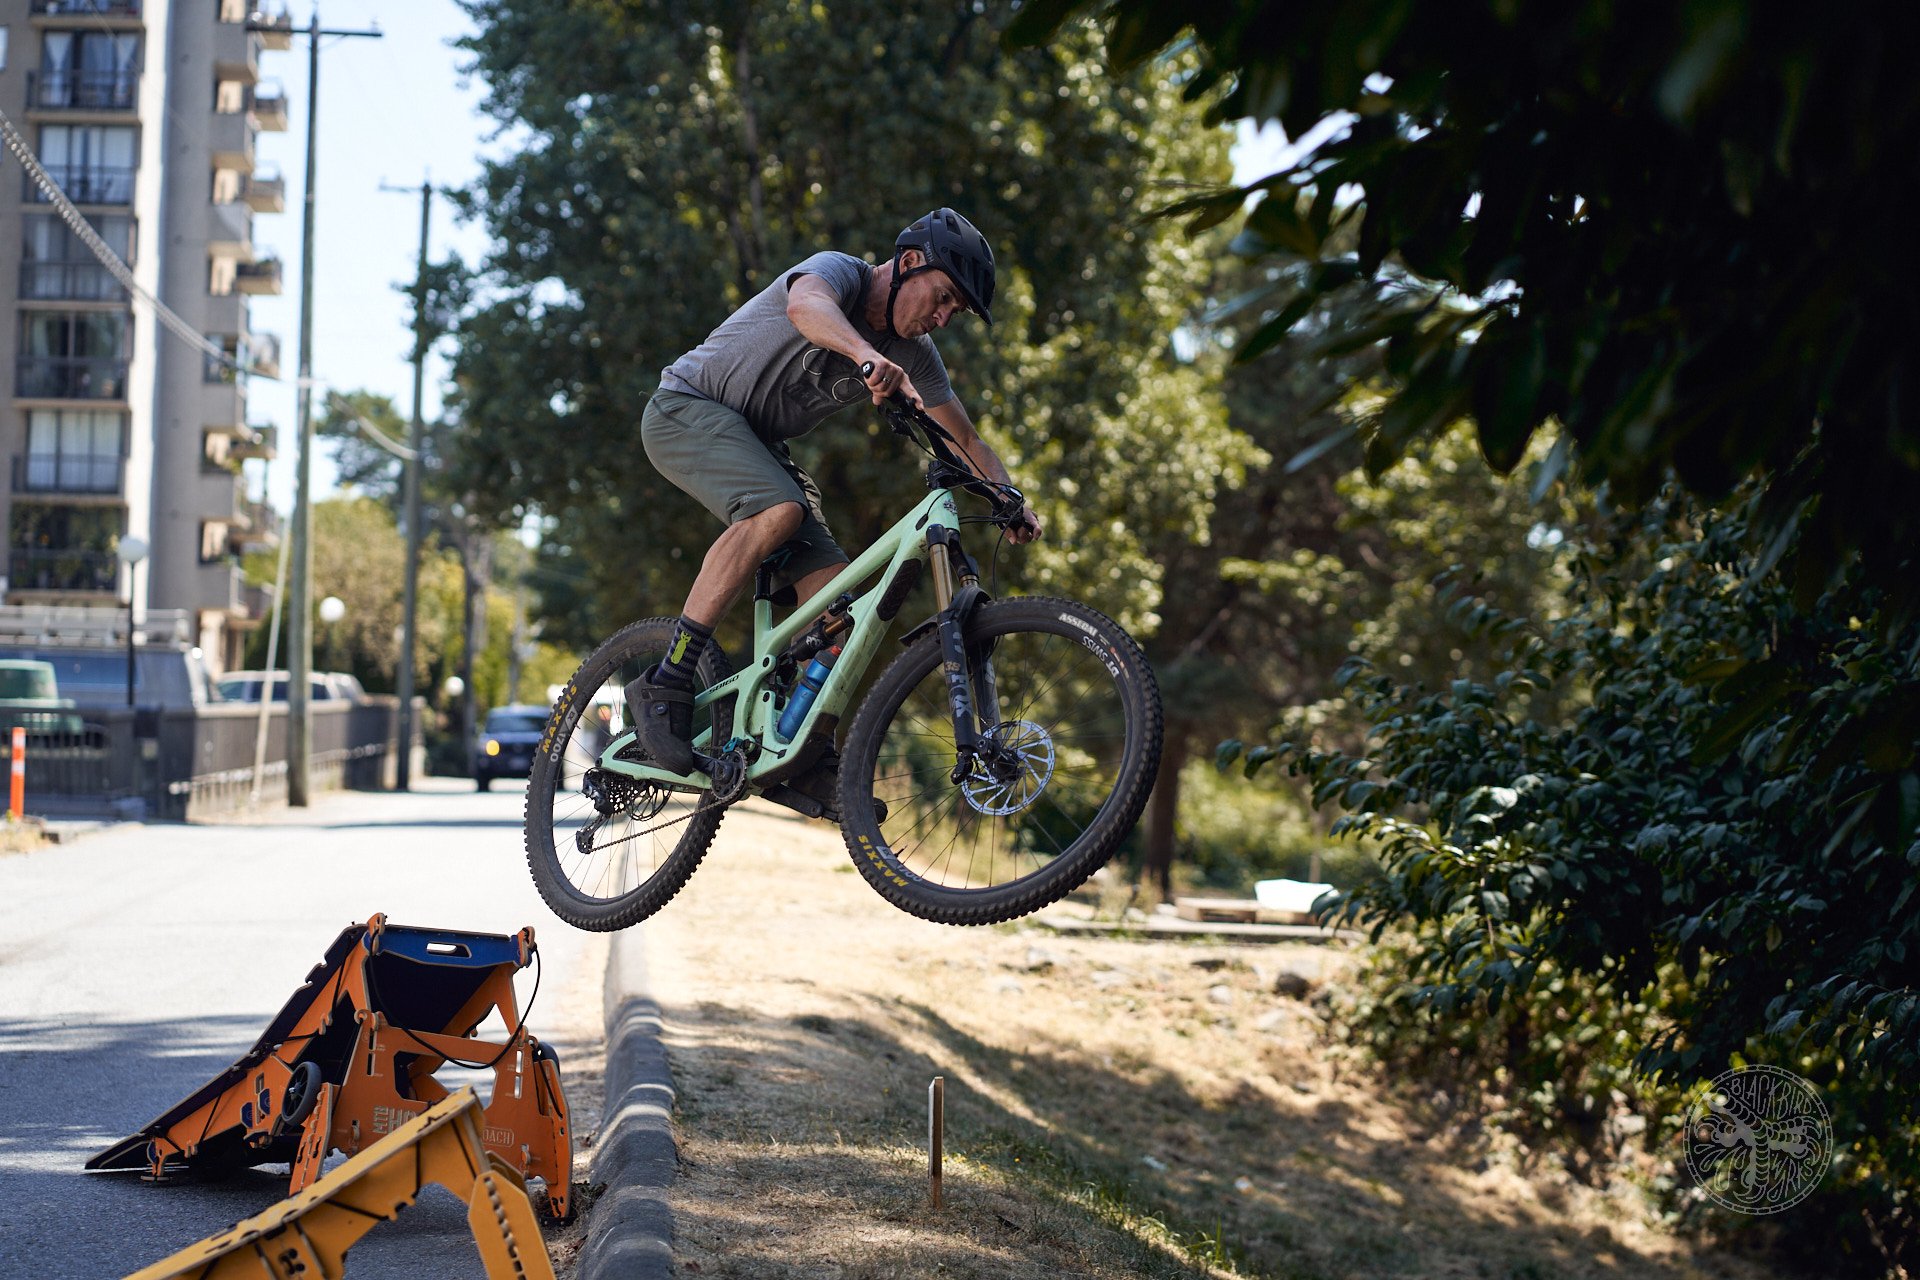
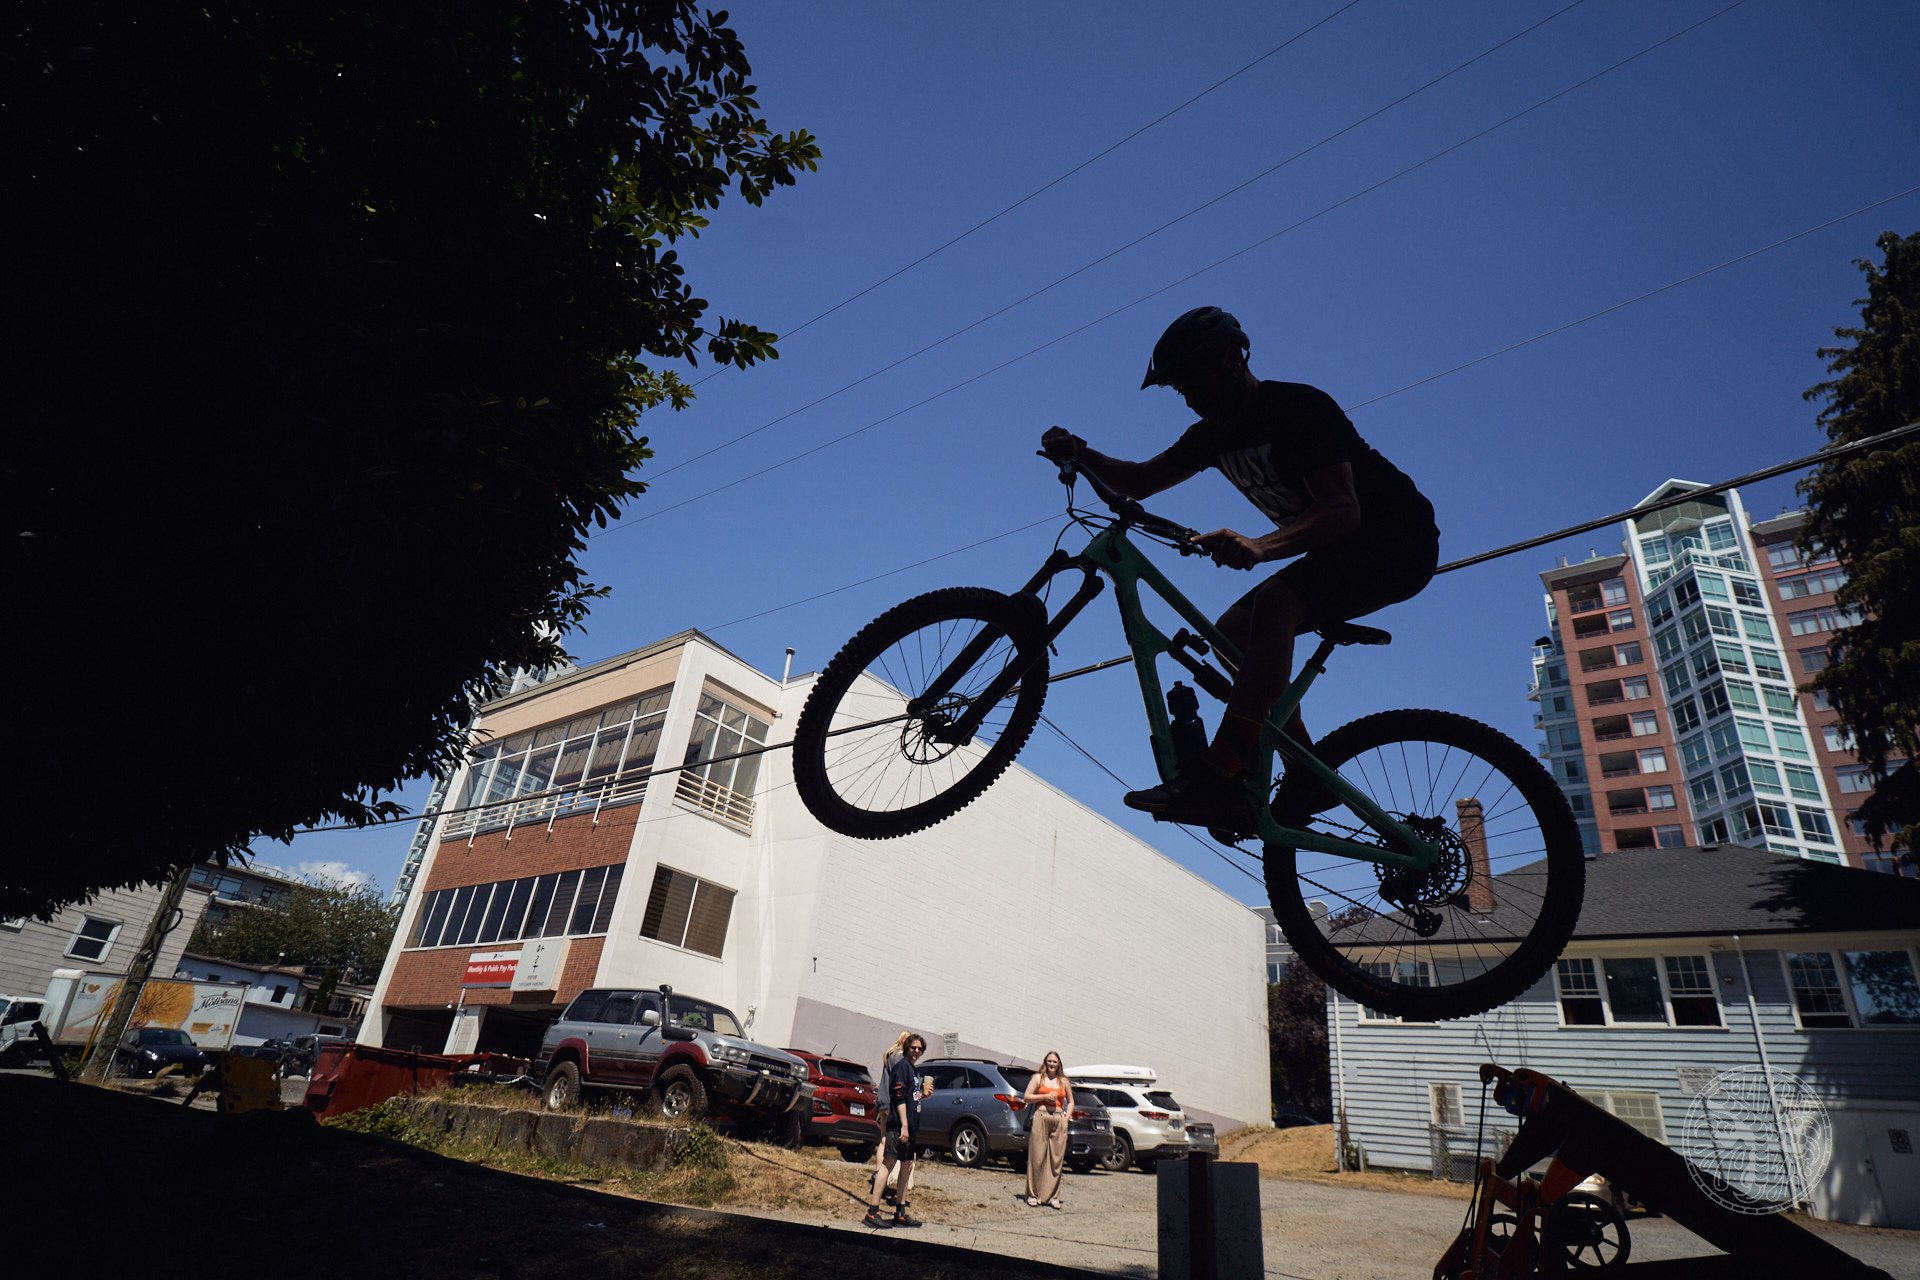
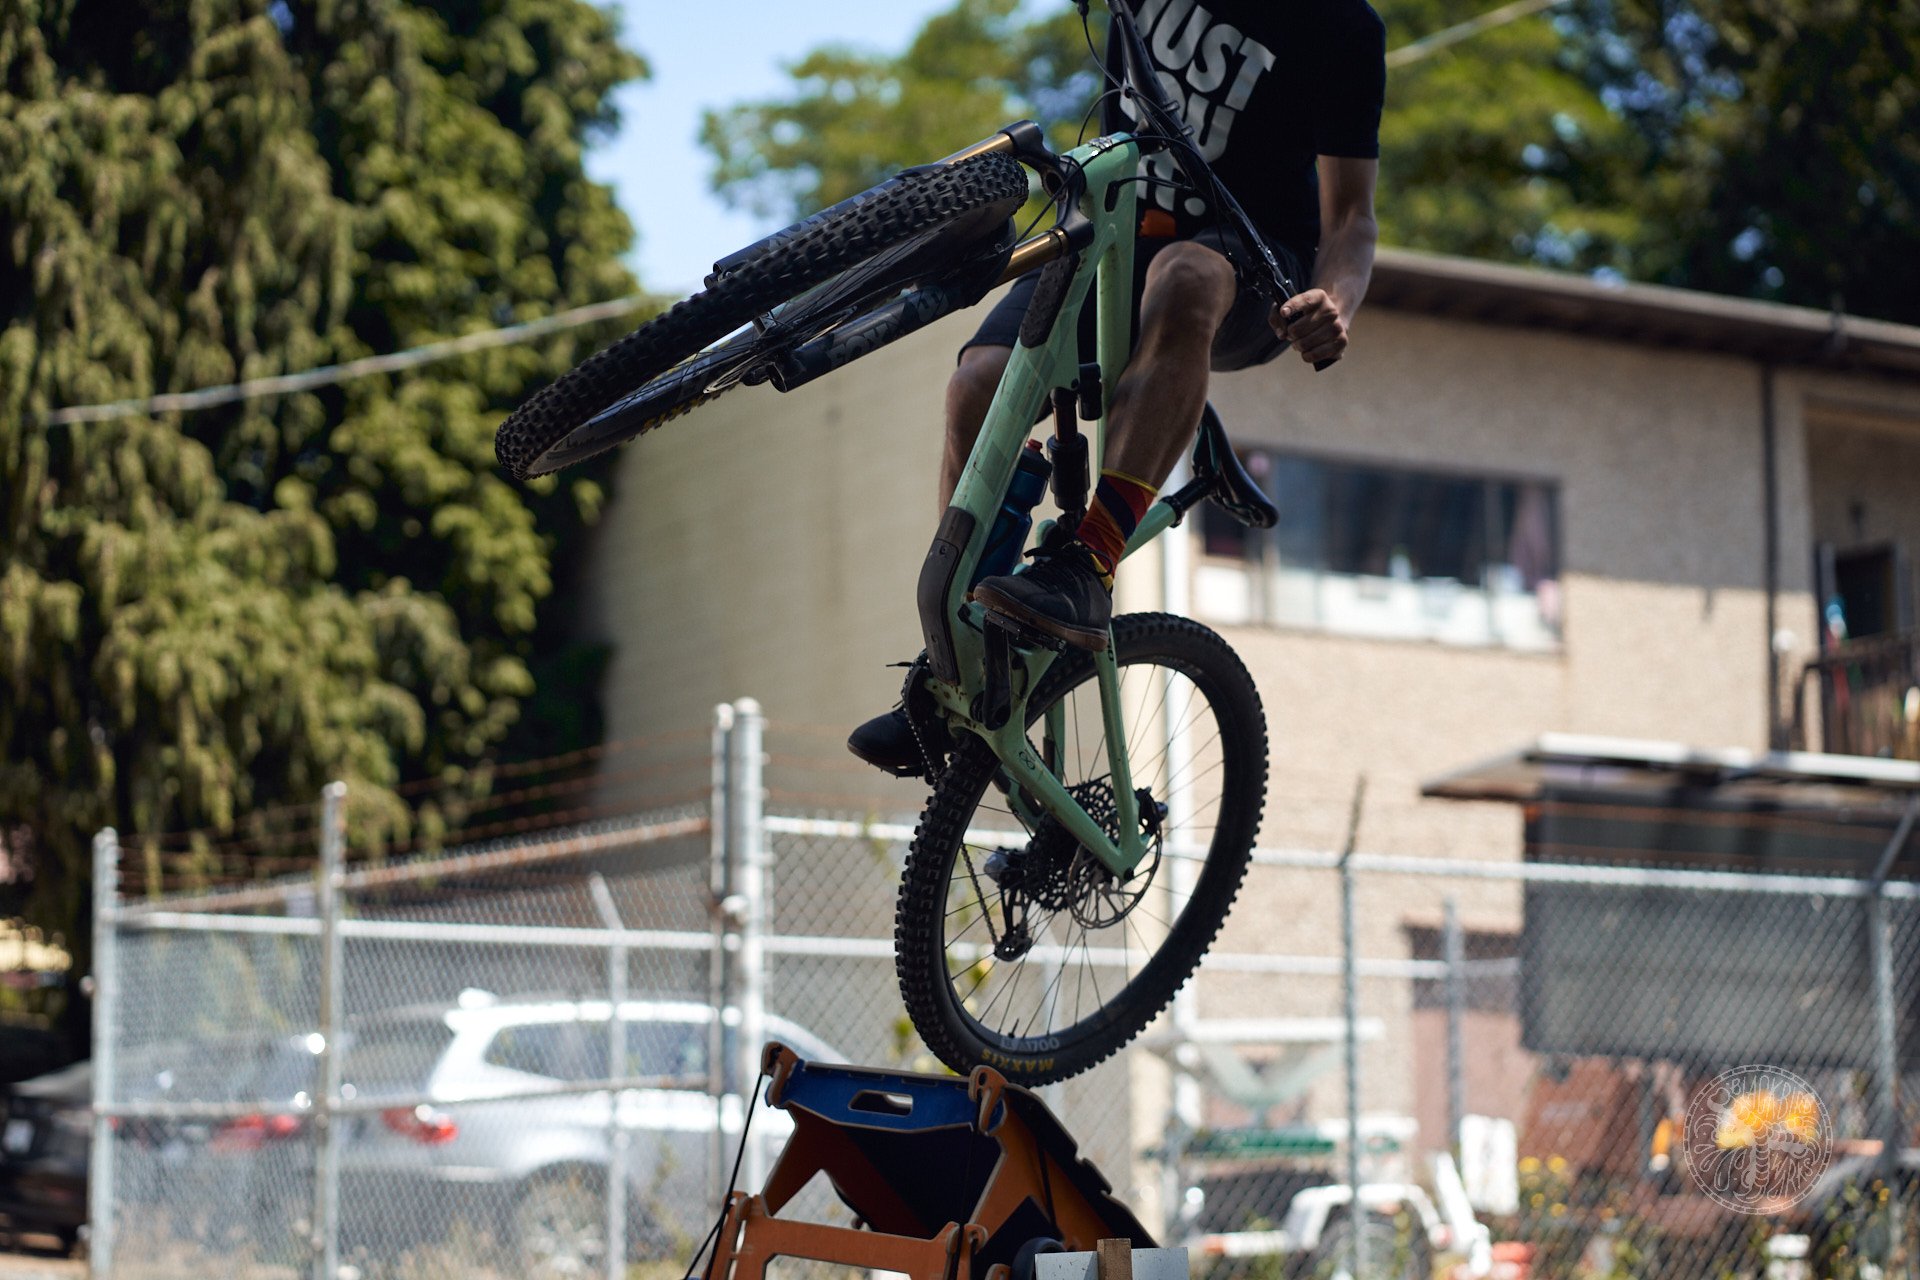
The Lite ramp is small and easily taken apart. Despite its size, you can do a lot with it and the right placement and terrain can get you as much air as you'd like. It's great fun to use either ramp as a step up if you can find the right urban setting.
It's also quite easy to set up and it can be ready in a couple of minutes. You need to be careful about the supports because there is a left and a right but it's not easy to see which way goes out at first. The diagrams are helpful in this regard.
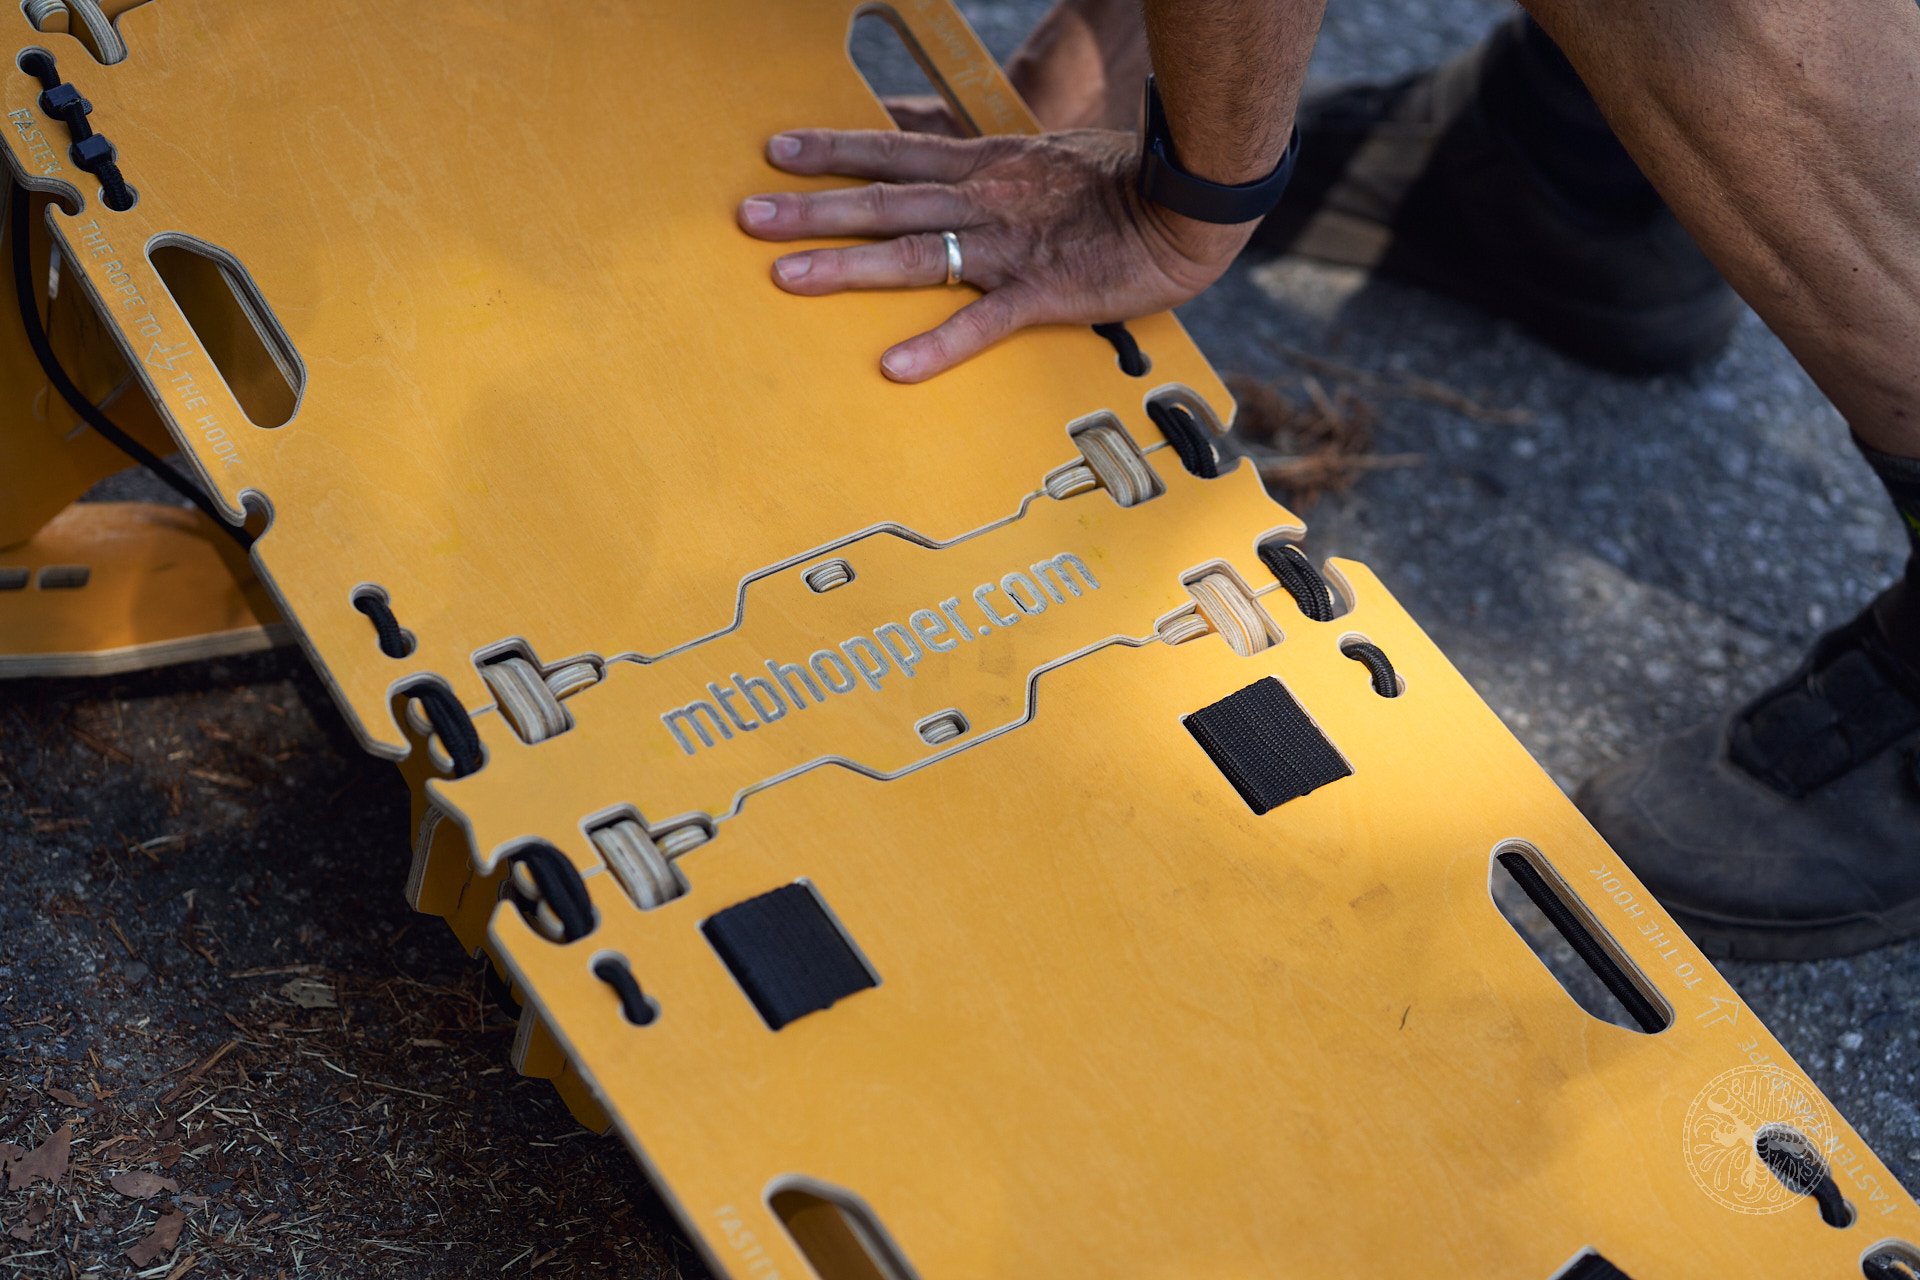
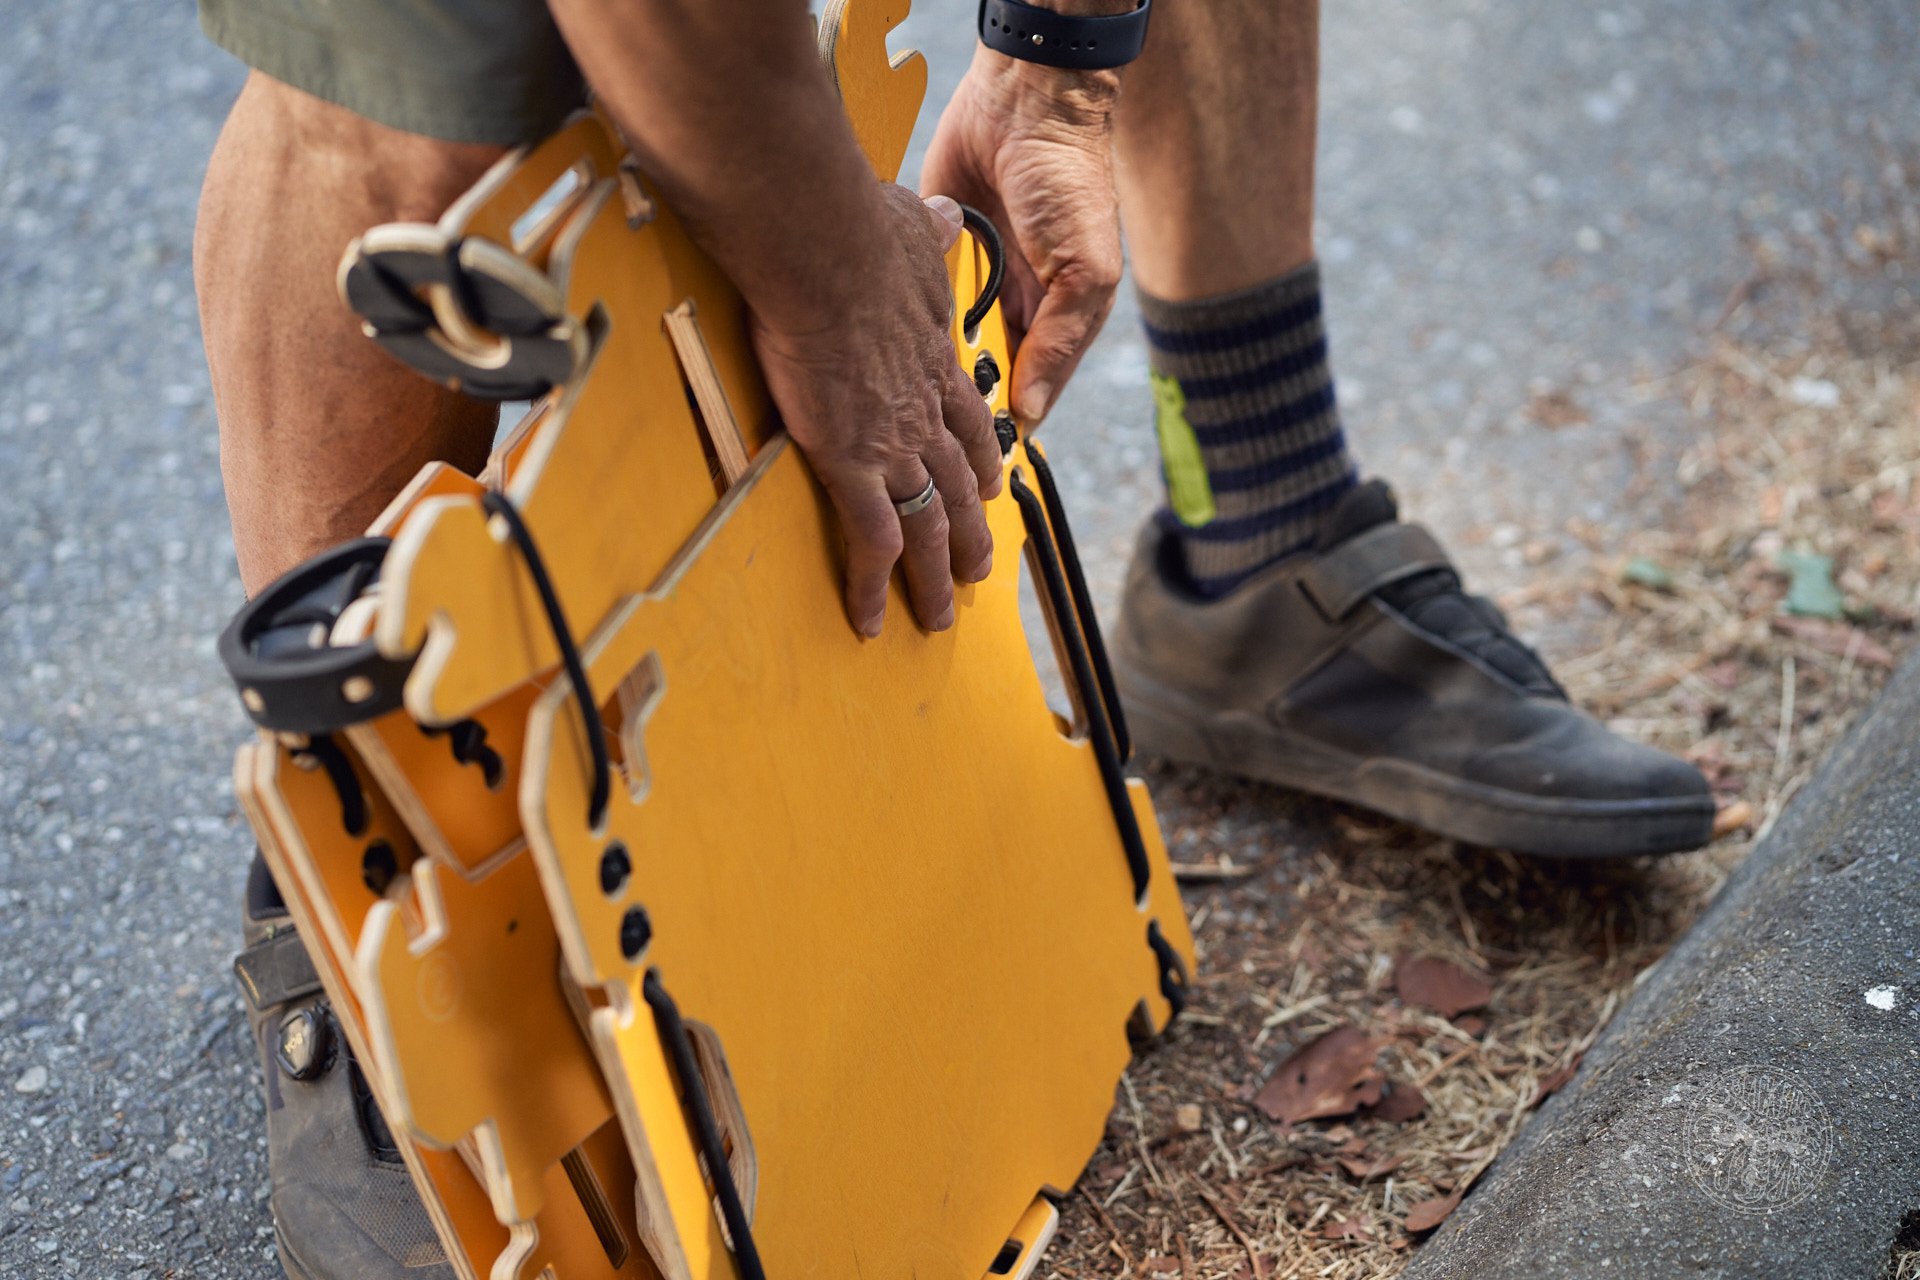
The top sheet presses securely onto the base and then is locked in with shock cords.
Securing the top sheet with the shock cords.
It's pretty much done at this point. The adjustable legs just need to go on the front, which takes seconds.
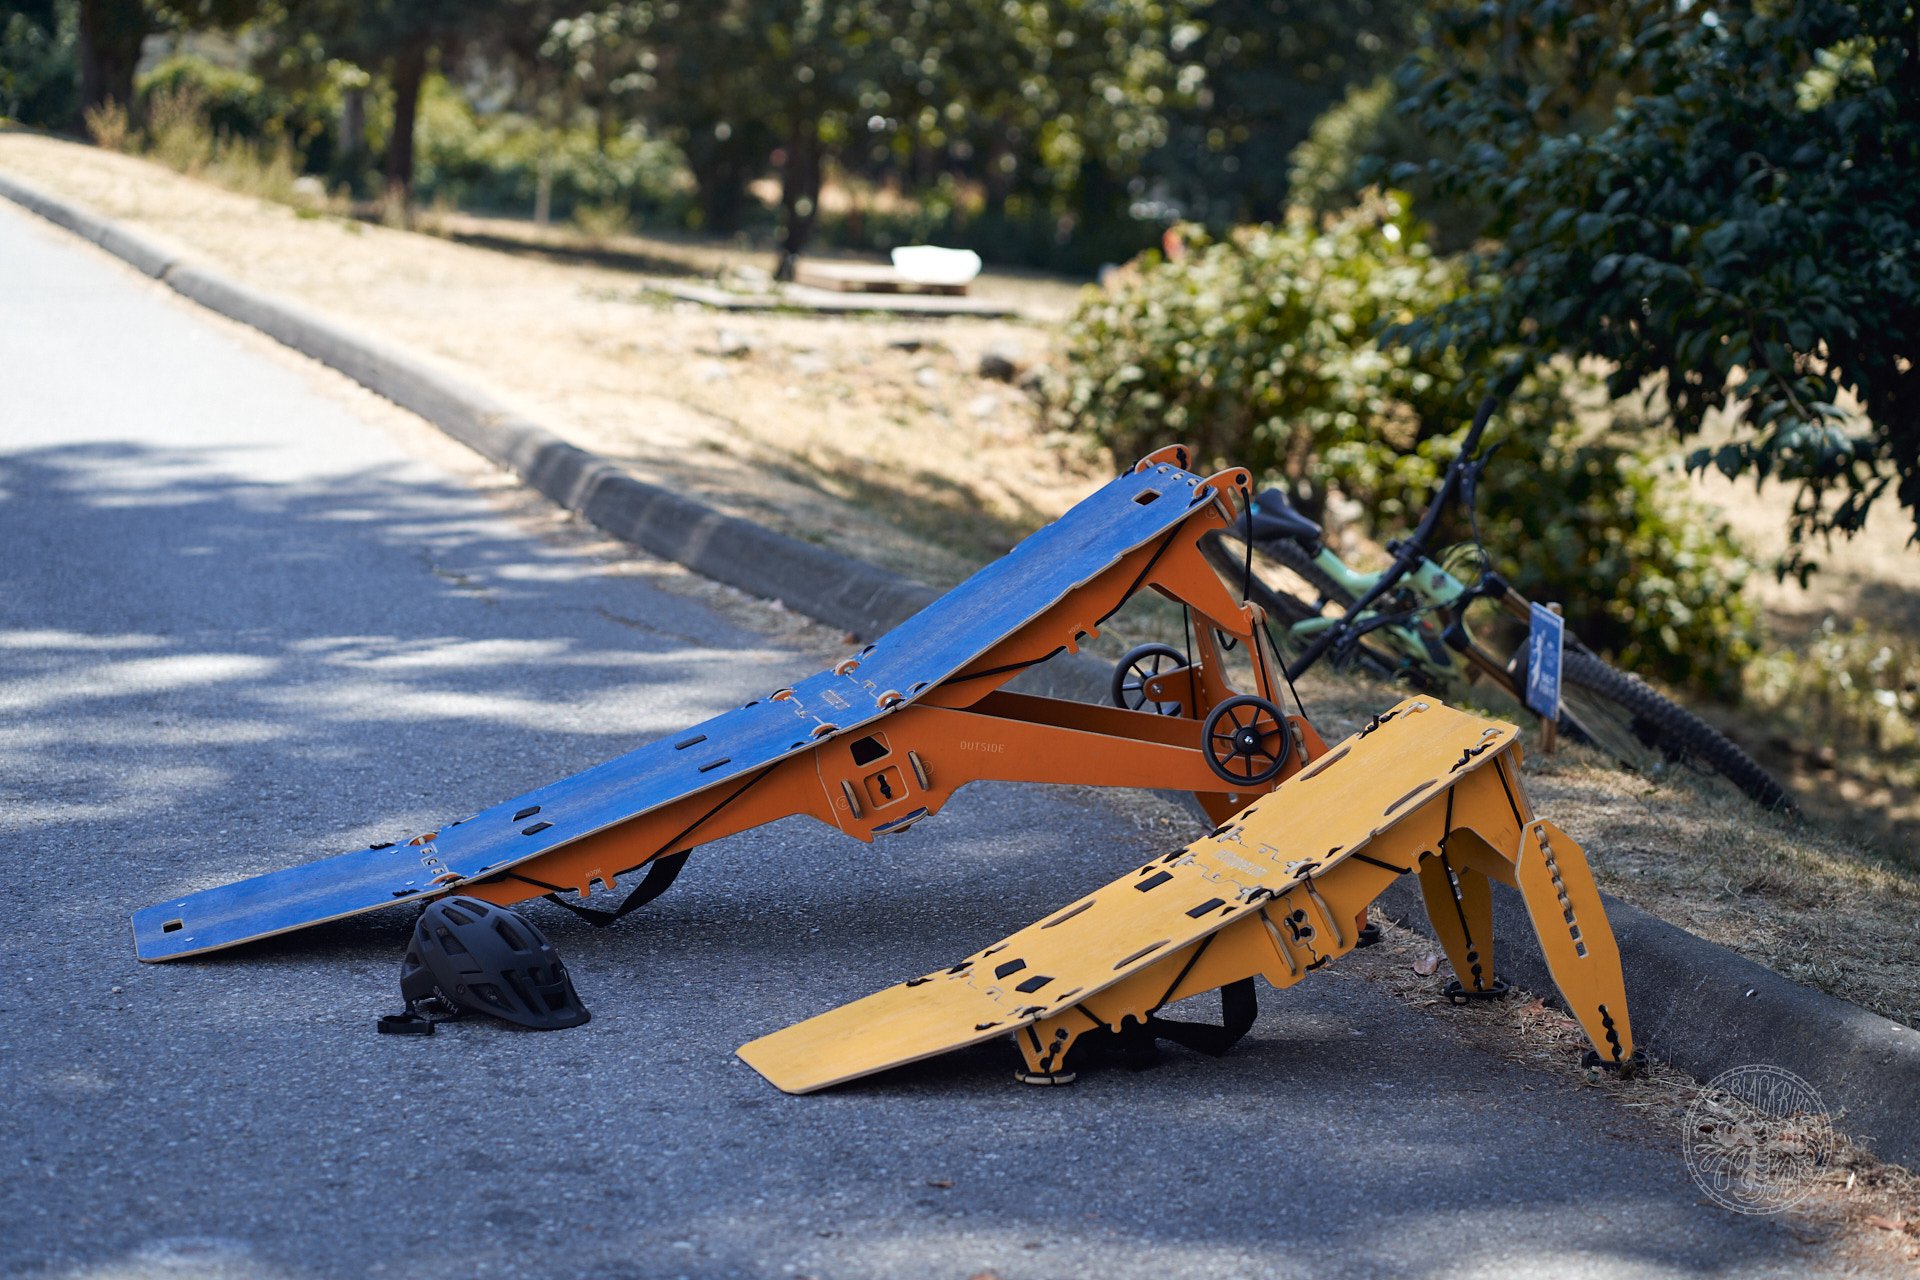
The Coach (background) and Lite are the two ramps we've been playing with. The Lite is small and light enough that you could ride all over town with it while the Coach weighs 15.2 kg or 33 lbs. You can wear it for awhile but it's much more awkward than wearing a packpack of the same weight.
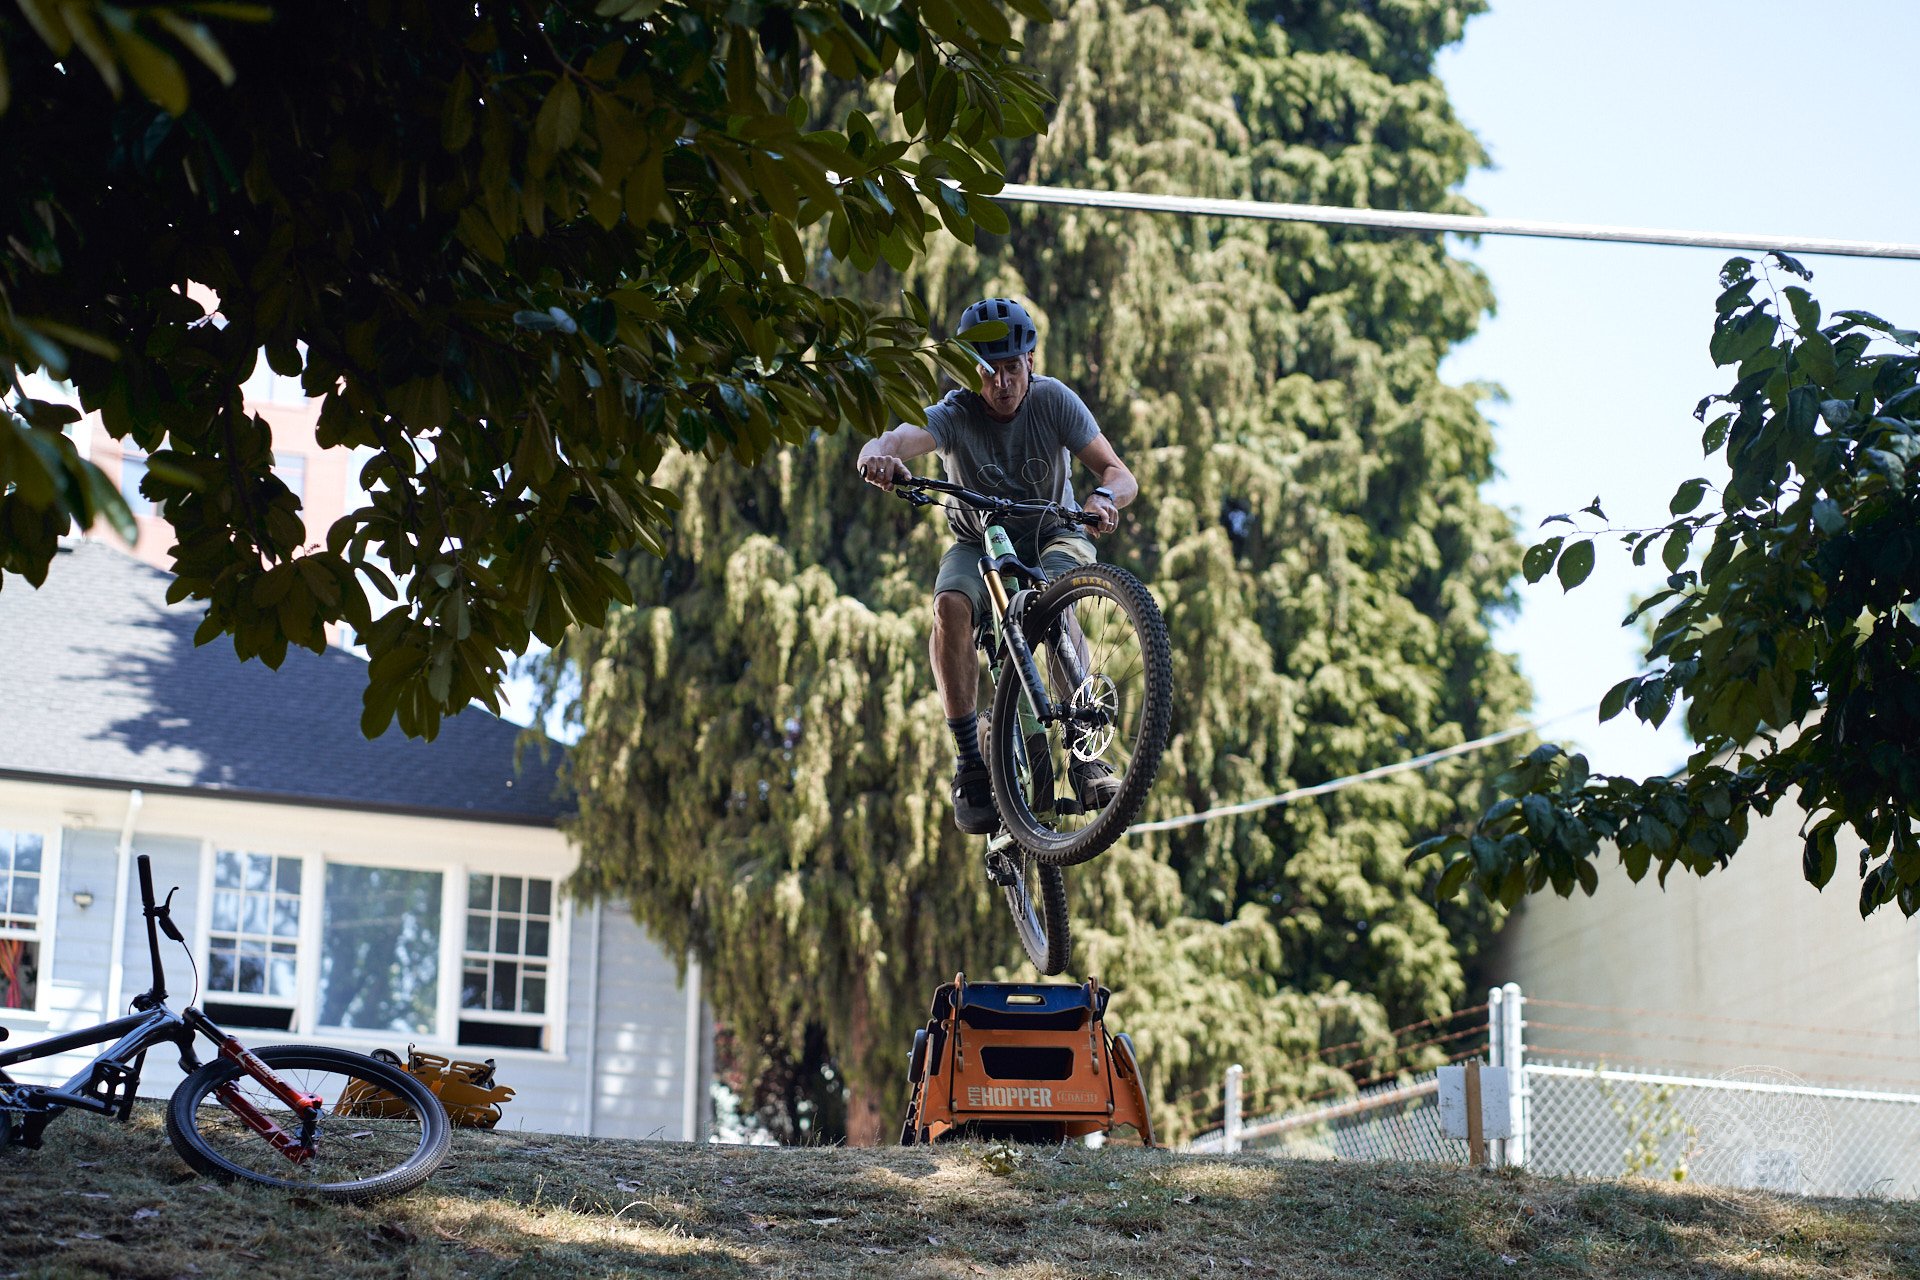
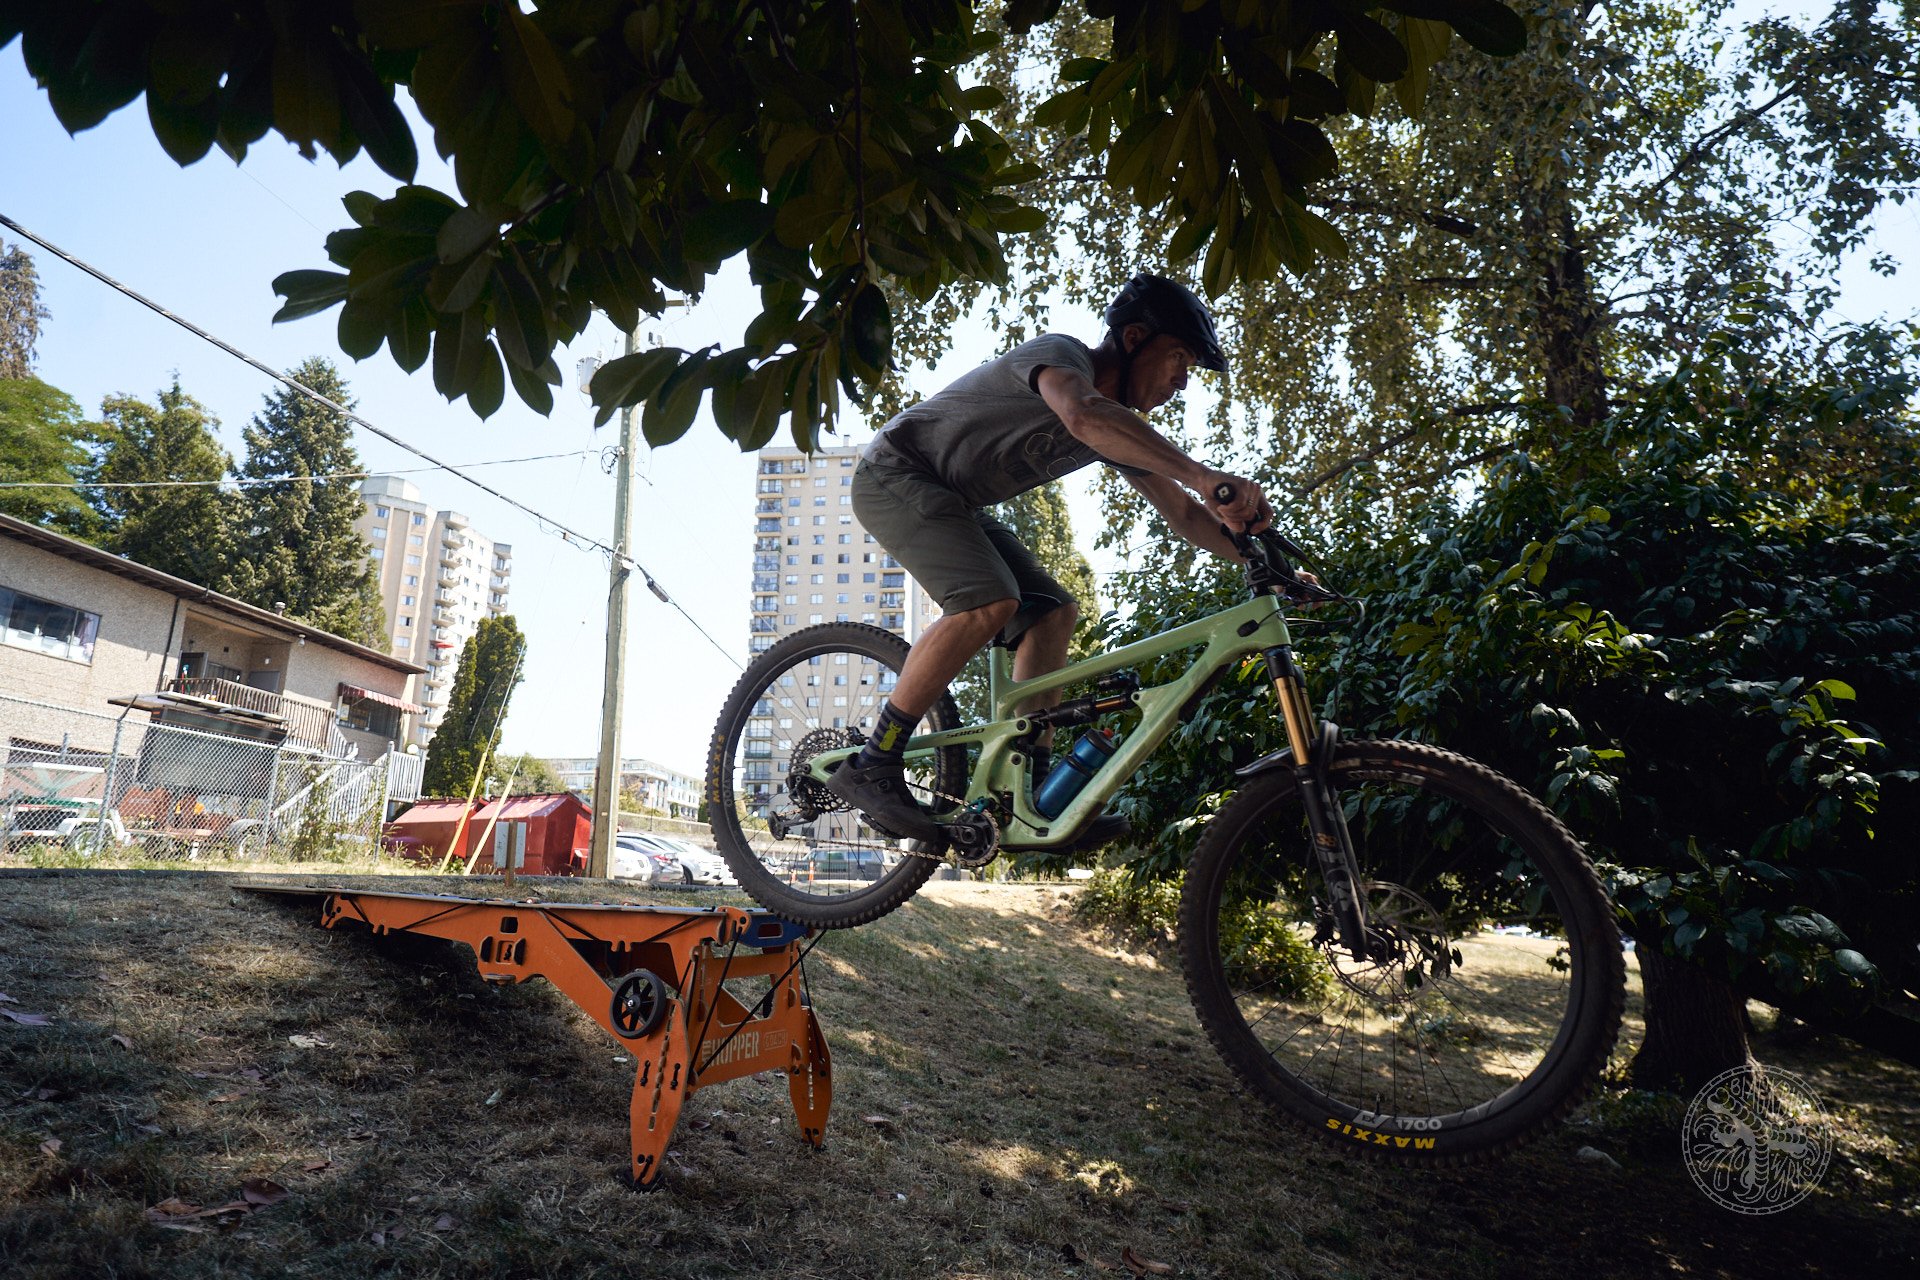
One of my favourite thing to do with the Hoppers is set them up as hips. I didn't know this was an option at first but when I tried it, it became clear this was part of the design and it works great in many situations. It seems to help me learn to move the bike and my body in the air as well.
Deniz demonstrating the hip with some actual style.
Even more style from Deniz, but with a poor photographer...
You might be getting the impression that I'm fond of these portable launchers. These are well-designed products that work exactly as advertised. They are stable and suitable for many different surfaces and locations. Assembly of the larger Coach ramp is a little tricky at first but before long it gets much easier. The Lite, while somewhat less adaptable and modular is surprisingly fun and useful in all sorts of situations, particularly when you can find a spot with a good transition or where there is already a drop to give gravity a head start.
The impact on my skills has been surprisingly immediate as well. Even short sessions of twenty to thirty minutes have made a difference to how I feel on the trail on subsequent rides. These are great tools for deliberate practice and repeatability. It used to be that my buddies and I would do regular urban rides and jump off loading docks and anything we could find. Repeatability is a hugely important training tool and if you are riding trails top to bottom it's tough to get the confidence you get from doing the same jump over and over again.
The legs shown supporting the ramp before the downside weren't shown in the diagrams but were included with my Coach ramp. Hunting on the website produced this image which made everything clear. This would be a great setting for absolute beginners or kids.
These are not an insignificant investments however.The Lite ramp, which is very useful and fun, costs 550 CAD.* Obviously you could make yourself a little ramp, and with a little ingenuity, possibly make it adjustable, but the real gold here is being able to pack the ramps up for storage or transport as well as wear them on your bike and pedal into an ideal location.
The Coach costs 740 CAD* and it gives you many more options in terms of size and progression. It can be used with another coach ramp to make a table top and you can add an extension to get even more air. In terms of value, the Coach feels like the better bet if you can manage it, but the Lite, as Wyn Masters demonstrated in the video above, can give you lots of options, hours of enjoyment, and help your progression as a mountain biker. These are great products that are excellent for mountain bikers looking to add more air to their diet because really, don't we all want to fly?
*These Canadian prices include tax, making them appear significantly more expensive than they are. Sales tax in Canada ranges from 5 to 15%. Here in B.C. we pay 12% when both Provincial and Federal taxes are applied.


Comments
Vincent Edwards
9 months, 2 weeks ago
I’ll weigh in here as a designer / furniture maker with a nice CNC Router, who considered making a similar product (but decided not to)…
I have a friend who is a professional MTB skills coach - he owns quite a few MTB hopper ramps and really likes them. He even has their largest ramp and an airbag setup!
So I spent about 4hrs in CAD designing something similar, and laying it out on Baltic Birch Plywood to get a sense of my production cost. This was before the invasion of Ukraine, which caused the price of this plywood to double. So while the price of these ramps is high, I can say from direct experience that by the time you factor in material cost, machine time, packaging, shipping, [plus the cost of marketing and running a business] these are priced very fairly.
_
My best guess is that they aren’t selling in large enough quantities to justify a more traditional manufacturing approach.
CNC and digital fabrication tools are a great way to produce a niche product like this, but the cost will never compete with oversees manufacturing. Now, if IKEA made a similar ramp…
_
Who is it for? Someone who is needs a portable ramp that can fold flat, and survive years of use.
If you’re handy with some power tools, you could DIY something effective for 1/3 the cost. But these are very well thought out, adjustable, expandable… and pretty unique.
Reply
Cam McRae
9 months, 2 weeks ago
Great perspective Vincent.
Reply
roil
9 months, 2 weeks ago
What about using a service like Send Cut Send to laser cut the parts from sheet metal?
Reply
Onawalk
9 months, 2 weeks ago
Heavy (to be sturdy), slippery (unless coated in something to provide grip), and down right costly (sheet metal is way more expensive than wood) compared to good ol wood.
Reply
Cooper Quinn
9 months, 2 weeks ago
Reply
chacou
9 months, 2 weeks ago
I think I've shared this before, but you can easily pair the nice ramp with a sketchy landing.
Reply
taprider
9 months, 2 weeks ago
🤣
Reply
taprider
9 months, 2 weeks ago
https://www.youtube.com/watch?v=oYdps2cQkic
Reply
Zero-cool
9 months, 1 week ago
Well you’ve just reminded me of a large part of my teenage years!
Reply
fartymarty
9 months, 2 weeks ago
This is very cool but $740 CAD buys a lot of spades in whatever currency you're buying spades in. It would even buy a sweet little DJ bike for the park / pump track.
Apologies for playing the Cheepnis card...
Reply
Timer
9 months, 2 weeks ago
As the name implies, these seem to be squarely aimed at coaches and trainers. I don’t think you would have many participants if your payed for skills camp started with half a day of digging.
Reply
fartymarty
9 months, 2 weeks ago
Fair call. It makes sense for trainers / coaches.
Dig Fit - wasn't that a thing?8
Reply
Gage Wright
9 months, 2 weeks ago
You could buy probably 3-4 descents tool stashes and build some dirt jumps. If you are in the city then a BMX is cheaper and jumping will translate. Something something BMX background. Deniz knows what I mean.
Reply
Deniz Merdano
9 months, 2 weeks ago
My BMX background has never, ever left the ground more than 10 inches. So I am not a good gauge of that, Gage.
Reply
Allen Lloyd
9 months, 2 weeks ago
These are awesome.... BUT the price is a bit crazy. I built an adjustable lip kicker that folds flat and packs easily in the back of my truck. It is perfect for camping and just spotting a transition and quickly setting up a jump. The adjustable lip makes it easy for beginners and then fun for more advanced riders with a quick adjustment. The downside to my ramp is there is no way you are carrying it around while riding. The ability to turn the Hopper into a hip has me very intrigued.
If you are not great at jumping these are the perfect tool to build a comfort level!
Reply
Deniz Merdano
9 months, 2 weeks ago
Remember that 46% of people in Europe live in Apartments.. this folding formula makes sense. My neighborhood is littered with decaying plywood jumps i dare not put a wheel on. Great fun for a DIY dad/mom to build some stuff with the kid, but i see the place in the market for the MTBhopper clearly.
Reply
chacou
9 months, 2 weeks ago
I picked up the Ninja MTB Turbo which looks like the "Lite", I'm pretty certain Ninja MTB just has these made by the same people just branded differently. My son and all his friends love it, we take it to the bike club.
It's a lot of fun, would highly recommend!
Reply
MTB_THETOWN
9 months, 1 week ago
I wonder if they could just print the instructions on the ramp itself?
Although once you get used too using it that would be a bit of an eyesore
Reply
Squint
9 months, 2 weeks ago
A significant improvement on the stack of 2x4 and plywood scraps we used to assemble on the street as kids.
But what caught my eye was the Smile stand in the last picture... looks really nice, and reasonable price too.
Reply
BarryW
9 months, 2 weeks ago
Very cool products, but I've got to agree that I would be more likely to buy a nice used dirt jumper than pay that for a ramp.
But having seen them in person they are very slick.
Reply
Dave Smith
9 months, 2 weeks ago
Knees: Good to go
Reply
Please log in to leave a comment.