TUNING GUIDE
RockShox Tuning Camp
“Yo, what air pressure are you running? How many clicks of rebound?”
We’re all tire kickers and setup chasers, aren’t we? Getting a new bike or fork dialed is daunting for some, but for others it’s like hitting the reset button of their riding animus. Joining that second group and unlocking better performance is not as hard as you might expect, and SRAM wants Rock Shox users to feel more comfortable poking around under the hood of their suspension so they can get more out of it.
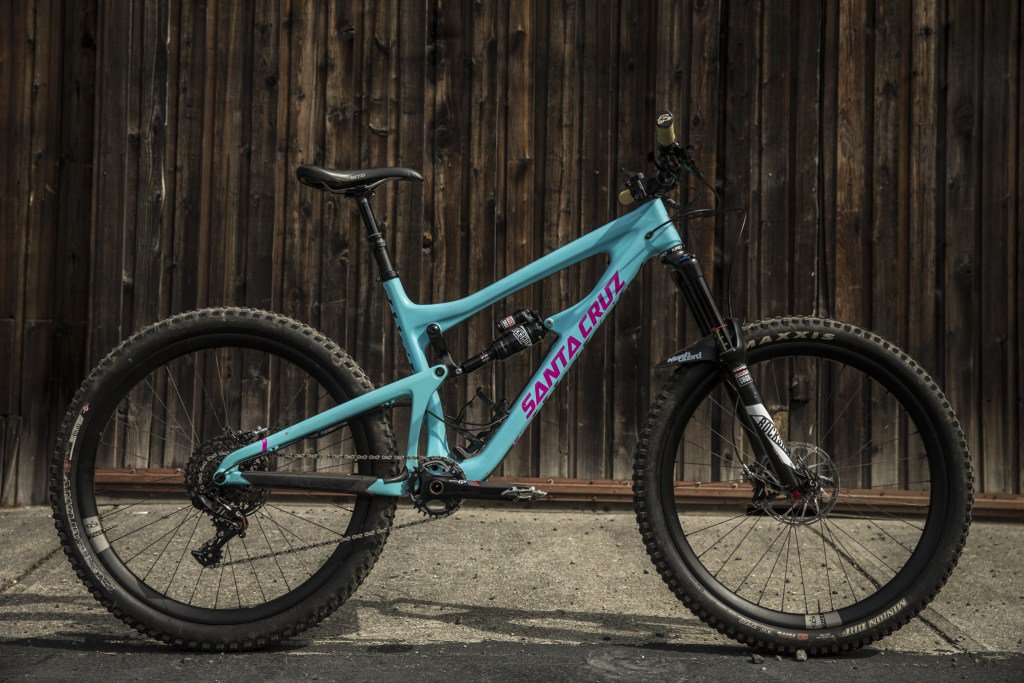
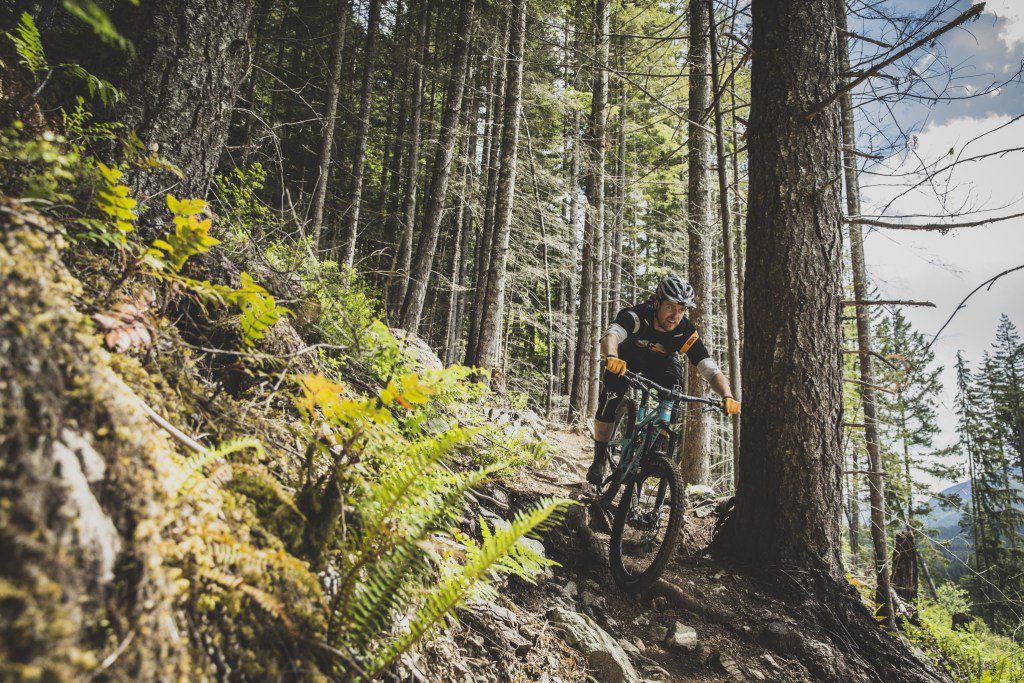
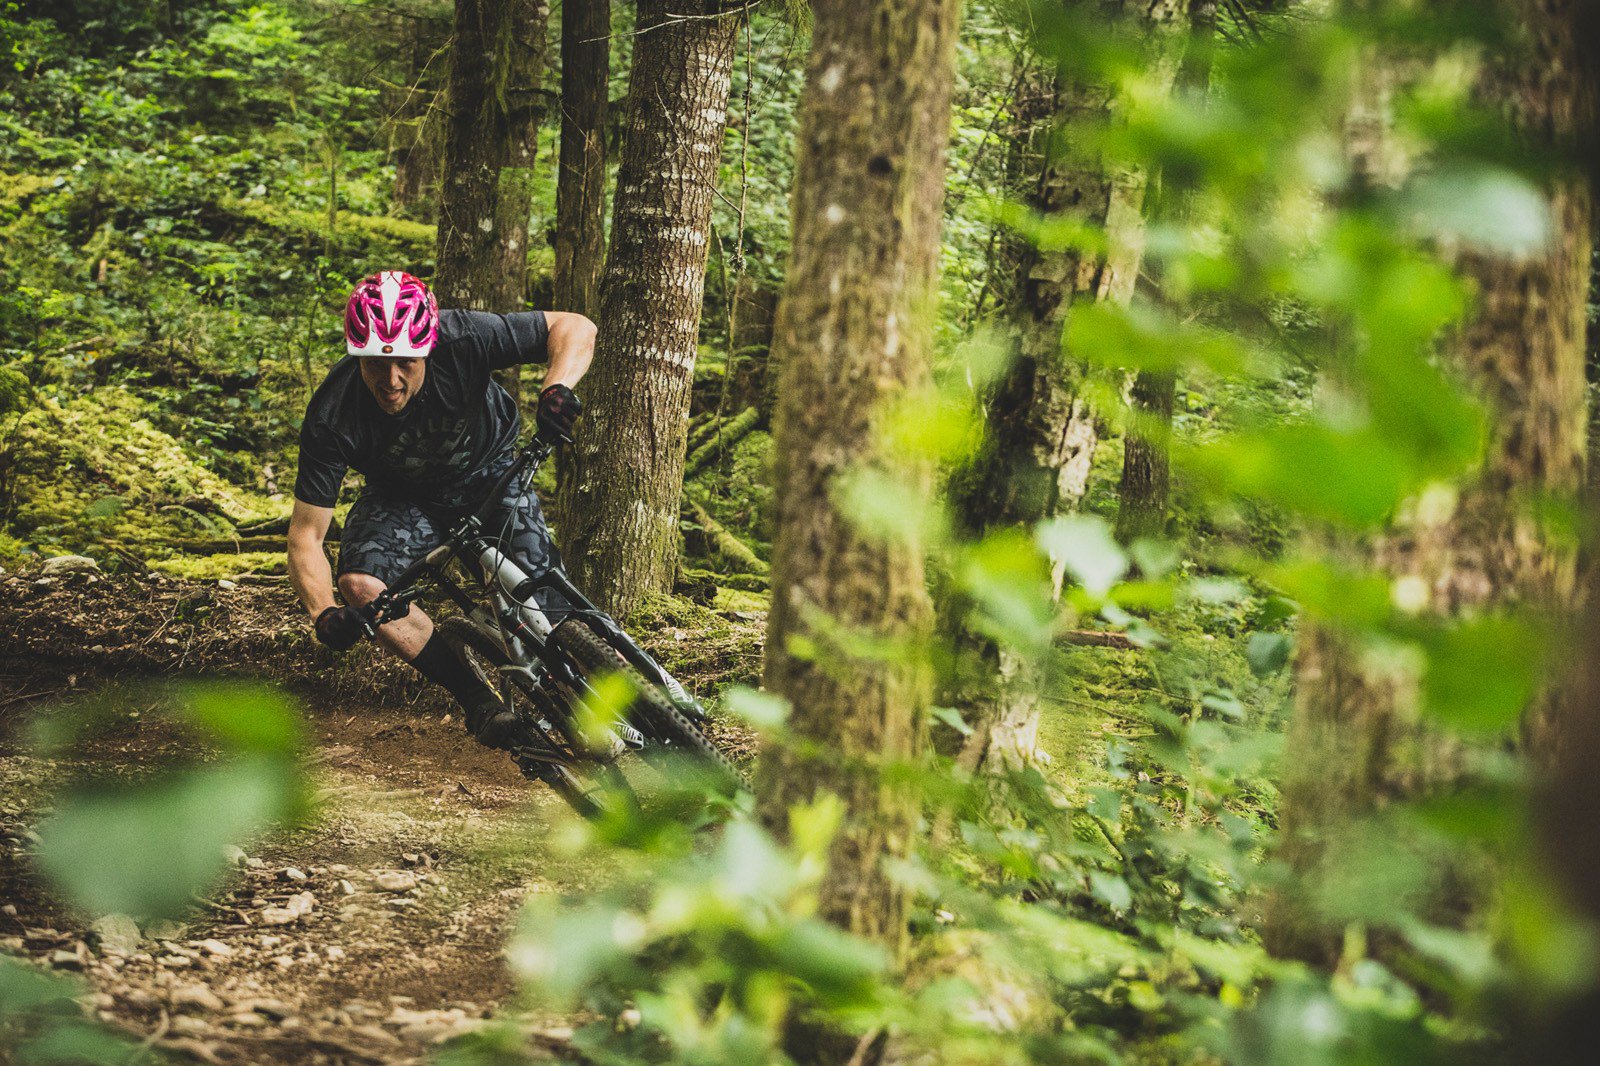
I’ve been beating on this Nomad for over a year now. Here it is with Rock Shox’s FNG (Fresh New Graphics) treatment on the Pike and Monarch Debonair. Harder to make out are the fresh SRAM Guide Ultimate brakes and GX1 group (more on those soon).
With that in mind, they invited a handful of media to spend a few days riding and tinkering, with the goal of getting a feel of the outer reaches of what a Pike and a Monarch could be made to do, and then working to get our personal rides dialed as much as possible. Before you think this is a braggy “MTB media gets treated so much better than you” article, let me assure you that the goal here is to relate the experience back to you and encourage you to take this on yourselves. Dialing in your Pikes and Monarchs – including adding and removing displacement spacers – is easy. You’re a lot closer than you think to eking out a better ride.
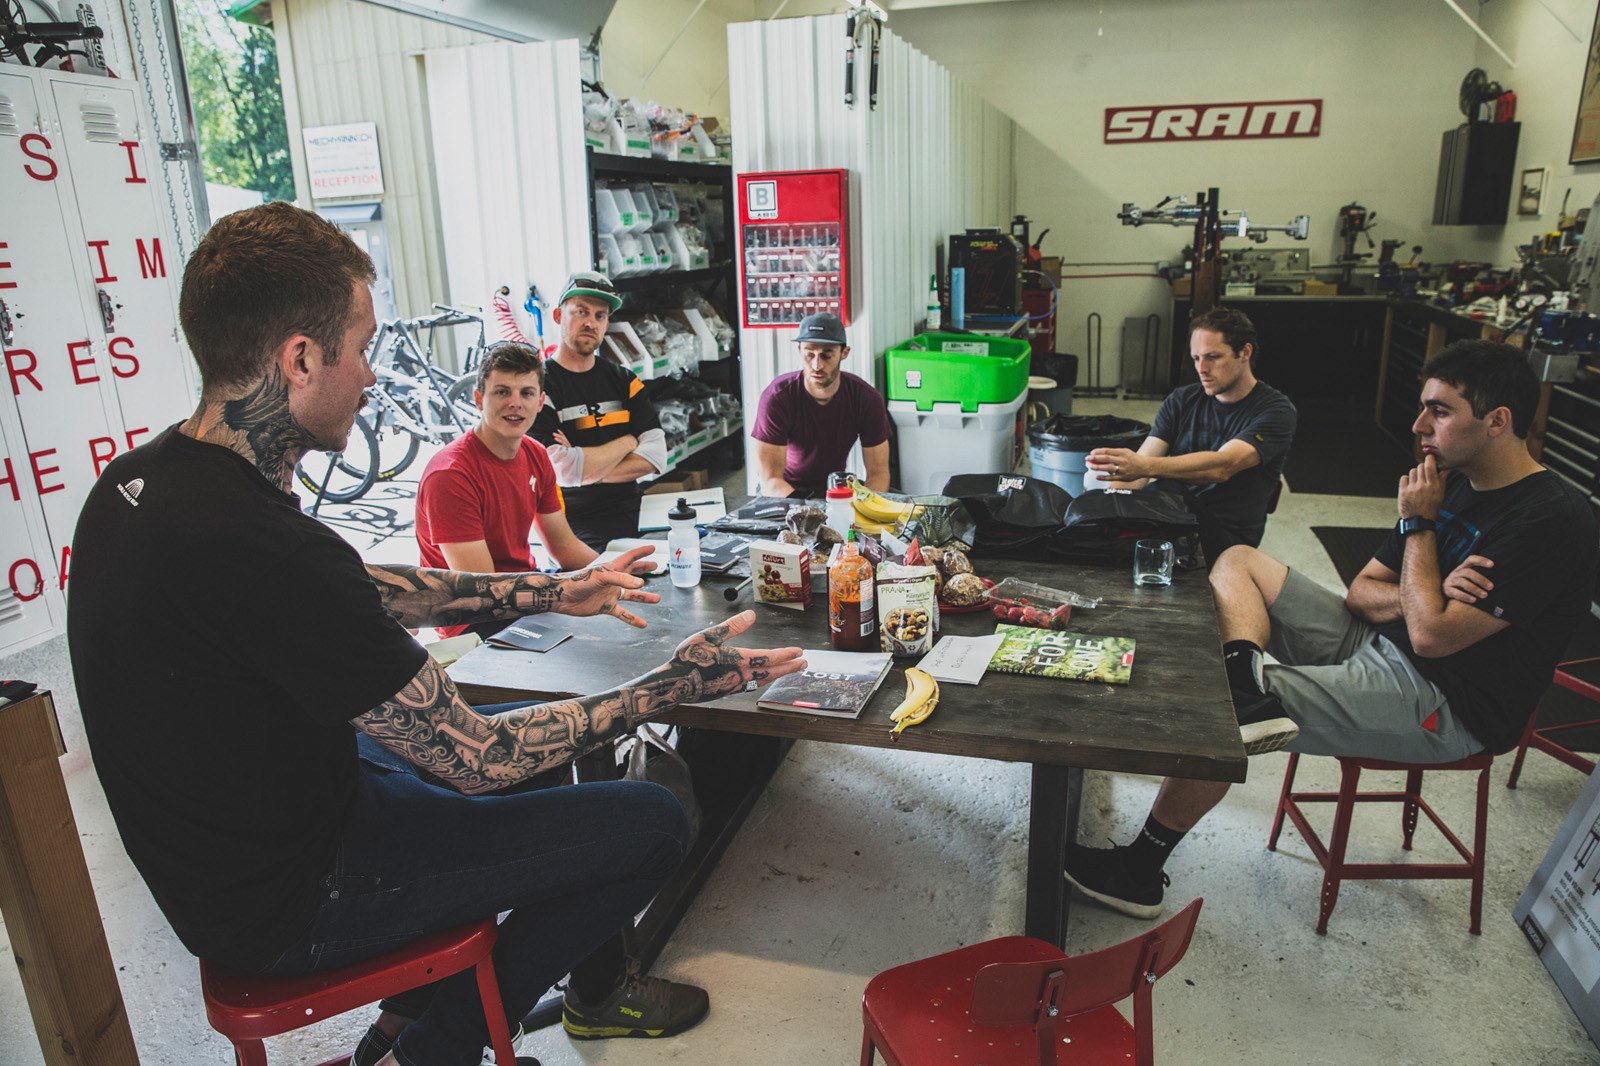
SRAM PR man Duncan Riffle (far left) walks us through the plan for the next few days.
We assembled on a warm morning in Squamish at Fluid Function, which is the domain of Shawn Cruickshanks, aka The Whiz in SRAM vernacular. Everyone sent bikes in advance to get them outfitted with Pikes and Monarch Debonairs, as well as the new SRAM Guide Ultimate brakes and GX1 drivetrains (more on those in future reviews). I was on my Nomad, which has been a great test platform for over a year now, and the original Pike and Monarch Plus Debonair are still going strong, so they got some service but will continue soldiering on.
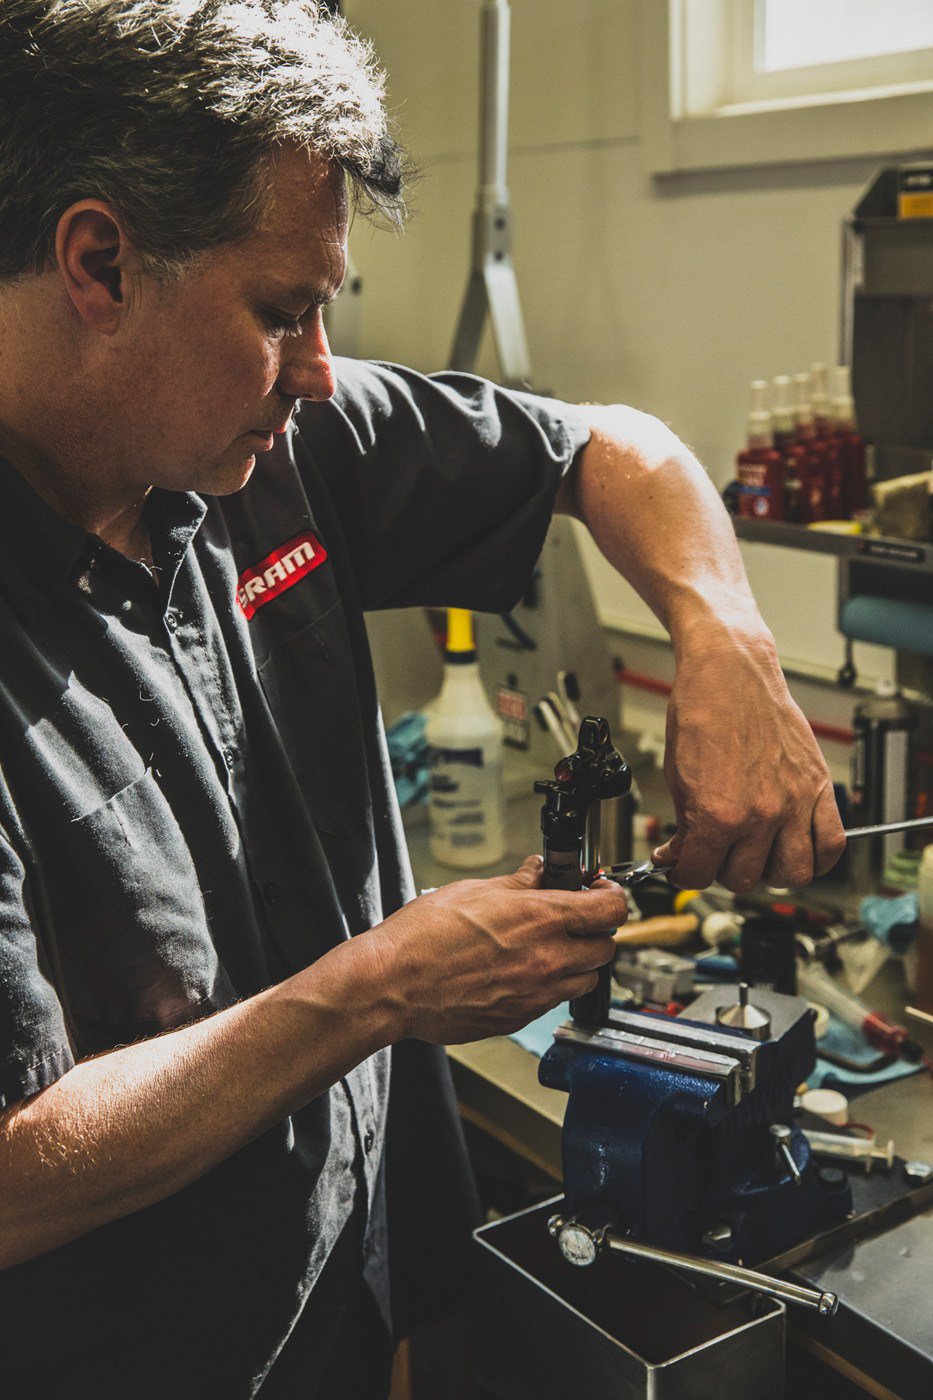
Shawn Cruickshanks takes care of SRAM athletes in the Sea to Sky corridor, and travels to events – sometimes he’ll be helping Semenuk & co. at an FMB event, other times he might lend a hand at an Enduro or Downhill race. If you’re lucky enough to live close to Squamish, you can have your Rock Shox products Whizzed for a price – assuming you don’t need it done today. Or tomorrow. The Wizard is busy.
Three hours in some of Squamish’s finest technical terrain was enough to break in some new parts and bikes and work up a proper thirst. After some tinkering and BSing back at Fluid Function, we headed up Hwy 99 to Whistler, where we’d spend the next day in the bike park and get to work.
Day 2 was devoted to the “Rock Shox Educational Experience”. The idea was to ride the same lap over and over again (Angry Pirate –> Boca del Vista –> Heart of Darkness) while making changes to our suspension after every lap. The goal wasn’t to zero in on our ideal setting as quickly as possible but rather to get a sense of the outer limits, such as how linear or how progressive our suspension could be made to feel while taking into account the relationships between air pressure, rebound, etc.
Before we get to that, though, let’s discuss air springs and bottomless tokens for a moment, because once that’s out of the way we can review the procedure we went through and then how easy it is for you to replicate at home.
You don’t need to be a suspension expert to get the most out of your gear. Wrap your hear around a few basic concepts and be aware that adding a token to a Pike or a few spacer rings to a Monarch is quick and easy.
As far as I know, Rock Shox’s Pike was the first mainstream suspension product to make it easy to control how progressive your spring curve is using spacers (SRAM calls them bottomless tokens), but it’s hardly a new concept where air springs are concerned. This diagram illustrates the idea better than words alone.
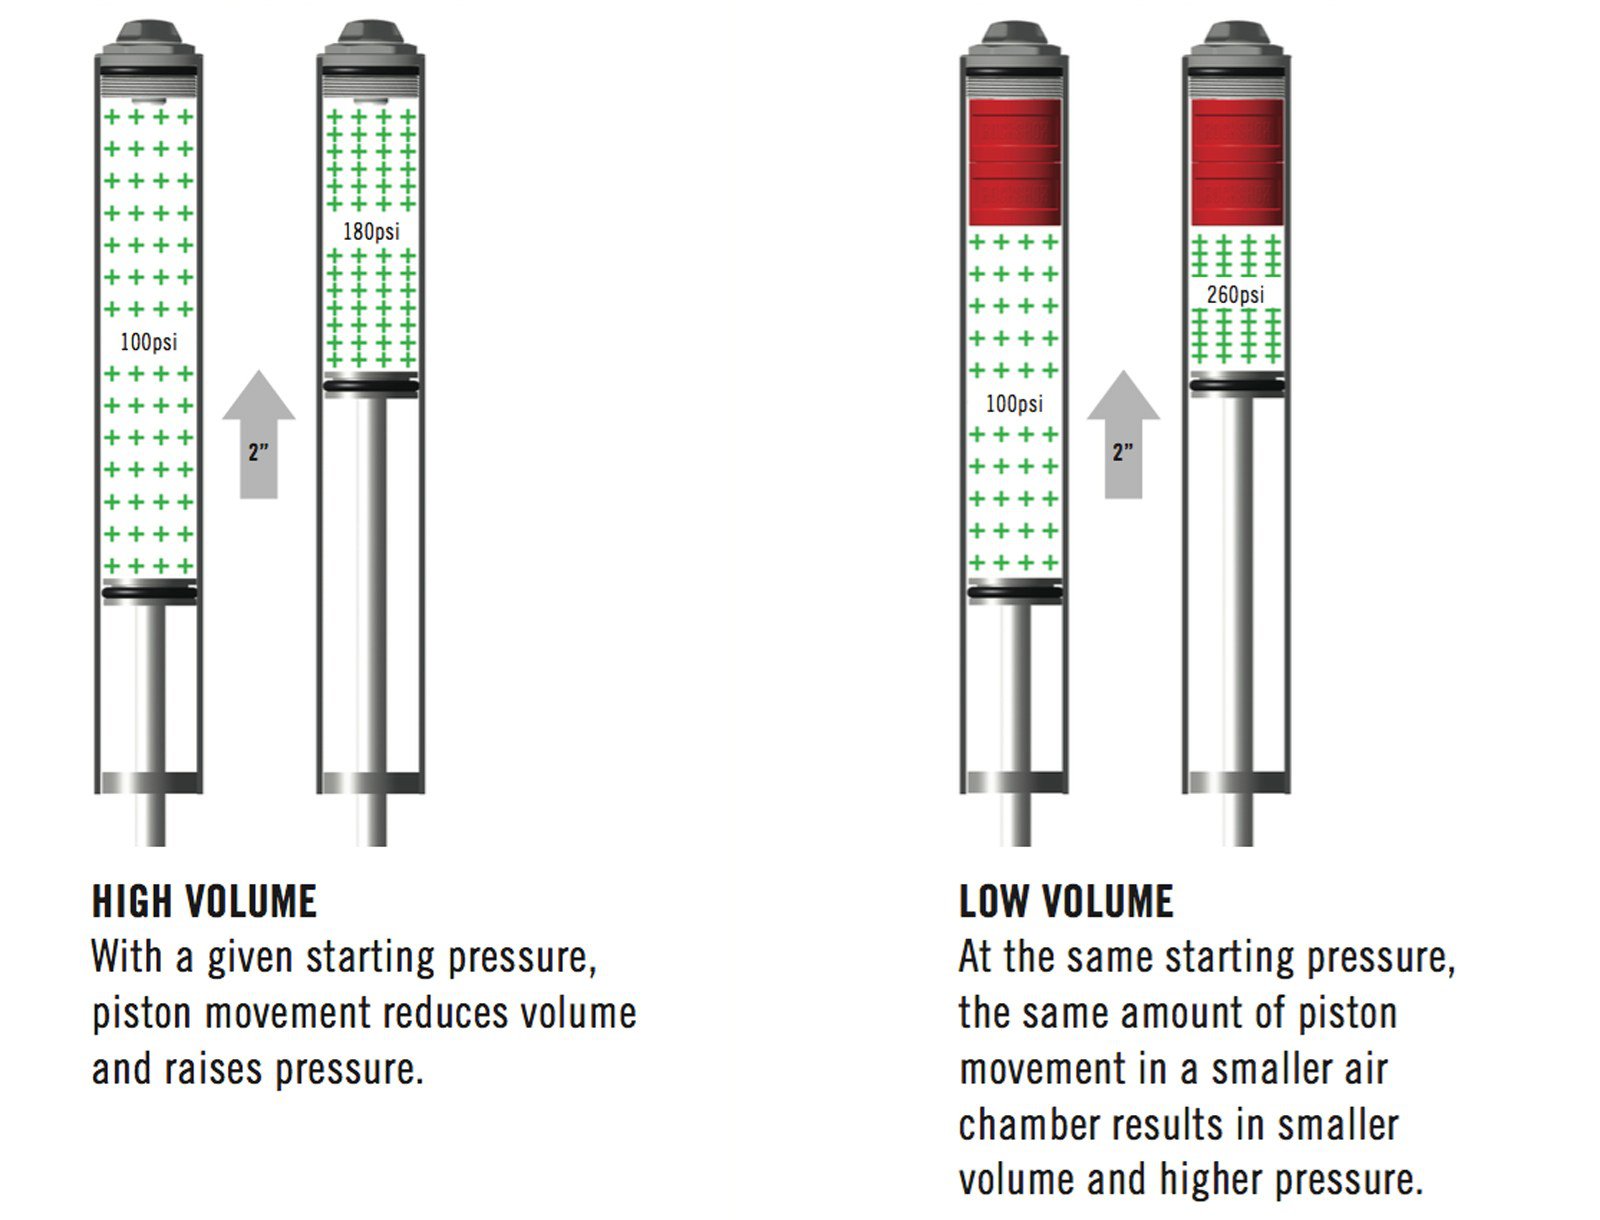
“This is your fork on tokens”. Top left, zero tokens means the air pressure ramps up more slowly as you go through your travel. Adding tokens contribute to a more progressive spring rate.
Adding Tokens and Tuning your Rock Shox Pike
The key here is to remember that if PSI is kept constant, the fork will feel the same at the very top of the stroke, but after that it changes very quickly. Most riders want their fork to be plush in the early stroke and then ramp up as they go through the travel. However, different folks definitely prefer different strokes, and that’s the beauty of an air spring: they give a lot of control over the relationship between initial plushness and mid/late travel ramp up, or spring curve progression.
The Rock Shox Pike is a good fork out of the box, but once you gain a better understanding of how you can bend its performance to your will, it becomes truly great.
Want it super soft early on but progressive as hell? Run low PSI and four tokens, and tune a bit with your low speed compression. Like it a bit more linear? Fewer tokens (maybe none) and tweak your PSI to get an initial stroke you like, and your spring rate won’t differ as much as you make your way through the travel. It’s not as simple as “more aggressive athletes run a more progressive rate curve” because a DH racer like Aaron Gwin who is famous for a really stiff suspension setup might run a fairly linear (but stiff) spring curve, whereas a non-aggressive rider might prefer it to be really soft early on, but would then need a very progressive spring rate in order to not bottom out over every mid-sized bump.
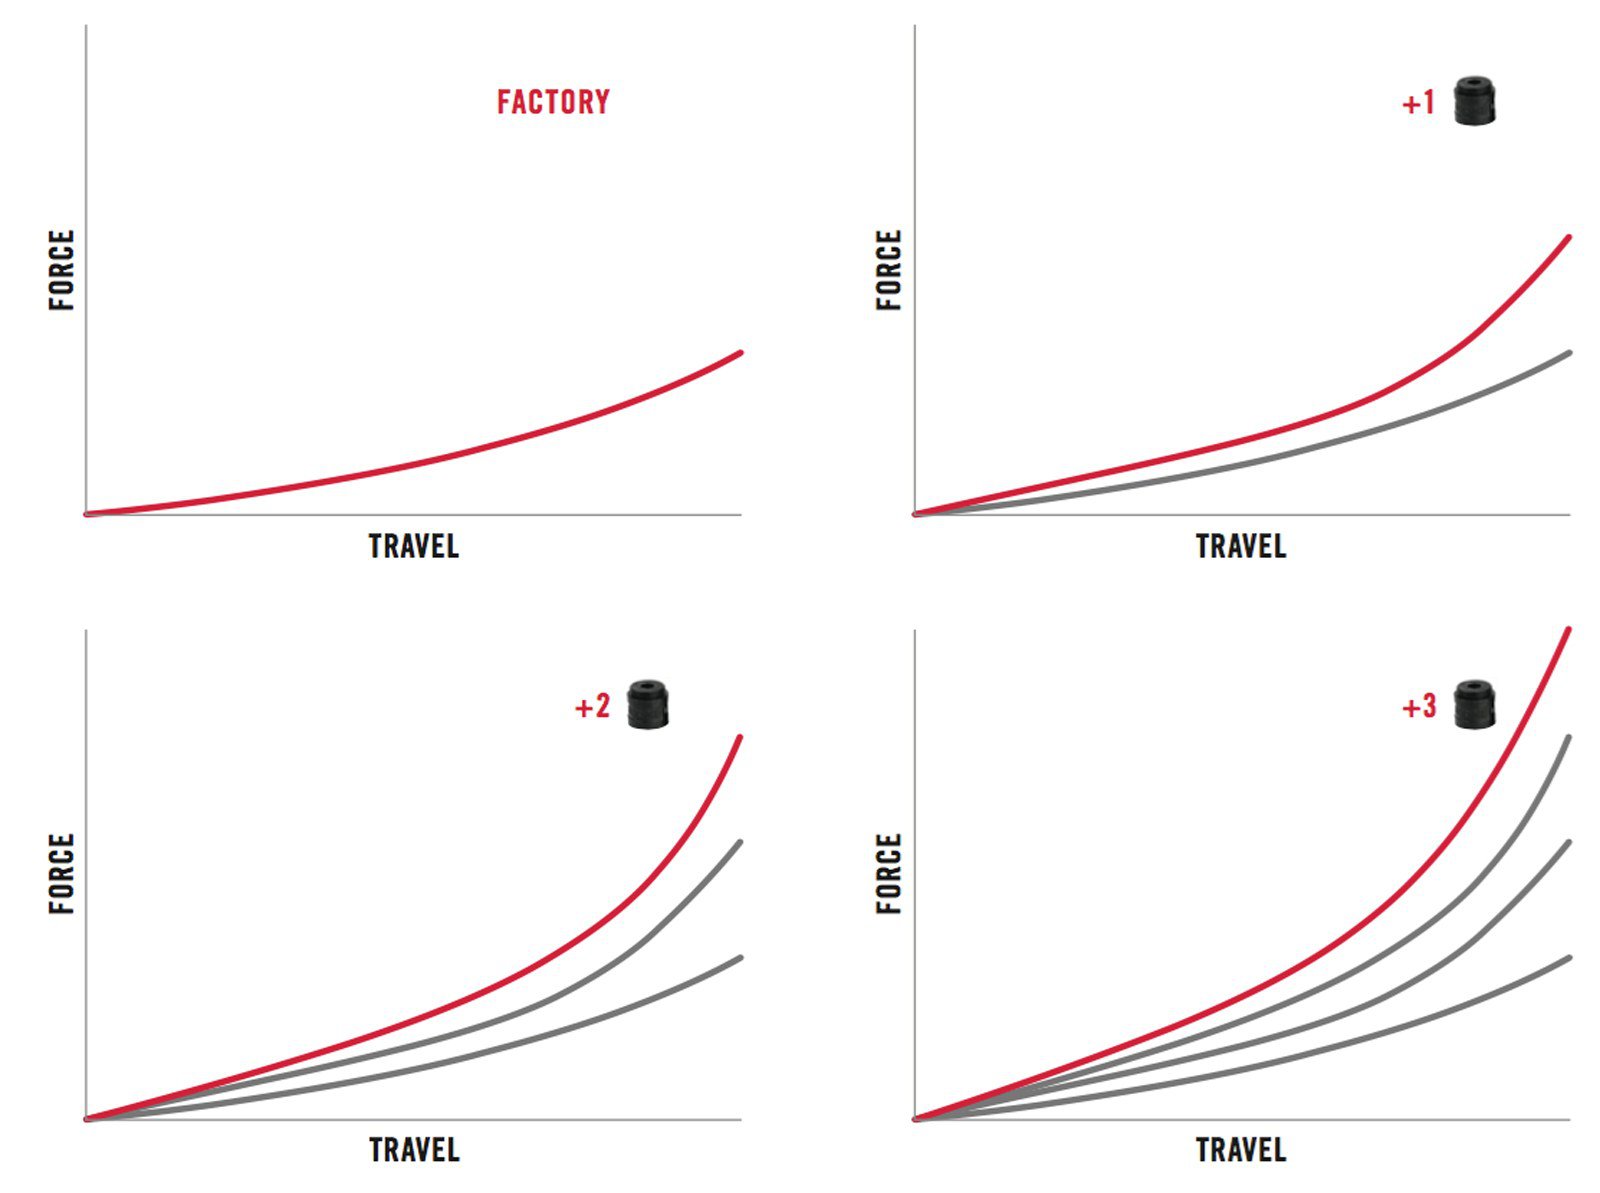
Pike rate curve with zero, one, two, and three tokens installed. The biggest difference is caused by the first token – after that your returns will diminish a little bit, but you can definitely feel the difference as you add or remove each token.
When you’re adding or removing tokens or air pressure, you need to take into account the effect it will have on your rebound. More tokens or PSI will make your existing rebound setting feel faster.
When you add air pressure or a token (to make it more progressive), you also need to slow the rebound down, assuming you want similar rebound performance. Similarly if you add a token, let a little air out (~5 psi) to compensate. We didn’t do it that way at the start because Duncan wanted us to isolate the change the tokens made and keep everything else equal.
Four bottomless tokens all screwed together and ready to give someone’s Pike the ‘full Barel’ treatment.
After a warm up with our ‘normal’ settings, we began at either end of the spectrum with our forks – first by removing all tokens, so it would feel as linear as possible. Next lap with the same air pressure and rebound damping, we put in the maximum number of tokens – on my Pike Solo Air RCT3 (160mm) that meant four tokens went in. Set up that way, with the same air pressure (84 psi), the fork felt firm off the top as before, but with four tokens the progressiveness was very pronounced and rebound was also noticeably faster as expected: the extra force needed to compress the air spring in the fork also means it’ll be coming back at you faster.

The notes I took as I made changes to my Pike. I only changed more than one variable at a time once I started to really zero in on what I wanted. Don’t be cavalier about taking notes – it’s the only way to stay on top of what you’re really doing and it’ll come in handy later.
Two turns in on Angry Pirate I remember thinking “this makes me feel like a 10 year old that stole Dad’s bike”. Working the fork felt like doing pushups with a drunken leprechaun sitting on my back and yelling abuse in my ear when I strayed off line. We had only finished our third run but were moving fast enough on trails that I would have expected to require all my front travel – but there was an inch and a half of stanchion still showing above my fork’s travel indicator. I couldn’t imagine riding all day like that, however I could discern that in certain situations (high speeds and smoother trails) that setup could be beneficial. Huh.
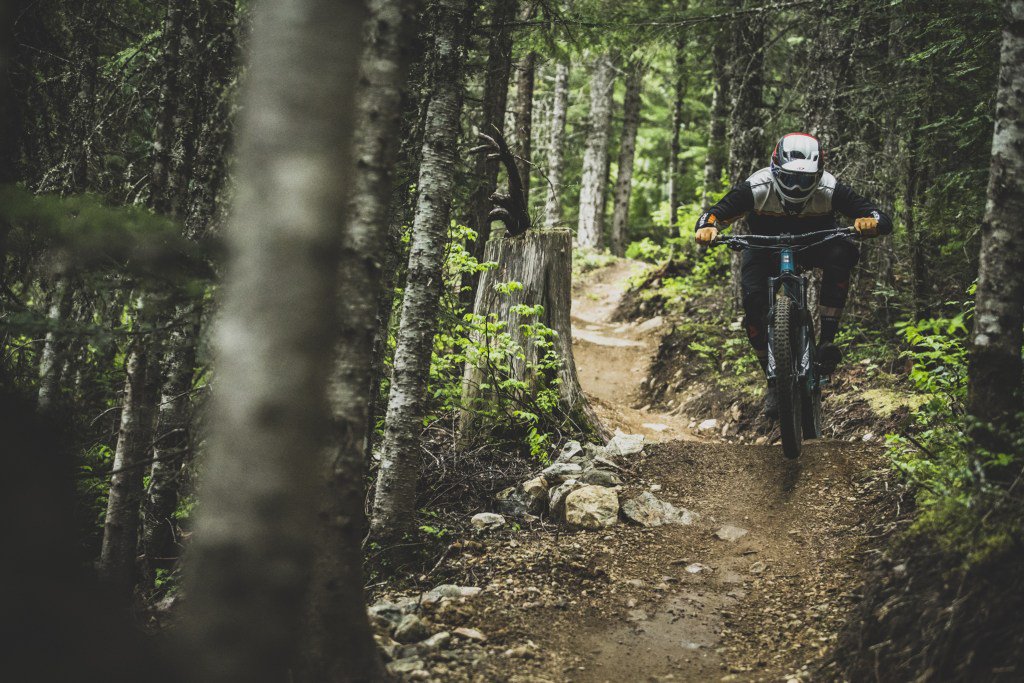
SRAM has a habit of hiring fast PR guys. Tyler Morland testing out the rate curves on his Trek Slash.
From there, you have a few options. You can keep four tokens in and lower the spring rate thus reducing PSI, or remove a token at a time and make rebound and PSI adjustments as necessary. For example for every token you remove you could start by adding 5 PSI and removing a click or two of rebound damping. However if you are able to do lots of lap repeats then I recommend trying only one adjustment at a time unless something else is glaringly out of order. I finally settled on 60 PSI, 3 bottomless tokens, 3 clicks of low speed compression damping, and 6 clicks of rebound (from fully open) – I thought my fork felt pretty damn good before I made all those changes but it’s much better now. Keep in mind that those settings will change based on temperature, terrain, fitness, mood, etc. For riding on the shore or in comparable steep terrain I would likely slow down the rebound a little. In faster terrain I would add PSI and speed up the rebound.
Bombing laps in the bike park on an AM bike is better on a lot of trails than on a big bike. Especially when you’re getting your bike dialed in between runs.
The best part is that all you need to make these changes to your Pike are a 24mm wrench, an 8mm allen key, some bottomless tokens, and a shock pump. By the way, your bike came with tokens in the box it was shipped in, but if you didn’t get them with your bike, it means your shop might have hung onto them for you, so you could ask nicely (beer works sometimes) but a 3-pack retails for $13.99 – well worth it.
Tuning your RockShox Monarch Debonair
The Monarch Debonair comes with a fairly progressive rate curve, but that doesn’t mean you shouldn’t experiment with spacers to see what it’ll do to your bike’s performance. Mine feels better in all sorts of situations now, including technical climbs, which was an unexpected bonus.
As we got our forks dialed, we started working on shocks as well. Something to note is that each spacer in a Monarch Debonair has less impact than a token in a Pike, and the useful range is smaller – you can try with zero or up to eight spacers but there is a sweet spot for each bike that isn’t as large as with a fork. This is mostly because rear suspension kinematics are complicated and that shock is dealing with pedaling forces and your body weight even more than your fork is. In addition, product managers spec shocks that have base tunes designed to work with your bike. That isn’t to say you can’t tune your shock to make it feel better for you, though.
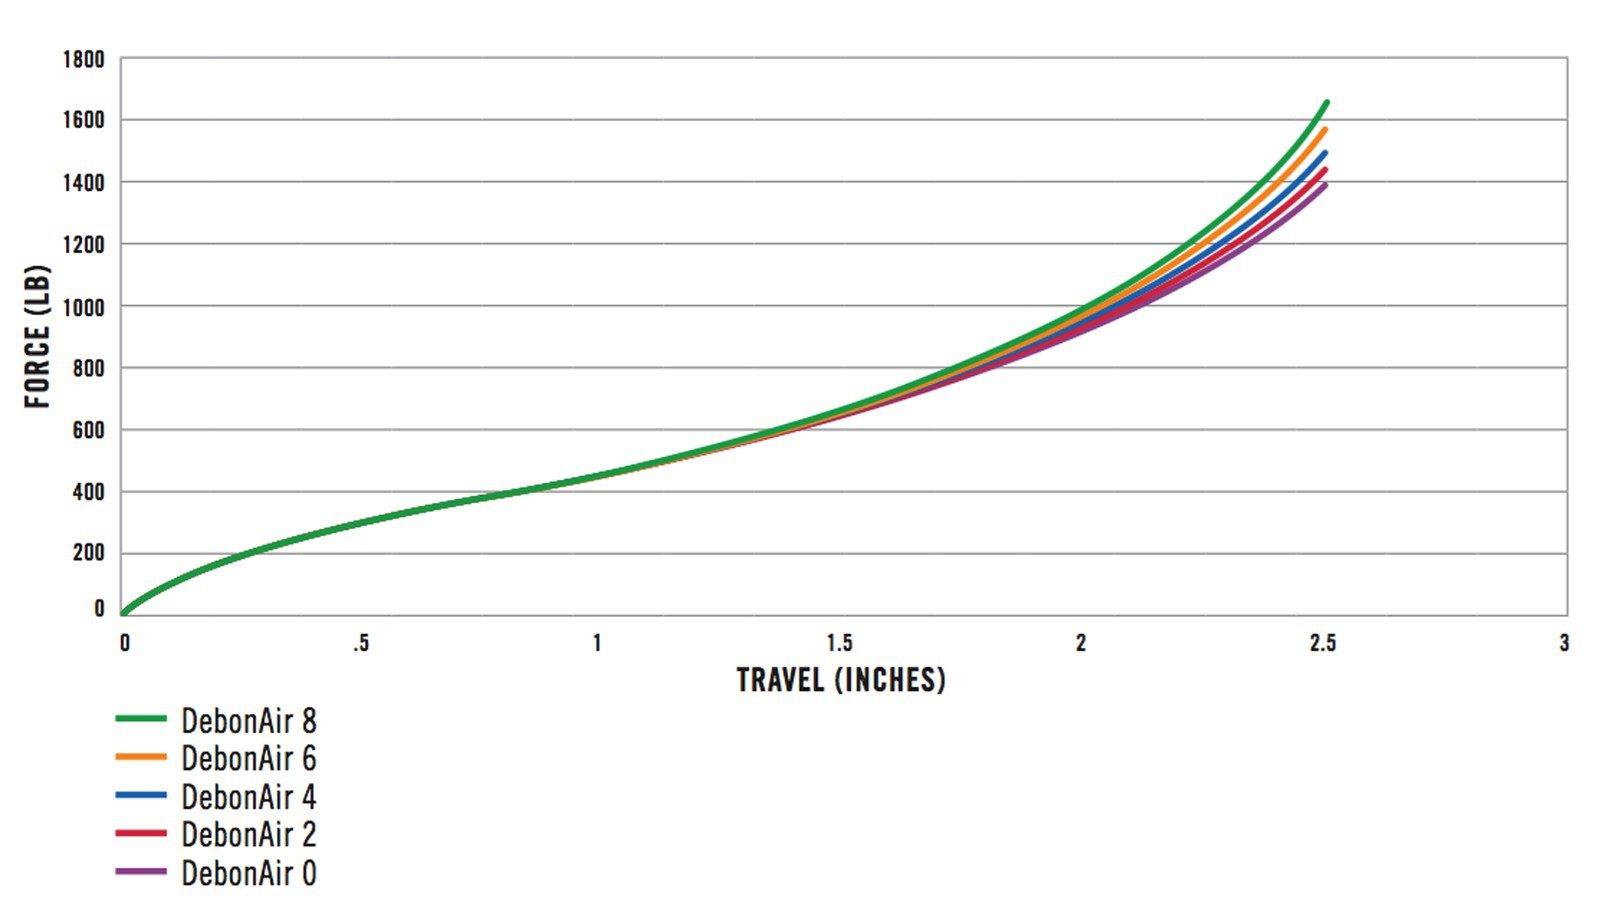
Monarch Debonair rate curves with different numbers of spacers installed. Note that the variability is smaller as you add spacers than when you add tokens to a Pike.
This process was quicker but no less dramatic. I didn’t expect adding spacers would make that positive a difference, but the improvement in support and ride height without sacrificing traction was surprising. The benefits have proven themselves even more since getting back to my trails on the north shore – and not just on the way down. Several times I have ridden into technical climbing sections and found myself cleaning them with less effort than before. And on descents where things get nasty, the extra progression in the rate curve has saved my ass more than once. See my notes below.
The procedure for adding and removing spacers to your Monarch is almost as simple as with a Pike but takes a bit longer since you have to take the shock off your bike. Let the air out, remove the o-ring on the outside and pop off the air can. Add/remove spacers, and re-assemble. If it’s been awhile since you’ve been in there, you might need to add some grease, but it’s really as simple as that.
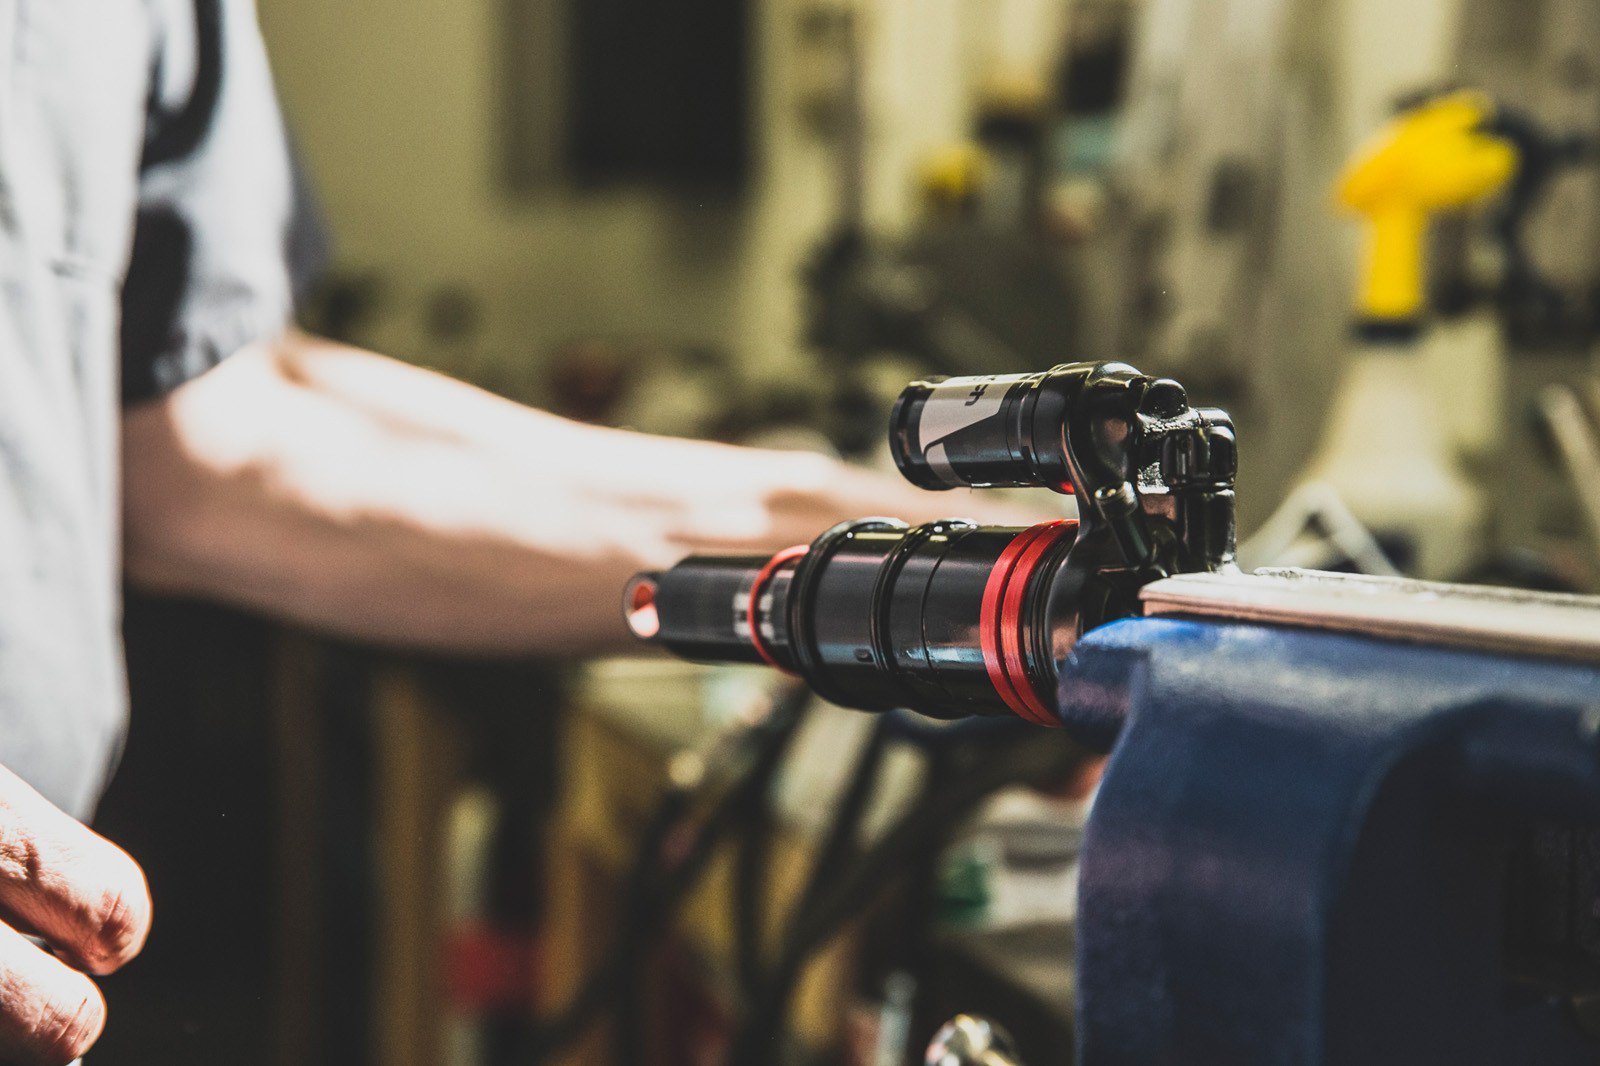
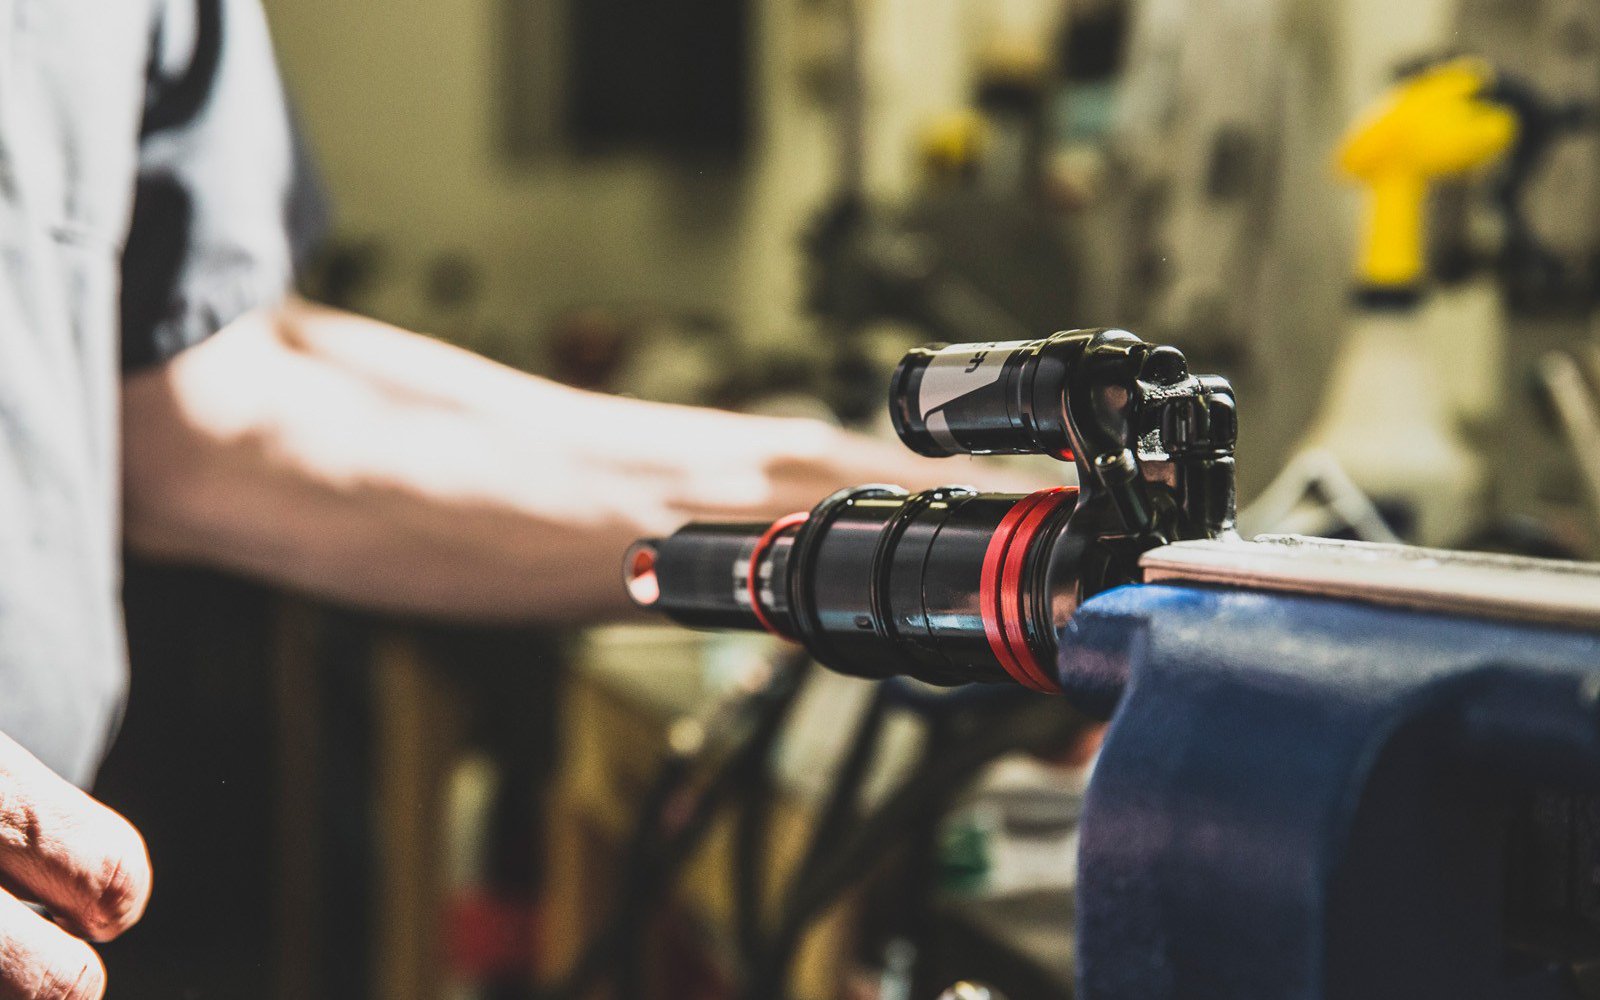
Gettin’ Wizzed. The red rings are the air can spacers – they’re essentially elastic bands.
It’s easy to forget how much technology we’re sitting on sometimes. But if you want to get the most out of the bike you bought, you owe it to yourself to take a bit of time to go through this process.
I liken it to experimenting with water temperature in the shower. You have a temperature that you aim for every morning when you jump in, but at some point you probably tried it hotter than normal or ice cold – and maybe you really liked it. If not, at least after trying it you came to know what you like or don’t like. We go through a lot of learning like that as children but with age, we tend to aim for the comfort zone as soon as possible. I don’t particularly want to go back to running four tokens in my fork with 84 psi, but I also know what it’ll feel like if I do, and that will make every subsequent setup of an air spring fork that much easier to achieve.


Comments
Paris
8 years, 1 month ago
Hi. I was checking your Pike settings table and I wonder about your initial and final sag considering that you dropped your psi from 84 to 60 which is huge!
You mentioned in another post that your final sag was around 25-30% after the 24 psi drop but that looks strange to me since the tokens don't affect that much the sag but the mid and end stroke.
So is there any relationship between tokens and sag? Sram says that for every token you should remove 5 psi but doesn't mention anything about the effect on sag. Also you went from 1 token and 84 psi to 3 tokens and 60 psi so you removed 12 psi per token. I am really confused.
Reply
lucifuge
8 years ago
Good question. I think the way to answer it would bike this:
The riders weight was 190lbs. Now, according to the Rockshox sag chart, that would imply a starting weight of approx 80psi. Now in the test, the rider began at 84psi. So, the starting value is already a bit high. Assume 80psi was more accurate with ZERO tokens (which is the default for such a long travel bike). Adding 3 tokens from none, you could approximate 15psi (3x5psi) drop in pressure which takes you to 65psi. I say 'approximate' because each additional token has less effect than the previous, i.e it's non-linear. Which is basically where the rider got to at the penultimate tune. He then dropped another 5%, probably due to the conditions of where he was riding. So the numbers make perfect sense to me.
FWIW, I have done a lot of testing with suggested pressures (RS) and lowering significantly as in this above scenario we are reading about. I really feel the fork works better at around 20% sag than 25%. And 30% is crazy. At 20% if you speed up the rebound and add in enough LSC, I find the fork is more supple ironically because it stays higher in the 'nice zone'. Also, faster you ride smoother it becomes. Try to get your tyre pressure as low as you can to eat the small stuff too.
Reply
Paris
8 years ago
Excellent answer. Thank you very much.
I agree that with faster rebound the Pike works so much better but if it is too fast (combined with also fast rebound in the Monarch Plus Debonair) then I seem to lose traction and control.
To avoid that I am still experimenting with my rebound settings but I think that I am getting closer.
For the record I have 3 tokens in my 160 Pike (Enduro 29) and 9 bands in my Monarch so both of them are quite progressive and I run 6-8 clicks of rebound from full slow in my Pike and 3-4 in my Monarch.
Reply
lucifuge
8 years ago
And 6-8 from slow is fast enough? What psi are you using?
Reply
Paris
8 years ago
I have 90 psi in the Pike (plus the 3 tokens) and 260 in the Monarch (plus the 9 bands) so 8 clicks are quite OK but not that fast really. I have tried to go up to 12 clicks but it was too fast for me so I dropped back to 8 and I will try 9 and 10 in the next rides.
Actually 12 clicks for fast flowy trails isn't that bad but when I hit slow steep trails with rocks, roots and step downs i get the feeling that I am fighting the bike so this is why I tried even slower rebound.
In your opinion do you think that sag is related to the number of tokens? I am asking because as I have 3 tokens and the fork is really progressive I have reduced my psi by 15 and this affected my sag which actually increased.
Reply
lucifuge
8 years ago
OK, I would expect that. Here's what I believe what is happening. You see this classic graph:
Looks at window for +3 tokens (you scenario). The lowest grey line is for zero tokens. Now imagine you put 105psi in the fork. In other words the maximum hit to the fork will use almost all travel with that shape. Now when you put in 3 tokens and you lower to 90psi what you do is effectively reduce the red curve such that the maximum point MEETS the high point of what was that maximum point of the grey line (for zero tokens). i,e the red line lowers. But realise now what's happened to the earlier travel part of the chart. The red line, for certainly the 1st 50% of the travel, has LOWER force than with zero tokens! In other words, more sag will occur. It's a bit tricky, have a think about it.
Reply
Lee Carey
3 years, 1 month ago
Holy thread revival Batman.. hoping you still on here mate as you seem very knowledgeable have you got experience with the charger2.1 damper?
Reply
Paris
8 years ago
Makes sense. Thank you again. By the way what are your psi and rebound settings for 20% sag? Also what is your weight?
Reply
lucifuge
8 years ago
green line is what I meant.
154lbs riders weight + 150mm solo air Pike:
60 psi with 1 token (65 psi rec by RS with none,… so the less 5 psi seems right).
seems 7-9 clicks rebound from fully fast, 4-6 clicks LSC from none.
Reply
Paris
8 years ago
Once again thank you very much.
Reply
lucifuge
8 years ago
welcome mate
Reply
Chantal
6 years, 1 month ago
This was such a Useful article and helped me a ton in setting up my nomad first and then fine tuning it to my own needs. Any chance your gonna run a similar articl on the super deluxe set up...I reckon the Lyrik I can go with the same approach as above, but I don’t know if the super deluxe which is quite revamped will be a different beast all together
Reply
Pete Roggeman
4 years, 10 months ago
Chantal, the good news is that air springs all respond this way, and adding and removing spacers is still a standard way to tune your air-sprung fork or shock. While the disassembly process may vary slightly, your service manual should fill in that gap for you. If not, it's easy to have your local shop or suspension tuner help out a bit. Good luck!
Reply
Peter Kundrat
7 years, 6 months ago
Peter - thanks for excellent article. Everything makes perfect sense except one thing - how come you prefer such low LSC damping (3 from open)? Brake dive is always a problem for me, especially on steeps and big rocks (even when i tried crazy high 120psi for my 80kg/175lb).
Your setup looks like you like the dive. Would you mind clarifying the rationale?
Reply
Rob Lalinde
8 years ago
Well thought out article. As tedious as getting suspension dialed in can be (Especially coming from from to Rockshox), this article really made me work on getting things dialed in on my new rig. Sure it makes a few rides more homework than just enjoying the ride, but then again, I would rather be "working" on getting my bike dialed in than "working" on grownup work any time. Thanks for the hard work!
Reply
lucas
8 years, 1 month ago
Obligatory newbie question, when you say "fully open" when referring to your rebound, that is the fastest setting, correct? Also, I have the Monarch on my devinci Spartan and am considering upgrading to a Debonair can. Worth the $$ (especially since the dollar sucks)? I am riding in Nelson, and like to ride up, prefer something that smooths out the small bumps, relatively light rider at 140 lbs. I am defenitely going to look into getting some tokens for the Pike, being a light rider I am having trouble finding a good balance between something too soft and divey and then being too firm. I think throwing a couple of tokens in there and futzing with the air pressure might do the trick.
Reply
DrBrownPow
8 years, 4 months ago
More articles like this. Awesome stuff.
Reply
Bogdan M
8 years, 8 months ago
Hey Pete … awesome article, thanks so much for posting. I just got a Nomad a few weeks back when they were blowing out the old colors and I'm experimenting. I had a CCDBa CS from a previous bike and tried it out and didn't really dig it too much, compared to the stock Monarch … my next step is to play around with some tokens in the back. I was wondering about something. We're adding spacers to the positive spring … not the negative … though I guess you can put it on either side, but by adding more to the positive you do get a bigger ramp towards the end, but you're also changing the positive/negative ratio which I would think is a good thing. Did the Rockshox guys talk about that much, just curious on their take on this. Or maybe adding the spacer to the neg side is not recommended.
Reply
Cam Shook
8 years, 10 months ago
Hi Pete thanks for the article. Where can i get air can spacers? my local shop has had no luck finding them.
Reply
Pete Roggeman
8 years, 10 months ago
Cam, they should be able to harass their distributor. If that didn't work, try giving Fluid Function in Squamish a call.
Reply
AndrewR
8 years, 10 months ago
Or Vorsprung in Whistler. Steve has them (or had them the other day when I bought a packet).
Reply
bkbroiler
8 years, 10 months ago
Where are my manners…great content! Thanks for this
Reply
bkbroiler
8 years, 10 months ago
Any idea if it's the same volume adjustment with the Vivid air Pete?
Reply
Pete Roggeman
8 years, 10 months ago
I know that the same kit is labeled as also being for use on the Vivid - what I can't tell you is whether it's just as easy to play around with a Vivid Air. I'm checking, though - stay tuned.
Reply
bkbroiler
8 years, 10 months ago
Thanks, tried some new stuff on my Pike and now the rear is nowhere near as good lol
Reply
Pete Roggeman
8 years, 10 months ago
Damned if you do, damned if you don't! But hey, getting the front end dialed is a great start.
Reply
t.odd
8 years, 10 months ago
great piece, Pete, nicely broken down in easy to understand terms! Given me a bit of confidence to look into my RS products a bit deeper!
note, the video link for installing tokens is dead….
Reply
Pete Roggeman
8 years, 10 months ago
Thanks, Todd!
Whoops, I messed up that link. It's been fixed.
Reply
Bogdan M
8 years, 8 months ago
Also a good vid here …
Reply
RV
8 years, 10 months ago
Rider weight?
Reply
Steven De 'Ath
8 years, 10 months ago
I wondered this also, well more importantly what your sag was Pete on your final set up? Great article, it has motivated me to try and improve on an already great fork, I'm going to try a 3rd token in my 160mm rc3t's and see how I get on, adjusting the settings accordingly.
Reply
Pete Roggeman
8 years, 10 months ago
25-30%. But as I was going through the process I wasn't even measuring sag, we were focused entirely on feel and not worrying about the rest - Duncan was even encouraging us not to worry about how much travel we were using (however when I was leaving 1.5″ on the table I couldn't ignore it). Sag is still important, but I learned it's not always as important as I used to think. Now to be fair, we were testing in the bike park, so it was all about downhill performance. In the case of where I ended up, with the Nomad, the settings that worked great for DH have held up nicely for pedaling, but your mileage may vary.
Reply
Steven De 'Ath
8 years, 10 months ago
Thanks for taking the time to reply Pete, I've just read a similar article on the 'other' website and yours kicks it's ass big time. Far more detailed and interesting. Keep em coming 🙂
Reply
Pete Roggeman
8 years, 10 months ago
Thanks, Steven. The response has been great. We're keen to do more content like this along similar lines for sure.
Reply
The Chez
8 years, 2 months ago
Thanks for this article. I'm going to have to try a couple things. But…as you mentioned you don't like leaving travel on the table. I agree, otherwise why carry around the extra weight of a heavier fork? I have never bottomed out on either of my Pikes and can't get all the travel. If I run too low a PSI there's brake dive. If I run too high, I like how it pounds through things but it's almost too stiff and I can't get through the travel. Either way, I'm not getting it all. Think there's a reason? Any help? I love how the forks feel I just wish I could eke out the last of the puzzle.
Reply
Pete Roggeman
8 years, 2 months ago
Your problem is tailor made for using air spacers, Chez. You'll be able to run a low PSI but the quicker ramp up will minimize brake dive, and you should be able to get full travel - how often you get full travel is up to your preference, riding style, and terrain.
Reply
The Chez
8 years, 2 months ago
Thanks for the response. I've put two spacers into each but still haven't found the solution. Maybe I'll buy a pack of spacers and try three and then maybe four. I love pushing that fork hard I'm just dreaming of the day when I can run a little more plush and not have dive. I've dialed out my low speed compression all the way to solve that issue but still have to run it too firm on the sag.
Reply
Pete Roggeman
8 years, 2 months ago
Back off the sag and run some low speed compression, Chez. The low-speed compression is there to counteract bobbing from things like pedaling and braking. What bike, size, fork length? And how tall and heavy are you?
Reply
The Chez
8 years, 2 months ago
I let off the PSI today and put in three spacers and added some low speed compression. Rode great but still diving a little more than I want. I'm going to try dialing in another two clicks. Finding good settings is all fun to me.
I'm on a medium Norco Range with a 160mm Pike RCT and a large Nimble 9. I'm 5'11" and 185 pounds with my gear. I worked today with your final settings and it worked pretty well. I think it was the first time I ran the fork open the whole time.
Reply
The Chez
8 years, 1 month ago
Thanks for the article, Pete. I now have my 150mm dialed and working for the fine tune to get the 160mm to go through full travel. I like not having dive but it being more plush rather than running the "Gwin" tune. It was always dial out low speed or run firm. The 150 is definitely in the sweet spot and I can feel the fork running the whole time. It's pretty confidence inspiring and I'm noticing I'm rolling sections a lot quicker than before. Cheers!
Reply
AndrewR
8 years, 10 months ago
I agree, settings (as you have already done the work - thanks very much) mean so much more if you supply rider weight.
Reply
Pete Roggeman
8 years, 10 months ago
Rider weight of 190 lbs.
But the point is that you shouldn't just take someone else's settings and expect that to work as well as doing it from scratch yourself. Temperature, riding style, tire psi, bike model, type of trails, different shock tunes, pump calibrations….a litany of reasons why you need to go through the whole process. By all means use it as a baseline if you like, but I strongly encourage you to feel the difference between really linear and really progressive and then dial it in from one side or the other of the spectrum.
Reply
AndrewR
8 years, 10 months ago
But the point is that some of use ride often enough and at a decent enough level that looking at your settings and comparing to a known weight and rider style (I have seen enough photos of you riding to determine that fairly accurately) gives me a pretty accurate start point.
Same bike, same shock tune, similar temps (Whistler), same trails, different shock pumps (they are all different), only real differences are riding styles, tyres and tyre pressures. But close enough to give me a start point.
You were bang on about 6 bands, who would have thought that all those extra bands would help create a better mid travel platform yet still allow full use of travel. Well done on experimenting with that many bands.
My experience with the Debonair:
M/L tune; no bands; 225 psi = 30% sag, bike cannot use full travel (even with deliberate experiementation) and bike rides like poop (poor traction and trail compliance in any setting). Search forums, find that 35% is the magic number, realise that a wide range of air pressures can give 35%, speak to suspension maestros and Santa Cruz re "problem" realise that:
a. Debonair not really designed for 215 lbs riders (140 -200 lbs given as design range).
b. Shock not very well understood by suspension maestros, and
c. Air can trying to juggle too many variables with one set of valves and not enough adjustment potential (ie no LSC and HSC and a fairly vague rebound dial).
Give up, fit X-Fusion Vector Air HLR, easy set up, awesome in all areas, would give it 100% if there was a climb switch to firm up LSC/ LSR for climbing but not an issue most of the time.
Thought I would give it another go whilst injured as I was doing a lot more seated climbing and a lot more slower descending. Expecting more from the climb and less from the descend.
M/L tune; 2 bands; 205 psi = 35% sag, bike cannot use full travel, far better traction but still looking for something more, requires lots of use of trail/ climb mode but traction suffers in climb mode.
M/L tune; 4 bands; 200 psi = 35% sag, bike can use full travel, hold up better in mid travel, needs trail mode for climbing. Traction could be better when climbing.
M/L tune; 6 bands; 195 psi = 35% sag, bike can smoothly use full travel, holds up well in mid travel, better with trail mode for climbing but no longer mandatory. Traction amazing. Starting to forget shock is there and just enjoying riding.
But to be honest it looks as if SRAM started running these press camps when they worked out that their initial shock set up material was actually very poor (implied that the volume reducing bands only affected end stroke and had no effect on the shock holding slightly higher in the mid travel or increasing traction) and that a lot of Nomad owners (and probably other bike model owners) were struggling to understand why the Debonair was selected for the Nomad in the first place.
Just my two cents worth based on playing with it (and riding it a lot) since July 2014.
Reply
Pete Roggeman
8 years, 10 months ago
Thanks for the contribution, Andrew! Lots of great stuff in there.
For what it's worth I loved the Monarch Debonair from the moment I put it on (last July) even though it wasn't performing as well then as it is now - but I maintain that it works better for me and the riding I do on the Nomad than the Vivid Air. To be fair I haven't spent nearly as much time tuning the Vivid.
Anyway, your observations and thoughts on the X-Fusion Vector Air are a good supplement - I'm sure some others will find it useful.
Reply
Bogdan M
8 years, 8 months ago
What I've started to wonder about reading thru this and starting to do my own tinkering is that from what I've read the Monarch has a very large Neg air chamber. So when we reduce the positive one it will indeed make it more rampy, but at the same time we've now made the neg air chamber larger in relation to the positive from before … so that also changes dynamics, perhaps now there's more neg spring to push back on the positive air chamber.
Reply
Bogdan M
8 years, 8 months ago
Actually reading this pb article it seems the neg air spring only affect the initial portion … so no effect towards the end. I wonder if there's any benefit from tunning the neg air chamber size … i guess if it's larger it would drop pressure slower then if it's smaller, so I guess by having a larger neg to pos ratio the neg air spring has more effect on the positive chamber I think …
Reply
Lee Lau
8 years, 10 months ago
Very useful. Thanks!
Reply
Justin
8 years, 10 months ago
Can the FNG sticker package be ordered through SRAM?
Reply
chrismitchell
8 years, 10 months ago
wondering this too, really want those decals
Reply
Cam McRae
8 years, 10 months ago
The BNG tune is good too. Bold! New Graphics.
Found this
Reply
Pete Roggeman
8 years, 10 months ago
I always get that wrong. BNG is the correct term 😉
Reply
Facebook User
8 years, 10 months ago
Great little summary of suspension tuning basics with modern forks and shock. Two things that most riders never adhere to is having their suspension serviced as regularly as recommended by the manufacturer and proper swingarm pivot set up. If you ride hard out all spring, summer and autumn, then your suspension fluid is going to get worked over, cooked and lose it's damping qualities in about 3 to 4 months. How often do you have to oil changed in your car? Every 10000k's, so why ride a whole year or more with out changing suspension fluids? Madness!
Take the shock out of your bike, remove the rear wheel, remove the brake and hose and then try cycling the swingarm up and down. Is it smooth and drag free? Probably not. Probably been over tightened in the factory and never been serviced, right? This will rob you of about 30% of your suspensions performance. There's no point trying to tune your suspension if it is hindered by poor build quality or lack of service.
If you haven't done this recently on your Nomad Pete, or changed the fluids, I would highly recommend you do. Santa Cruz are one of the worst offenders for having over tightened pivot bearings from the factory and freshly serviced suspension is the best place to start when you want to get things dialled, otherwise you don't really know were you are.
Reply
Pete Roggeman
8 years, 10 months ago
Thanks, Doug, those are good points. My suspension was serviced right before this exercise took place for that very reason.
Reply
Darren Beckett
8 years, 1 month ago
Hi Pete,
Firstly thanks for such a great write up, and thanks again to all who have responded with input and ideas as well.
I have a 2016 Giant Reign 1, fitted with Rockshox Pike RC Solo Fork and
Rockshox Monarch R Debonair Rear Shock, my bike has 160mm Travel.
I weigh in at 205lb, I have tried my Bike now for the last 4 mths, using
the Factory Guides regarding pressures in the Fork and Shocks for my
riding weight.
Fork Pressure at 85psi, Rebound 7 click from Full Open, Compression at 6 click from Full Open.
Rear Shock Pressure at 250psi, Sag at 35%, Rebound 4 click from full Slow.
I have thought my bike was pretty good before, using all travel and doing what it should, BUT.
I have had a play around after reading all of these replies Especially
the Post from Andrew R, and original thoughts from yourself, those
Tables that you have supplied have been a huge development baseline for
me to look at what can be achieved and done.
I have my Current Set Up at the moment, my bike feels like a completely
different machine to ride, so much smoother and just seems to float
through the Trails.
My Current Set Up is,
Fork Fitted with 3 Tokens, Pressure 60psi, Rebound 6 clicks from Full Open, Compression at 3 clicks from Full Open.
Rear Fitted with 4 Bands, Shock Pressure 230psi, Sag at 35%, Rebound 4 click from Full Open.
I am heading over to New Zealand very soon, can not wait to hit the Trails over there.
Reply
AndrewR
8 years, 10 months ago
Good point Doug. Friend just built (in fact doing it right now) a new frame and all pivots were over tight and lacking in lubrication.
Reply
xeren
8 years, 10 months ago
how does one go about loosening up pivot bearings?
Reply
Please log in to leave a comment.