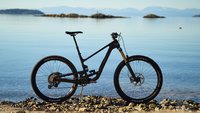
MindShift rotation180 Trail camera pack
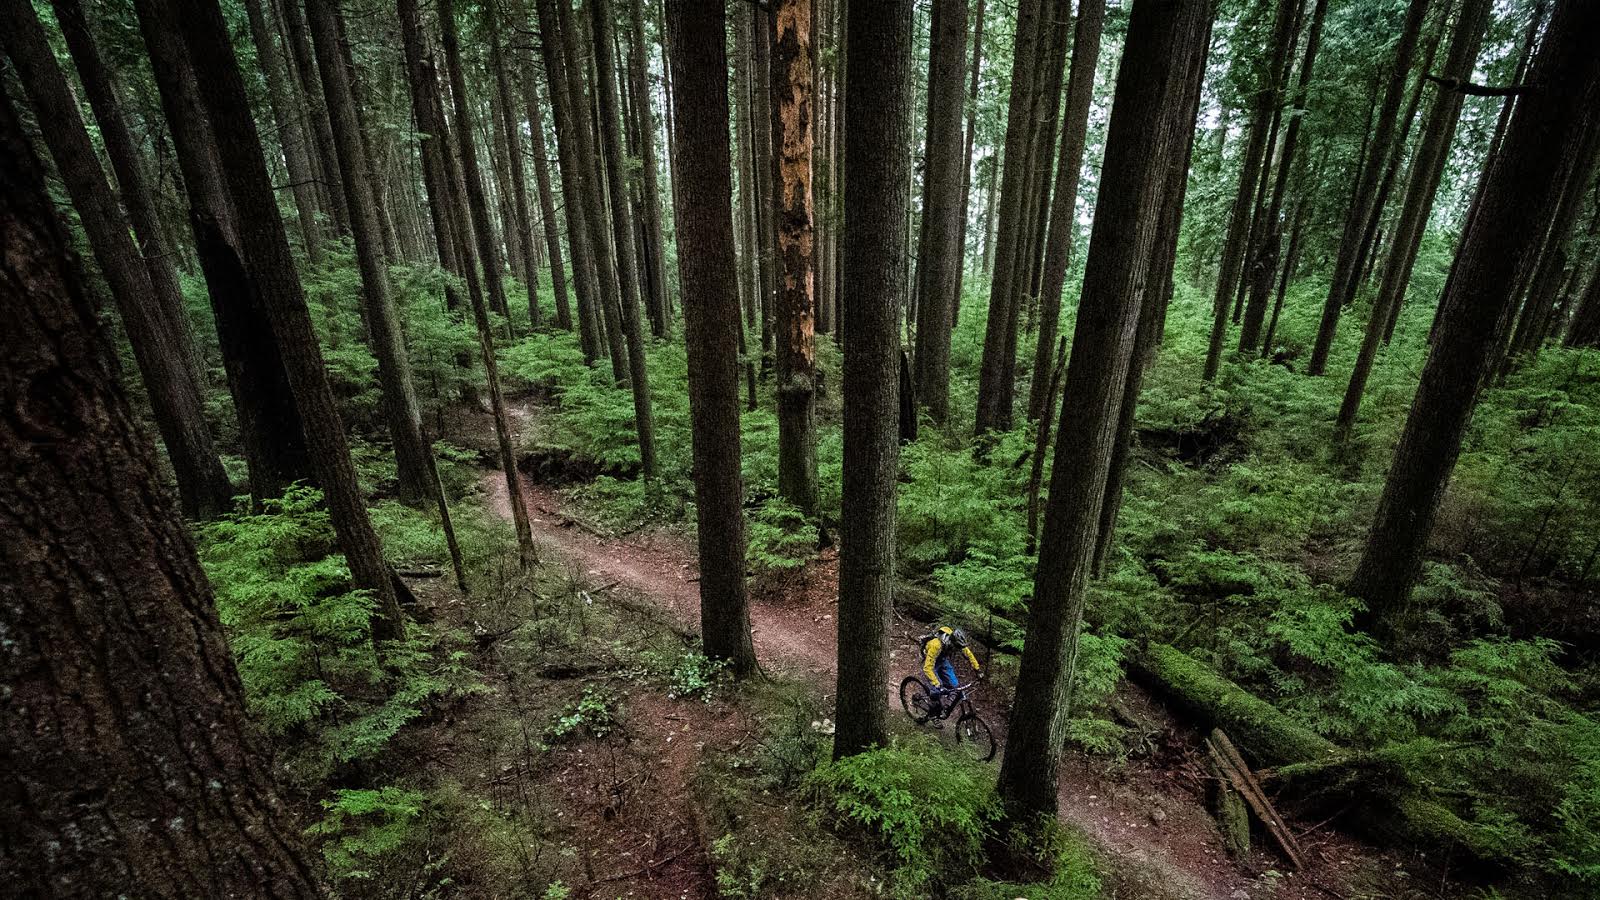
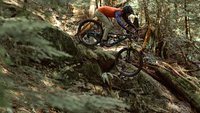
I often take a DSLR camera with me when I hit the trails so I can get shots of friends riding, the beauty of the woods or some product I’m testing. Because I didn’t want to risk damaging my camera gear, I used to put it in a Pelican case and jam that into a Dakine Apex pack. The whole thing ended up weighing north of 20lbs when it was fully loaded, and I often felt like I was going to tip over backwards on steep climbs. It was heavy, bulky, a bit of a pain to take photos (which meant that there were times when I didn’t even bother) and nearly impossible to get spontaneous shots. Then along comes a solution to all of those headaches: the new rotation180° Trail pack from MindShift Gear.
MindShift is a group of professional photographers and gear designers out of northern California. They’ve created a series of five photo / hydration packs that make it much easier and faster to capture pictures while you’re out enjoying nature. The premise is simple: a fully functional hydration pack that allows you to access your camera at any time – without having to remove the pack itself.

The rotation180° Trail might look like an ordinary hydration pack at first glance, but there’s something special hiding in the bottom compartment. The dark blue pouch on the outside of the pack is stretchy, for extra gear storage. Note the small tripod tucked into the pocket on the left side of the bag.
The whole idea is made possible thanks to a moveable camera beltpack that’s incorporated into the backpack, but can move independently of it. Simply push down on the magnetized clip that holds a security flap in place, tug on a waist strap that is attached to both sides of the beltpack (not the main pack) in a counterclockwise direction and the beltpack slides out of its compartment for easy camera access – the rotation 180° in the product name. Once you’ve taken your photos, tug the waist strap in a clockwise direction, let the magnetic clip snap back into place and resume riding. It really is that easy.
. The waist straps are attached to the beltpack, not the backpack. The curved piece at the bottom of the pack is padded for additional camera protection.")
The right side of the Trail pack, with the security flap held closed with the magnetic clip (the light grey plastic piece near the bottom of the pack). The waist straps are attached to the beltpack, not the backpack. The curved piece at the bottom of the pack is padded for additional camera protection.
Function and fit
There are a host of smart features on the Trail: the beltpack is padded on all sides with closed cell foam, so it protects your camera. It comes with two removable Velcro’d dividers to partition or resize the pouch for smaller cameras, as well as a mesh pocket with a Velcro closure and a sleeve pouch that will fit a small tablet; a leash secures the beltpack to the backpack so you can’t accidentally lose it.

The hinged security flap open and the beltpack exposed. You can remove it from its cave by first pulling on the waist strap and then using the handle on the beltpack.
The backpack itself isn’t flashy, but it’s well executed. Comfortably padded shoulder straps and back padding are made of breathable airflow mesh, and the adjustable sternum strap is plenty long. The waist strap is adequately but not excessively padded and pulls inward to tighten. All of that makes the pack very comfortable to wear and distributes weight evenly, even for extended periods of time.

There’s plenty of room in the belt pack for a Canon Rebel with an 18-55mm lens. The pouch on the right is designed for a tablet. The orange mesh pouch on the left can hold maps or other small items. The divider allows you to create separate compartments for snacks, if you want. There’s room in the belt pack for a Canon 7D camera with a 24-105mm lens, which is what I normally carry on the trail, but it takes up virtually all of the belt pack’s room. The leash attaches to the pack at the top of the security flap, and clips to the top corner of the beltpack.
Although the main compartment on the pack isn’t divided into smaller compartments, it does have a zippered mesh pocket with a key clip inside. It’s large enough to hold a sandwich, tube, tire pump, shock pump, tube, multi tool, knee warmers and an XXL Race Face Chute winter jacket. I’ve also used it to hold a second lens for the camera, which I carried in its own padded lens case.

The main gear compartment on the backpack has plenty of room for standard day-trip riding gear, as well as an extra camera lens or clothing. The zippered orange mesh pocket on the left is great for wallets and keys. The small zippered accessory pocket on the top of the bag is good for phones, sunglasses and iPods, but it would better if it had fleece lining.
A dedicated hydration reservoir compartment has room for a 2L bladder; the fact that it’s double-isolated from the camera is a big plus. There’s a water bottle / tripod leg pouch on the left side of the bag, as well as an accessory pouch at the top and a large stretch pocket on the front of the pack. A single compression strap on each side of the backpack allows you to cinch things down when the main compartment isn’t full. You can also tuck clothing under a strap in a pinch, but it will flap around. Lastly, there’s a second layer of foam padding on the curved bottom portion of the backpack to provide additional protection for your camera.

The hydration reservoir compartment. The orange nylon tab holds the bladder in place much better than the plastic hook used in some other companies’ bags.
I’m a tall guy (Stu is 6’4″ tall -Ed), and packs often feel like they have to sit really low in the straps in order to get them comfortable on my back, but that was never the case with the Trail. More importantly, it didn’t move around when I was riding, distributed the weight very well and I never had a sore lower back. All wins in my book.

The Trail fit me very well, and always felt comfortable on my back. The beltpack compartment is at the very bottom of the bag, on the wearer’s right. Hopefully this won’t be too much of an issue for lefties. Everything is nicely compact and neat when closed. Photo: Danielle Gibson
The verdict…
The MindShift rotation180 packs are a pretty revolutionary concept when you think about it. Allowing riders to take photos without having to remove their packs opens the door for people to capture so many more great memories. It also saves your riding buddies from having to wait around for the photographer.
For the first few rides with the Trail, I found myself instinctively starting to take off my pack to grab my camera. Over time, though, it became second nature and I even started to think more about taking photos than I did in the past – specifically because I knew it was easy to get to my camera. On top of that, I was also able to capture the type of spontaneous shots that I’d missed in the past because I couldn’t get my camera out in time.

The beltpack emerging from its cave. It’s easy to find the magnetic clip, even without looking, and the motion of undoing the clip and sliding the beltpack around to the front becomes fluid fairly quickly. Photo: Danielle Gibson
Riding with a nice DSLR in my pack was always a bit worrisome because I can’t afford to wreck my camera. Although I didn’t crashtest the Trail, I’m reasonably confident that between the camera location at the bottom of the pack, the thicker closed-cell foam of the beltpack and the padding at the base of the backpack, my camera will be well protected. I’m trading that extra degree of Peli case protection for easier and faster access, lighter weight, less bulk and more photos, and it’s a worthwhile trade in my opinion.
A minor gripe – getting the beltpack back into its cave can be a bit of a struggle if the security flap gets in the way. Returning it to its home can become a slightly awkward two-handed operation, but not so much so that it’s actually frustrating. [UPDATE – the guys at MindShift contacted me to let me know that the bungee cord with the cord lock located on the top edge of the flap holds it open when the cord is pulled out a couple of inches. And what do you know – it does hold the flap out of the way. Problem solved.]

The optional rain cover package for the Trail includes one for the backpack and one for the beltpack. It took a couple of tries to figure out how it attached, but once I got it in place, it was solid. The fact that you don’t lose any functionality is great.
What would I change? Fleece lining in the accessory pocket, to protect sunglasses. A couple of pouches in the main compartment, so it’s possible to organize food, clothing and tools. Most of all, I’d like to see a pair of external compression straps to hold a jacket or set of knee / shin pads. It would free up room inside the pack for more food, an additional camera lens or two, and save me from having to put wet or dirty gear inside the bag.
My biggest compliment for any product is that I don’t think about it while I’m using it. And I never thought about the rotation 180° Trail while I was riding. The pack itself works as a stand-alone product; adding the easy-access, protected camera component to it makes it a great product that mountain bikers and hikers who like to bring their photo gear with them will be glad to have at their disposal. This will definitely be my go-to pack when I’m hitting the trails with my camera.

I never thought about the Trail while I was riding with it, because it carried the weight so well, didn’t move around at all and kept my camera gear safe. Photo: Danielle Gibson
US buyers can order the Trail directly from MindShift, but The Camera Store in Calgary is apparently the place to purchase from on this side of the 49th parallel. MSRP is US$179 / CAD$209, plus you’ll need to shell out another $30 for a bladder. The rain cover will cost you an additional US$19.99. The Trail is the smallest of the five packs offered by MindShift; the largest is 29.6L, with an MSRP of $499.99.
It’s like a kangaroo pouch for your camera. On your back.
Comments
Please log in to leave a comment.