Gear Shots #56
VHoldr Contour HD
Words and photos by Lee Lau
In the ContourHD product, Vholdr has developed a compact light camera that can be used to shoot POV (Point of View) video footage with exceptional picture quality. It’s a well thought-out unit; easy to operate yet with pretty much every feature that one might want in a POV camera. This preliminary review does not lend itself to anything more then the most cursory of examinations of mounting options but this appears to be an area that might need improvement and/or some tinkering. A more involved review to follow will look at the Vholdr ContourHD for use primarily in the sport of freeride/downhill mountain biking. It will also suggest some easy-to-implement mounting option modifications.
From the Vholdr site here’s some selected highlights of the ContourHD
* HD (1280 x 720) at 30 fps SD (Actual 29.97)
* 135-degree wide angle lens
* MicroSD/SDHC up to 16GB (2GB included)
* Internal microphone
* Optimized for H.264 code
* Outputs files in .MOV format
* Weight – 4 oz, 101.5g (precise weight measurement courtesy of gramslightbikes)

ContourHD next to a helmet for comparative size
Form Factor
To disclose my bias, I have zero interest in POV Cameras with wires. Let me explain further. I will use a POV Camera if it’s easy to use. I’ve seen enough people ferkling around with wires and bulky control units in winter or in summer that I know I would quickly lose interest in any POV unit that was excessively big or unergonomic.
The ContourHD seems to fit the bill in this regard. It’s an attractive non-descript black brushed aluminium unit. According to Vholdr it’s water resistant and can “withstand dust, dirt, mud and snow“. It has no wires and is self contained. It is also purportedly “shock, vibration and impact-resistant“. Since freeride and DH biking will invariably involve impacts, this is a pre-requisite.

VHoldr ContourHD mounted on a helmet – note the wording on the lens is pointed the correct way.
Useability
ContourHD comes with a Quickstart guide (the downloadable version is here). The manual is short and it should be as this is about as easy to use as one can make a complex machine. One button turns it on. another button flips the record switch on and off. The power button is small but easy to find even with gloves on. The record on/off catch is also easy to operate and a big flip switch on the unit; both buttons are readily accessible even while the unit is on a helmet. This is an obvious bonus when riding and filming with an impatient group as set up times for fliming downtimes are reduced to almost zero.
Powering up the ContourHD turns on aiming lasers. If you’re following a rider, remember to point the lasers at a point above the riders head; as (in my opinion) its nicer to have the rider fill the bottom of the screen and have the trail ahead occupy the top half of the screen. Aiming tip; when worn on the helmet this will result in the Vholdr being inclined approximately minus 5 to minus 10 degrees from an axis perpendicular to your neck, i.e. tilted back ever so slightly.

Cam jerry-rigged a vented helmet mount on his helmet. The mount is correctly pointed slightly up (tilted minus 5 degrees from an axis perpendicular to the helmet top) so the rider fills the bottom of the frame. When mounted on the Vholdr-provided goggle strap the camera is mounted pointing too far down. The fibre is a piece of paper inserted in the mount to take up some slop in the mount; I told you that this was a very preliminary review.
According to Vholdr, the ContourHD charges up in 3 hours. Charging is accomplished by plugging the camera into a USB port in a computer or, by purchasing an accessory, by plugging into a car. Plugging into a computer is also the means by which videos can be downloaded (at USB 2.0 hi-speeds). The camera is shipped with a 2GB microSD card that gives 1 hour of recording but it supports cards as big as 16GB.
Vholdr’s very useful tech specifications worksheet provides a guide to buttons and explains o:her features:

Vholdr ContourHD technical specifications sheet
Video Quality – video and frame grabs
I compared the Vholdr against the following cameras: (vholdr’s comparables against many other units is here). I selected these cameras because I was familiar with them (I reviewed the GoPro here) and also because they fit my criteria of being self-contained and easy to use.
-
GoPro Hero Wide Standard Definition 512 wide x 384 high pixel image 30 frames per second
-
Panasonic Lumix FX-35- HD1280x720 30fps
-
Vholdr ContourHD – HD1280x720; 30fps
Preliminary observations
My observations based on very limited time with the Vholdr was as follows:
1. There is no question that Vholdr’s static shots are superior even to the highly regarded (for a point and shoot) Panasonic. One look at the stills clipped from the video footage will tell you that.
2. A wider fisheye type of lens (eg the GoPro’s 170 degree lens) makes the riding look faster. Note that in the test video, the rider with the GoPro and the rider with the Vholdr ContourHD are on the same trail at about the same speed but the GoPro rider looks to be going at a faster clip then the Vholdr rider. If that’s the effect you’re trying to achieve you can achieve that using post-processing or organically with a fisheyed/ultra wide-angle lens POV camera.
3. GoPro’s footage is smoother. I hesitate to pronounce a definitive reason due to limited time on the Vholdr and the very preliminary stage of this review. Here’s some speculation:
-
The Vholdr’s jerry-rigged mount on my test unit was not the most rigid (ziptied to helmet- perhaps either helmet or mount could shake a bit) vs the GoPro’s very secure chest mount.
-
Extreme wide angle views distort the real world image but tends to make footage appear smoother
-
The Vholdr’s extremely detailed clear image might work against it in that poorer resolution video could hide jitteriness in video footage.
4. Edges of footage are much more distorted (vignetted) with the wide-angle lens vs the Vholdr’s mildly wide angle of 135 degrees which preserves the reality of the image better
5. One could argue that video quality is of lesser importance if one is to mainly share videos through an internet service such as Youtube or Vimeo. However, even when uploaded to such sites, Vholdr’s video footage is sharper and less pixelated even when video is compressed. The Vholdr ContourHD’s footage delineates dark and light better; colors are sharper and less washed out and, in particular, white balance is much more accurate (eg. less blown out highlights).
Full size picture frame grabs are presented below – from top to bottom: GoPro; Panasonic Lumix and VHoldr (then re-saved as medium jpegs and resized to 600×400)
GoPro

Panasonic


Vholdr
Unresolved questions
Test units of the Vholdr ContourHD are still hard to find. NSMB has one unit and I pried it out of Cam’s hands for one weekend. It came with a mounting unit that was modified to fit on Cam’s helmet and I used it without the opportunity to tinker (something told me that cutting into Cam’s helmet wouldn’t go down well). I didn’t have much time with the unit and therefore have lots of unresolved questions and issues to investigate. Some are listed below
-
EasyEdit software – this is quck and dirty video editing software bundled with the Vholdr ContourHD. I didn’t get to check this software out as it failed to recognize the camera when I plugged it in. I believe this to be an OS issue (I am cursed with running the orphan Vista 64 bit OS).
-
Mounting options are plentiful but I have not had a chance to assess them yet. The “192 degree rotating lens” feature allows the lens to rotate through 192 degrees. The implication is that you can mount the Vholdr at many angles and record video right side up (make sure the words on the front of the lens are pointed up). I like the chest-mount videos the best. I would hazard a guess that it would be possible to rig a mount for the Vholdr where it is closer to the torso by cannibalizing pieces from the vented helmet mount but I’ll let you know more about that when I actually get a dedicated test unit.
-
Vholdr.com site video hosting – Unlike youtube and vimeo, the Vholdr website supports 60 fps video. However, my uploads took a long time and five days after upload, the videos are “still processing”. I’ll try again later with a dedicated test unit.
-
Battery – LiOn batteries are good in the sense that they last a long time and hold a charge really well even in cold weather. Cold weather performance won’t really matter till late fall and winter rolls around; it’ll be interesting to see how the ContourHD does in that regard. LiOn batteries are bad in the sense of being proprietary. Having said that, you can buy spare batteries without getting bent over for an unreasonable amount.
-
Audio – Vholdr has better audio then the lamentable GoPro microphone but not as good as the Panasonic’s audio. The ContourHD still has wind noise. Community forum discussions have suggested fixes with noise muffling foam around the mic and I’ll certainly try that on a dedicated test unit.
GoPro crop

Panasonic crop

Vholdr crop

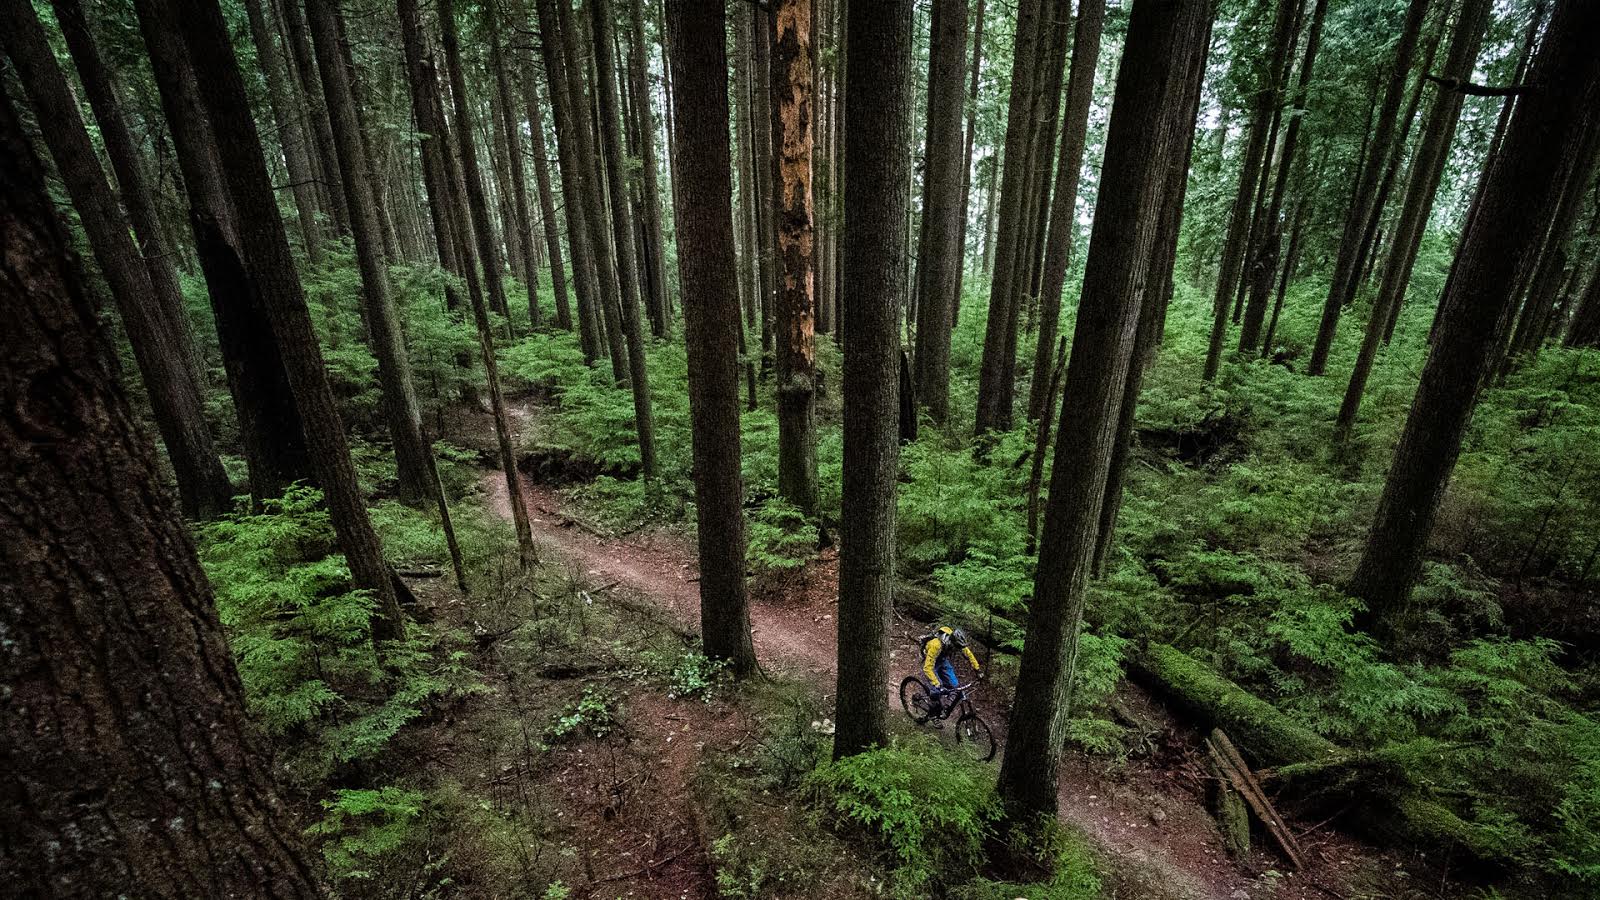
Comparison of GoPro vs VHoldr ContourHD on Vimeo
NOTE: Both mounted Helmet Cam. Rider on same trail at same time. Angry Midget in Squamish. Compressed to 640 x 480 25 fps. H264 codec for QT (did this as its an optimized size for sharing videos without caring overmuch for quality via Vimeo or Youtube)
Comparison of GoPro vs VHoldr ContourHD from Lee Lau on Vimeo
Kona CoilAir Supreme
Words and photos by Lee Lau
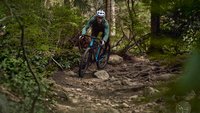
The CoilAir Supreme is the highest end spec of Kona’s Enduro/Freeride line and the highest end bike featuring Kona’s Magic Link proprietary 6 +1 suspension. The Coilair line is basically an all-mountain line of bikes that’s biased towards those who love gravity and a wee bit of airtime yet who expect to climb their bikes.
From the Kona site highlights of the Coilair Supreme include:
- Kona Clump 7005 Aluminum Magic System
- 6+1” Travel Frame
- Fox 36 Talas RC2 165mm Travel Fork
- Fox RP23 Rear Shock
- Shimano XTR/XT Drivetrain
- Mavic Crossmax ST Wheelset

Kona Coilair Supreme in Eurotastic orange in-your-face colours
Frame and “Magic Link”
My test bike is a size 18″. I am a 32″ inseam and 5′ 10″ and prefer bikes on the smaller side. The Kona fit me like a glove right off the bat.
Frame angles are a conventional all-mountain 67deg head angle, and 72deg seat tube angle. With a wheelbase of 1,172mm (46in) the Coilair is a bit on the long side for this category of bike and we’ll have to see how this affects bike handling in tight trails.
The dominating feature of the Coilair and what is driving consumer curiosity is Kona’s “Magic Link“. Now in its second year on a production bike, simply put the Magic Link is a secondary rear shock activated in certain circumstances. Note in pictures below, that the Magic Link is the black linkage piece connecting the main rear Fox RP23 shock to the main frame member and an articulating pair of rear chainstays. The theory is that the frame dynamically adjusts to terrain offering a standard long travel all-mountain 6” of travel in more typical situations but when the going gets a bit more burly, becomes a longer travel machine with slightly different frame angles. Bigger hits and rugged terrain “activate” the Magic Link yielding 7.4 ” (188mm) of rear wheel travel. Kona has copious amounts of documentation on the Magic Link including a laudably detailed tech manual (every manufacturer should learn from this example and provide better documentation!) so I won’t dwell any more on the topic till the full review is written. I’ll then provide personal impressions.
The frame itself is nicely built and well crafted out of 7005 series aluminium. For a long time, Kona has been accused of sticking to dated designs. One look at the Coilar Supreme frame will show that you can no longer make the accusation that Kona isn’t trying to be innovative. While Kona hasn’t joined the swoopy angles bandwagon, it has refined the aluminium tubing of its Coilair frames. A pierced junctioned downtube permitting the rear shock to join the Magic Link, beefy dropouts, and a head tube that’s tapered from 1 1/8 to 1.5″ (for added stiffness) shows that Kona designers put a lot of thought into this frame. Having said that, blocky chainstays, industrial looking swingarms and bolted hefty dropouts show vestiges of the old, burly we-mean-business Kona. Old-schoolers who like the industrial techno look need not feel left out.

Magic Link

Components
For this price, one would expect nothing but high-end components and the Coilair Supreme has that. Mavic CrossMax ST wheels with 2.35″ Maxxis High Rollers are the crowning glory. A mix of Shimano XT and XTR fills out the drivetrain with a beeyootiful XTR Shadow carbon caged derailleur. RaceFace cranks, bottom bracket, handlebar and stem round out the front cockpit. Shimano brakes are provided. Fox’s dependable Talas 36 RC2 and extra volume RP 23 rear shock provides suspension
Other product managers take note and learn! Kona specs a bashguard (skipping the big ring) and a 70mm stem (as opposed to the “standard” 90mm stem). Euros get the big ring. This makes so much sense given that these are standard component swaps which a lot of Canucks make. Anyone wanting a longer stem and a big ring can walk down to a bike shop and find boxes and boxed of those and very relieved and surprised staff that anyone would actually want one.
All this high-end bling, combined with the Coilair Supreme’s frame weight of approximately 7.8 pounds yields a bike weight of approximately 33 lbs. This is certainly biased more towards downhill than uphill.

Front-end of the Coilair Supreme
Price
At $ 5,799 USD (Canadian MSRP is the same), this is by no means a recession-friendly bike. If you want bling parts, you will pay for it. Despite the eye-popping price you’ll have to note that comparable top-of-the-line 6 x 6 bikes in this category are all about the same price with the Kona Coilair at the high end of the range (data from mountainbikebuyersguide.com). For curiosity I sampled the following bikes and here are their MSRPs (of course end-of-season or bro-deal pricing throws off this theory):
-
Trek Remedy 9 – comparable spec (XTR/XO , Fox 36 Talas, Fox RP23 XV can) – $ 5499
-
Rocky Slayer SXC 70 – spec a little less high-end (XO/X9, Fox 36R, Fox DHX Air 4) – $4,100
-
Norco Fluid LT One – very high end spec (XT/XO, RS Lyrik 2-step, DHX Air 5, Industry 9 wheels) – $ 6,225
-
Santa Cruz Nomad XO – comparable spec (XO, Fox 36 Talas RC2, RS Monarch, – $ 5,199
-
Giant Reign XO – spec a little less high-end (SLX/XO, Fox 36 Float RC2, Fox DHX Air 4) – $ 4,650
-
Specialized Enduro SL Carbon – comparable spec (XT/XO, Fox Talas RL, prop Spec rear shock) – $ 5,500
Non-drive side of the Coilair Supreme

Coilair Supreme rear – industrial looking rear end

Mace NOS Short
Words and photos by Pete Roggeman.
It used to be that riding shorts consisted of pulling on some lycra and whatever boardies/cut-offs (don’t lie – you did it too!)/or moth-eaten gym shorts you had lying around. But now there are a lot more girls on the trails than there used to be, and like it or not, our industry is better for it in a lot of ways, and in this case I’m talkin’ about style, Stuey.
When it comes to shorts, I’m not easy to please. At just over 6′ but with a 31″ inseam, some shorts are just a bit baggy on me and get hung up on the seat, which accounts for at least 12% of my falls (the other 88% were all based on me doing something dumb). I can’t fix the occasional case of the stupids, but I can demand a better short, and the Mace NOS is better than most I’ve ridden and crashed in.

The slash pockets ARE deep enough, despite how it looks in the photo. Essentials like your cash and Bro Card fit nicely into the low profile cargo pockets. THis is one of the best riding short pocket combinations I’ve seen.
I wouldn’t use the phrase “High octane all mountain comfort” to describe anything that covers my ass, but Mace does, and bean fuel jokes aside, they are a short that can be used for all types of riding. I took them with me to the Yukon and used them on a 2 hour XC jaunt and a 4 hour midnight shuttle epic, and they were perfect for both: light enough that you don’t feel encumbered when pedaling, and durable enough to withstand some mighty crashes including one that left me with an enormous bruise in my armpit, and a rung bell. These have also been a go-to for me on short lunchtime rides, and I don’t feel like a loser if I end up wearing them to grab a lb. of coffee afterwards. Unless I crash while dismounting in front of the shop, because then a tuxedo and your pearly white smile won’t save you – you just suck.

The NOS short has lots of refined touches. Thingh vents release steam – and your inner bad ass; Mace branded zipper pulls and a small molded tab keep the shorts looking low pro.
Let’s break ’em down into a bit more detail.
- Versatile short for both Freeride and XC (I said that already)
- Two slash pockets so you can put your hands somewhere (but they’re not deep enough to play “where’s the pocket change?”)
- Two low profile zip closure cargo pockets
- Zippered front thigh vents
- Low profile waist tabs for easy fit adjustment
- Stretch rear gusset displays your caboose flatteringly (Cam is out of town so that is a word!)
- Woven stretch shell: 95% nylon, 5% spandex.
- DWR (Durable Water Repellent) coating keeps you dry
- Anti-pill coating for durable looks
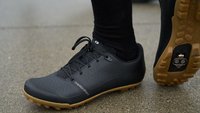
They come in charcoal (tested) and tan which doesn’t look as lame as it sounds (sorry Mace but tan is a lame colour descriptor). The tan version also has some extra print detailing which looks good (I linked it up above but here it is again ya lazy jerk).

Two front buttons cleverly disperse the load a bit and add a stylie touch. The upwardly curved section at the back helps your riding buddies say no to crack.
The fit is great. No saddle nose hangups, length is just right, they’re comfy to pedal in and the fabric doesn’t feel stiff or make annoying noises. Two buttons and a zipper keep you from going full frontal and it’s a good system – the buttons are easy to do up but because there’s two of them you’re not as likely to lose one. The zipper is, uh, a zipper. It zips. The gusset at the back keeps them fitting nicely when you’re back behind the saddle and the high-backed cut means your buddies can’t throw pine cones down the back of your shorts. But I’m calling Mace out on the belt loops – they are way too small. The only belt that would fit in there is a lady’s leather dress belt or a piece of rope…unless your name is Gilligan and you wear tan pants…hey wait a minute! Luckily the waist tabs do a nice job with any slack, but I like to wear a belt and that was not an option with the NOS shorts – be aware.

Back end winners were the elasticized gusset and low profile waist tabs, but the too-thin belt loops are all but useless.
The NOS short retails for $110 CAD. Check ’em out and the rest of the Mace line, which includes a solid lineup of apparel, gloves, armour, and helmets.
In the mood for a CoilAir, some tan shorts, or a POV camera to catch your riding buds’ next crash..? Discuss it here…


Comments
Please log in to leave a comment.